Introduction
MySQL, as one of the most popular open-source relational database management systems, plays a crucial role in enterprise applications. With the continuous growth of data volume and the increasing demand for data security, high availability and data redundancy backup of databases have become particularly important. The Master-Slave Replication technology is an effective solution to achieve this goal, as it not only improves the availability of the database system but also enables read-write separation, effectively distributing the database load.
This article will detail the installation and configuration process of the MySQL database on the CentOS 7 operating system, with a focus on how to set up a MySQL master-slave replication environment. Through step-by-step guidance, readers will learn the entire process from basic installation to complex configuration, including the initialization settings of the MySQL server and the parameter configuration of the master and slave servers.
My public account (with interview materials):Java Enjoy
1. Downloading MySQL
Log in to https://dev.mysql.com/downloads/mysql/5.5.html#downloads to access the official download page, as shown in the figure.
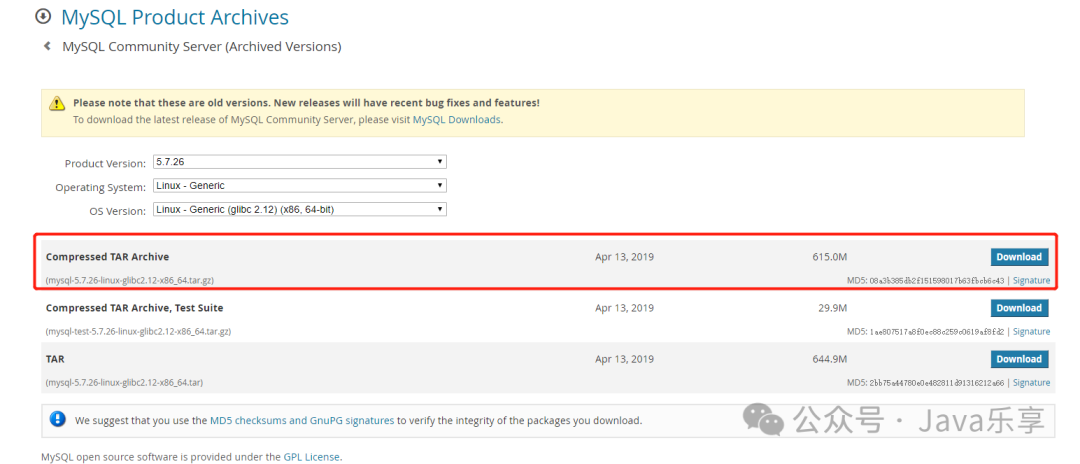
After the download is complete, execute the following operations:
# Install lrzsz
yum install lrzsz
cd /usr/local
rz (select the downloaded compressed package)                                    # Upload
tar -zxvf mysql-5.7.26-linux-glibc2.12-x86_64.tar.gz       # Unzip
mv mysql-5.7.26-linux-glibc2.12-x86_64/ mysql              # Rename
Create a MySQL user group and user, and modify permissions.
groupadd mysql
useradd -r -g mysql mysql
Create a data directory and assign permissions.
mkdir -p  /data/mysql              # Create directory
chown mysql:mysql -R /data/mysql   # Assign permissions
Configure my.cnf
vim /etc/my.cnfWith the following content:
[mysqld]
bind-address=0.0.0.0
port=3306
user=mysql
basedir=/usr/local/mysql
datadir=/data/mysql
socket=/tmp/mysql.sock
log-error=/data/mysql/mysql.err
pid-file=/data/mysql/mysql.pid
# Character config
character_set_server=utf8mb4
symbolic-links=0
explicit_defaults_for_timestamp=true
# log-error=/var/log/mariadb/mariadb.log
# pid-file=/var/run/mariadb/mariadb.pid
Note: You need to comment out the two lines under [mysqld_safe], otherwise the subsequent initialization data will report an error.
2. Initializing the Database
Enter the MySQL bin directory.
cd /usr/local/mysql/bin/Initialize the database.
./mysqld --defaults-file=/etc/my.cnf --basedir=/usr/local/mysql/ --datadir=/data/mysql/ --user=mysql --initializeIf the following error occurs:
./mysqld: error while loading shared libraries: libnuma.so.1: cannot open shared object file: No such file or directoryYou need to perform the following operation before re-executing the initialization:
yum -y install numactlCheck the password:
cat /data/mysql/mysql.err
Record the password NFVn%5bfBf+w, as it will be needed for login later.
3. Starting MySQL and Changing the Root Password
First, place mysql.server in /etc/init.d/mysql.
cp /usr/local/mysql/support-files/mysql.server /etc/init.d/mysqlStart MySQL; the following indicates a successful start:
service mysql start
Change the password:
./mysql -u root -p # In the bin directoryCopy the previously recorded password and perform the following operations:
set password = password('root');
flush privileges;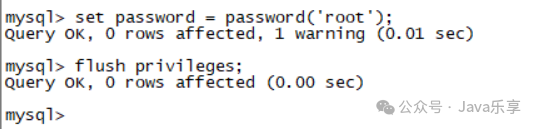
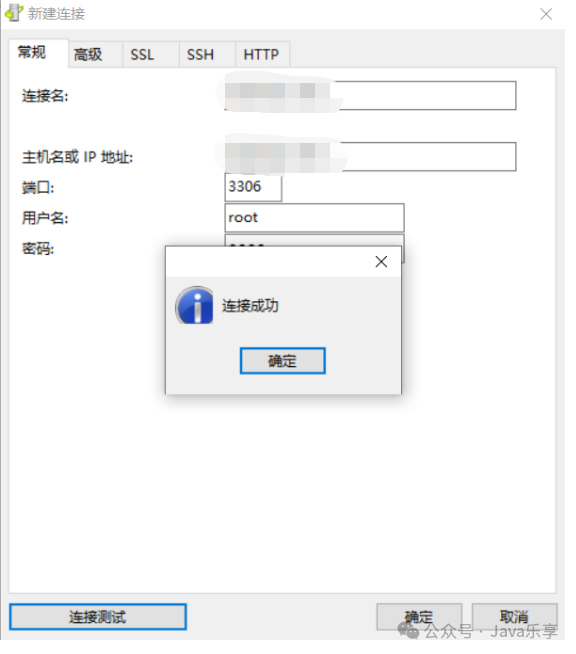
If you try to connect remotely now… you will find that you cannot connect.
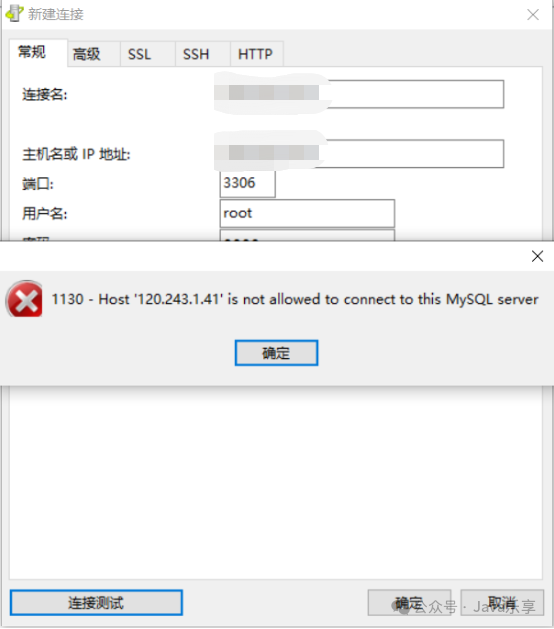
Execute the following commands:
use mysql                                            # Access the MySQL database
update user set host = '%' where user = 'root';      # Allow root to access from any host
FLUSH PRIVILEGES;                                    # Refresh privileges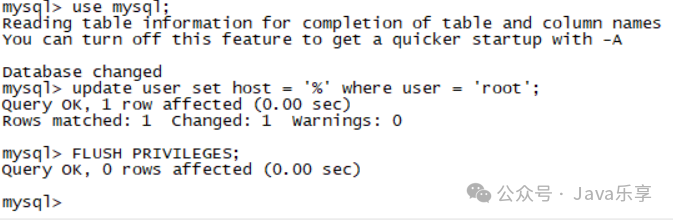
Note:If you are using Tencent Cloud or Alibaba Cloud, you need to configure security group rules.
And add security group rules in the Tencent Cloud interface (click more operations -> join security group -> click security group ID to set).

Reconnect to succeed.
4. Master-Slave Synchronization
1) Edit the MySQL configuration file.
vi /etc/my.cnf2) Add binary log configuration and enable binary logging (mysql-bin is just the name of the binary log, you can specify it yourself).
server-id=1            # The ID must be specified and is unique (the master database ID must have a higher priority than the slave database ID)
log-bin=master-bin     # Enable binary logging
3) Grant permissions.
Log in to the database.
You need to configure a user/password permission for the slave database.
mysql> grant replication slave on *.* to 'root'@'slave database IP' identified by 'password';This allows a specific user at a specific IP address to perform replication operations on all databases and tables of the current database.
After configuration, you need to refresh privileges.
mysql> flush privileges;The above configuration file modification requires a service restart.
service mysql restart4) Check the master status.
Log in to the database.
mysql> show master status;
file: is the log file name.
position: is the log position.
5. Enabling Slave Binary Logging
Log in to the slave server.
1) Configure the my.cnf configuration file.
vi /etc/my.cnf2) Add slave binary log configuration and enable binary logging (mysql-bin is just the name of the binary log, you can specify it yourself).
server-id=2
log-bin=mysql-bin
Note: Each server must have a unique server-id identifier.
After modifying the configuration, the service needs to be restarted.
[root@VM_0_16_centos ~]# service mysql restart3) Configure the slave to point to the master.
Log in to the database.
mysql> change master to -> master_host='master database IP', -> master_user='master authorized account', -> master_password='authorized password', -> master_log_file='master log file (mysql-bin.000002)', -> master_log_pos=master log position (154);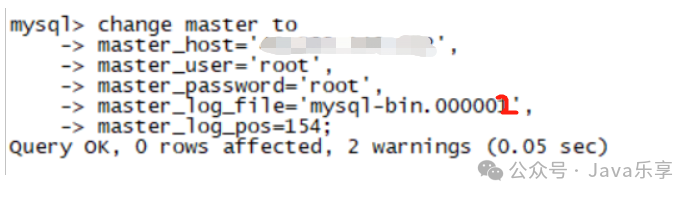
The master log file name can be viewed in the master database using show master status;
6. Enabling Master-Slave Replication
Execute the following on the slave server:
mysql> start slave;Check the slave running status:
mysql> show slave status\G; 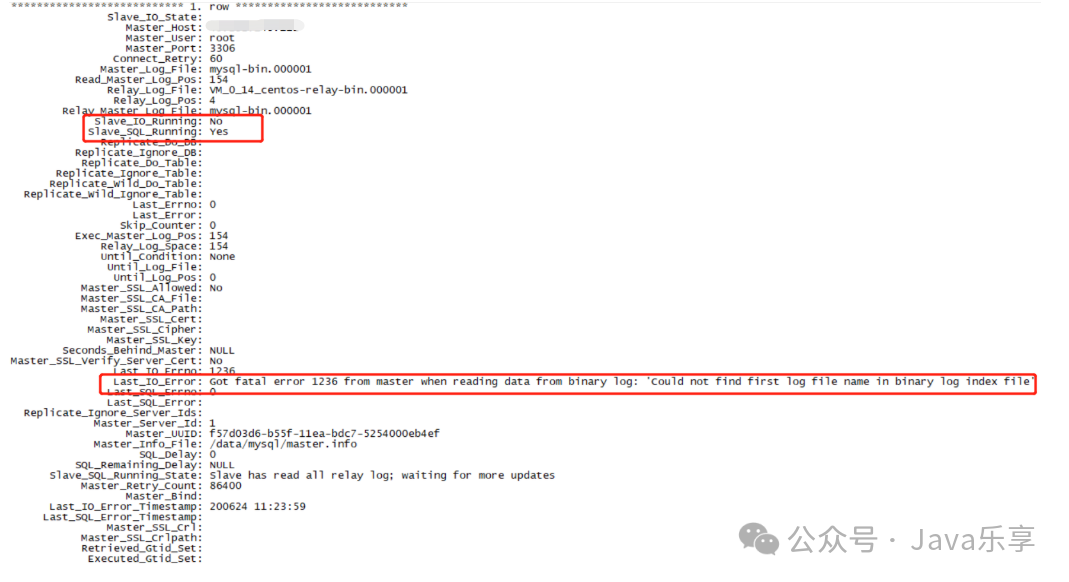
If both are yes, then it is successful. If Slave_IO_Running: No appears, it indicates that the slave’s log reading thread has failed to start.
Solution:
stop slave;
reset slave;
start slave;
Check again to see if both are yes.
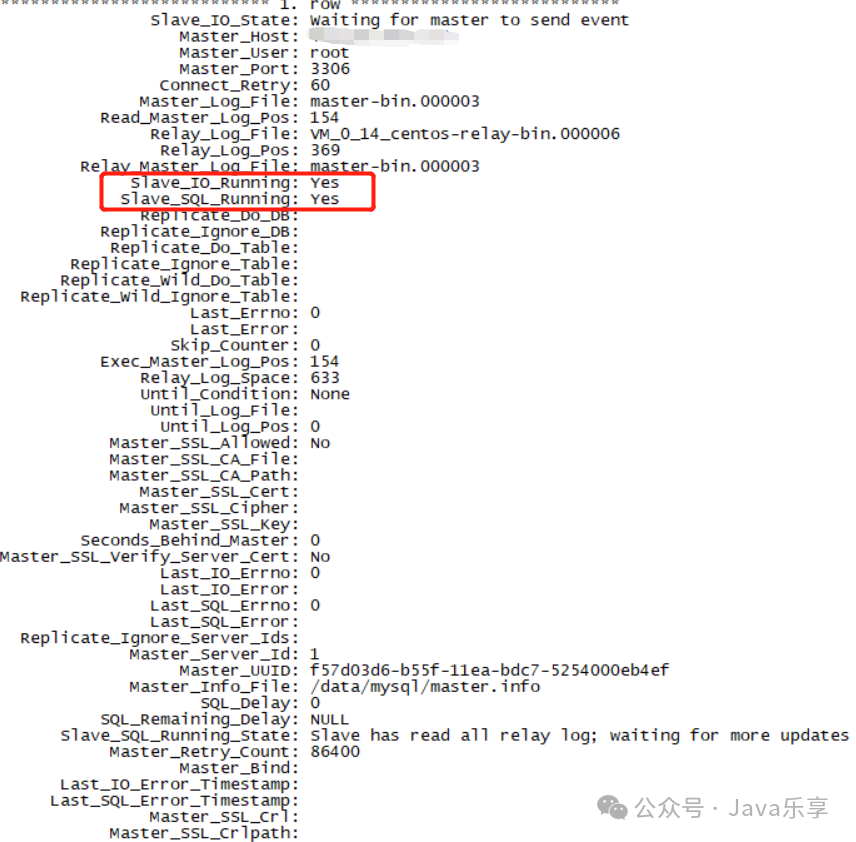
Test by creating a test database in the master database and refreshing the slave database to see the created test database displayed in the slave database.