In the process of digital transformation in enterprises, EDI (Electronic Data Interchange) systems have become the core hub for connecting supply chains and automating business processes. Typically, we recommend equipping separate servers for testing and production environments to ensure maximum stability and performance. However, in reality, IT teams often face the challenge of how to quickly set up an EDI system that meets both development testing needs and temporarily supports production operations when server resources are limited.
This article is prepared for you if you are looking for solutions in the following scenarios:
- You need to quickly set up independent testing and production environments for a new project, but the budget or hardware resources are temporarily unavailable.
- You want to clearly isolate two sets of EDI services (ZhiXing Bridge EDI) on an existing Linux server to avoid mutual interference.
- You plan to use this solution as a temporary measure during resource shortages, preparing for a smooth migration to independent servers in the future.
This article will guide you step by step on how to successfully deploy two independent ZhiXing Bridge environments on a Linux server through clever configuration. We will ensure that these two environments (for example: edi-test and edi-prod) have their own data, ports, and runtime space, achieving complete logical isolation.
However, please note: the core value of this solution lies in its flexibility and temporariness. Sharing the same server’s hardware resources means that during peak data processing periods, the two environments may compete for CPU, memory, and I/O resources, posing potential performance bottleneck risks. Therefore, we strongly recommend using this as a stopgap measure; if you need to run core EDI operations stably and long-term, deploying them on separate servers remains the best choice to ensure system robustness.
Next, let’s explore how to achieve double the environmental value with a single resource.
1. Download ZhiXing Bridge
First, please visit the ZhiXing software official website to download the compressed package (tar.gz) of the Java version of the ZhiXing Bridge EDI system.
2. Unzip to Installation Directory
Place the compressed package in the directory where you want to install it; here we take the /opt/arcesb directory as an example:

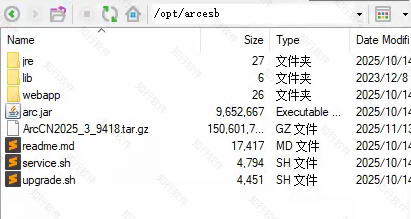
Use the command tar -zxvf ArcCN2025_3_9418.tar.gz to unzip the files to the current directory. After successful extraction, you should see the following files in the current directory:
3. Confirm Java Environment
Use the command java -version to check if the Java environment exists. If it does not, you can use the JDK that comes with ZhiXing Bridge (located in the jre directory of the unzipped folder) and configure it in the environment variables.
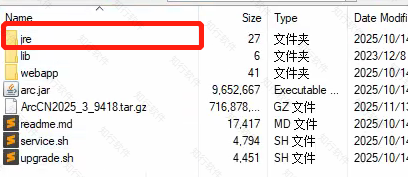
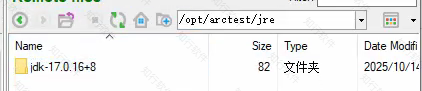
Note: The ZhiXing Bridge environment requires the JDK version to be no lower than JDK 17.
The method to configure the ZhiXing Bridge JDK environment variables is as follows:
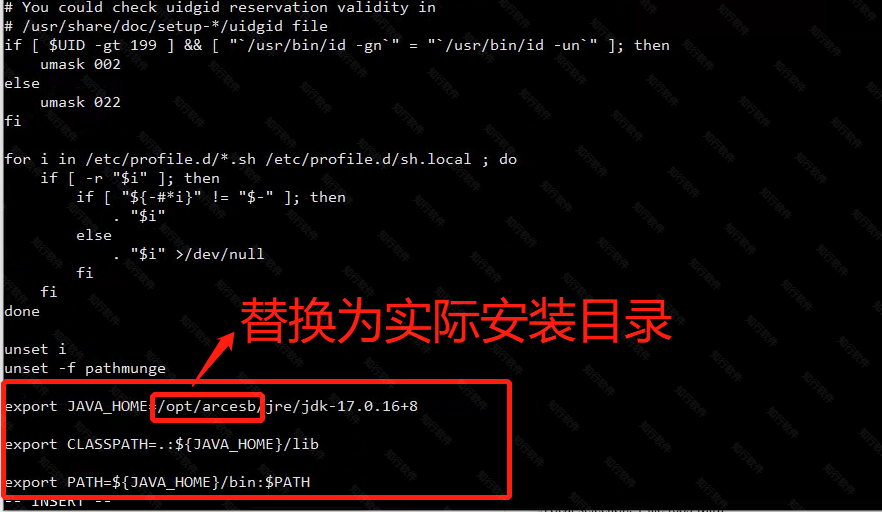
(1) Add the following at the end of the server’s /etc/profile file:
export JAVA_HOME=[ZhiXing Bridge Installation Directory]/jre/jdk-17.0.16+8 // Note: In this example, the installation directory is /opt/arcesb
export CLASSPATH=.:${JAVA_HOME}/lib
export PATH=${JAVA_HOME}/bin:$PATH
(2) Execute the command source /etc/profile to reload.
(3) Execute the command java -version again to verify if the environment variable is configured successfully:

4. Configure ZhiXing Bridge Ports and Data Directory
Enter the ZhiXing Bridge installation directory and execute the command java -jar arc.jar -GenerateProperties to generate the ZhiXing Bridge configuration file:
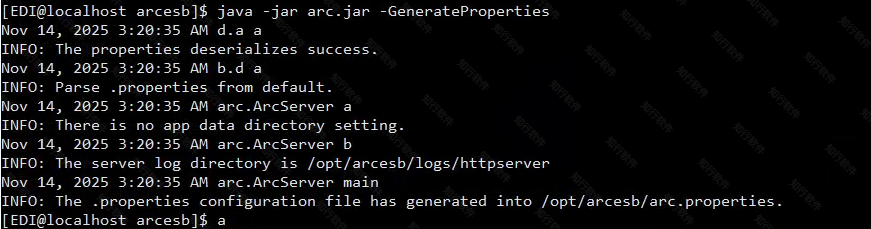
After successful execution, you will see an arc.properties file generated in the installation directory, which is the configuration file for ZhiXing Bridge.

Open the arc.properties file, and you will see the following information:
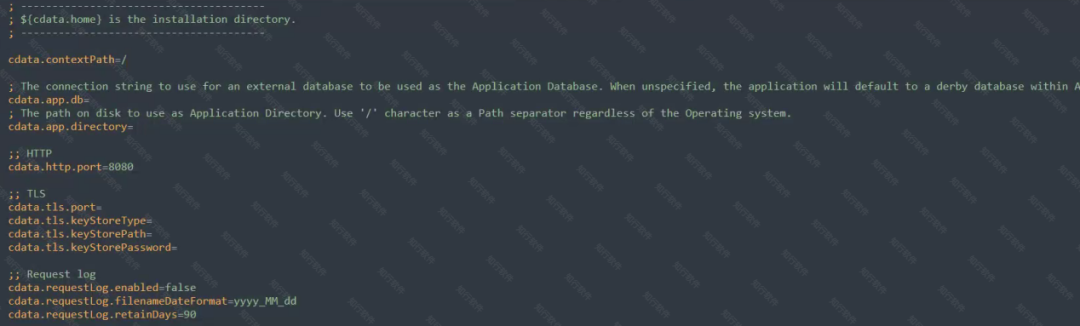
The default port number is 8080; if necessary, it can be changed to another port number, here we modify it to 18080 as an example.
We also configure the data directory for this ZhiXing Bridge service, in this example, the data directory is configured under the installation directory:
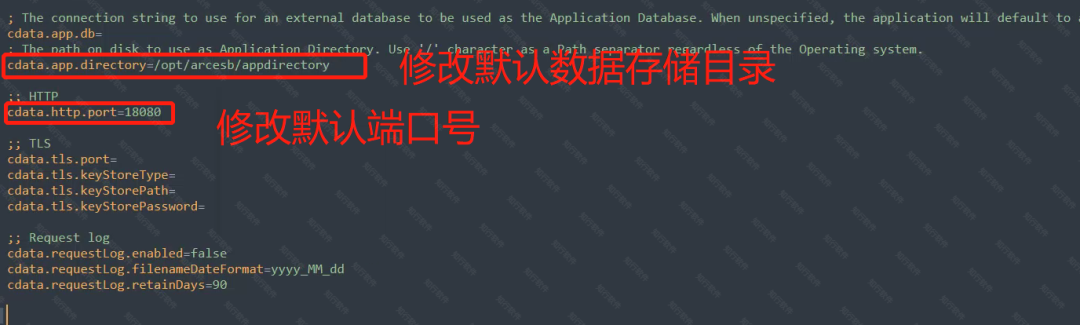
After editing, save the configuration.
Note: The data storage directories and port numbers for the two environments on the same server must be differentiated and cannot be the same.
5. Modify Service Name
Enter the ZhiXing Bridge installation directory, and you will see a service.sh file. Edit this file, find the PRODUCT_NAME information, which defaults to arc, and modify its value to distinguish the two environments:
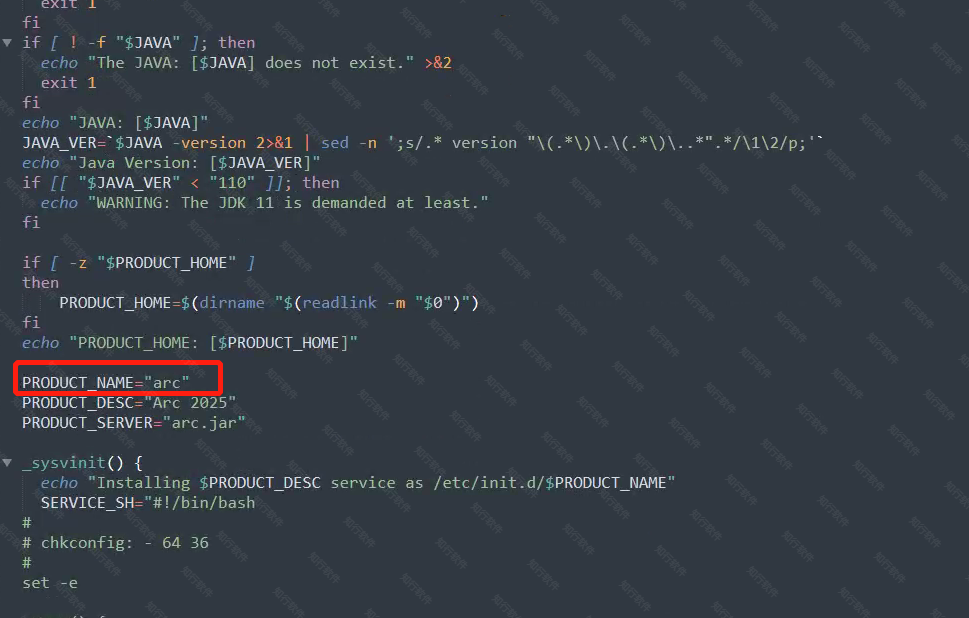
Here we modify it to arcfortest:
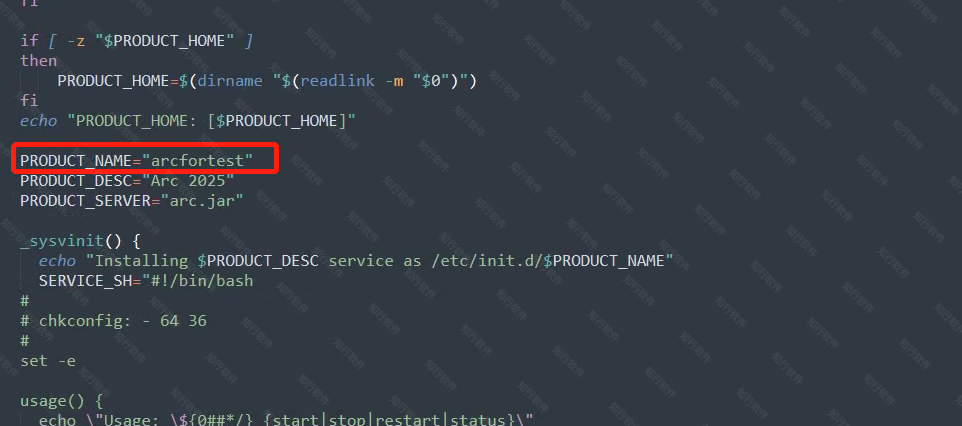
After modification, save it. The PRODUCT_NAME you modified here is the name of the service registered for this ZhiXing Bridge environment in step six.
6. Register Service
Enter the ZhiXing Bridge installation directory and execute the command sudo ./service.sh to register the ZhiXing Bridge service:
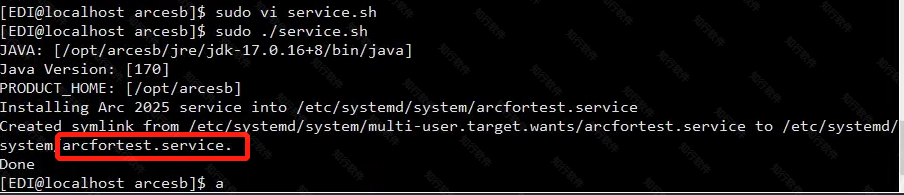
Here you can see the red box indicating the name of the service we just modified.
7. Start ZhiXing Bridge Service
Execute the following commands to start, stop, and check the status of the ZhiXing Bridge service: replace arctest with the PRODUCT_NAME modified in step five.
Start service: service arcfortest start
Stop service: service arcfortest stop
Check service status: service arcfortest status
Restart service: service arcfortest restart
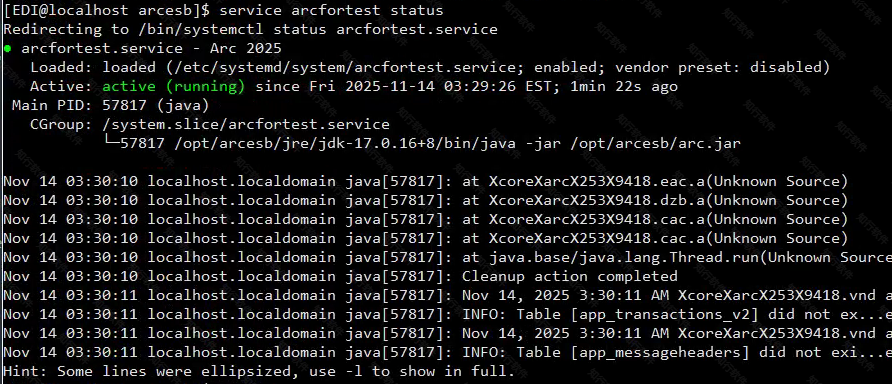
8. Access ZhiXing Bridge UI Page to Verify Service Startup
Access the ZhiXing Bridge service by visiting the server’s IP address + port number in a web browser. For the above configuration, it would be: http://192.168.0.105:18080/
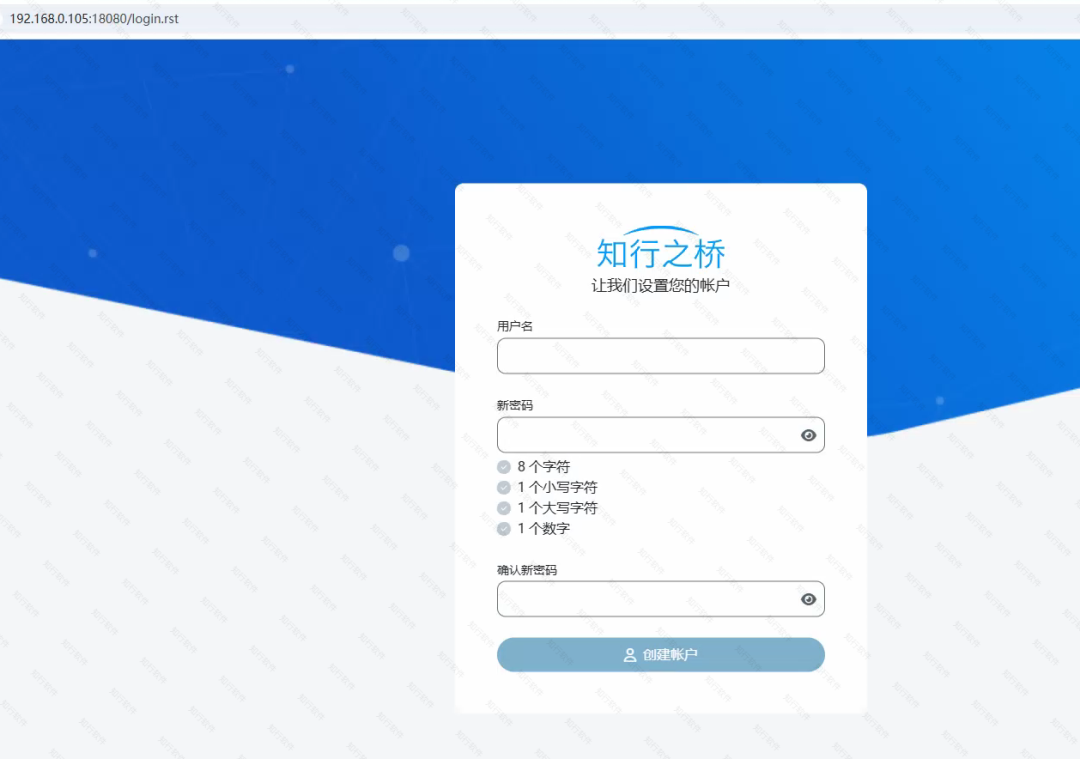
9. Set Up the Second ZhiXing Bridge Environment
At this point, an independent ZhiXing Bridge environment has been set up. We can repeat steps 2-4-5-6-7-8 to complete the setup of the second ZhiXing Bridge environment on the same server. Note: Be sure to differentiate the data directories, port numbers, and ZhiXing Bridge service names for the two environments in steps four and five.
The above describes the operational steps for deploying two sets of ZhiXing Bridge EDI systems on a single Linux server. It is important to note that due to server resource and performance limitations, this solution is only recommended for temporary testing environments. For long-term stable operation, we strongly recommend deploying the two instances on separate servers to ensure optimal system performance and stability.
If you encounter any issues during the practical operation or wish to learn more about EDI integration, please feel free to contact us.
Scan the QR code or call 137-2065-8862 to contact an EDI consultant for professional one-on-one consulting services and system configuration guidance.
 International Certification / Free Trial / Clear Pricing|
 Click “Read the Original”Note: The images and content in the text are sourced from the internet, and the copyright belongs to the original authors. If your rights are infringed, please contact us for deletion. We sincerely apologize for any inconvenience caused.