# get a fresh start
$ sudo apt-get update
$ sudo apt-get upgrade
# install pip3
$ sudo apt-get install git python3-pip
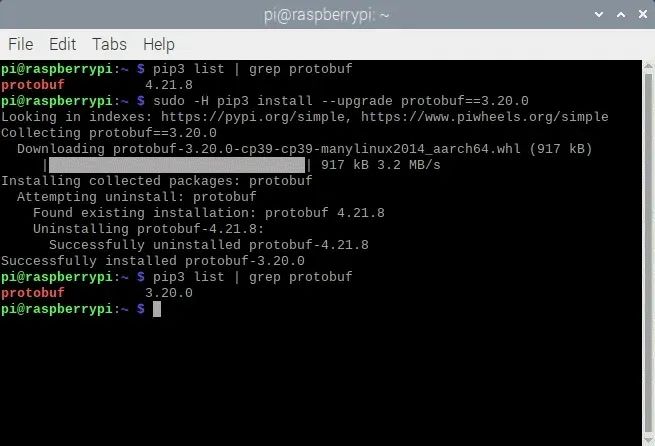
# install correct version protobuf
$ sudo -H pip3 install --upgrade protobuf==3.20.0
Method 1
# download tensorflow io
$ git clone -b v0.23.1 --depth=1 --recursive https://github.com/tensorflow/io.git
$ cd io
$ python3 setup.py -q bdist_wheel --project tensorflow_io_gcs_filesystem
$ cd dist
$ sudo -H pip3 install tensorflow_io_gcs_filesystem-0.23.1-cp39-cp39-linux_aarch64.whl
$ cd ~
Method 2
# or download wheel
$ git clone https://github.com/Qengineering/Tensorflow-io.git
$ cd Tensorflow-io
$ sudo -H pip3 install tensorflow_io_gcs_filesystem-0.23.1-cp39-cp39-linux_aarch64.whl
$ cd ~# install TensorFlow 2.14.0
$ sudo -H pip3 install --upgrade tensorflow==2.14.0# install TensorFlow 2.13.0
$ sudo -H pip3 install --upgrade tensorflow==2.13.0# install TensorFlow 2.12.0
$ sudo -H pip3 install --upgrade tensorflow==2.12.0# install TensorFlow 2.11.0
$ sudo -H pip3 install --upgrade tensorflow==2.11.0# install gdown to download from Google drive
$ sudo -H pip3 install gdown
# download the wheel
$ gdown https://drive.google.com/uc?id=1G2P-FaHAXJ-UuQAQn_0SYjNwBu0aShpd
# install TensorFlow 2.10.0
$ sudo -H pip3 install tensorflow-2.10.0-cp39-cp39-linux_aarch64.whl# install gdown to download from Google drive
$ sudo -H pip3 install gdown
# download the wheel
$ gdown https://drive.google.com/uc?id=1xP6ErBK85SMFnQamUh4ro3jRmdCV_qDU
# install TensorFlow 2.9.1
$ sudo -H pip3 install tensorflow-2.9.1-cp39-cp39-linux_aarch64.whl# install gdown to download from Google drive
$ sudo -H pip3 install gdown
# download the wheel
$ gdown https://drive.google.com/uc?id=1YpxNubmEL_4EgTrVMu-kYyzAbtyLis29
# install TensorFlow 2.8.0
$ sudo -H pip3 install tensorflow-2.8.0-cp39-cp39-linux_aarch64.whl# utmost important: use only numpy version 1.19.5
# check the version first
$ pip3 list | grep numpy
# if not version 1.19.5, update!
$ sudo -H pip3 install numpy==1.19.5
# (re)install termcolor at the correct location
$ python3 -m pip install termcolor
# install gdown to download from Google drive
$ sudo -H pip3 install gdown
# download the wheel
$ gdown https://drive.google.com/uc?id=1FdVZ1kX5QZgWk2SSgq31C2-CF95QhT58
# install TensorFlow 2.7.0
$ sudo -H pip3 install tensorflow-2.7.0-cp39-cp39-linux_aarch64.whl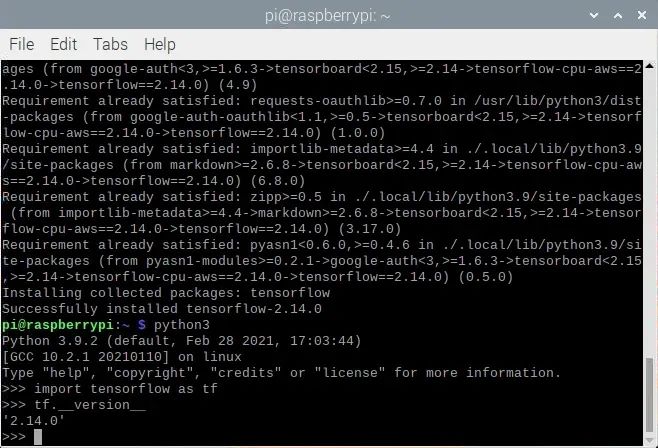
# get a fresh start
$ sudo apt-get update
$ sudo apt-get upgrade
# remove old versions (if found)
$ sudo rm -r /usr/local/lib/libtensorflow*
$ sudo rm -r /usr/local/include/tensorflow
# the dependencies
$ sudo apt-get install wget curl libhdf5-dev libc-ares-dev libeigen3-dev
$ sudo apt-get install libatomic1 libatlas-base-dev zip unzip
# install gdown to download from Google drive (if not already done)
$ sudo -H pip3 install gdown
# download the tarball
$ gdown https://drive.google.com/uc?id=1GOC5CiT5Ws2NpiBem4K3g3FRqmGDRcL7
# unpack the ball
$ sudo tar -C /usr/local -xzf libtensorflow_cp39_64OS_2_10_0.tar.gz# get a fresh start
$ sudo apt-get update
$ sudo apt-get upgrade
# remove old versions (if found)
$ sudo rm -r /usr/local/lib/libtensorflow*
$ sudo rm -r /usr/local/include/tensorflow
# the dependencies
$ sudo apt-get install wget curl libhdf5-dev libc-ares-dev libeigen3-dev
$ sudo apt-get install libatomic1 libatlas-base-dev zip unzip
# install gdown to download from Google drive (if not already done)
$ sudo -H pip3 install gdown
# download the tarball
$ gdown https://drive.google.com/uc?id=1Z83_RQTvCb2jL2BO1Zdez3x4Qx-XheRk
# unpack the ball
$ sudo tar -C /usr/local -xzf libtensorflow_cp39_64OS_2_9_1.tar.gz# get a fresh start
$ sudo apt-get update
$ sudo apt-get upgrade
# remove old versions (if found)
$ sudo rm -r /usr/local/lib/libtensorflow*
$ sudo rm -r /usr/local/include/tensorflow
# the dependencies
$ sudo apt-get install wget curl libhdf5-dev libc-ares-dev libeigen3-dev
$ sudo apt-get install libatomic1 libatlas-base-dev zip unzip
# install gdown to download from Google drive (if not already done)
$ sudo -H pip3 install gdown
# download the tarball
$ gdown https://drive.google.com/uc?id=1dmJKIk8lUi_XCzlVnRgL-UvfVFriRmCG
# unpack the ball
$ sudo tar -C /usr/local -xzf libtensorflow_cp39_64OS_2_8_0.tar.gz# get a fresh start
$ sudo apt-get update
$ sudo apt-get upgrade
# remove old versions (if found)
$ sudo rm -r /usr/local/lib/libtensorflow*
$ sudo rm -r /usr/local/include/tensorflow
# the dependencies
$ sudo apt-get install wget curl libhdf5-dev libc-ares-dev libeigen3-dev
$ sudo apt-get install libatomic1 libatlas-base-dev zip unzip
# install gdown to download from Google drive (if not already done)
$ sudo -H pip3 install gdown
# download the tarball
$ gdown https://drive.google.com/uc?id=1kScCKyj0pr265XbCgYmXqXs77xJFe6p1
# unpack the ball
$ sudo tar -C /usr/local -xzf libtensorflow_cp39_64OS_2_7_0.tar.gz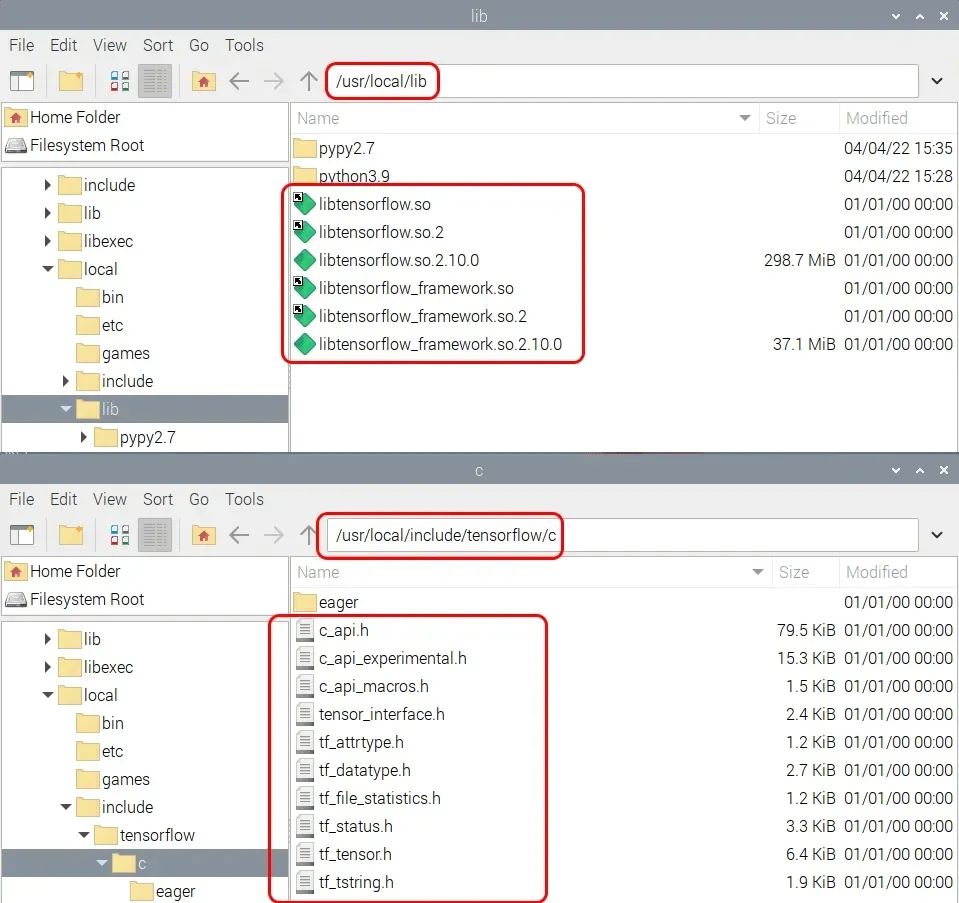
# install dphys-swapfile
$ sudo apt-get install dphys-swapfile
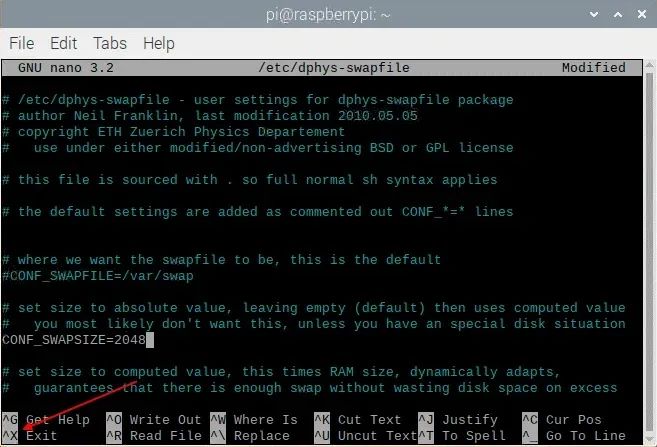
# give the required memory size
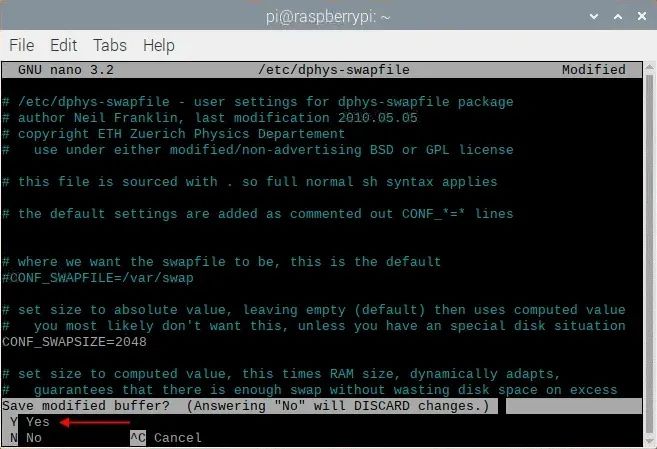
$ sudo nano /etc/dphys-swapfile
# reboot afterwards
$ sudo reboot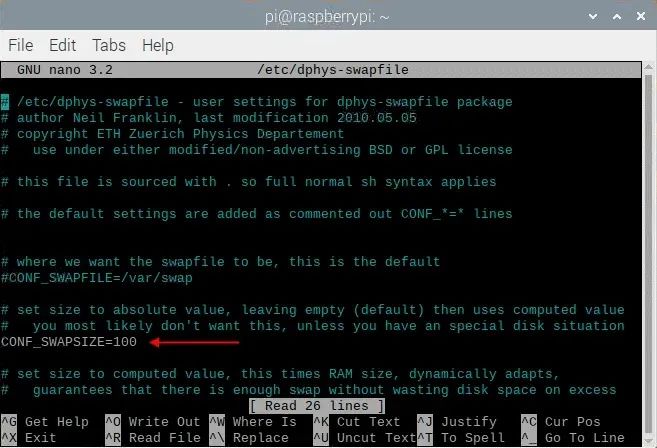
If everything goes smoothly, you should see something similar to the content below.

The image shows the total amount of swap space allocated by dphys-swapfile and zram. Once completed, do not forget to remove dphys-swapfile.
# reactivate dphys-swapfile after a reboot
# (when zram and dphys-swapfile are both enabled)
$ sudo /etc/init.d/dphys-swapfile stop
$ sudo /etc/init.d/dphys-swapfile start# get a fresh start
$ sudo apt-get update
$ sudo apt-get upgrade
# install pip and pip3
$ sudo apt-get install python3-pip
# install some tools
$ sudo apt-get install zip unzip curl
# install Java
$ sudo apt-get install openjdk-11-jdk$ wget https://github.com/bazelbuild/bazel/releases/download/5.1.1/bazel-5.1.1-dist.zip
$ unzip -d bazel bazel-5.1.1-dist.zip
$ cd bazel$nano scripts/bootstrap/compile.sh -c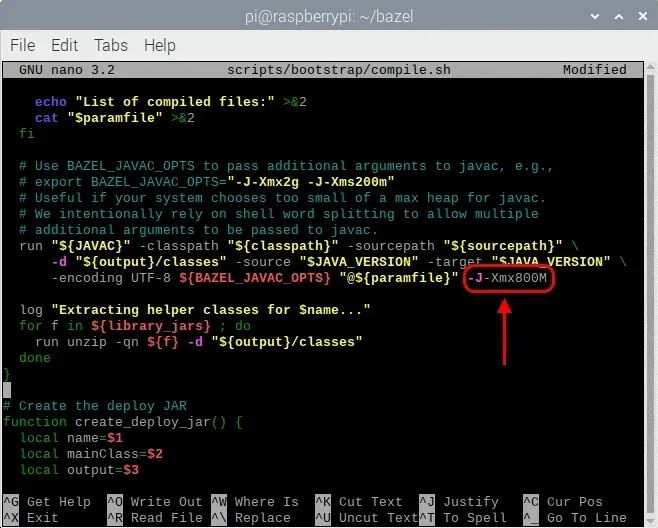
# start the build
$ env EXTRA_BAZEL_ARGS="--host_javabase=@local_jdk//:jdk" bash ./compile.sh
# copy the binary
$ sudo cp output/bazel /usr/local/bin/bazel
# clean up
$ cd ~
$ rm bazel-5.1.1-dist.zip
# if you have a copied bazel to /usr/local/bin you may also
# delete the whole bazel directory, freeing another 500 MByte
$ sudo rm -rf bazel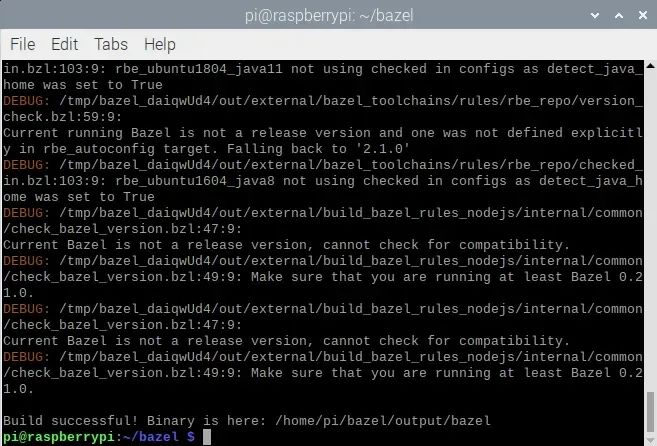
# get a fresh start
$ sudo apt-get update
$ sudo apt-get upgrade
# the dependencies
$ sudo apt-get install zip unzip
$ sudo -H pip3 install keras_applications --no-deps
$ sudo -H pip3 install keras_preprocessing --no-deps
# install correct version protobuf
$ sudo -H pip3 install --upgrade protobuf==3.20.0
# download tensorflow io
$ git clone https://github.com/Qengineering/Tensorflow-io.git
$ cd Tensorflow-io
$ sudo -H pip3 install tensorflow_io_gcs_filesystem-0.23.1-cp39-cp39-linux_aarch64.whl
$ cd ~
# download TensorFlow 2.10.0
$ wget -O tensorflow.zip https://github.com/tensorflow/tensorflow/archive/v2.10.0.zip
$ unzip tensorflow.zip
$ cd tensorflow-2.10.0
$ ./configure# get a fresh start
$ sudo apt-get update
$ sudo apt-get upgrade
# the dependencies
$ sudo apt-get install zip unzip
$ sudo -H pip3 install keras_applications --no-deps
$ sudo -H pip3 install keras_preprocessing --no-deps
# install correct version protobuf
$ sudo -H pip3 install --upgrade protobuf==3.20.0
# download tensorflow io
$ git clone https://github.com/Qengineering/Tensorflow-io.git
$ cd Tensorflow-io
$ sudo -H pip3 install tensorflow_io_gcs_filesystem-0.23.1-cp39-cp39-linux_aarch64.whl
$ cd ~
# download TensorFlow 2.9.1
$ wget -O tensorflow.zip https://github.com/tensorflow/tensorflow/archive/v2.9.1.zip
$ unzip tensorflow.zip
$ cd tensorflow-2.9.1
$ ./configure# get a fresh start
$ sudo apt-get update
$ sudo apt-get upgrade
# the dependencies
$ sudo apt-get install zip unzip
$ sudo -H pip3 install keras_applications --no-deps
$ sudo -H pip3 install keras_preprocessing --no-deps
# install correct version protobuf
$ sudo -H pip3 install --upgrade protobuf==3.20.0
$ cd ~
# download TensorFlow 2.8.0
$ wget -O tensorflow.zip https://github.com/tensorflow/tensorflow/archive/v2.8.0.zip
$ unzip tensorflow.zip
$ cd tensorflow-2.8.0
$ ./configure# get a fresh start
$ sudo apt-get update
$ sudo apt-get upgrade
# the dependencies
$ sudo apt-get install zip unzip
$ sudo -H pip3 install keras_applications --no-deps
$ sudo -H pip3 install keras_preprocessing --no-deps
# download TensorFlow 2.7.0
$ wget -O tensorflow.zip https://github.com/tensorflow/tensorflow/archive/v2.7.0.zip
$ unzip tensorflow.zip
$ cd tensorflow-2.7.0
$ ./configurepi@raspberrypi:~/tensorflow-2.10.0 $ ./configure
You have bazel 5.1.1- (@non-git) installed.
Please specify the location of python. [Default is /usr/bin/python3]: <enter>
Found possible Python library paths: /usr/lib/python3/dist-packages /usr/local/lib/python3.9/dist-packages
Please input the desired Python library path to use. Default is [/usr/lib/python3/dist-packages] <enter>
Do you wish to build TensorFlow with ROCm support? [y/N]: n
No ROCm support will be enabled for TensorFlow.
Do you wish to build TensorFlow with CUDA support? [y/N]: n
No CUDA support will be enabled for TensorFlow.
Do you wish to download a fresh release of clang? (Experimental) [y/N]: n
Clang will not be downloaded.
Please specify optimization flags to use during compilation when bazel option "--config=opt" is specified [Default is -Wno-sign-compare]: <enter>
Would you like to interactively configure ./WORKSPACE for Android builds? [y/N]: n
Not configuring the WORKSPACE for Android builds.
Preconfigured Bazel build configs. You can use any of the below by adding "--config=<>" to your build command. See .bazelrc for more details.
--config=mkl # Build with MKL support.
--config=mkl_aarch64 # Build with oneDNN and Compute Library for the Arm Architecture (ACL).
--config=monolithic # Config for mostly static monolithic build.
--config=numa # Build with NUMA support.
--config=dynamic_kernels # (Experimental) Build kernels into separate shared objects.
--config=v2 # Build TensorFlow 2.x instead of 1.x.
Preconfigured Bazel build configs to DISABLE default on features:
--config=noaws # Disable AWS S3 filesystem support.
--config=nogcp # Disable GCP support.
--config=nohdfs # Disable HDFS support.
--config=nonccl # Disable NVIDIA NCCL support.
Configuration finished$ sudo bazel clean
$ sudo bazel --host_jvm_args=-Xmx1624m build \
--config=opt \
--config=noaws \
--config=nogcp \
--config=nohdfs \
--config=nonccl \
--config=monolithic \
--config=v2 \
--local_cpu_resources=1 \
--define=tflite_pip_with_flex=true \
--copt=-ftree-vectorize \
--copt=-funsafe-math-optimizations \
--copt=-ftree-loop-vectorize \
--copt=-fomit-frame-pointer \
//tensorflow/tools/pip_package:build_pip_package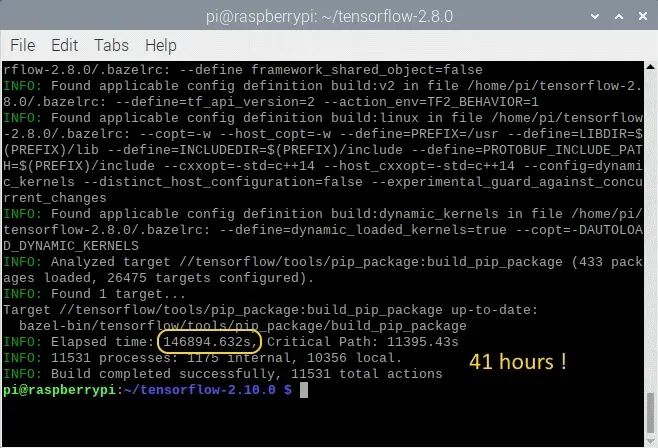
# synthesize the wheel
$ sudo bazel-bin/tensorflow/tools/pip_package/build_pip_package /tmp/tensorflow_pkg
$ cd ~
# go to the folder where the wheel is located and install tensorflow
$ cd /tmp/tensorflow_pkg
$ sudo -H pip3 install tensorflow-2.10.0-cp39-cp39-linux_aarch64.whl# synthesize the wheel
$ sudo bazel-bin/tensorflow/tools/pip_package/build_pip_package /tmp/tensorflow_pkg
$ cd ~
# go to the folder where the wheel is located and install tensorflow
$ cd /tmp/tensorflow_pkg
$ sudo -H pip3 install tensorflow-2.9.1-cp39-cp39-linux_aarch64.whl# synthesize the wheel
$ sudo bazel-bin/tensorflow/tools/pip_package/build_pip_package /tmp/tensorflow_pkg
$ cd ~
# go to the folder where the wheel is located and install tensorflow
$ cd /tmp/tensorflow_pkg
$ sudo -H pip3 install tensorflow-2.8.0-cp39-cp39-linux_aarch64.whl# synthesize the wheel
$ sudo bazel-bin/tensorflow/tools/pip_package/build_pip_package /tmp/tensorflow_pkg
$ cd ~
# go to the folder where the wheel is located and install tensorflow
$ cd /tmp/tensorflow_pkg
$ sudo -H pip3 install tensorflow-2.7.0-cp39-cp39-linux_aarch64.whl# the dependencies
$ sudo apt-get install build-essential make cmake wget zip unzip
$ sudo apt-get install libhdf5-dev libc-ares-dev libeigen3-dev
$ sudo apt-get install libatlas-base-dev
# download TensorFlow 2.10.0
$ wget -O tensorflow.zip https://github.com/tensorflow/tensorflow/archive/v2.10.0.zip
# unpack the folder
$ unzip tensorflow.zip
$ cd tensorflow-2.10.0
$ ./configure# the dependencies
$ sudo apt-get install build-essential make cmake wget zip unzip
$ sudo apt-get install libhdf5-dev libc-ares-dev libeigen3-dev
$ sudo apt-get install libatlas-base-dev
# download TensorFlow 2.9.1
$ wget -O tensorflow.zip https://github.com/tensorflow/tensorflow/archive/v2.9.1.zip
# unpack the folder
$ unzip tensorflow.zip
$ cd tensorflow-2.9.1
$ ./configure# the dependencies
$ sudo apt-get install build-essential make cmake wget zip unzip
$ sudo apt-get install libhdf5-dev libc-ares-dev libeigen3-dev
$ sudo apt-get install libatlas-base-dev
# download TensorFlow 2.8.0
$ wget -O tensorflow.zip https://github.com/tensorflow/tensorflow/archive/v2.8.0.zip
# unpack the folder
$ unzip tensorflow.zip
$ cd tensorflow-2.8.0
$ ./configure# the dependencies
$ sudo apt-get install build-essential make cmake wget zip unzip
$ sudo apt-get install libhdf5-dev libc-ares-dev libeigen3-dev
$ sudo apt-get install libatlas-base-dev
# download TensorFlow 2.7.0
$ wget -O tensorflow.zip https://github.com/tensorflow/tensorflow/archive/v2.7.0.zip
# unpack the folder
$ unzip tensorflow.zip
$ cd tensorflow-2.7.0
$ ./configure$ sudo bazel --host_jvm_args=-Xmx1624m build \
--config=opt \
--config=noaws \
--config=nogcp \
--config=nohdfs \
--config=nonccl \
--config=monolithic \
--config=v2 \
--local_cpu_resources=1 \
--copt=-ftree-vectorize \
--copt=-funsafe-math-optimizations \
--copt=-ftree-loop-vectorize \
--copt=-fomit-frame-pointer \
//tensorflow/tools/lib_package:libtensorflow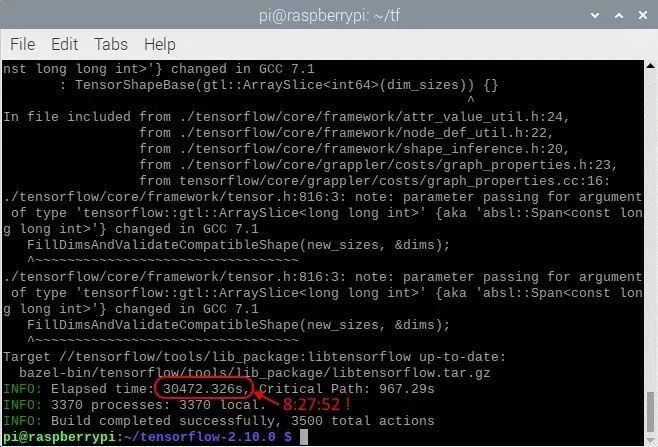
# clean up the whole bazel cache
$ sudo rm -rf ~/.cache/bazel# clean up the whole bazel cache
$ sudo rm -rf ~/.cache/bazel# remove the dphys-swapfile (if installed)
$ sudo /etc/init.d/dphys-swapfile stop
$ sudo apt-get remove --purge dphys-swapfileInstalling Keras on Raspberry Pi 64 OS
After installing TensorFlow, you can load Keras. Keras is a high-level shell running on top of TensorFlow. It claims to be more user-friendly than TensorFlow, providing a more intuitive set of abstractions for easily developing deep learning models. Installation is done with just one command.
$ pip3 install keras


We will update regularly~
Follow Raspberry Pi developers~
Learn more about Raspberry Pi related content~