
Now that we are gradually familiar with the Raspberry Pi, we can start doing some simple experiments!
Among digital sensors, the most commonly used are I2C communication sensors. The I2C (Inter-Integrated Circuit) bus is a two-wire serial bus developed by PHILIPS for connecting microcontrollers and their peripherals. It is a bus standard widely adopted in the field of microelectronics communication control.
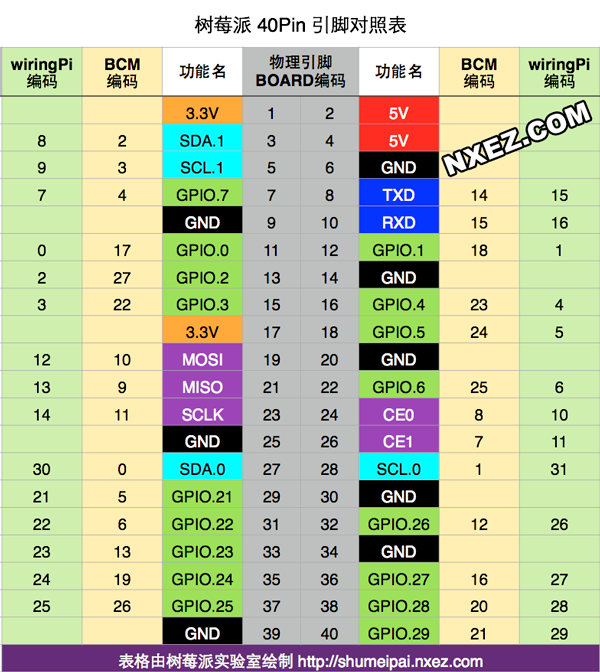
Below is the pinout diagram of the Raspberry Pi; we only need to understand the I2C pins for now.
Before using the I2C pins on the Raspberry Pi, we need to enable the I2C pins.
sudo raspi-config
Follow the steps in the image to enable it!
After enabling I2C, you can use it without rebooting the Raspberry Pi.
Generally, I2C sensors have four interfaces: VCC, GND, SDA, and SCL. We need to connect these four interfaces to the Raspberry Pi’s pins 3, 4, 5, and 6 as shown in the figure above.
Now let’s start debugging on the Raspberry Pi!
First, we need to install the I2C library and tools.
sudo apt-get install i2c-tools
After successful installation, we enter the following command:
sudo i2cdetect -y -a 1
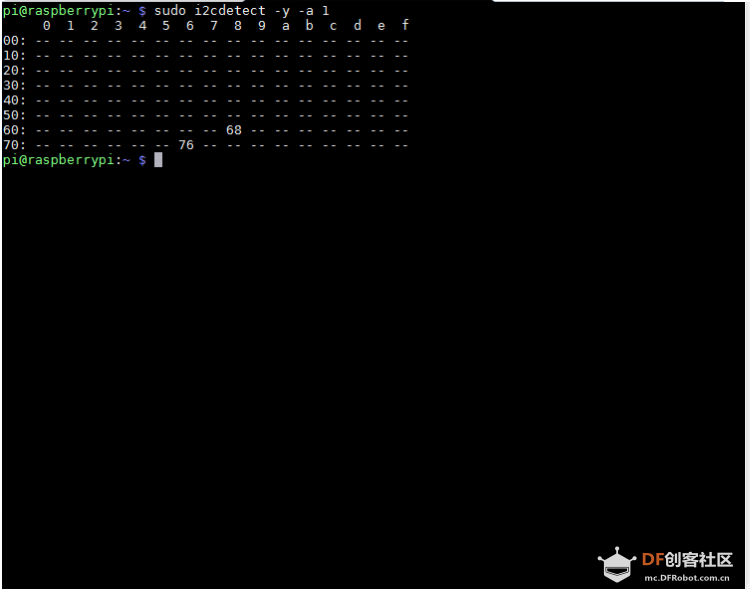
The purpose of this command is twofold: first, to confirm that I2C has been successfully enabled and can communicate normally with the sensor, and second, to scan the I2C device addresses for convenience in the next operation.
Reading Data from I2C Device
sudo i2cdump -y 1 0x68
-
-ymeans to skip the user interaction process and execute the command directly. -
1represents the I2C device number. -
0x68represents the I2C device address.
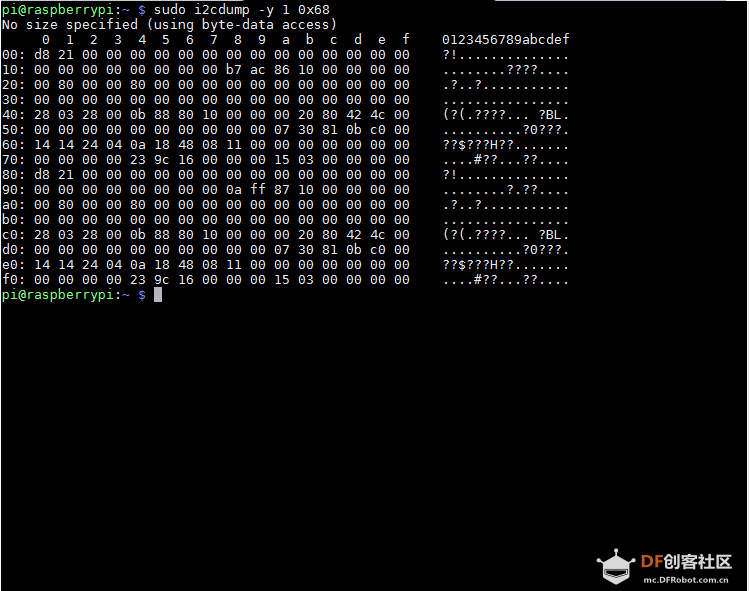
The output shows the data from various registers of the device at address 0x68.
Writing Data
sudo i2cset -y 1 0x68 0x1a 0x55
-
1represents the I2C device number. -
0x68represents the I2C device address. -
0x1arepresents the register address. -
0x55represents the data to be written to the register.
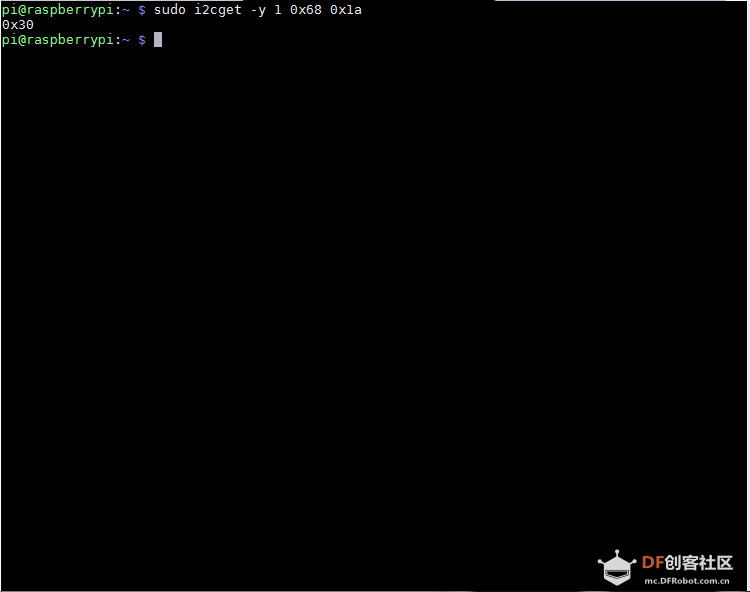
Reading Register Data
sudo i2cget -y 1 0x68 0x1a
-
1represents the I2C device number. -
0x68represents the I2C device address. -
0x1arepresents the register address.
I2C Programming
The above methods are for command-level I2C communication; now we move on to the programming phase!
In this tutorial, we will primarily learn Python as the programming language for Raspberry Pi, so we will only introduce I2C programming in Python.
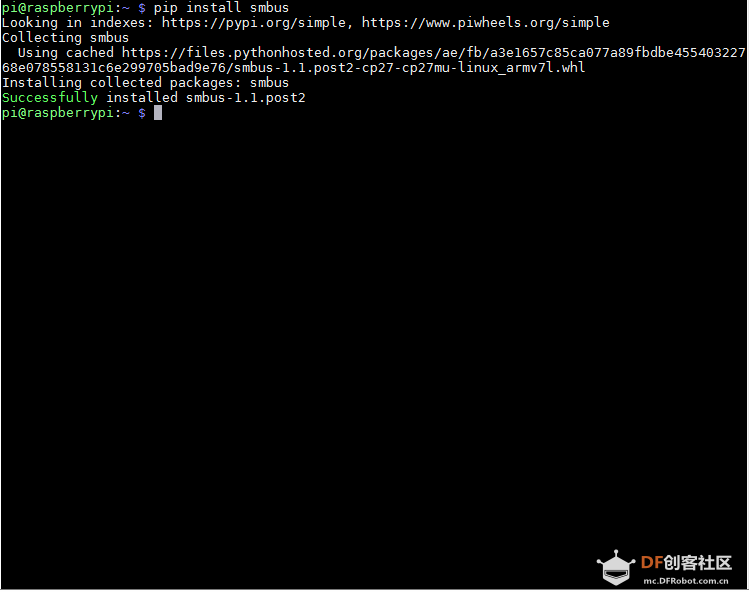
First, we need to install the smbus library.
sudo pip install smbus
Next, let’s learn how to use the smbus library.
The following code uses the four most commonly used methods of the smbus library:
import smbus
import time
i2cbus= smbus.SMBus(1)

data=i2cbus.read_byte_data(addr,reg)
print(data)

i2cbus.write_byte_data(addr,reg,0x99)

# For reading and writing 16-bit data
data=i2cbus.read_word_data(addr,reg)
print(data)

i2cbus.write_word_data(addr,reg,0x01d6)

# Read and write lists
data=i2cbus.read_i2c_block_data(addr,reg)
print(data[0])
buffer=[0x24,0x26]
i2cbus.write_i2c_block_data(addr,reg,buffer)
Open the Python environment and input the above code line by line; you can see the results after entering each line (the part after # can be ignored).
You can also input the code into a Python script with a .py suffix, and running the script will show you the I2C reading results!
– END –
Hardware Arsenal
Click to learn more details👆
If you have any thoughts or corrections regarding the article, please feel free to leave a comment below!
For those with extra energy, you can click to read the original text and continue learning in the community!
Past Reviews
What is Raspberry Pi? Can it be eaten?
Raspberry Pi Basics: Configuring and Initializing the Raspberry Pi
Raspberry Pi Basics: Remote Connecting to Raspberry Pi
Raspberry Pi Basics: Learning Linux Commands
Raspberry Pi Basics: Lighting Up an LED
Raspberry Pi Basics: Measuring Distance with Ultrasonic Sensor
Raspberry Pi Basics: Button Control for Raspberry Pi Shutdown
Raspberry Pi Basics: Implementing an Automatic Temperature-Controlled Fan with Raspberry Pi
Click to read👆