1. Software Introduction Arduino is an open-source electronic prototyping platform primarily used for rapid development in fields such as the Internet of Things (IoT), robotics, and automation control. It includes hardware (various models of development boards) and software (Arduino IDE and related tools), making it suitable for beginners, maker enthusiasts, and professional developers. The Arduino IDE is the official programming tool provided, supporting cross-platform (Windows, macOS, Linux). Its main features are as follows:
| Code Editing | Programming based on C/C++ syntax, simplifying low-level operations |
| Compilation and Upload | One-click compilation of code to upload to the development board |
| Serial Monitor | Used for debugging, allowing you to view sensor data and send commands |
| Library Management | Built-in a large number of libraries (such as servo, sensor libraries, etc.) |
| Example Tutorials | The software includes a large number of example tutorials for reference |
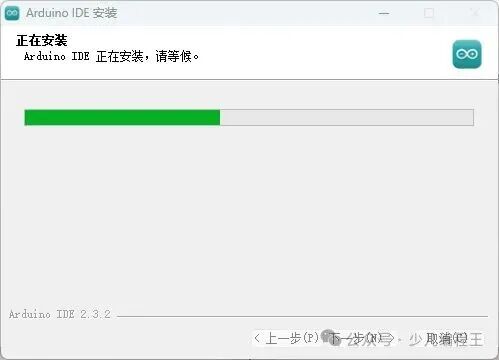
2. Software Installation TutorialStep 1: After downloading the software, run the Arduino IDE software icon as an administrator.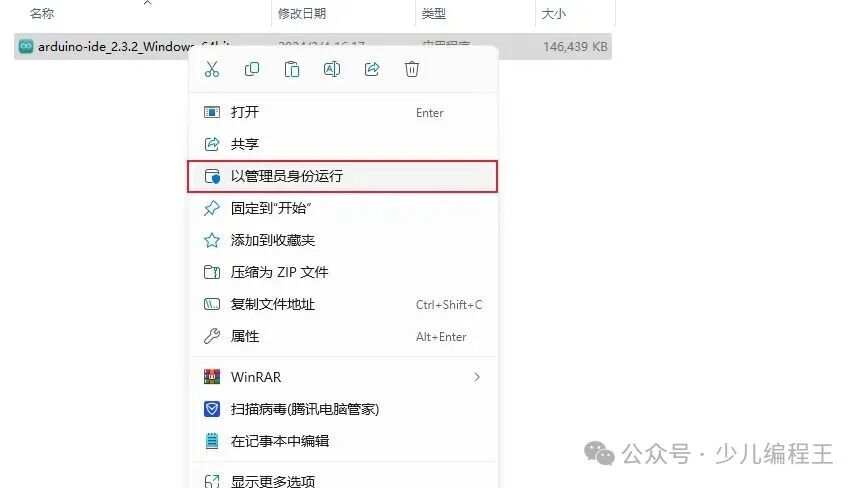 Step 2: After selecting the default or specified folder, click install. (Note: It is best not to use Chinese characters in the installation path to avoid installation failure!)
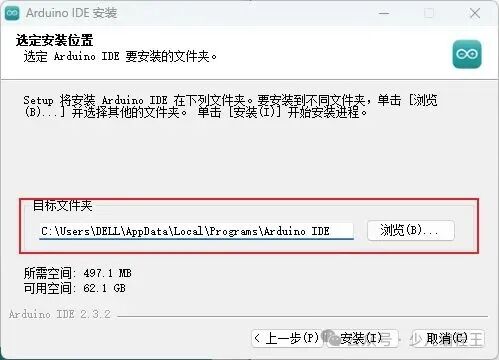
 Step 3: After installation is complete, click finish.
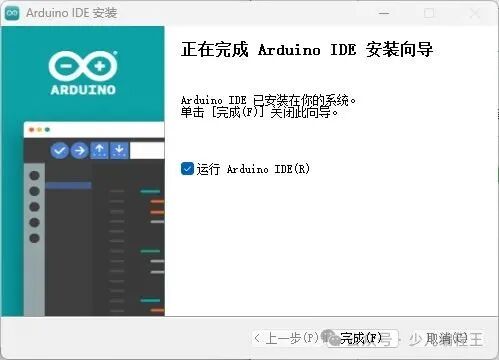 Step 4: If this is your first installation, it will download libraries and install drivers when opened. (Note: Just click allow or install on any pop-up boxes!)
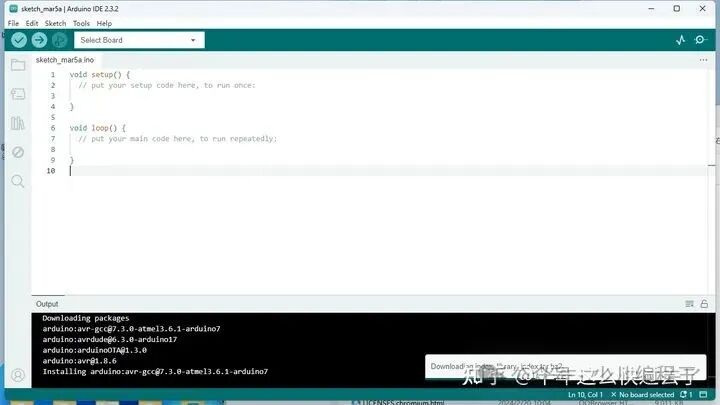 3. Software UsageStep 1: The software will automatically open a project program file by default.
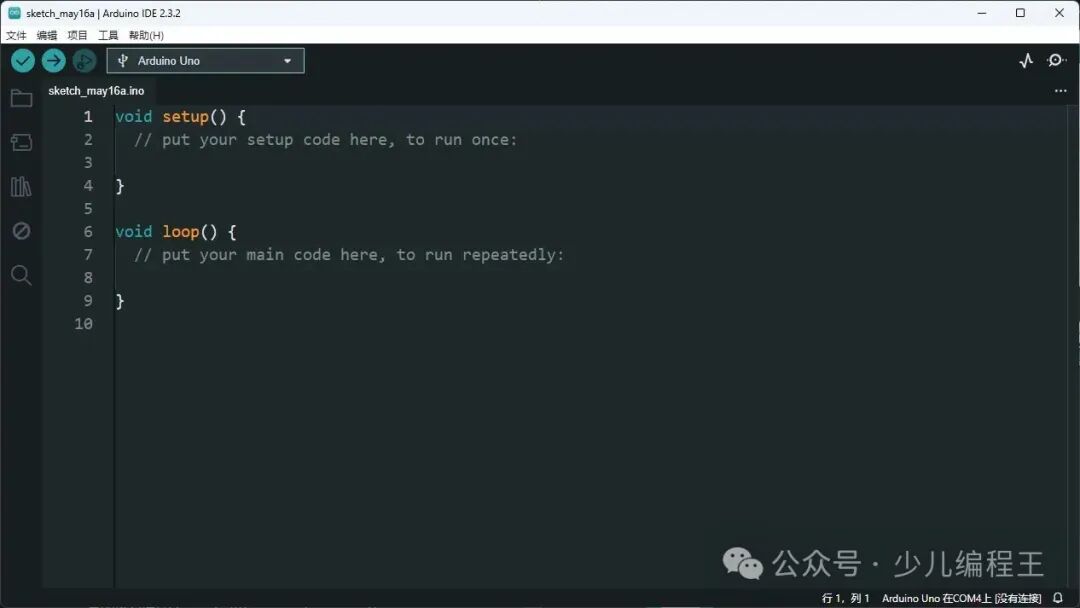 Step 2: When using for the first time, you can select the example programs provided by the software for testing and learning.Step 2-1: Select the corresponding development board model in the toolbar.
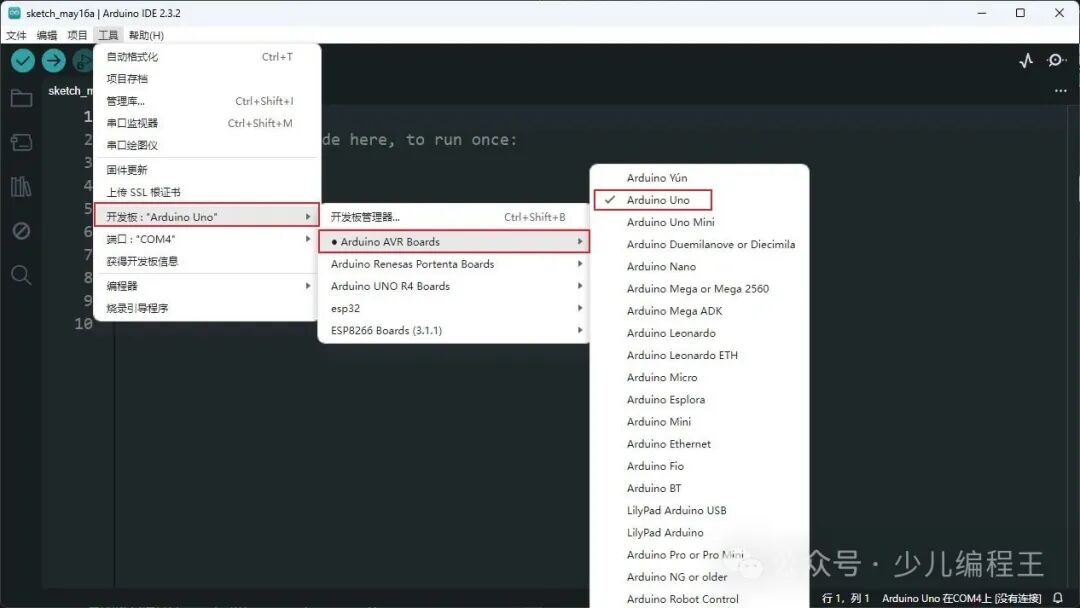 Step 2-2: Select the corresponding COM port.
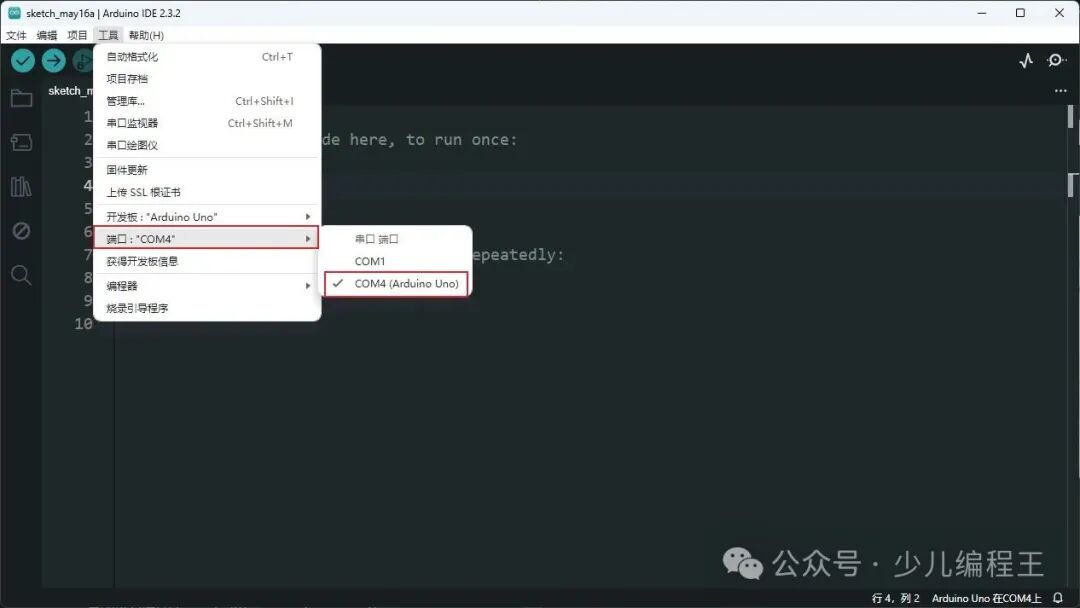 Step 3: Select the corresponding example program from the examples under the file menu for testing or learning.
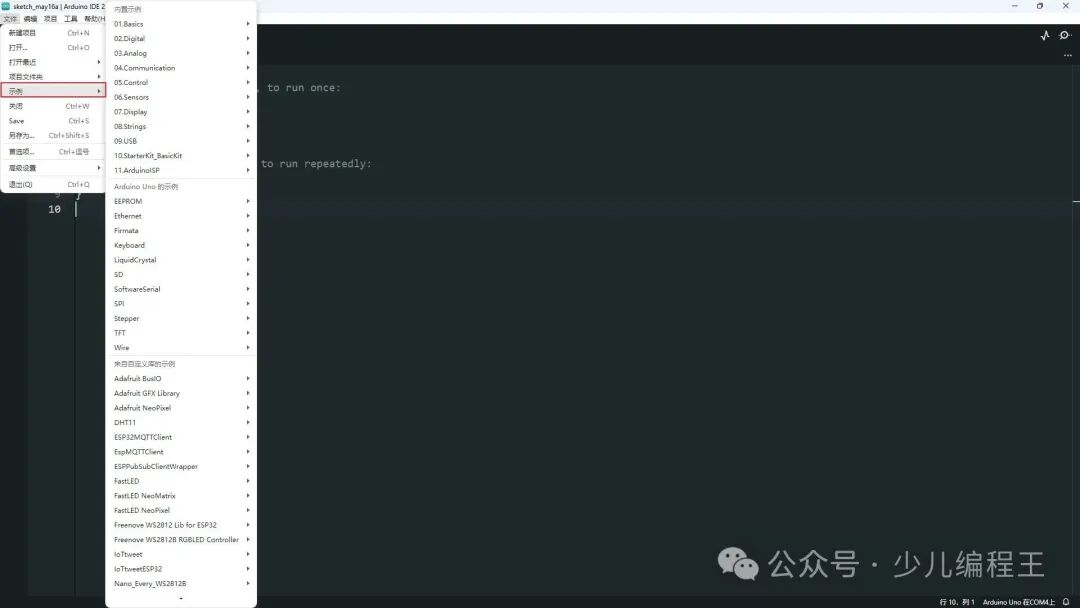