(Pretending to be a Geek by Ding Ding) Due to the pandemic, schools closed early. After printing a thick stack of exercises for my child, as a parent concerned about the next generation of socialist successors, I have the obligation to ensure my child has a more fulfilling winter vacation at home.

Introducing my child to popular software and hardware knowledge beyond just mobile phones and tablets is naturally my glorious mission as a worker who has yet to receive an invitation to be a successor, to inspire her determination to strive for the great rejuvenation of the Chinese nation.

Thinking of this, I feel the weight of my responsibility heavier.
Thus, the latest Raspberry Pi Pi 400 became the preferred platform for the next generation of socialist successors.
 Why Choose Raspberry Pi?
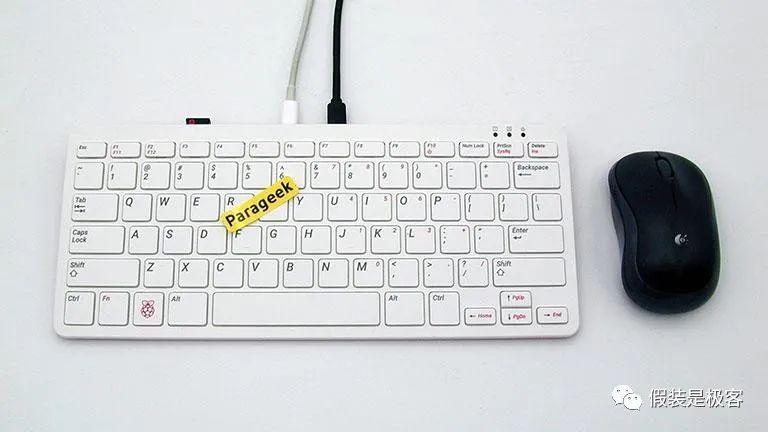
The Pi 400 reconfigures the Raspberry Pi 4 into a mini portable keyboard, solving the trouble of needing an additional case and heat sink in previous versions. At the same time, the red and white keyboard also aligns with children’s aesthetics.
Simply connect a mouse, USB power supply, and HDMI monitor to use it as a children’s computer.
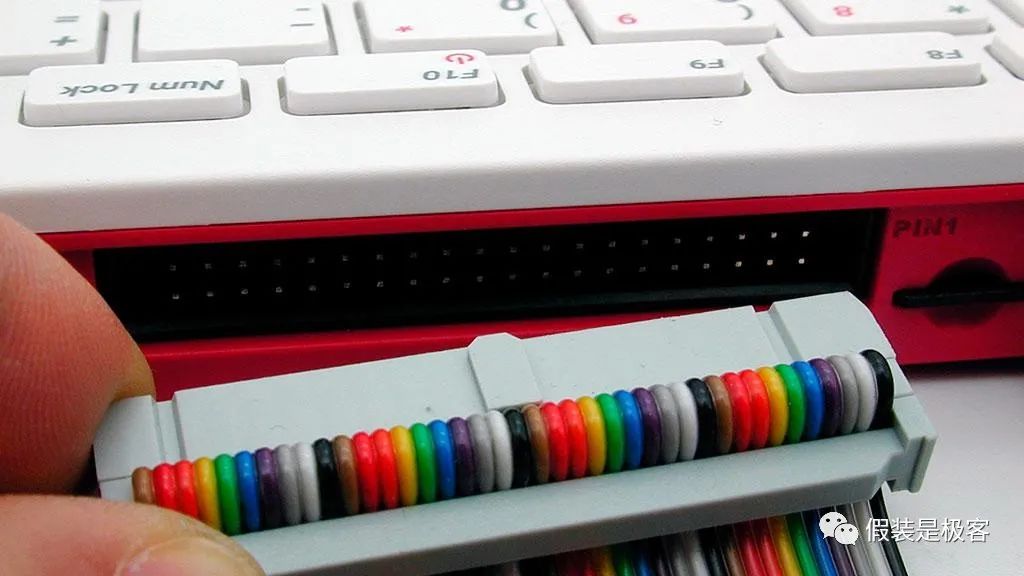
With GPIO ports that are fully compatible with previous versions, it can connect various electronic components and sensors, making it perfect for children to play with.
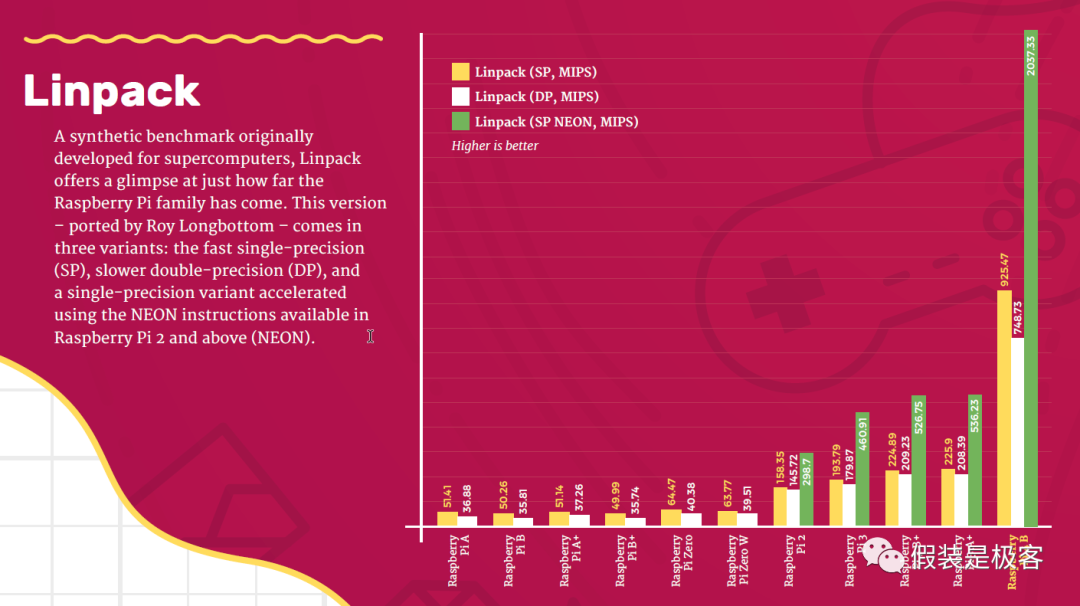
In terms of hardware configuration, it features a Broadcom BCM2711 quad-core 64-bit 1.8GHz ARMV8 processor and 4GB LPDDR4-3200 memory, ensuring ample performance for ordinary lightweight office applications.
Here is a comparison chart of the Raspberry Pi 4B with other versions. It is worth noting that the processor used in the Pi 400 operates at a frequency 300MHz higher than that of the 4B.
Previously, pretending to be a geek provided a detailed teardown analysis of the Pi 400, which interested parties can refer to.
On the software side, the Raspberry Pi OS is a derivative of Debian, and the official software for creating system disks is provided, allowing users to easily create their own boot disks.
The Raspberry Pi also supports several third-party systems, such as Ubuntu, Kodi, RetroPie, and Lakka, providing users with mature solutions for office work, entertainment, and gaming.
At a retail price of around 500 yuan, the Pi 400 offers an integrated lightweight platform for learning about Raspberry Pi hardware, IoT applications, and various popular programming languages such as Python, Scratch, Java, and C++.
For younger children, the special version of Scratch that comes with the Raspberry Pi OS supports the GPIO interface, eliminating the need to purchase expensive textbooks and corresponding hardware accessories for using official Scratch or various modified versions in the domestic market (official Scratch only supports programming on platforms like LEGO).
Therefore, using this new era’s learning machine to teach the new generation of socialist successors software, hardware, and electronics knowledge is quite appropriate.
Of course, there are other reasons to use Raspberry Pi, such as:
The Raspberry Pi platform is relatively open, with corresponding open-source communities both domestically and internationally, where a wealth of reference materials can be found;
The platform’s hardware resources are abundant; beyond “learning,” it can also be applied in other areas, truly achieving maximum utility;
The cost is relatively low, allowing the use of existing peripherals from platforms like Arduino.

Easy Creation of Pi 400 System Disk
Required equipment:
A functioning computer with internet access
At least an 8GB TF card (also called a Micro SD card), the faster the better
A USB TF card reader
The new version of Raspberry Pi currently provides only one method for creating a system disk:
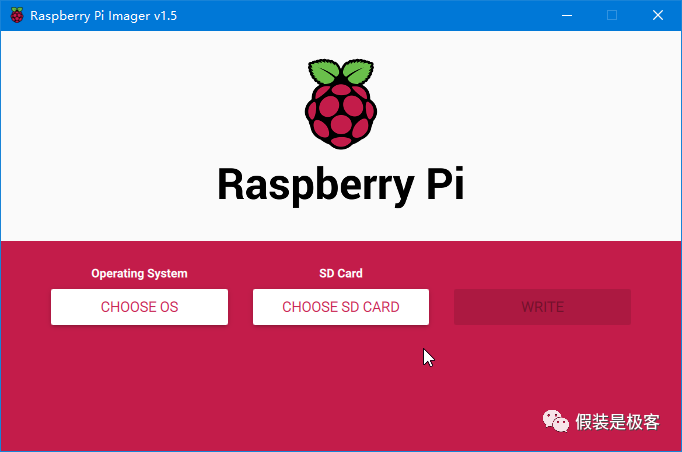
Using Raspberry Pi Imager.
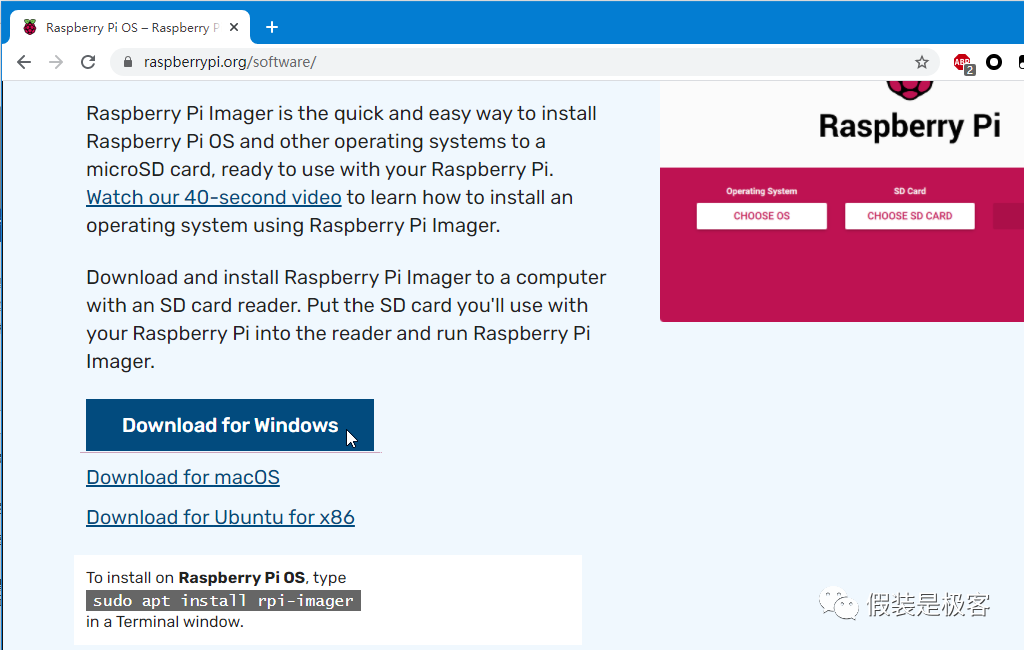
You can directly download Windows, MacOS, Ubuntu, and the official OS versions from the official website.
After installing Imager, run this system disk creation program.
You can directly download the corresponding system image online.
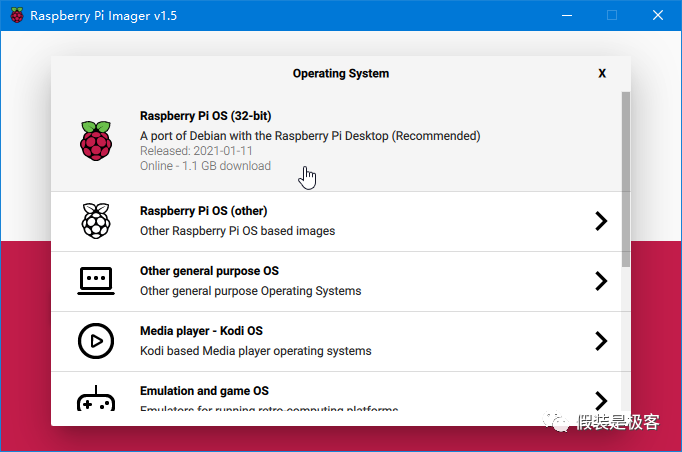
If you just want to focus on learning programming, it is recommended to use the official recommended 1.1GB image with a graphical desktop.
If you have other needs during use, you can directly install relevant office, entertainment, and graphic processing software online.
However, since the Raspberry Pi’s official website is located abroad, the domestic CDN acceleration is poorly done, and the download speed of the images during online installation is very slow, especially during peak hours in the evening. Even with telecom or unicom broadband, the slow speeds can be unacceptable. Therefore, pretending to be a geek suggests that adults use offline methods to create Raspberry Pi boot disks.
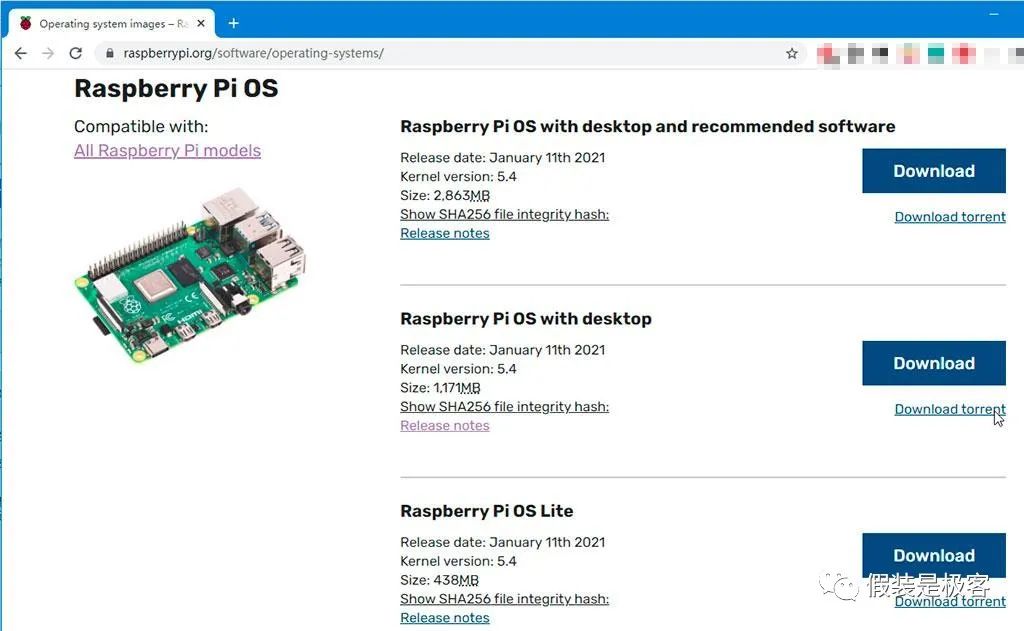
On another page, download the BT torrent seed file for the Raspberry Pi system, and through a download software, you can obtain the corresponding Raspberry Pi OS image file in just a few minutes.
After obtaining the file, unzip it to get an image file with the suffix .img.
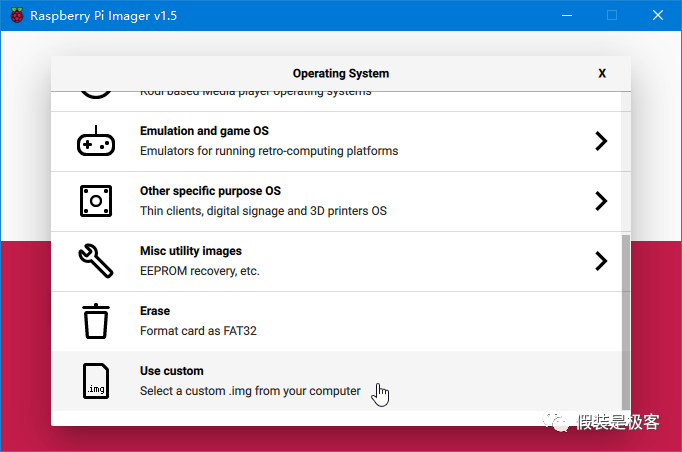
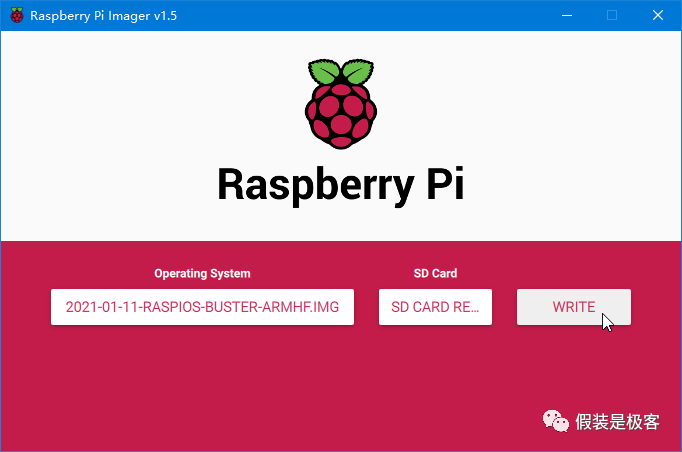
At this point, we open the Raspberry Pi Imager software, in the operating system selection bar, scroll down to the bottom, and manually select the img image file that we just downloaded.
Then, select the corresponding TF card.
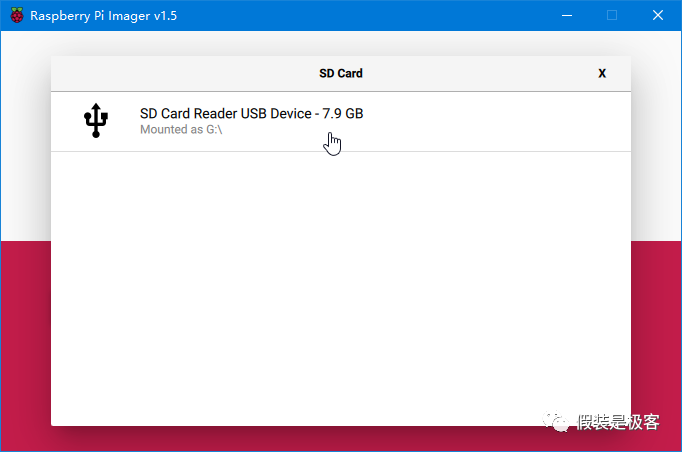
After selection, click the WRITE button, and the system disk can be created.
Before writing the system, the software will provide a safety prompt, please confirm that you no longer need the data on this TF card~~
Then comes the tedious creation time.
The time taken for this process is closely related to the speed of your TF card reader and USB interface.
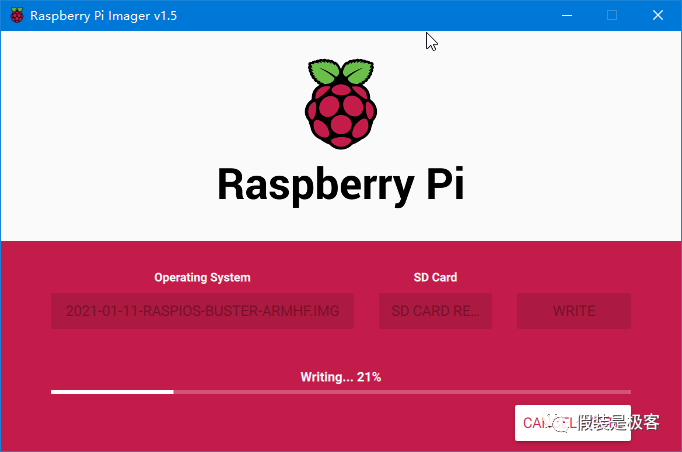
Upon completion, the software will also notify you.
Insert the TF card into the Pi 400 and connect the corresponding cables to configure the Raspberry OS system.
For specific configuration steps, please follow the next article and video from pretending to be a geek.

#The reason pretending to be a geek is doing this series of articles and related videos on Raspberry Pi Pi 400 is quite simple.
#With the updates of the Raspberry OS system, many tutorials available online have become somewhat outdated; additionally, it serves as a record for my child to have a reference while learning. As for the videos, recording the screen while operating is very convenient, so it was done as a bonus.
#This series of tutorials primarily references the official beginner’s guide from Raspberry Pi. We will learn Scratch 3 and Python together with the child, mainly to enhance her exploration and hands-on abilities.
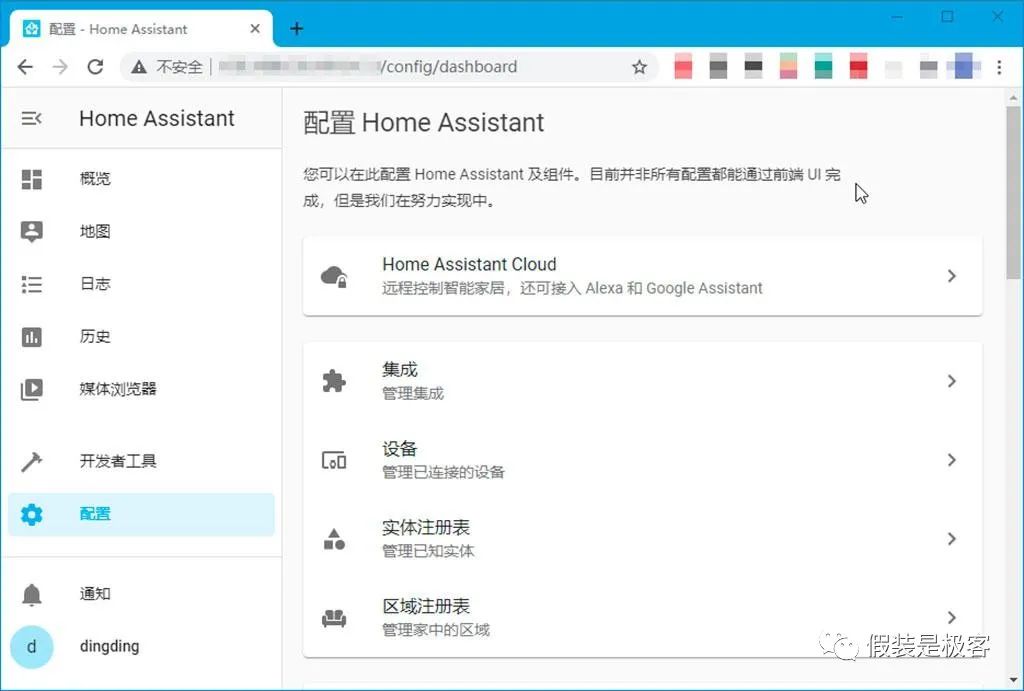
#Everything is aimed at cultivating the child’s interest from a practical perspective, so in the future learning process with the child, I will also let her use Raspberry Pi to interact with various popular smart hardware devices. For this purpose, pretending to be a geek has also specifically built an open-source platform environment for Home Assistant, allowing her to experience the sparks of wisdom that emerge from her fingertips.
#Playing with Raspberry Pi with children doesn’t necessarily require the latest Pi 400. Previous versions, such as the Raspberry Pi 2B from five to six years ago, can fully meet the needs. Even the cheaper Zero series can provide a learning environment for children for less than a hundred yuan.
#It is not recommended to use the newly released Raspberry Pi Pico, which is just a microcontroller module that is slightly more powerful than the 8-bit Arduino platform, and its playability is far lower than that of other versions.