Click on the image for details
Embedded Studio is an all-in-one integrated development environment (IDE) for embedded systems, used for managing, building, testing, and deploying embedded applications. Embedded Studio also provides a powerful project manager and source code editor, along with an integrated C/C++ compiler and a debugger with advanced debug information windows. It also offers direct J-Link integration for automated application deployment and version control features, and the project generator supports common microcontrollers.
Main Features
Free for non-commercial use, such as for educational and assessment purposes, with no restrictions.
Cross-platform: runs on Windows, macOS, and Linux.
Multi-threaded builds minimize build time.
Highly optimized runtime libraries for best performance and minimal code size.
Feature-rich debugger with seamless J-Link integration.
Powerful project management capable of handling very large projects.
Package-based project generator suitable for all common microcontrollers.
Projects created with IAR, MDK (AC5), MDK (AC6), and Eclipse can be converted to work on the Embedded Studio platform.
Professional IDE solution for embedded C/C++ programming, including Clang/LLVM & GCC & SEGGER C/C++ toolchains.
The MM32 series MCUs are also one of the early MCU manufacturers that received official support from SEGGER, allowing for seamless development and debugging on the Embedded Studio platform. Today, we will introduce the development and debugging of MM32 MCUs on the Embedded Studio platform.

Environment Setup

01
Download Software
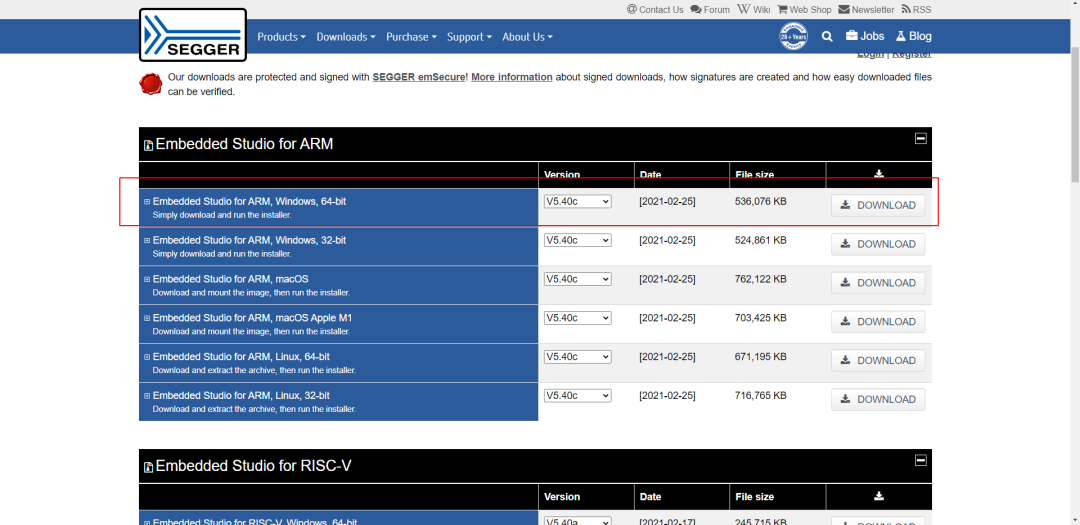
Log in to the SEGGER official website to download the latest Embedded Studio software (https://www.segger.com/).
Choose the appropriate version of the software for your computer’s operating system. Since this tutorial uses a Win10, 64-bit computer, select the 64-bit Win10 version for download.
02
Install Software
The software installation can be done by clicking Next continuously; basically, select the default configurations as it is quite simple.
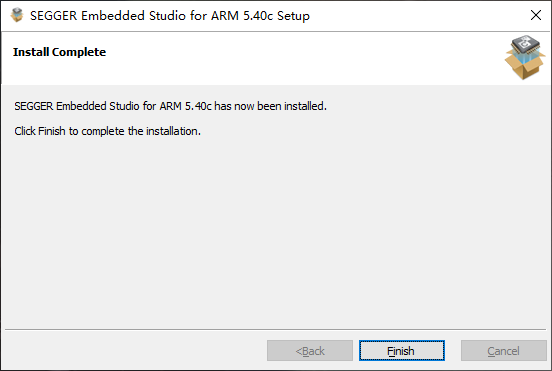
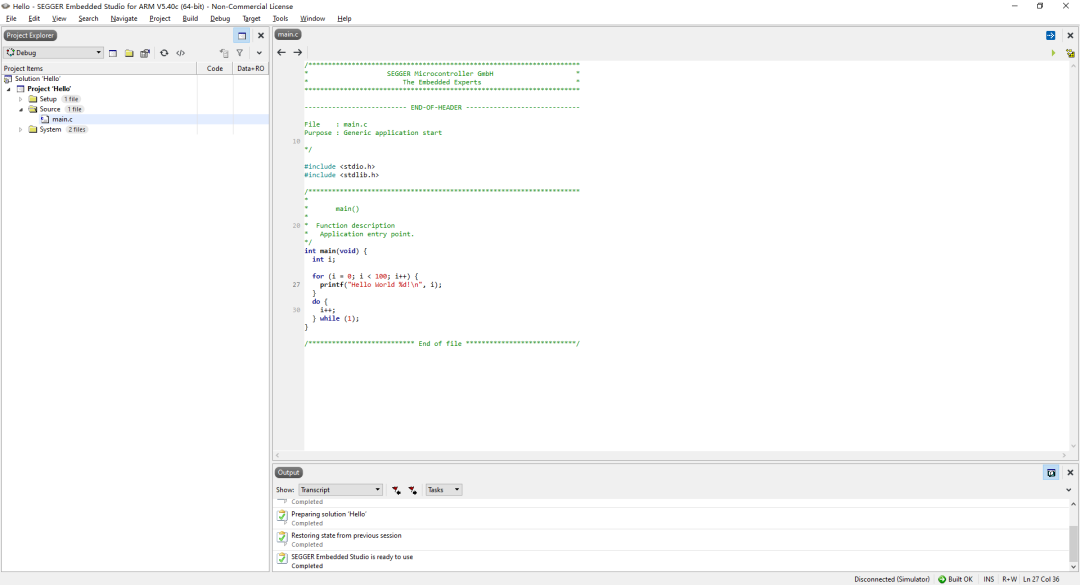
Once completed, double-click to open the Embedded Studio IDE. A warning dialog will pop up; we can directly click the CONTINUE button to skip it, and then we will enter the system’s default project page, indicating that our environment configuration is successful.
03
Install PACK
Open the Embedded Studio software, navigate to the Tools tab -> Package Manager to enter the pack management tab.
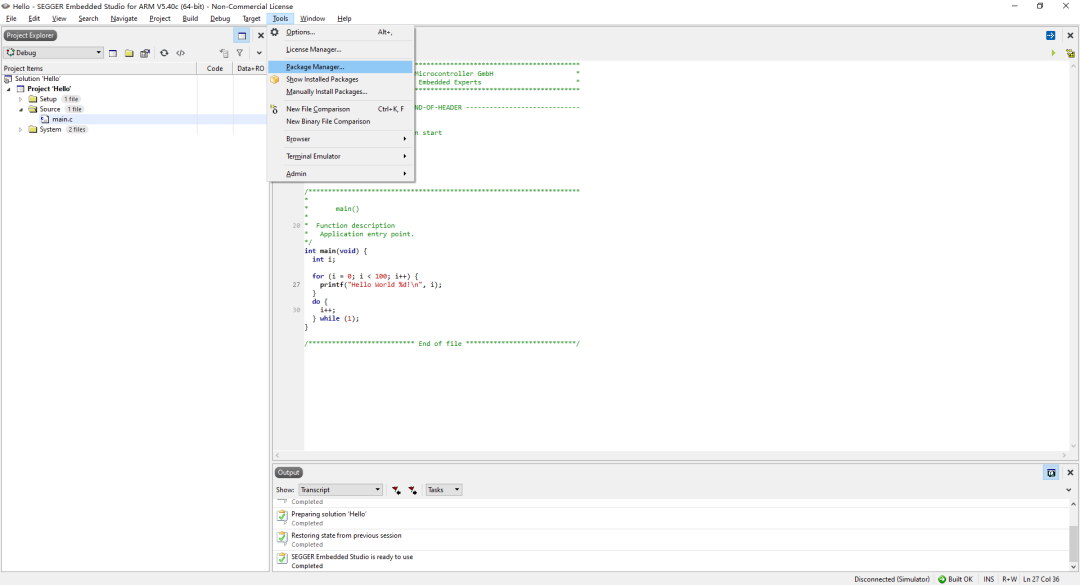
In the SearchPackages search box, enter MM32 to find and install the pack. Install the pack according to your project requirements (the pack for the latest series of MM32 MCUs is currently being supported by SEGGER, and users can also choose packs of the same model).
Clicking the selected pack will show the Next button in the IDE.
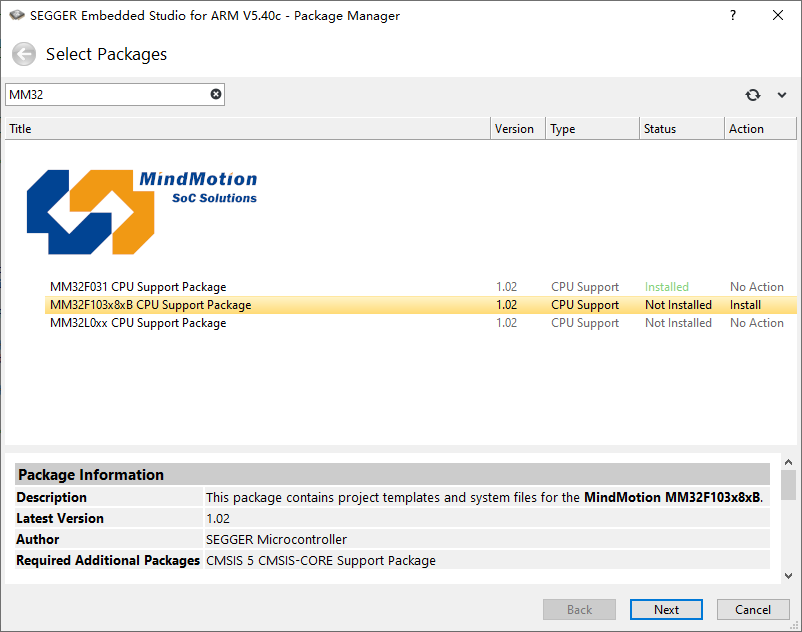
Click the Next button to enter the installation options tab.
04
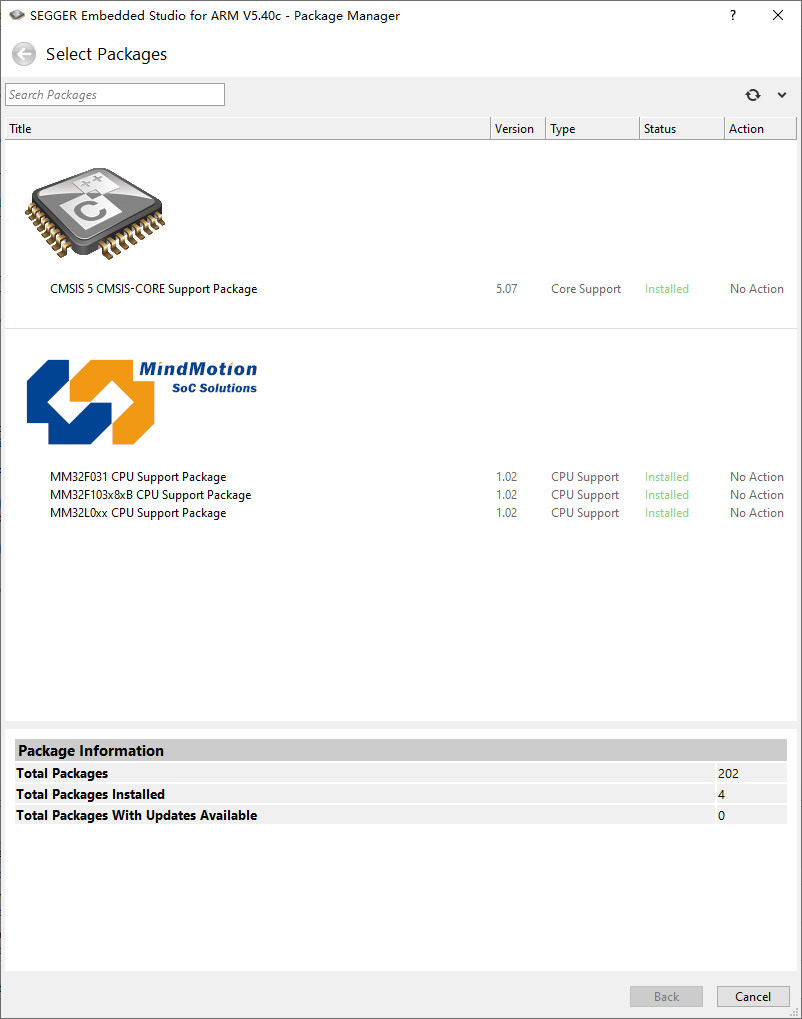
View Installed PACKs
Click the Display Installed tab to see the installed packs and view their related information.
Projects created with IAR, MDK (AC5), MDK (AC6), and Eclipse can be converted to work on the Embedded Studio platform, and new projects can also be created based on the Embedded Studio platform. This chapter will experiment with two ways to create the MM32F013X project environment.
Creating MM32 Project in Embedded Studio
The specific steps are as follows:
01
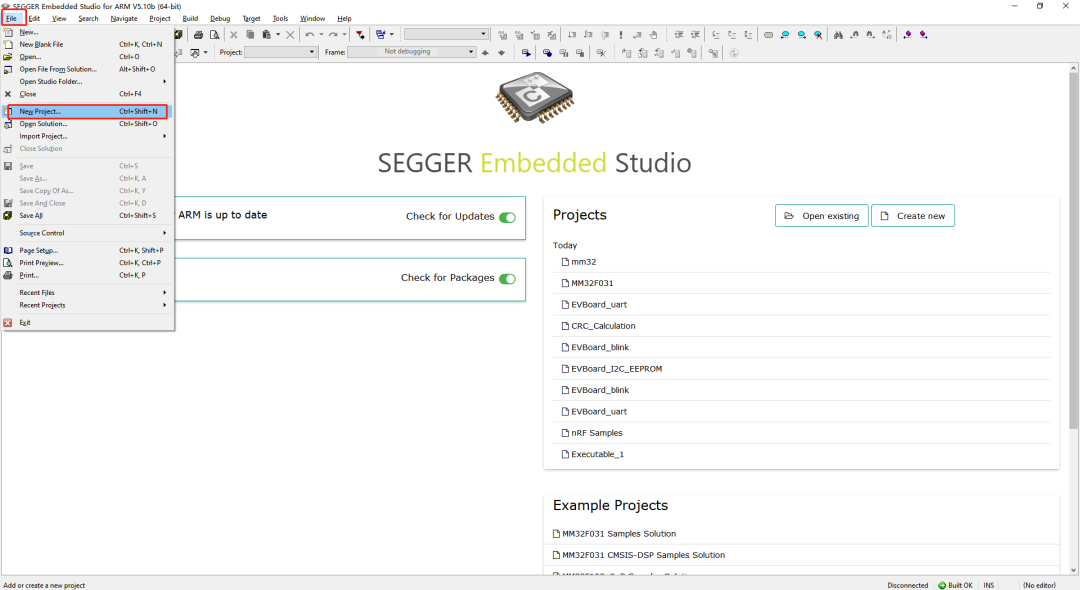
Create New Project
Select File -> New Project from the tab.
Select the MM32 chip model.
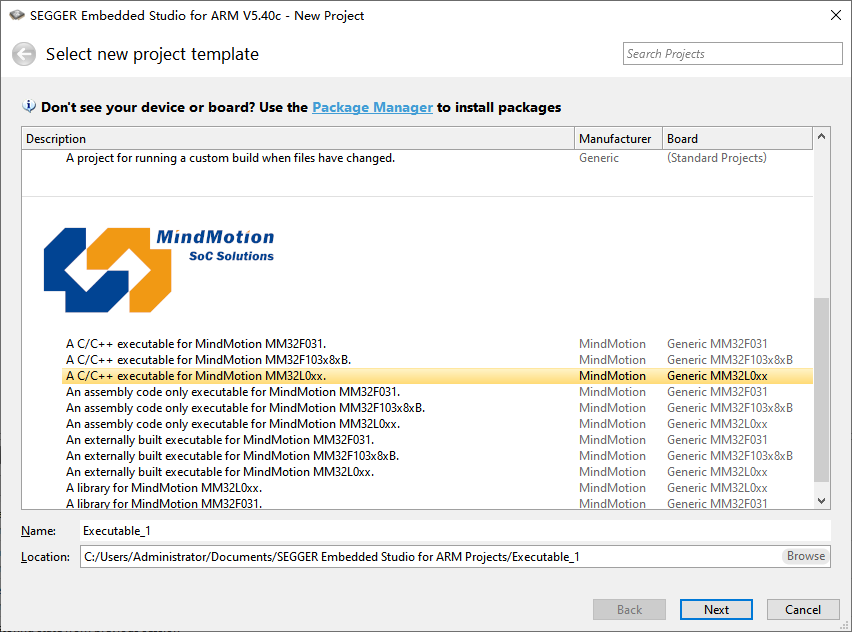
Configure the project name, changing the default project name to MM32.
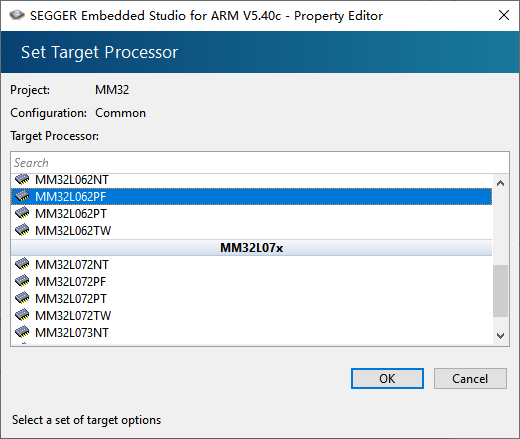
Select the relevant project configuration and click Target Processor to choose the specific chip model.
02
Load Files
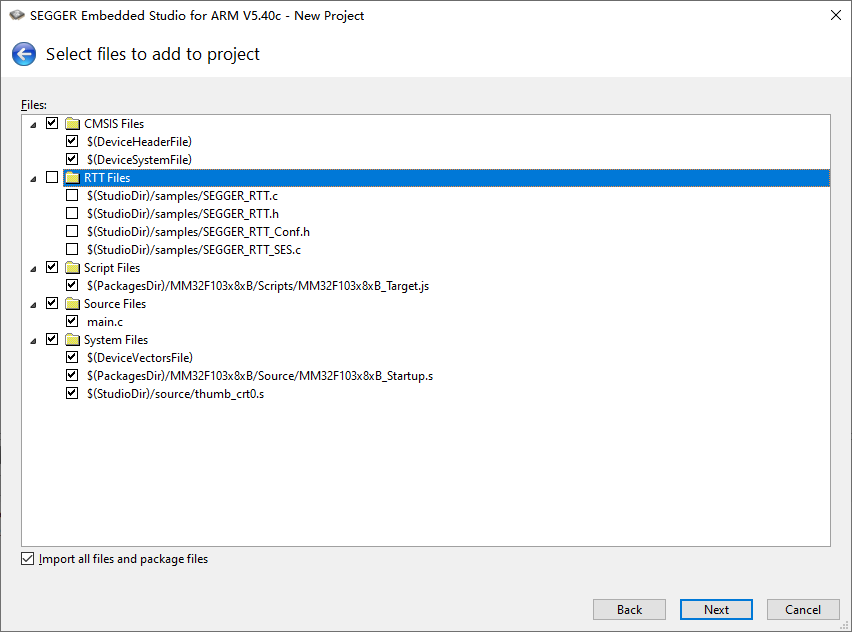
Port the MM32F013x library to our project. First, download the latest MM32F013x SDK package from the MM32 official website to our computer and extract it.

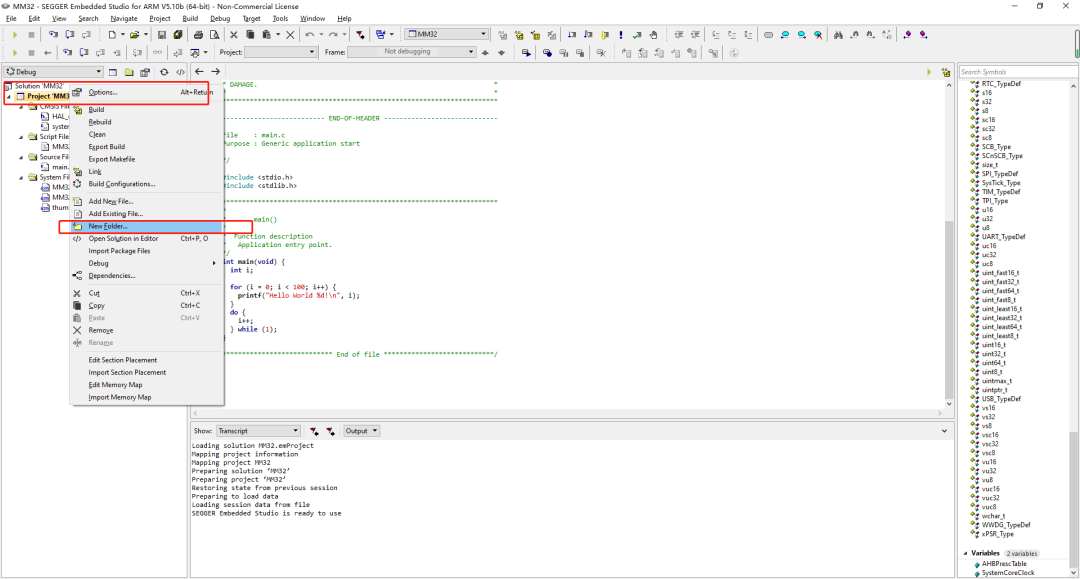
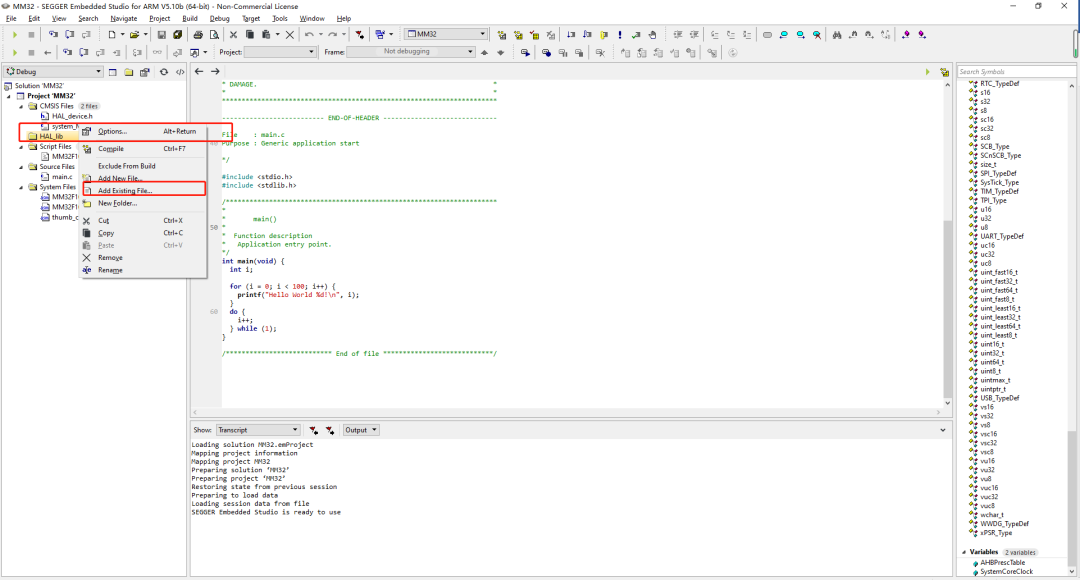
Copy the HAL_lib from the Device folder to our project folder, create a new folder in the project, and add the files from the HAL_lib to the project. The specific steps are as follows:
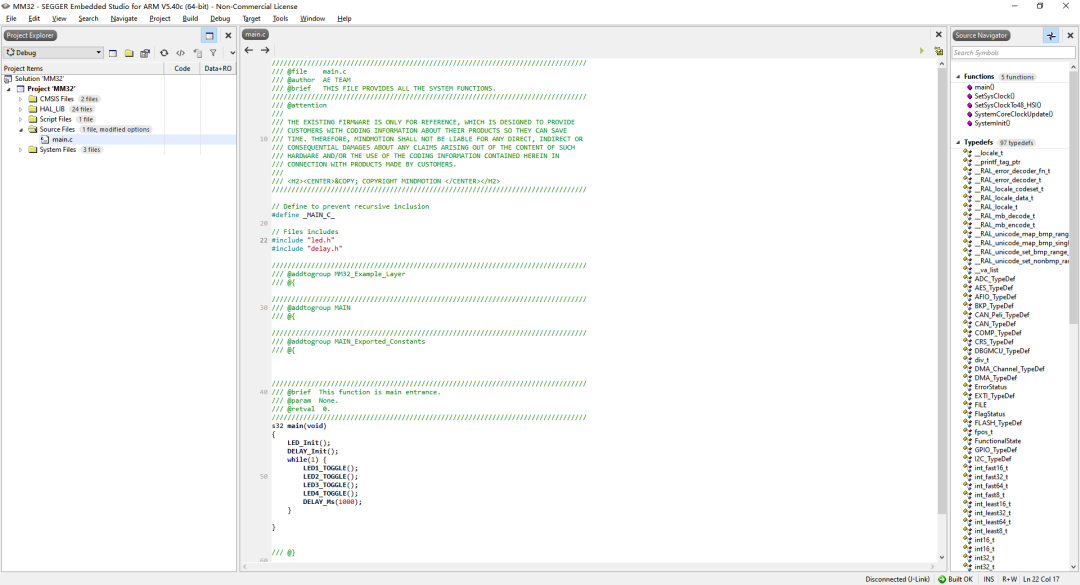
Replace the main.c file in our project with the main.c file from the IOtoggle project of the MM32F013x library.
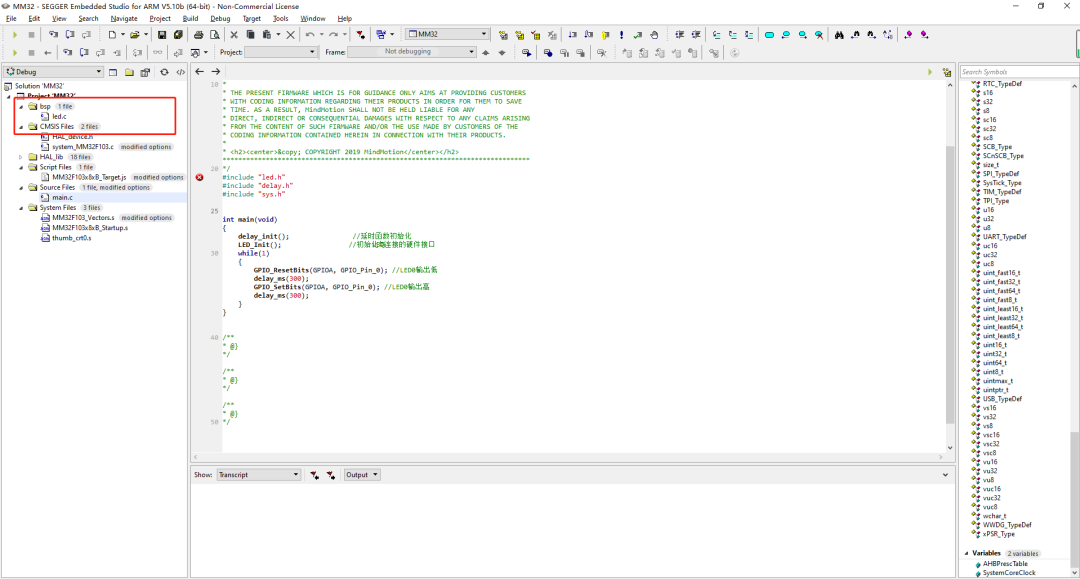
Add the LED driver files to the project: create a BSP folder in the project and copy the LED.c file from the HARDWARE folder under the IOtoggle folder into the BSP folder, then add it to the project.
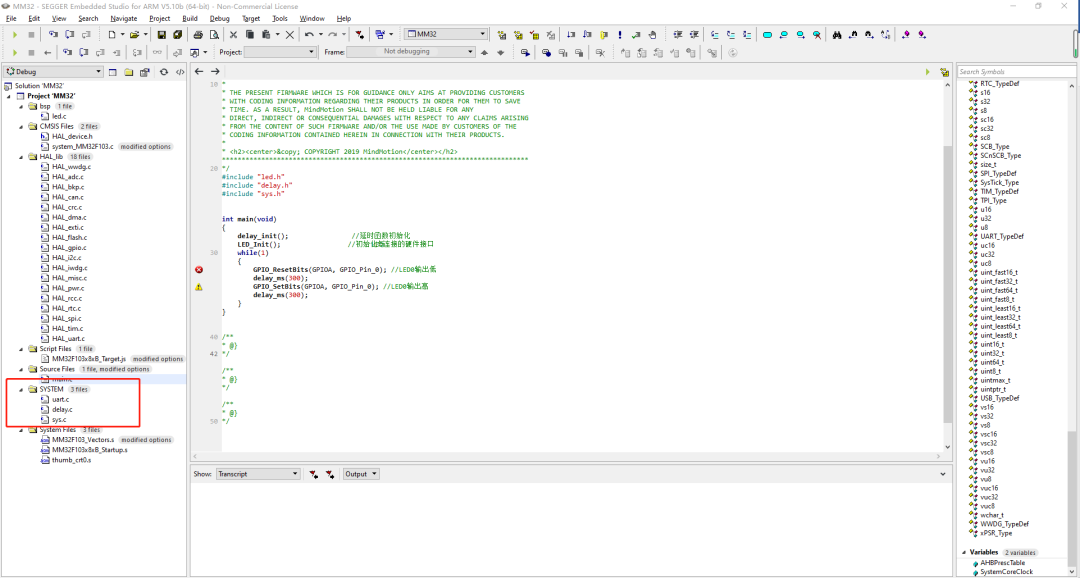
Add the SYSTEM folder to the project and add files. The specific operation is to copy the SYSTEM folder from the IOtoggle folder to our project and add it to the project. The specific steps are as follows:
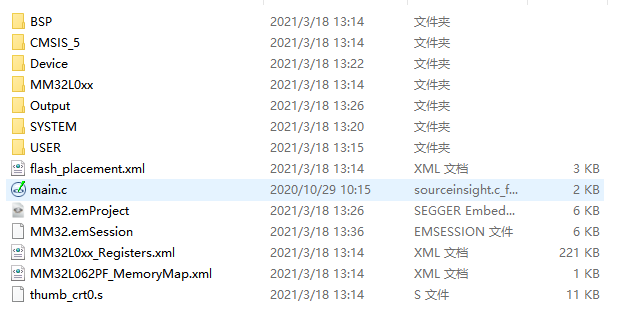
Create a new inc folder under the SYSTEM folder and place the .h files migrated from the official library in this folder.


Add .C files to the project.
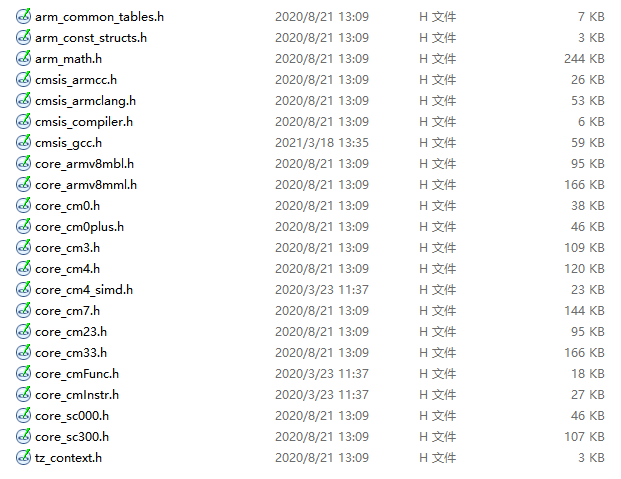
Add the header files from the MM32F013x library to the project. The specific operation is to copy the files from the CMSIS folder under the Device folder to the Include folder under CMSIS_5 -> CMSIS in the project folder.
03
Add Paths
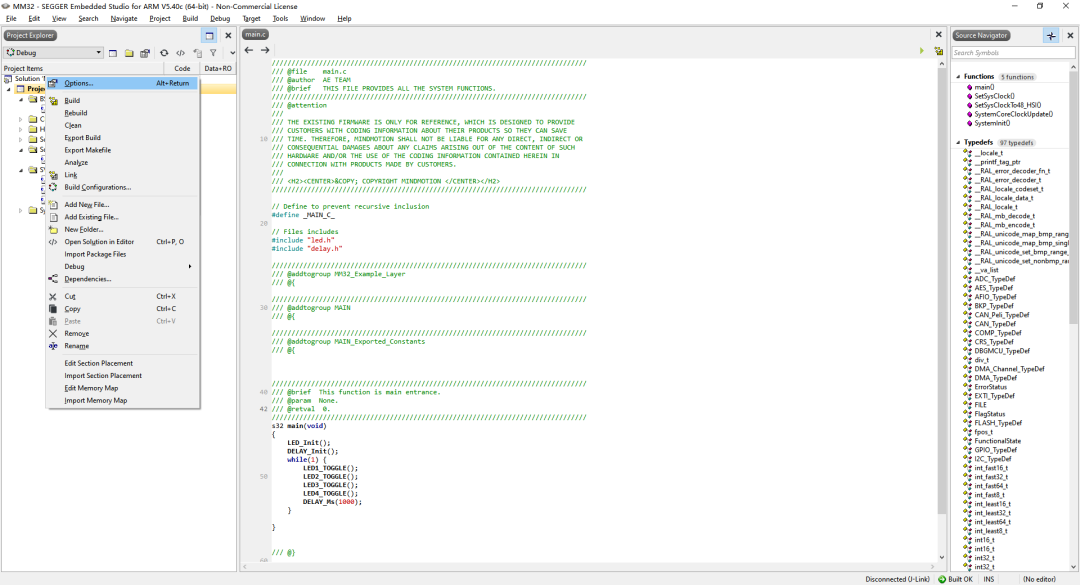
Right-click on Project -> Options.
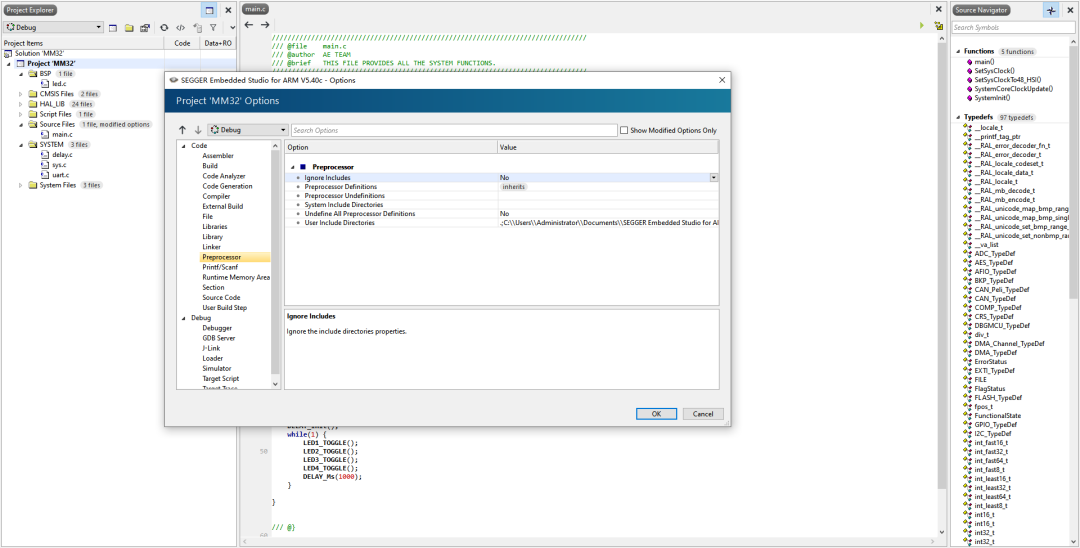
In the Preprocessor under the Code directory, click User Include Directories to select and add paths.
04
Compile
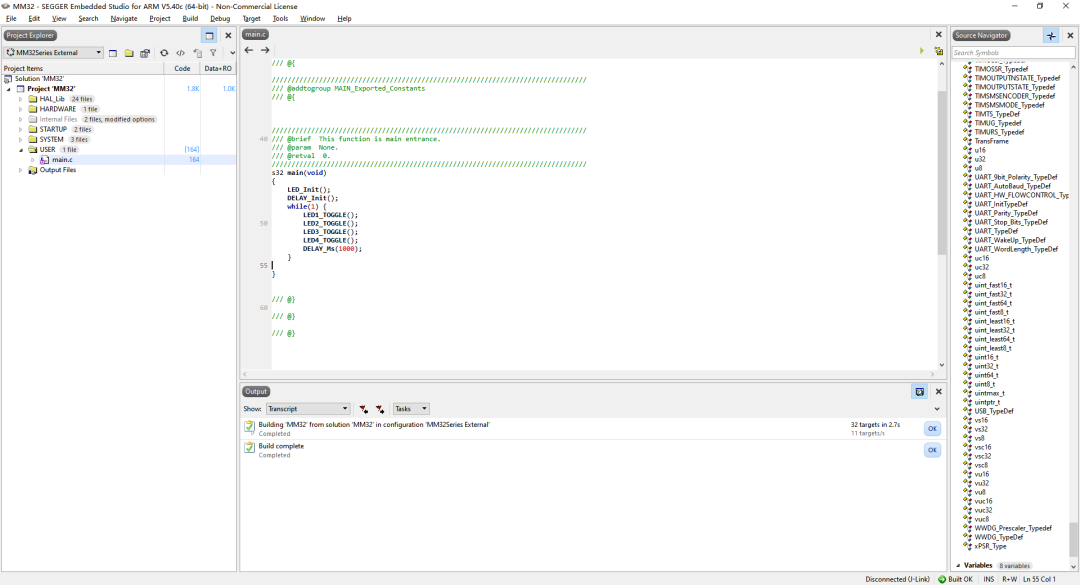
We will find many errors; in delay.c and uart.c, we need to add #include “HAL_conf.h” header file and comment out the line FILE __stdout in uart.
If Build complete appears, it indicates that our files have compiled successfully. Next, we will download the code to our board for testing, which means our project setup is successful.
During debugging, we can choose either the software’s built-in debugging method or use Ozone for debugging.
Import KEIL Project into Embedded Studio Compiler
01
Import MDK Project
Import the KEIL project into the SEGGER Embedded Studio compiler to compile the files. The specific steps are as follows:
Select File -> Import Project to add the MDK project and choose the type of MDK project to import. Currently supported types include MDK, MDK-ARM6, IAR, and GCC.
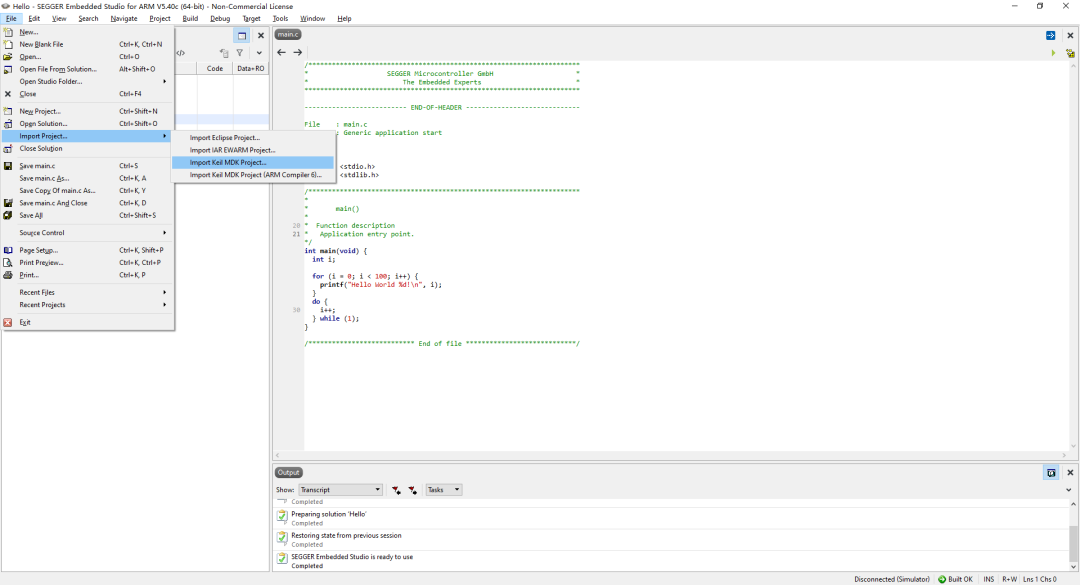
Select the MDK project file.
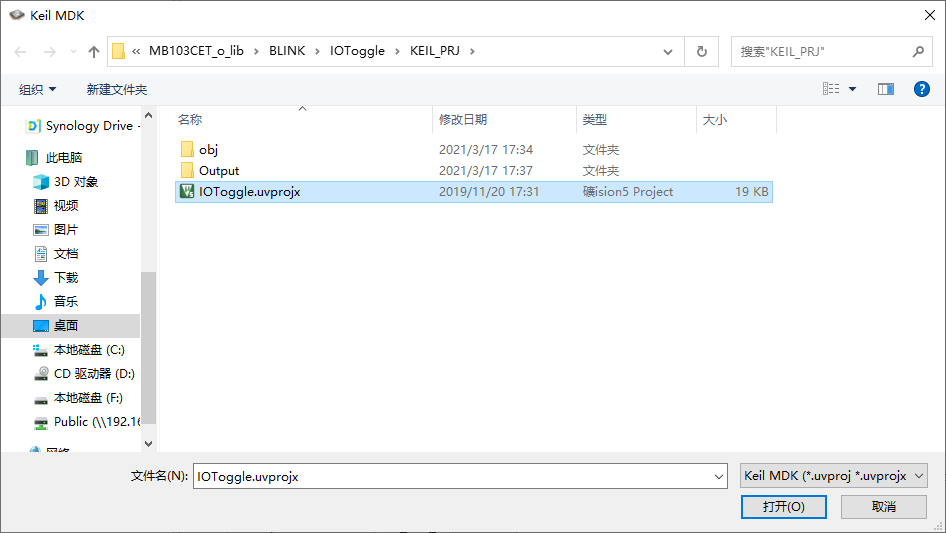
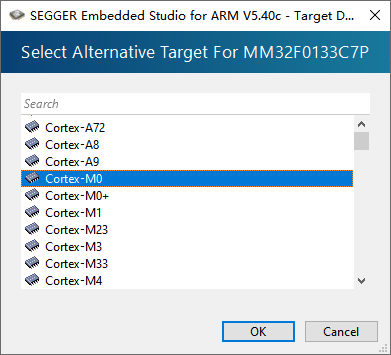
Select the core model:
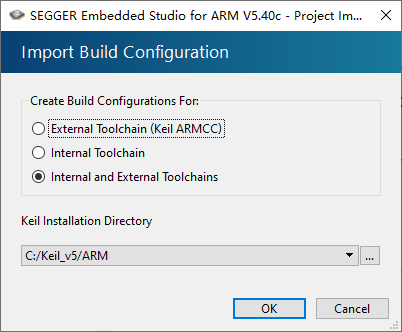
Select the compilation configuration, and choose external compilation tools.
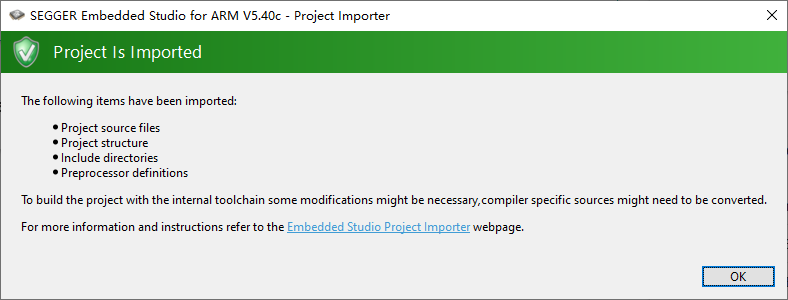
At this point, we can see that our files have been successfully imported.
02
Compile
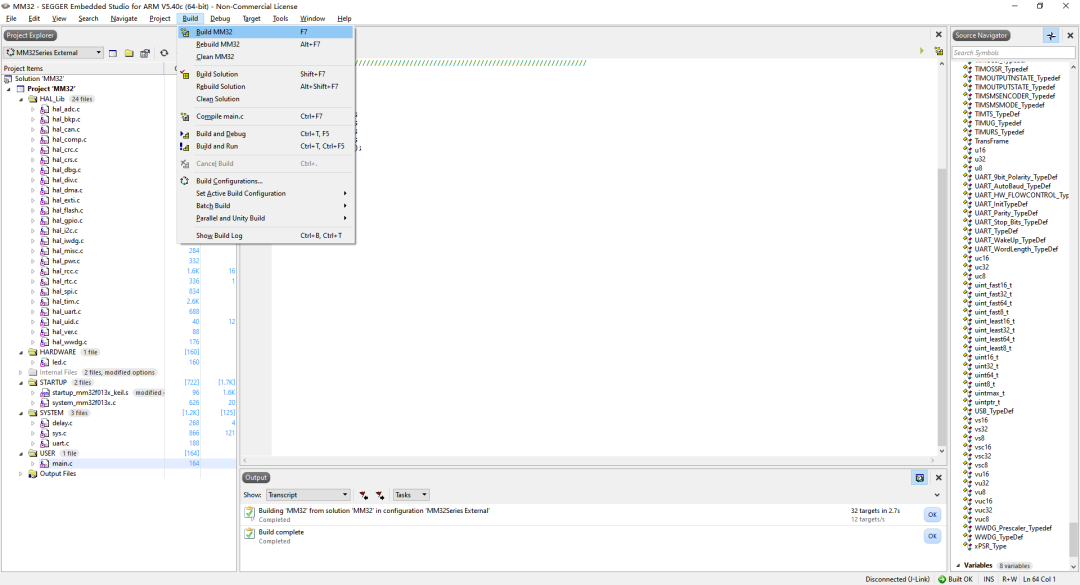
If Build complete appears, it indicates that our files have compiled successfully.
03
Download and Debug
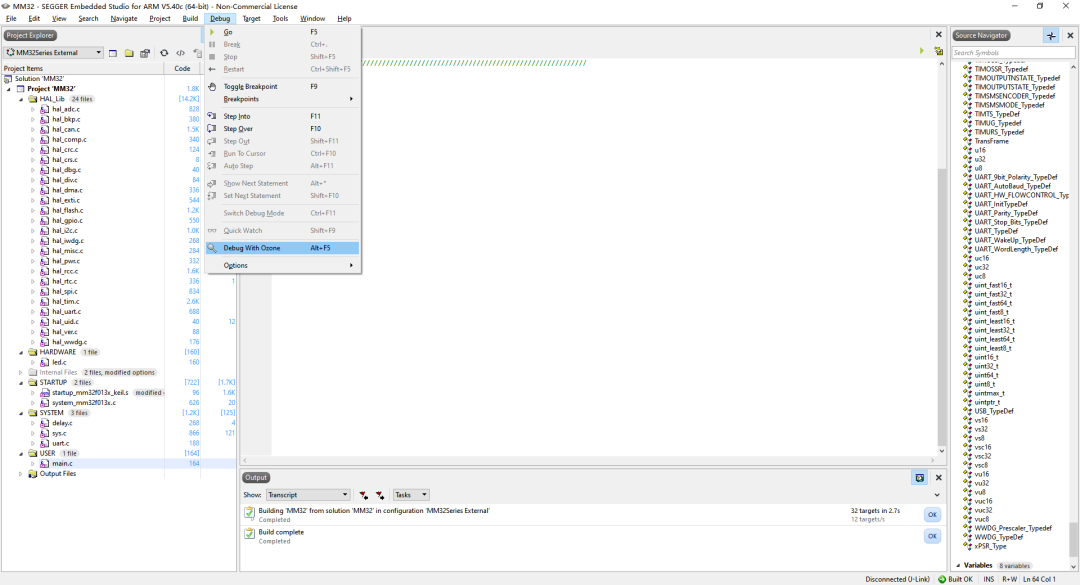
Select Debug -> Debug with Ozone to enter Debug mode.
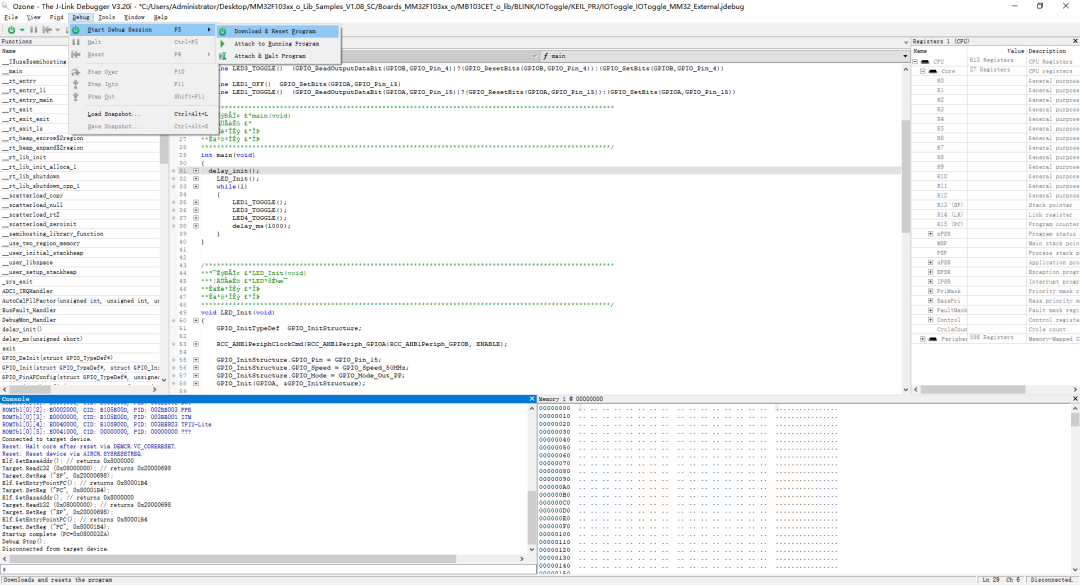
Download and start debugging:
Today, we mainly discussed the environment setup for Embedded Studio and creating MM32F013x project files. In future tutorials, we will continue to explain the methods of using SEGGER related tools based on MM32F013x.
Previous Highlights
MM32F013x – Developing and Debugging MM32 Based on Eclipse in WindowsMM32F013x – Setting Up Eclipse Development Environment in WindowsMM32F013x – Porting EasyLogger ComponentMM32F013x – Porting EasyFlash ComponentMM32F013x – Hardware Watchdog and Option Byte OperationsMM32F013x – RTC Alarm Wake UpMM32F013x – Eternal CalendarMM32F013x – TIM1 Hardware Phase Shift FunctionMM32F013x – ADC Arbitrary Channel Working ModeMM32F013x – I2C Slave Multi-Address ApplicationDynamic Micro Classroom Compilation
About Lingdong
Lingdong was established in 2011 and is a leading provider of general-purpose 32-bit MCU products and solutions in China. The MM32 MCU products developed by the company based on the Arm Cortex-M series cores include five major series: F/L/SPIN/W/P, with over 200 models delivered, totaling over 200 million units, ranking among the top in local general-purpose 32-bit MCU companies. MM32 MCUs are widely used in smart industries, automotive electronics, communication infrastructure, medical health, smart home appliances, Internet of Things, personal devices, mobile phones, and computers, with tens of millions of excellent products equipped with Lingdong MM32 MCUs delivered to customers every year.
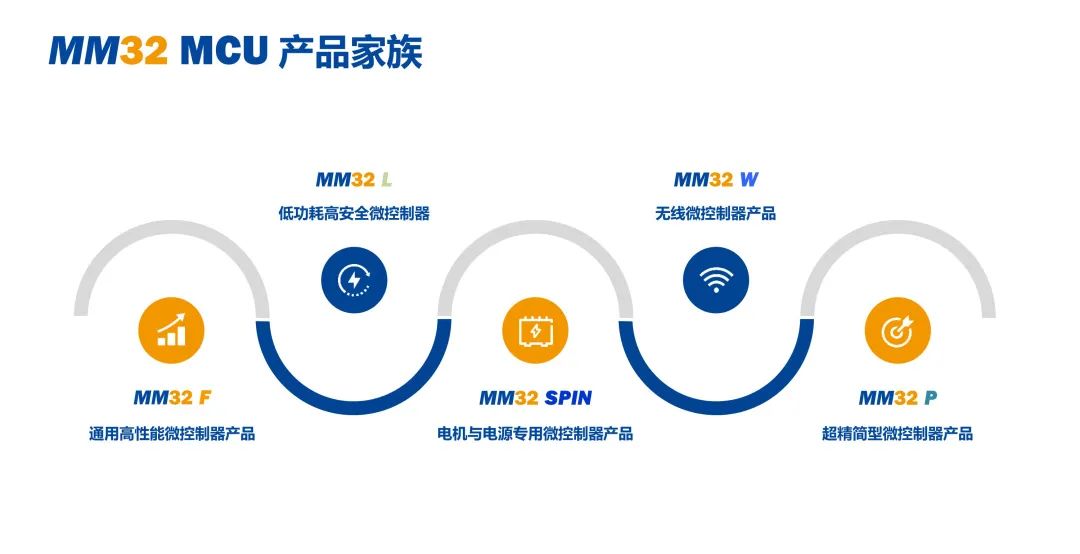
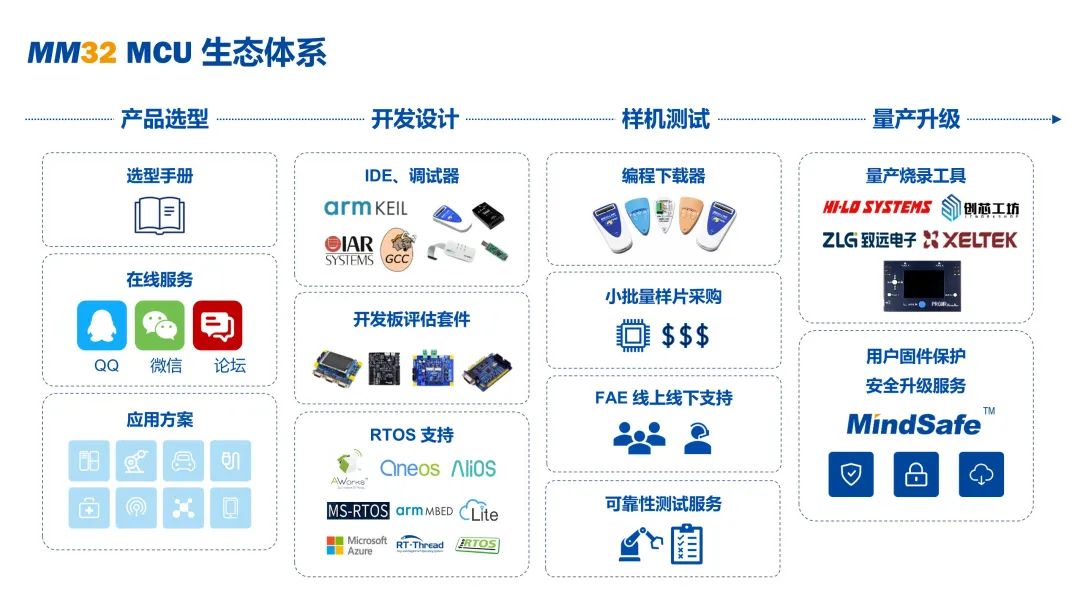
To date, Lingdong is the only local MCU company that has obtained official support from development tools such as Arm-KEIL, IAR, SEGGER, and is one of the few general-purpose MCU companies that has established a complete and independent ecosystem, dedicated to providing customers with comprehensive support from chip hardware to software algorithms, from reference solutions to system design, truly providing underlying technical drive and support for China’s electronic information industry.
Lingdong
WeChat ID: MindMotion-MMCU


Long press to identify the QR code to follow us

MORE
For more information, please visit: www.mm32mcu.com
For WeChat official account, please search: Lingdong MM32MCU
QQ technical discussion group: 294016370
Taobao store: Shanghai Lingdong Microelectronics Co., Ltd.
Lingdong MM32MCU Technical Forum: bbs.21ic.com