In the previous article in this series, we introduced OpenCV. In this article, we will guide you through creating a simple facial recognition time clock using the Jetson Nano 2GB.
In fact, this is a beginner-level AI application that fully utilizes the OpenCV library and Python3 development environment provided on the Jetson Nano 2GB to achieve facial identity recognition for clocking in. It can be used not only in office environments but also as a roll-call system for teachers in class, making it highly practical.
This project uses the face_recognition library, which is currently the easiest-to-use Python facial recognition library. It is an interface developed based on the well-known dlib machine learning open-source algorithm library, and its calling method is more straightforward than the native dlib, so this project primarily focuses on the face_recognition library.
The first part of this project is to guide you in using the face_recognition library’s face_locations() function to easily implement the “facial location” functionality. It is important to note that “location” is a prerequisite for “identity recognition”; you must first confirm the location of the face before proceeding to comparison.
Now, let’s begin the content of this project.
Installing the face_recognition Library
For this, you only need to execute the Python version, so installing the face_recognition library is very simple. Just execute the following command, and Python’s pip3 will install all necessary dependencies, including dlib, pillow, click, numpy, etc., which is very convenient.

The installation will take a while, approximately 30 minutes, as it installs the libraries that face_recognition depends on, such as dlib, pillow, click, numpy, etc. Once installed, you can call it directly.
The face_recognition library has only 7 API interfaces, which are as follows:
-
load_image_file: Loads an img file into a numpy array.
-
face_locations: Finds the location of all faces and facial features in the image.
-
batch_face_locations: Batch facial location function (GPU).
-
face_landmarks: Facial feature extraction function.
-
face_encodings: Converts image encoding to feature vector.
-
compare_faces: Compares feature vectors.
-
face_distance: Calculates the difference between feature vectors.
For detailed usage instructions, please visit the official website:
https://face-recognition.readthedocs.io/en/latest/face_recognition.html
Preparing Recognition with Photos and Videos
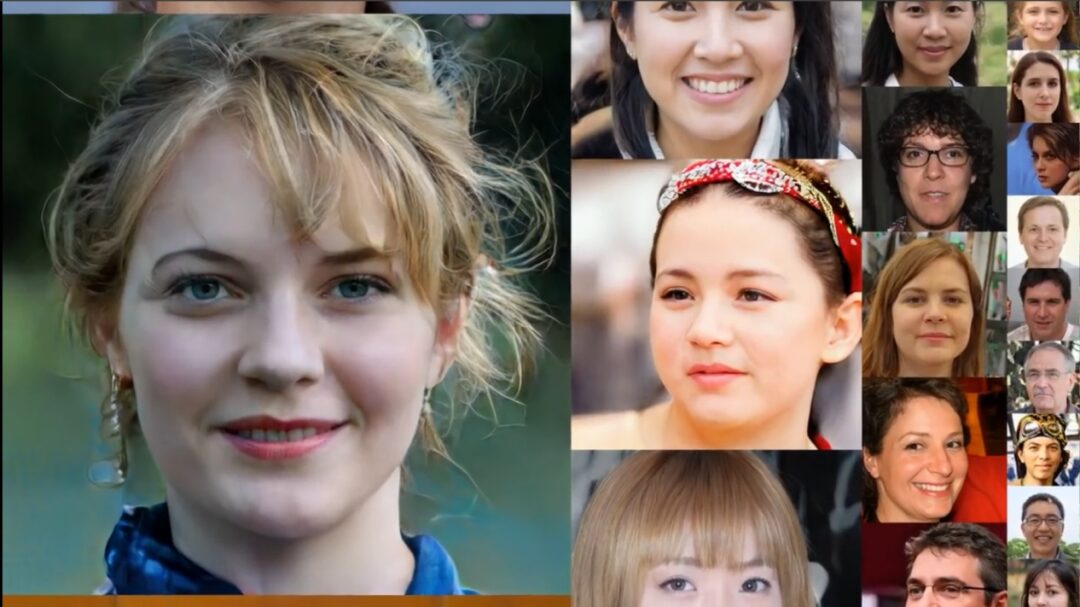
To avoid involving personal portrait rights issues, we will use publicly available promotional videos from NVIDIA’s GAN adversarial network technology on YouTube (https://www.youtube.com/watch?v=kSLJriaOumA) as the basis for extracting some video and photo data for this experiment. The following photos are all generated by NVIDIA GAN technology; any similarities are purely coincidental.
Next, let’s see what face_recognition can do!
Facial Location in Images
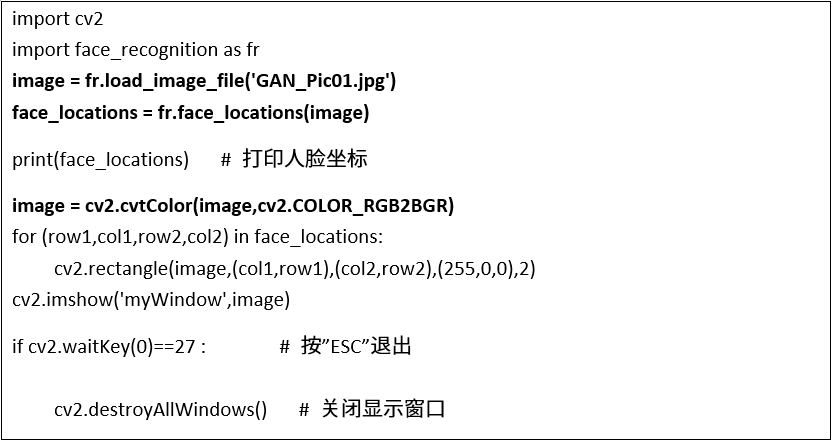
The first basic function of face_recognition is to automatically find the location of faces. The code below can find the location of each face in any image containing faces. The face_recognition library provides the following two functions to handle this task, with a brief explanation of the code logic:
face_recognition.load_image_file: Reads the image file.
face_recognition.face_locations: Directly finds the location of faces in the image (multiple faces).
Since the color space of the loaded image is in RGB format, it needs to be converted to BGR format using cv2.cvtColor.
Then, use cv2.rectangle to draw boxes around the locations found by face_locations on the original image.
Finally, display the result using cv2.imshow.
The complete code is as follows:
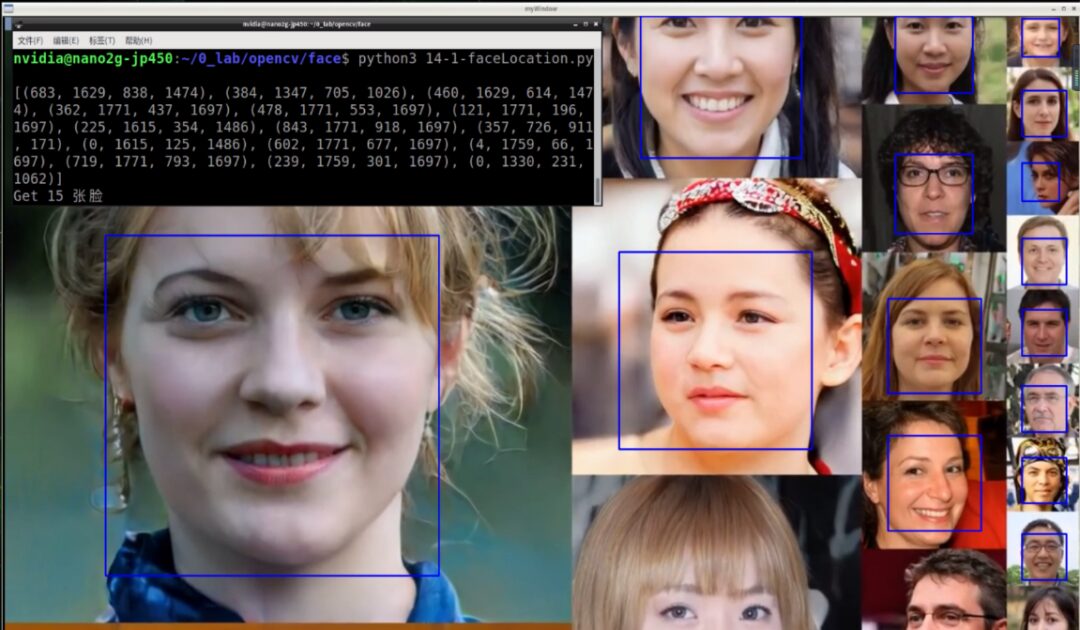
Here you can see that the terminal displays 15 groups of location data, corresponding to the locations of the 15 faces above, although the order may not completely match.
In fact, in the above code, the function to read the image can directly call OpenCV’s cv2.imread(), which reads the image in BGR format, saving the conversion process with cv2.cvtColor. Therefore, modifying the above code to the one below will yield the same result.
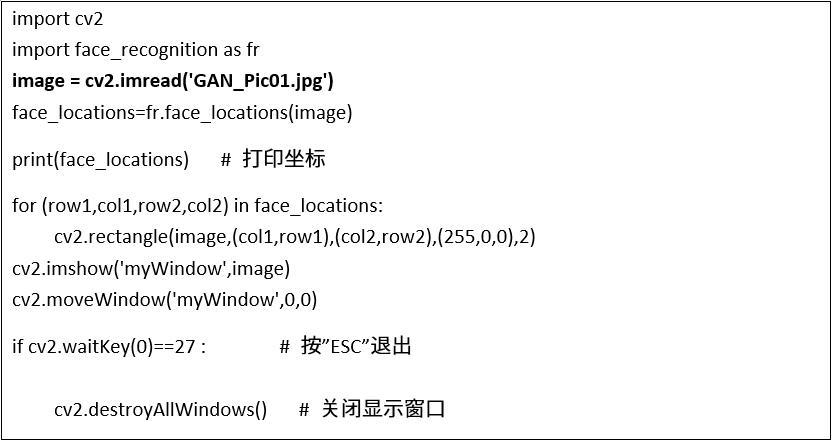
If you want to know how many faces can be detected in this detection, simply set a parameter i before the “for loop” with an initial value of 0, and then increment it inside the loop to count how many faces there are.
Facial Location in Videos
Once the image processing is successful, processing videos is simply a matter of reading in the frames repeatedly. Therefore, just wrap the previous code in a “while loop” to read the video, and you can generally apply it to find the locations and counts of faces in the video. The modified code is as follows:
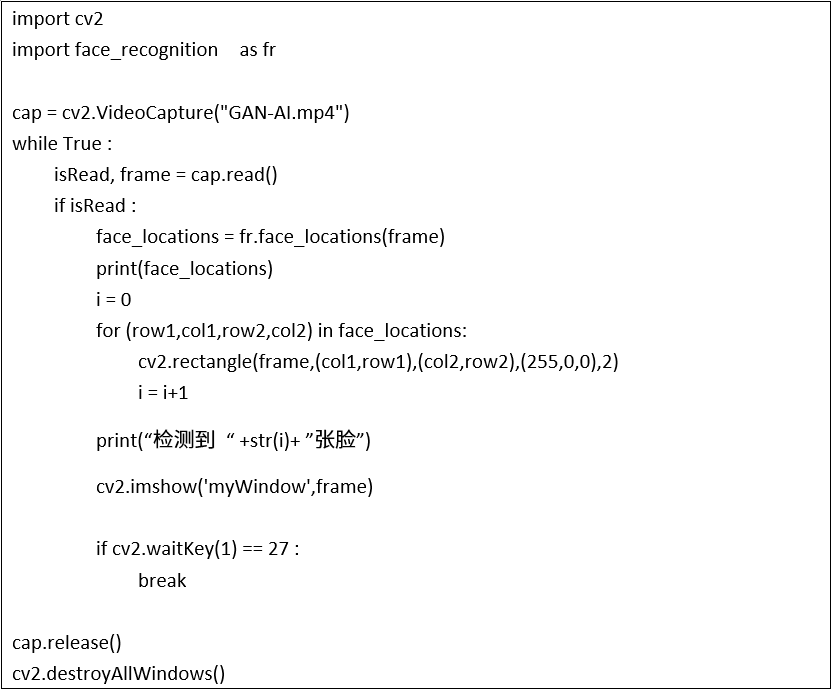
This way, you can locate faces in the video! However, during actual execution, you will find that the recognition performance is very slow, achieving only about 1-2 FPS. This is because the face_locations() function consumes a lot of computational resources, resulting in poor performance.
Performance Optimization Strategies
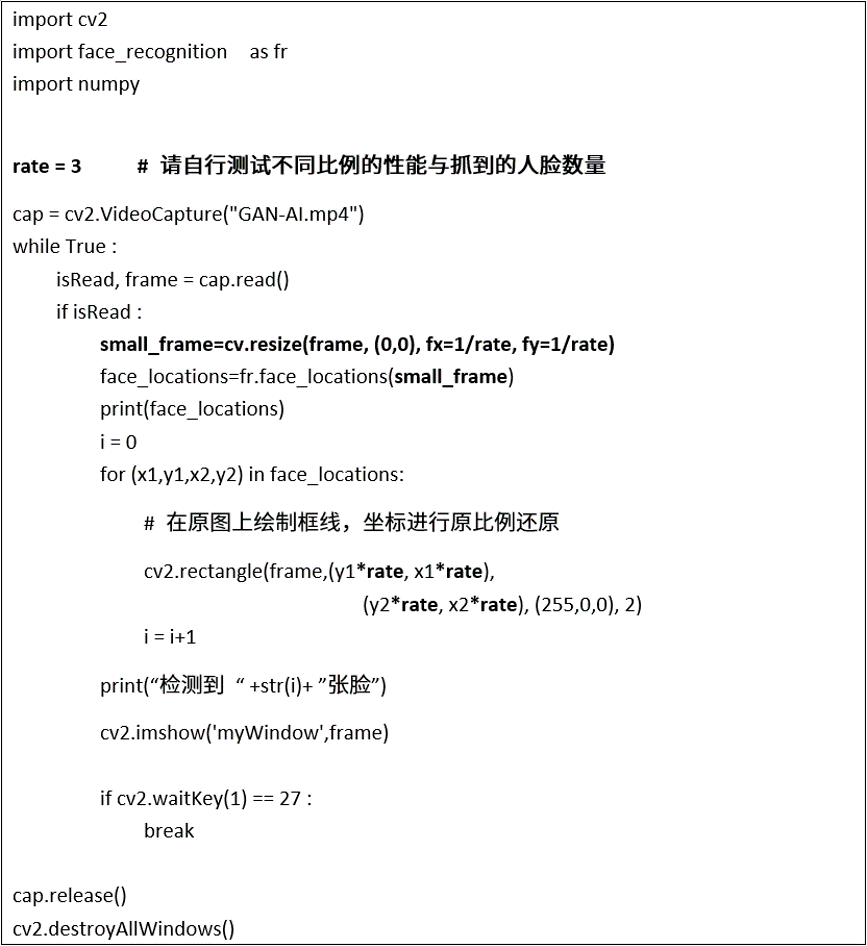
Here is a performance improvement method: first, resize the image given to face_locations() to find the locations, and then restore the location points to their original proportions to draw boxes on the original image.
Use a variable rate to adjust the aspect ratio given to face_locations(), and store the resized image in small_frame. Then provide small_frame to face_locations() for facial detection tasks. The modified complete code is as follows:
After adjusting the rate ratio, you will noticeably feel the difference in recognition performance and the number of faces detected. In this example:
-
rate=1 (original ratio), performance about 1.5 FPS, can locate 12-17 faces.
-
rate=2 (1/4), performance about 3-4 FPS, can locate 6-9 faces.
-
rate=3 (1/9), performance about 6-7 FPS, can locate 5-8 faces.
-
rate=4 (1/16), performance about 12-13 FPS, can locate 3-5 faces.
If you want to conduct the above experiment using a camera, simply change the source in the cv2.VideoCapture() function to the camera.
This is a simple way to call the face_recognition library’s face_locations() function to easily achieve facial location detection in images and videos. Isn’t it very simple?
If you want to learn more about the “Jetson Nano 2GB,” please click on “Read Original“.
Recommended Reading
NVIDIA Jetson Nano 2GB Series Article (1): Unboxing Introduction

NVIDIA Jetson Nano 2GB Series Article (2): Installing the System

NVIDIA Jetson Nano 2GB Series Article (3): Network Setup and Adding SWAPFile Virtual Memory

NVIDIA Jetson Nano 2GB Series Article (4): Experiencing Parallel Computing Performance

NVIDIA Jetson Nano 2GB Series Article (5): Experiencing the Visual Function Library

NVIDIA Jetson Nano 2GB Series Article (6): Installing and Calling the Camera

NVIDIA Jetson Nano 2GB Series Article (7): Calling CSI/USB Cameras through OpenCV

NVIDIA Jetson Nano 2GB Series Article (8): Executing Common Machine Vision Applications

NVIDIA Jetson Nano 2GB Series Article (9): Adjusting CSI Image Quality

NVIDIA Jetson Nano 2GB Series Article (10): Dynamic Color Space Adjustment Techniques

NVIDIA Jetson Nano 2GB Series Article (11): What You Should Know About OpenCV


Free Registration for GTC2021 is Now Open. We welcome all aspiring individuals riding the waves of the AI era to join us in discussing the immense challenges of today’s world, establishing new connections based on a shared passion for technology!