
—–Disassembly Report by I Love Audio No.366—–
Sonos is an audio brand focused on wireless sound systems, founded in 2002 and headquartered in Santa Barbara, California, USA. The company primarily operates integrated wireless smart speakers, smart home theater audio, and wireless smart audio connector devices. Currently, Sonos collaborates with over 100 streaming platforms globally, with products sold in more than 60 countries. This disassembly report by I Love Audio focuses on the Sonos Play:1 wireless smart speaker, which uses WiFi connectivity instead of Bluetooth. Two speakers can connect to form a TWS pairing, and it can also interact with other Sonos products to create a home audio system. Additionally, the Sonos Play:1 supports wall mounting and has a moisture-resistant design, making it suitable for various home audio setups. Let’s take a detailed look at its internal structure through this disassembly report from I Love Audio.~1. Unboxing the Sonos Play:1 Wireless Smart Speaker
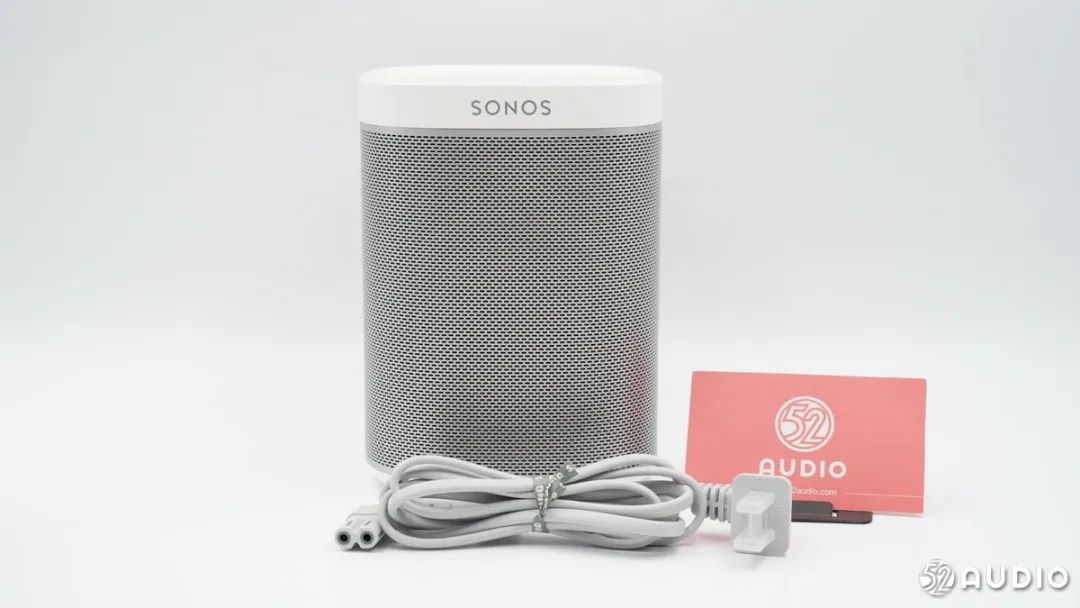
This is an older product, so the packaging is no longer available. Here are the main items: the Sonos Play:1 speaker and the charging cable.
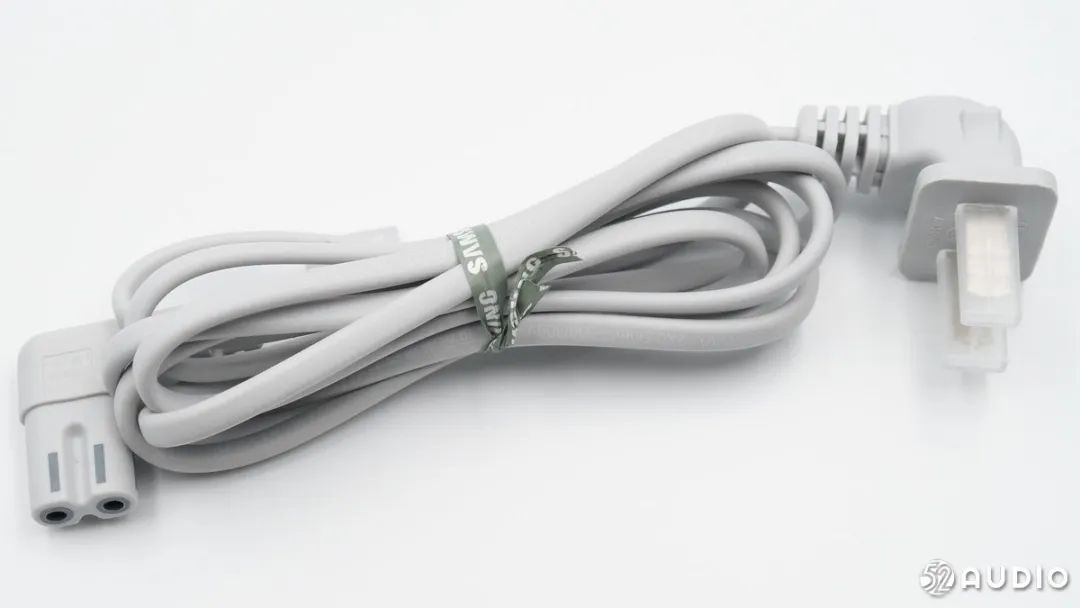
The power cable is manufactured by Samsung and is similar to those used for Samsung monitors.
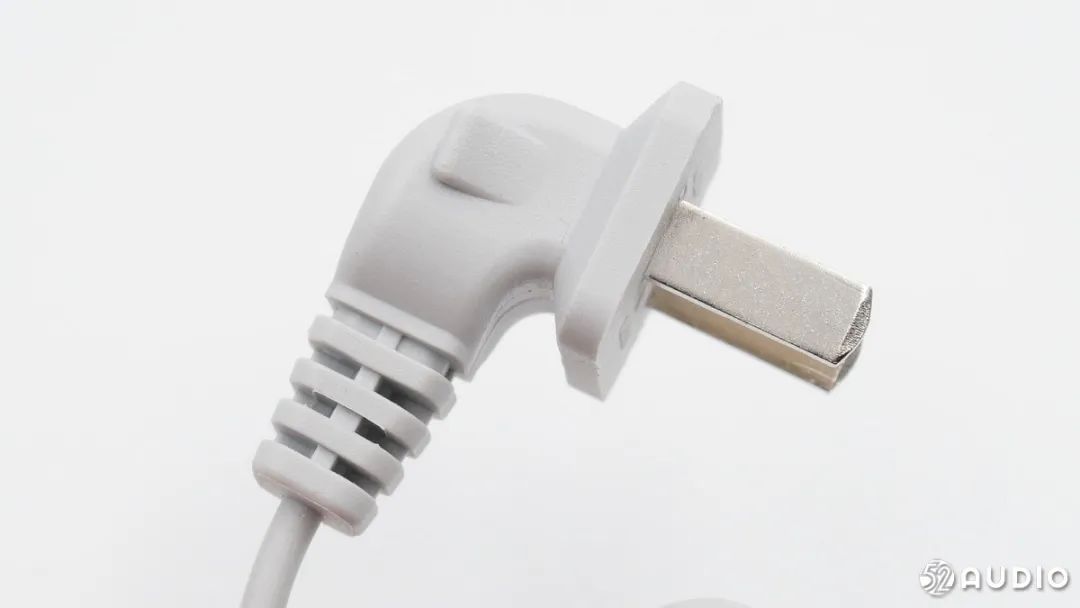
It has an L-shaped flat plug.
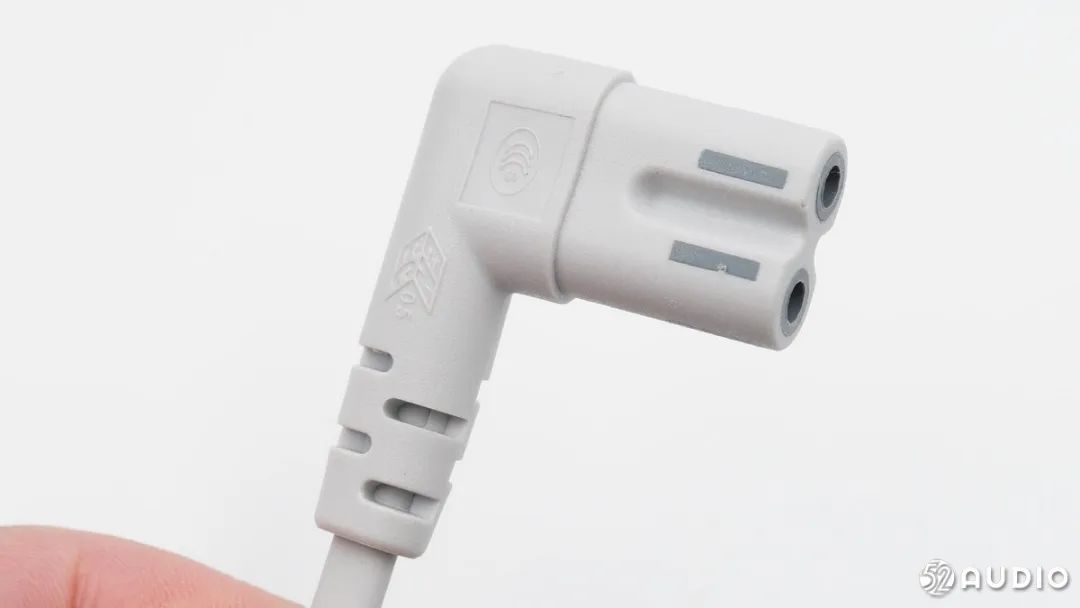
It also features an L-shaped figure-eight plug.
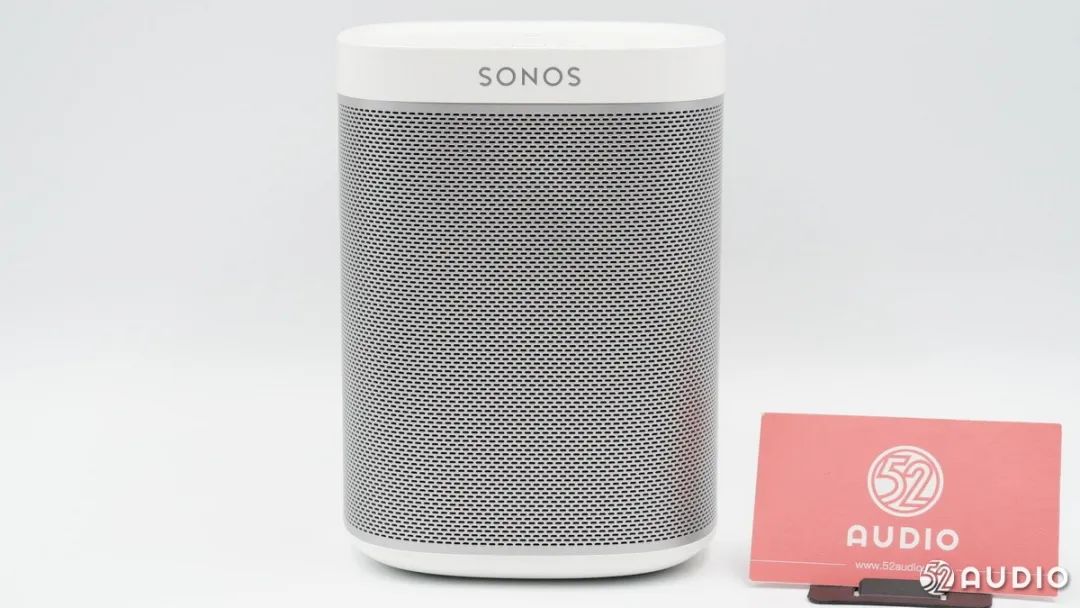
The front of the speaker has a large metal dust protection mesh, and the top and bottom have a white shell transition, giving it a very minimalist look.
The Sonos brand logo.
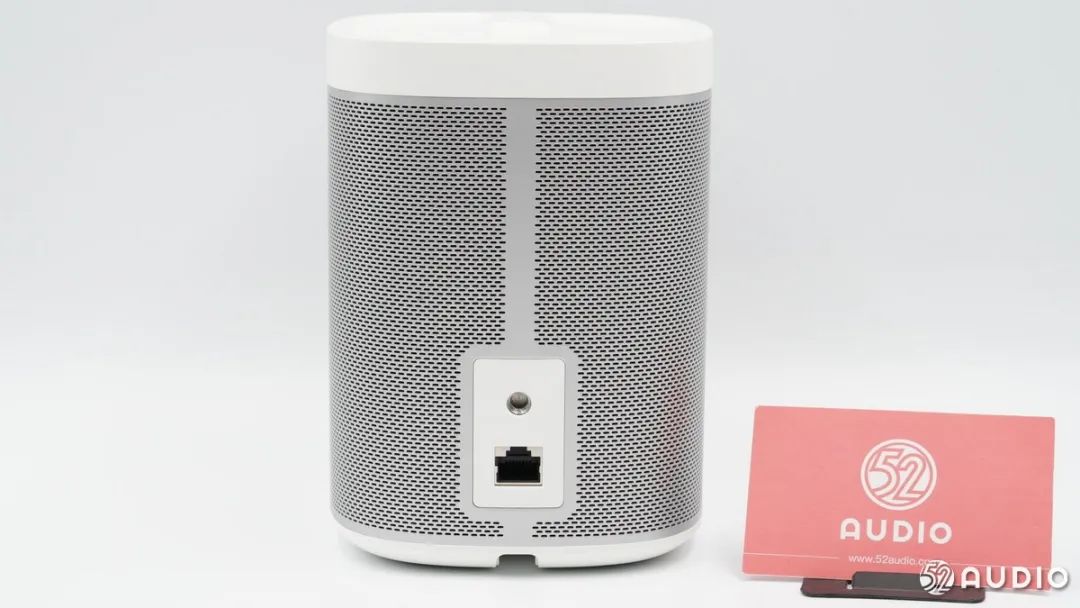
The back of the speaker has a metal mesh with a break in the middle, making the network cable interface below look less obtrusive.
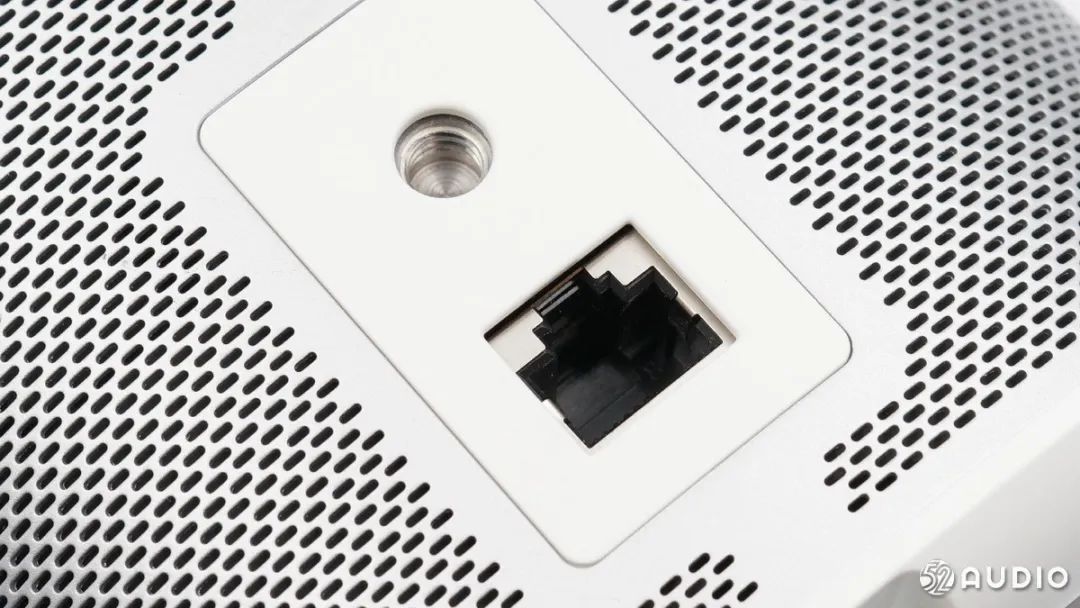
There is a quarter-inch threaded hole for easy wall or stand mounting; below it is a 10/100Mbps Ethernet port for a more stable wired connection.
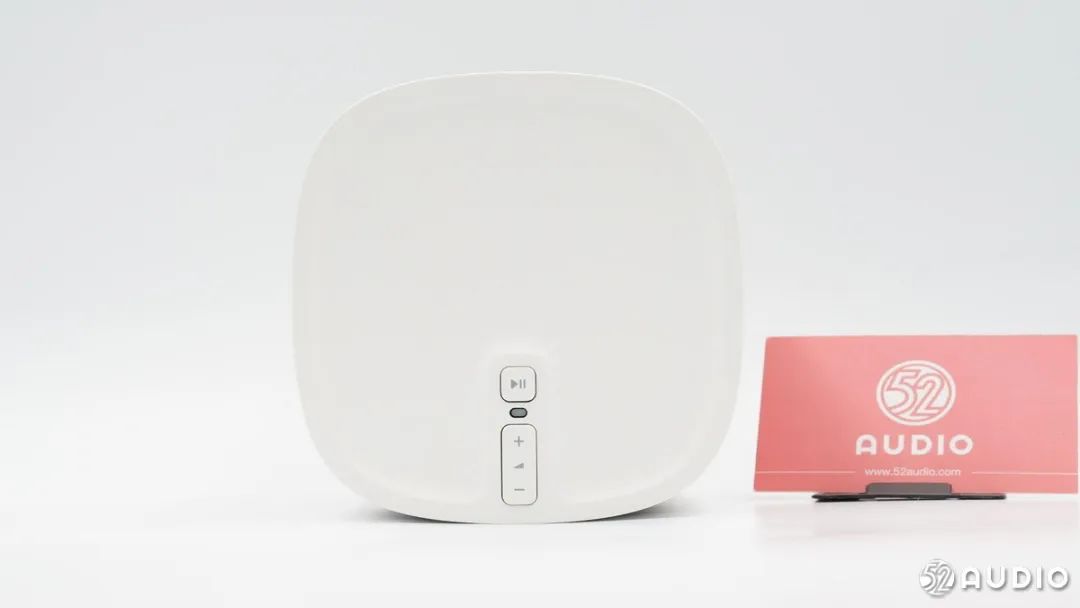
On the top of the speaker, the shell is slightly recessed, with a row of buttons in the middle.
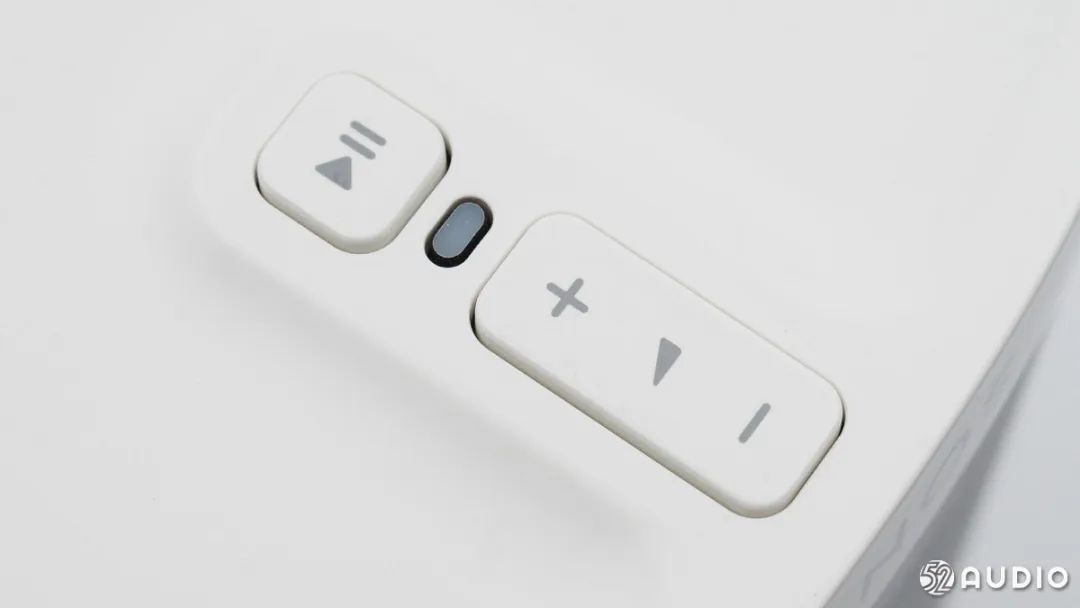
A close-up of the button area shows, from top to bottom, the play/pause button, indicator light, and volume up/down buttons.
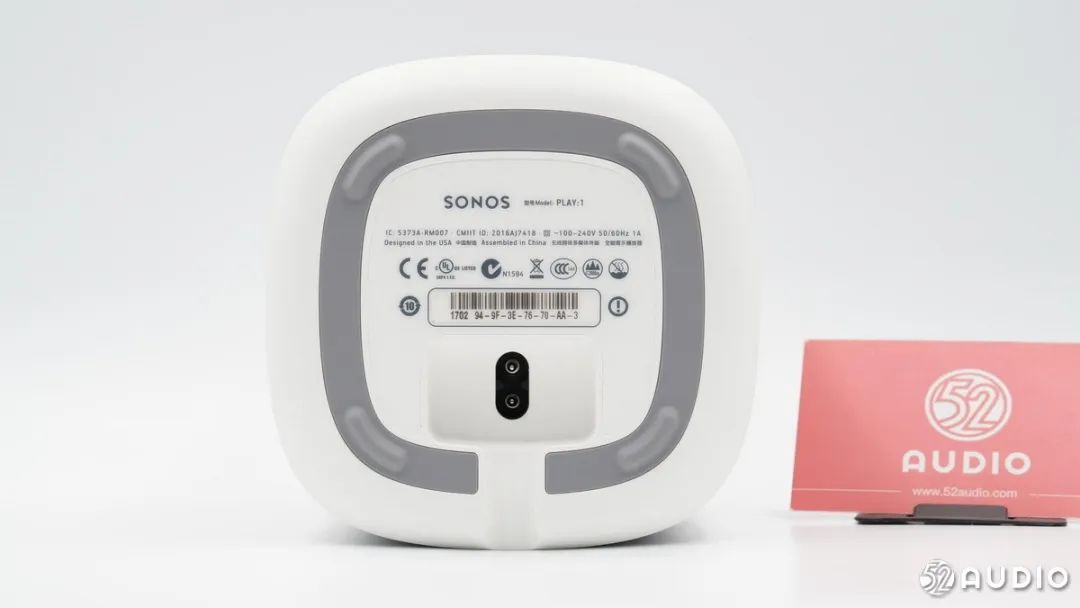
At the bottom of the speaker, there is some product information: Sonos Play1, wireless network multimedia terminal, all-in-one music player. Power input: 100-240V~50/60Hz, 1A.
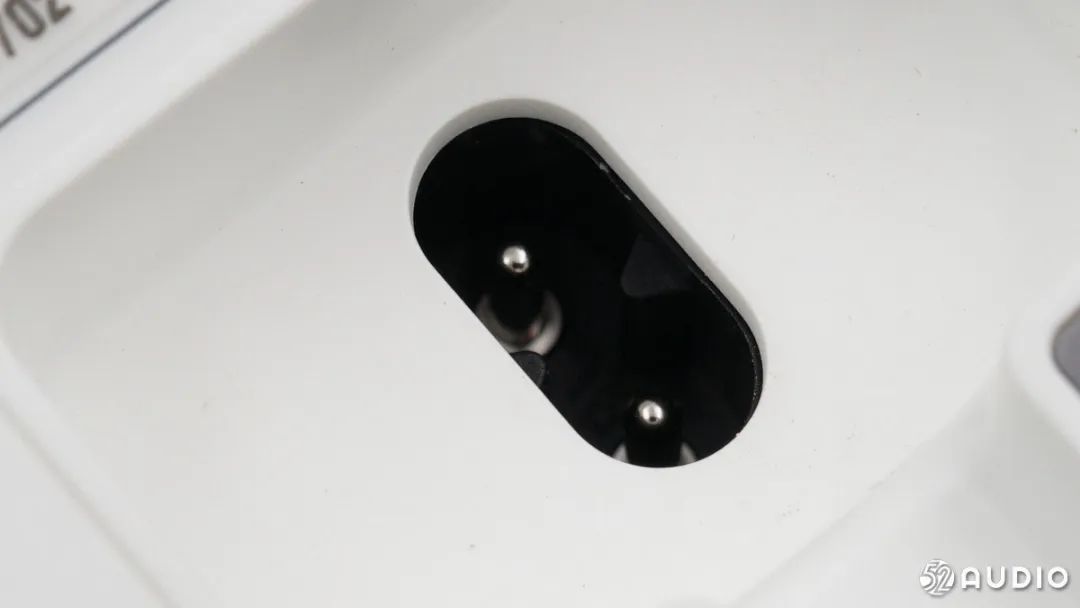
The charging interface is located at the bottom of the speaker.
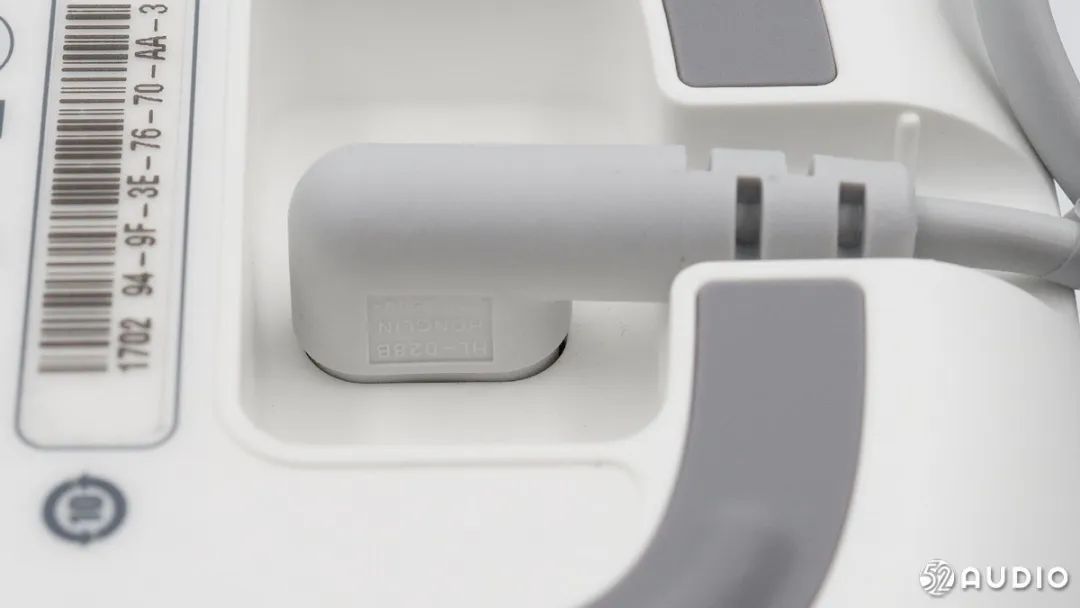
The shell has grooves to facilitate the speaker lying flat on the table when powered.
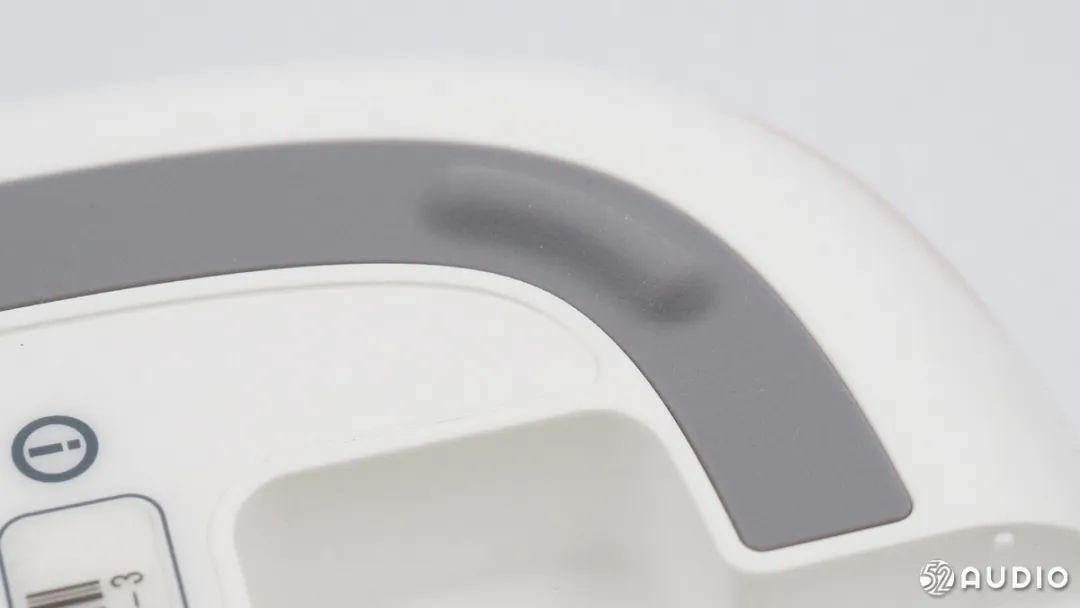
The rubber anti-slip pad at the bottom of the speaker has raised corners to prevent direct contact with the table, reducing resonance.2. Disassembly of the Sonos Play:1 Wireless Smart Speaker
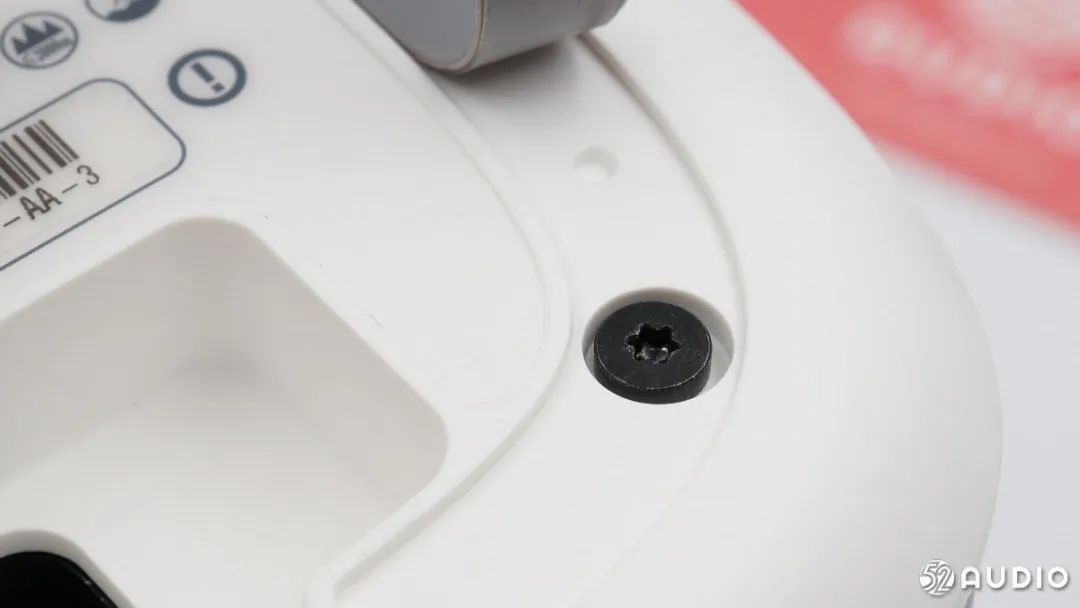
Peeling off the anti-slip pad at the bottom reveals the screws that secure the internal structure of the speaker.
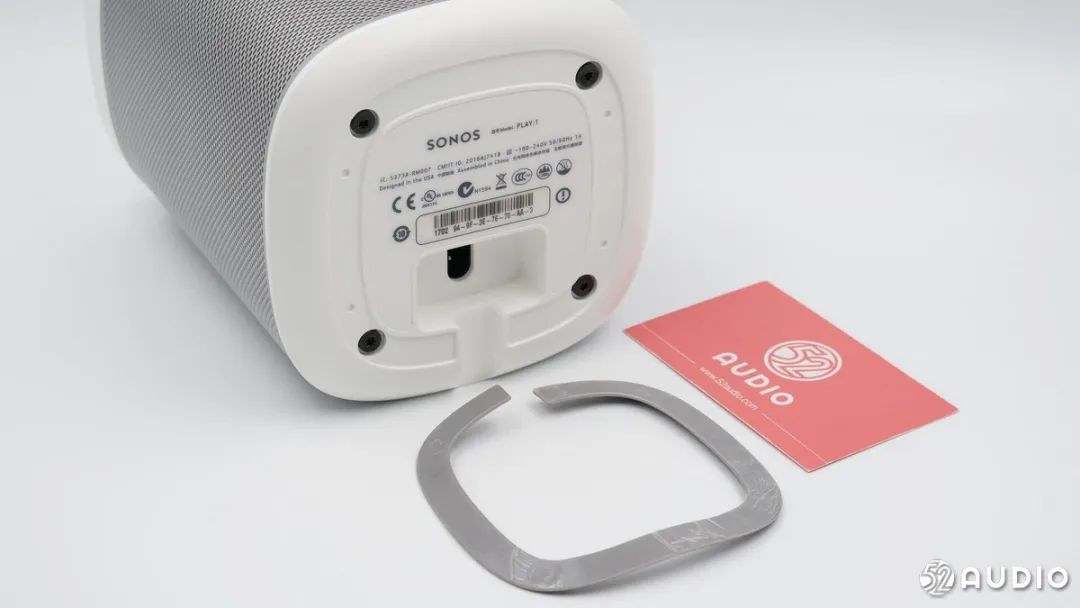
Removing the anti-slip pad.
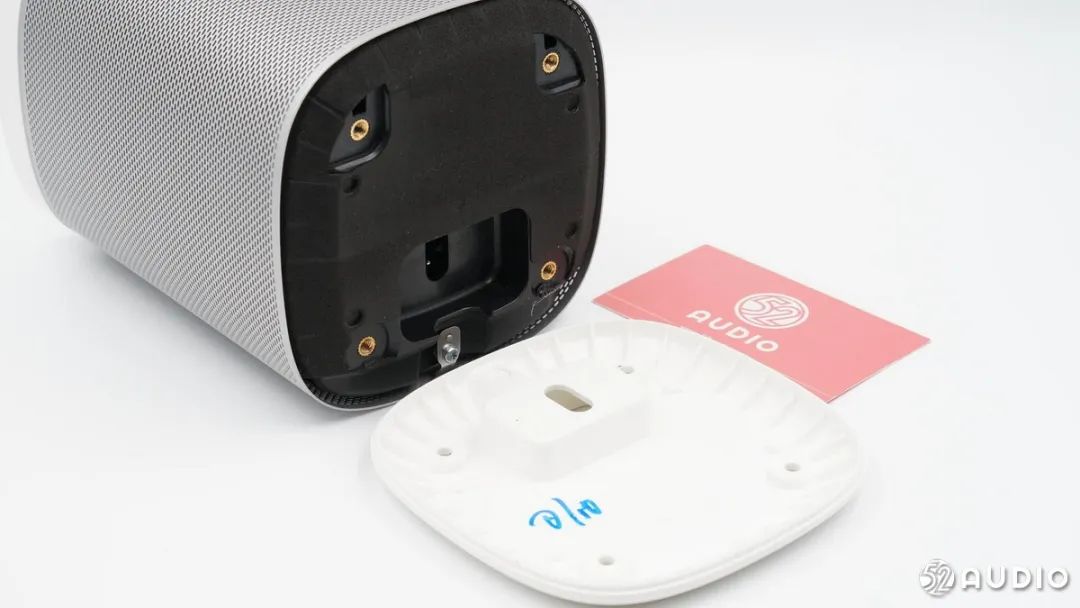
After removing the screws, the complete internal structure of the speaker is still not visible; there is still a screw securing the bottom. It can also be seen that the screw holes use more expensive injection-molded copper nuts.
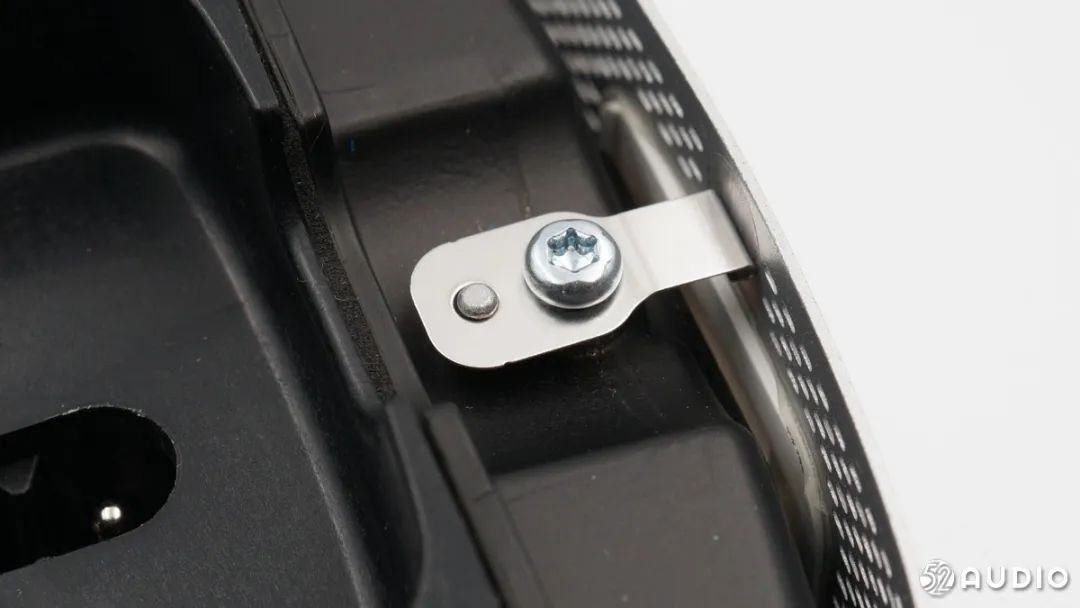
The metal dust protection mesh is fixed by screws, used to dissipate static electricity from the speaker housing.
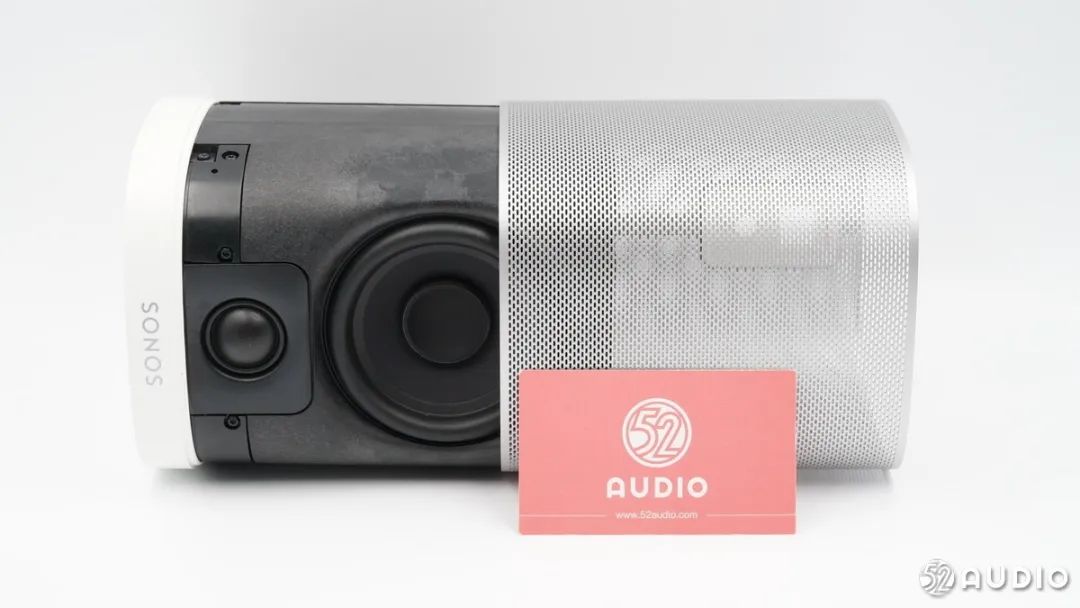
Sliding out the metal protection mesh.
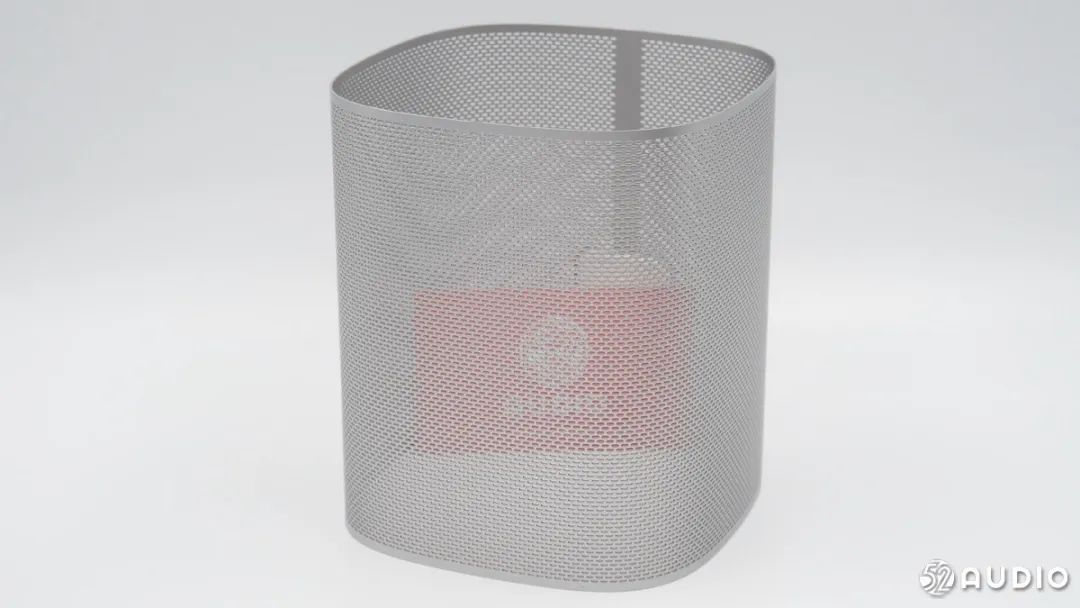
The metal protection mesh is relatively fine but does not have an internal dust filter. The advantage is that sound waves can propagate more easily, but the downside is that dust can easily accumulate on the speaker unit.
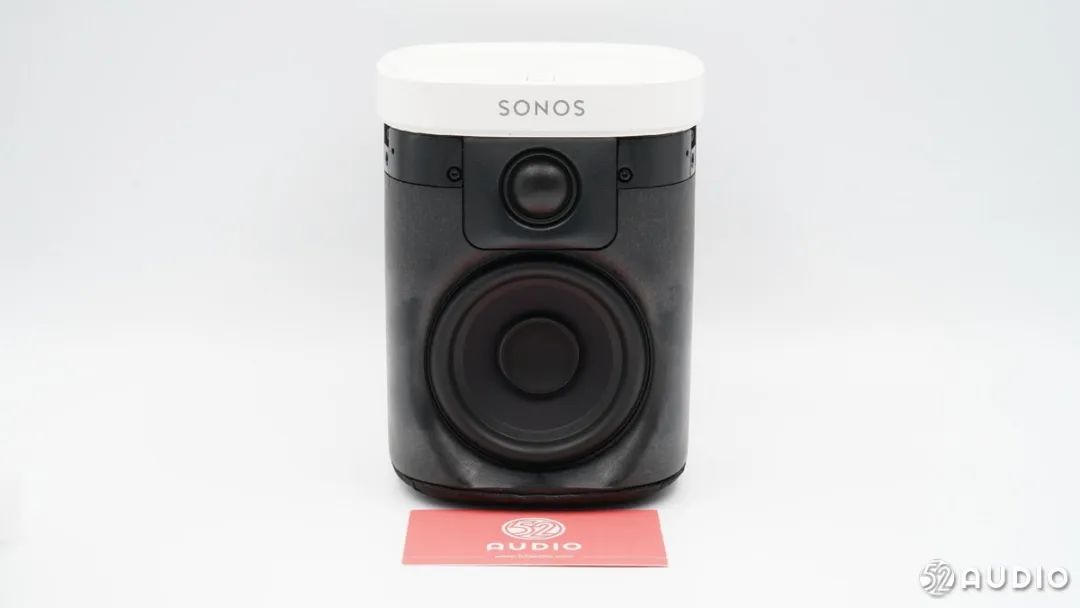
The internal structure of the speaker is an integrated design primarily to prevent moisture. The front of the speaker has two drivers, officially described as a high-frequency driver and a mid-bass driver.
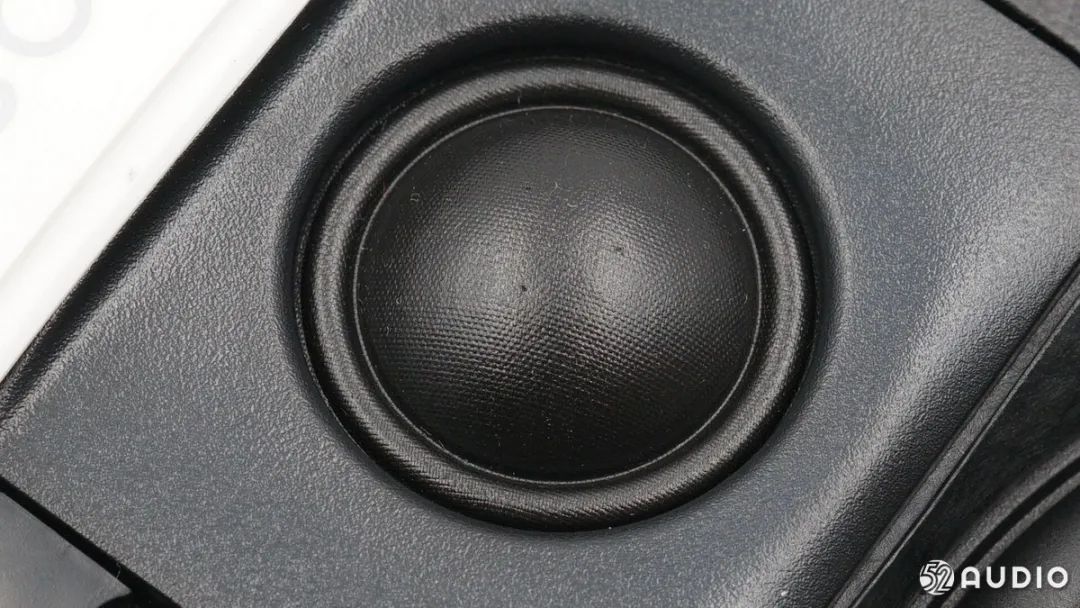
A close-up of the dome tweeter shows the textured material remains visible after gluing.
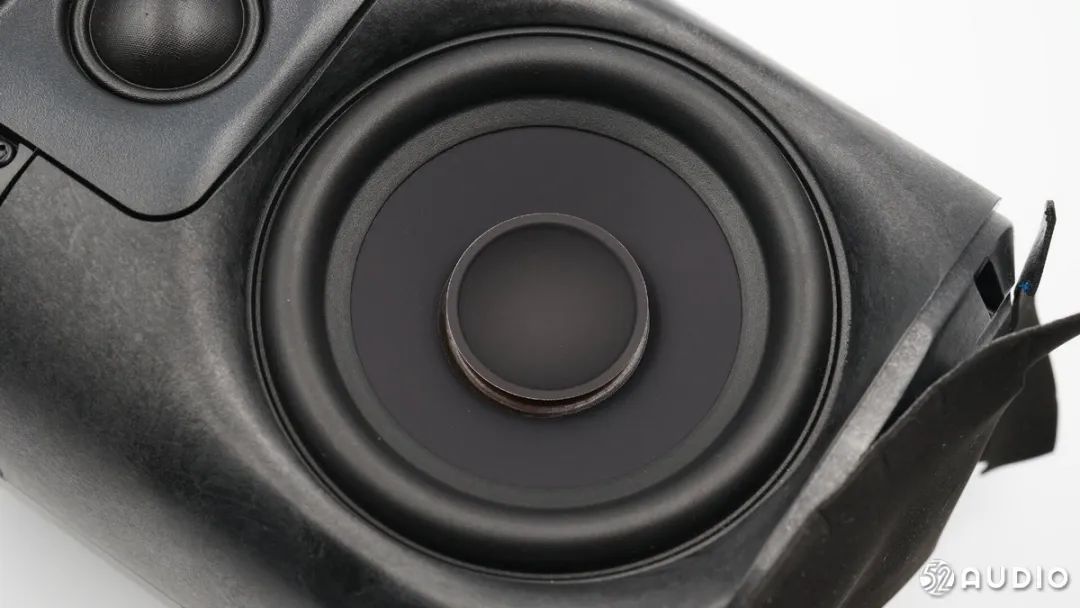
The low-frequency driver has a paper cone with a foam surround.
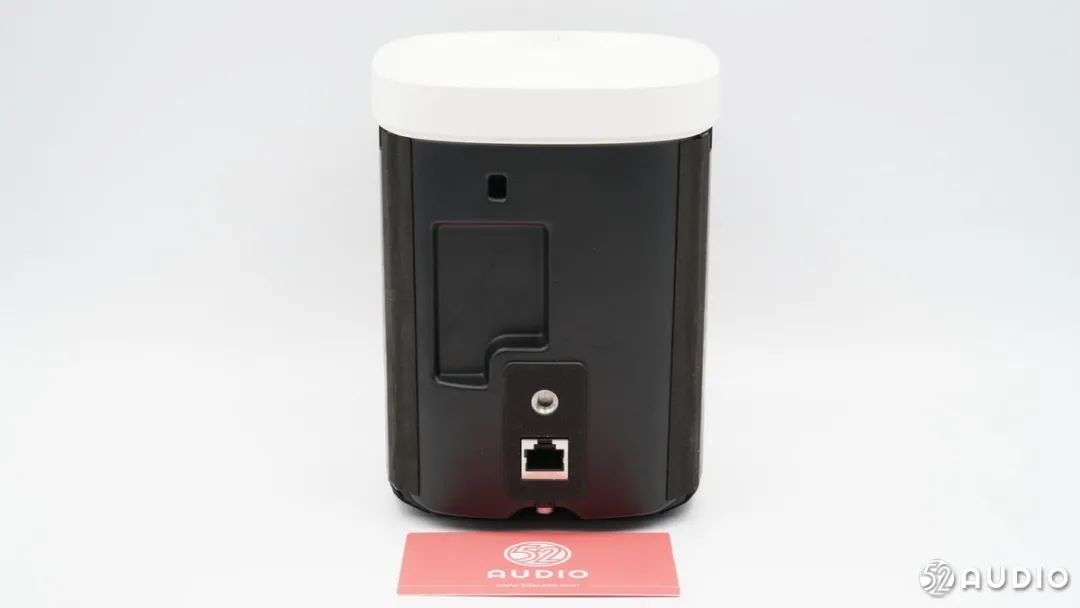
The black part on the back of the speaker is made of metal, with sealing tape applied on both sides.
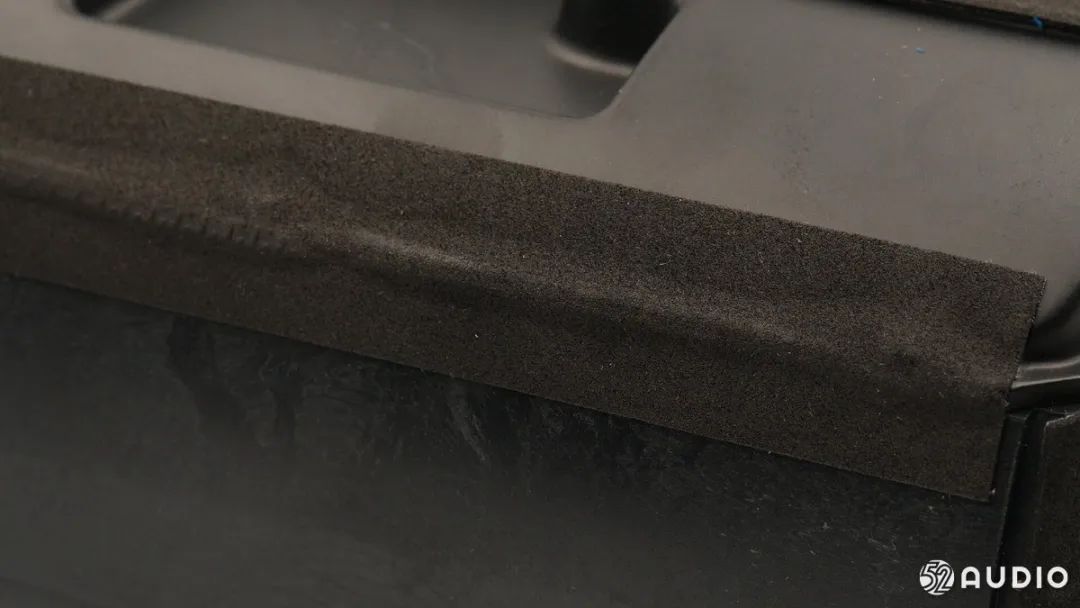
Sealing tape is used along the seams for additional sealing.
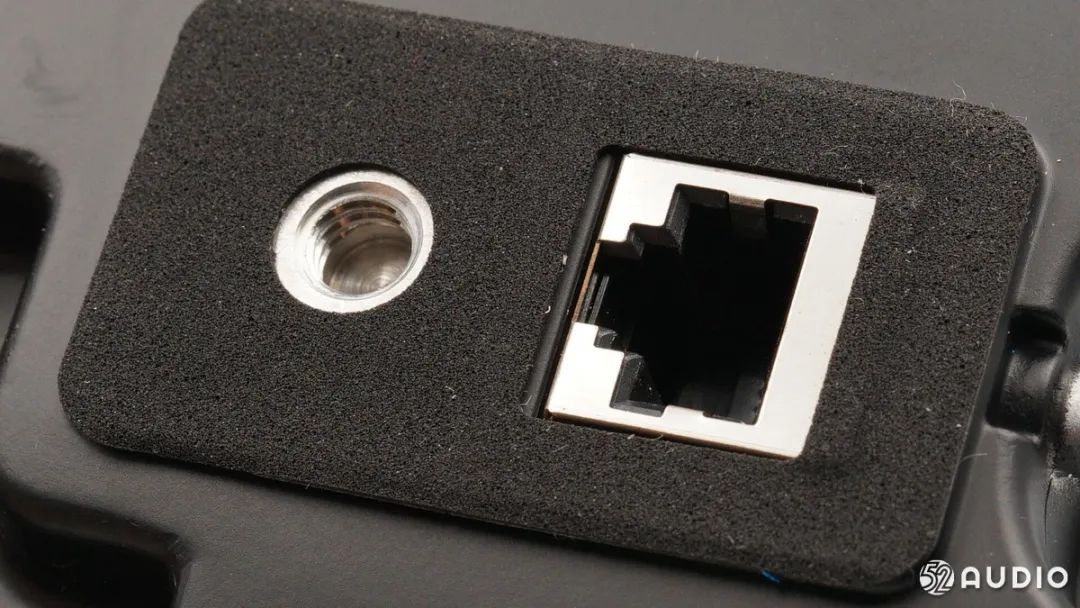
A close-up of the threaded hole and network port shows cushioning foam in contact with the metal mesh cover.
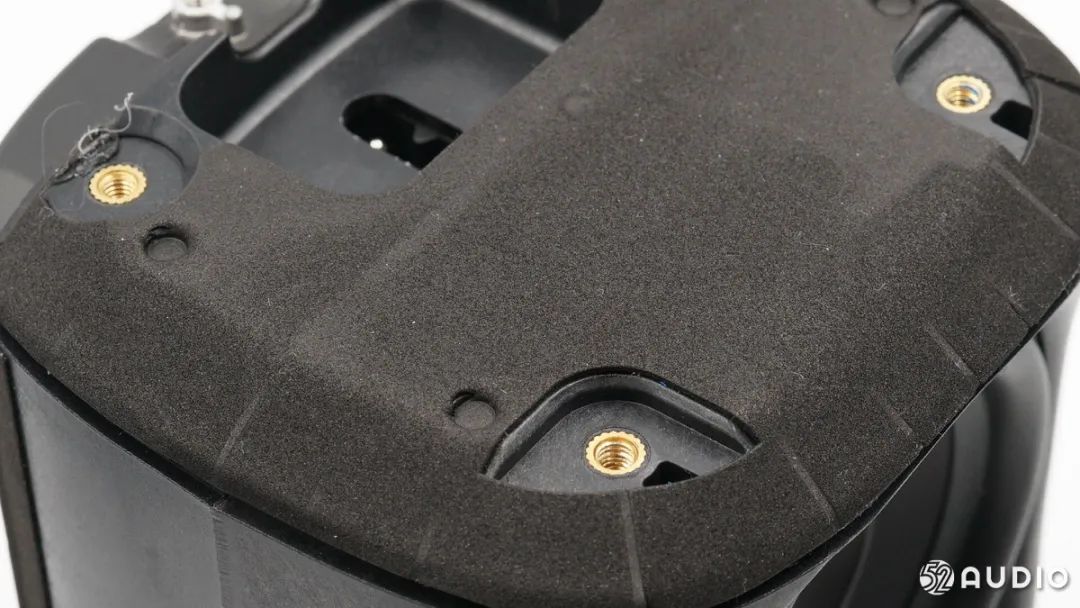
There is a thin layer of cushioning foam at the bottom of the speaker.
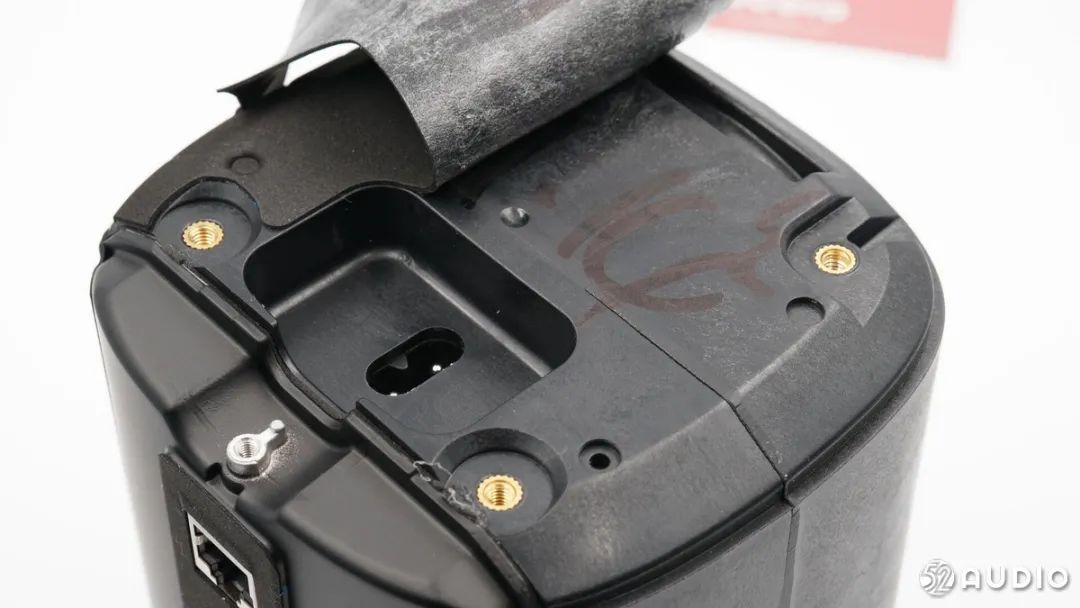
There are no special designs below the cushioning foam.
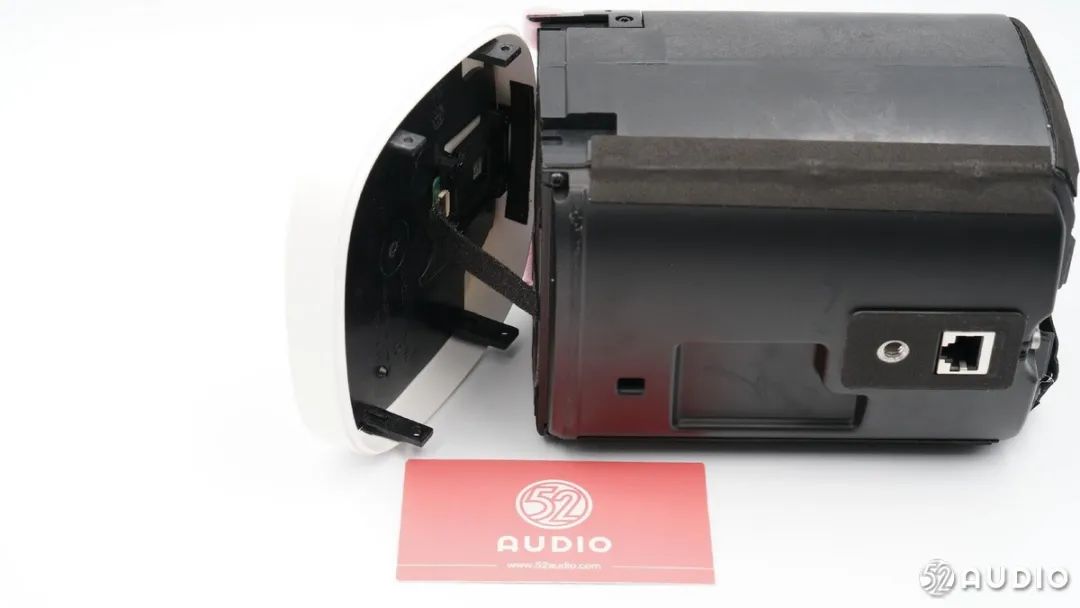
The top cover of the speaker is secured with screws, and the internal circuit is connected to the main board via a ribbon cable.
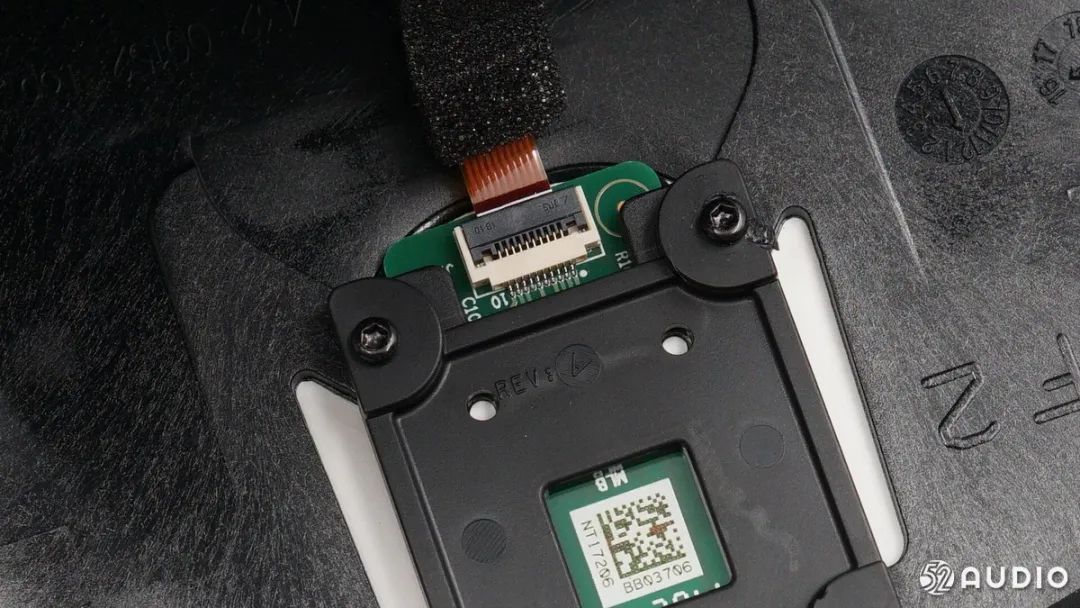
A close-up of the socket where the ribbon cable connects.
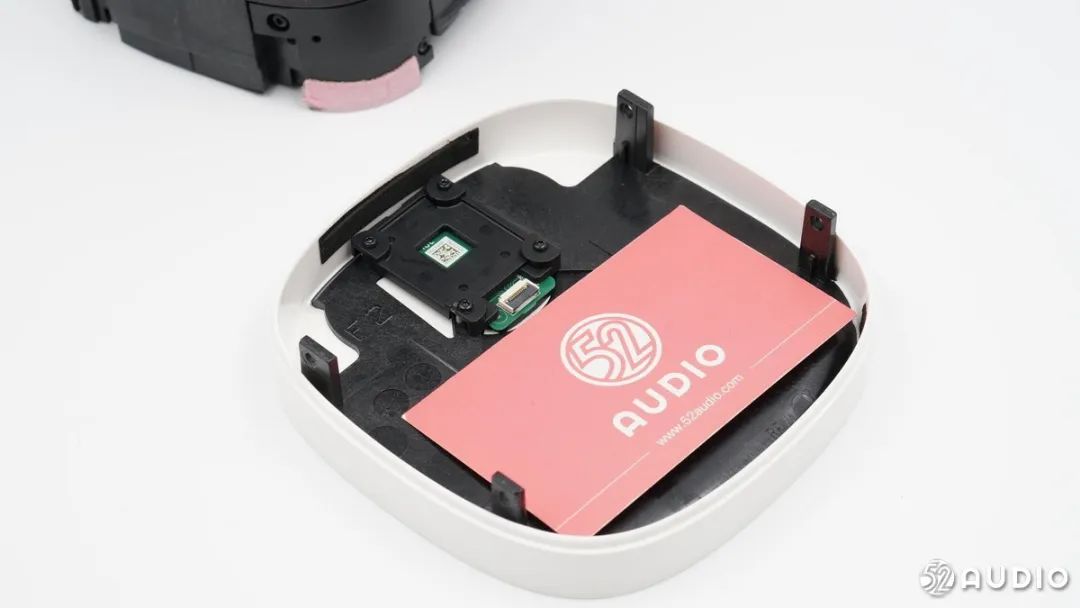
Removing the top panel of the speaker.
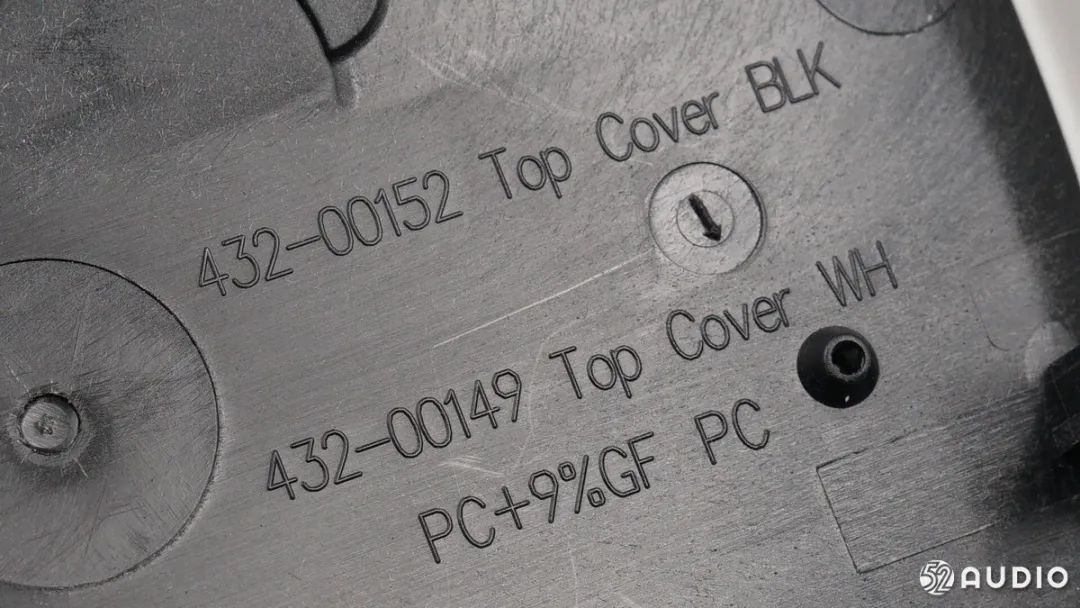
The inner shell of the panel is marked with the material of the panel.
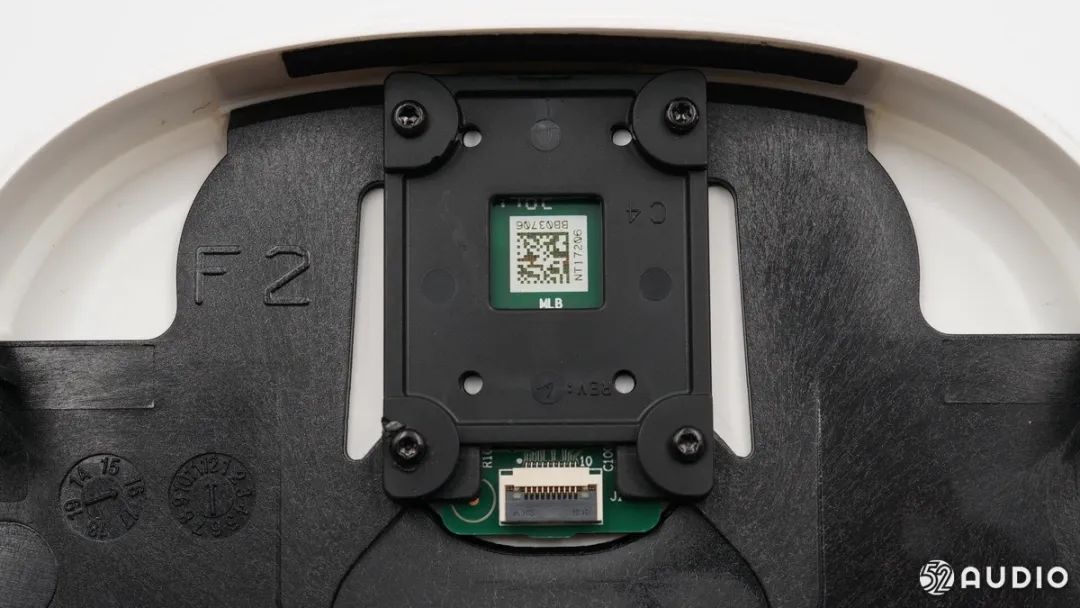
There is a small PCBA on the top of the speaker, secured through a plastic cover and four screws, connected by a ribbon cable.
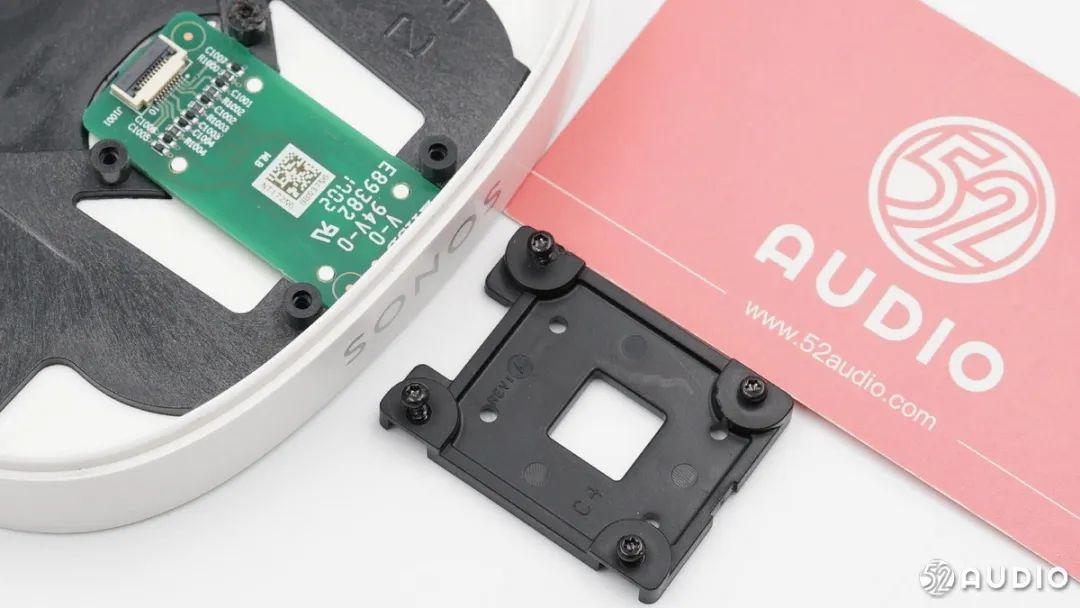
After removing the screws, the plastic cover is taken off.
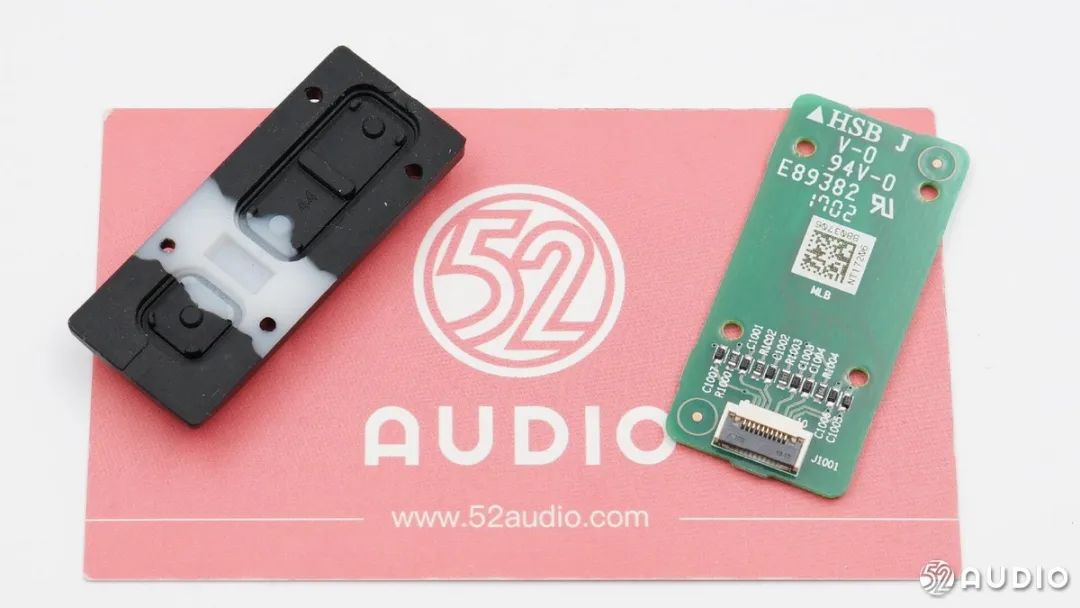
The PCBA and the silicone shell for the buttons.
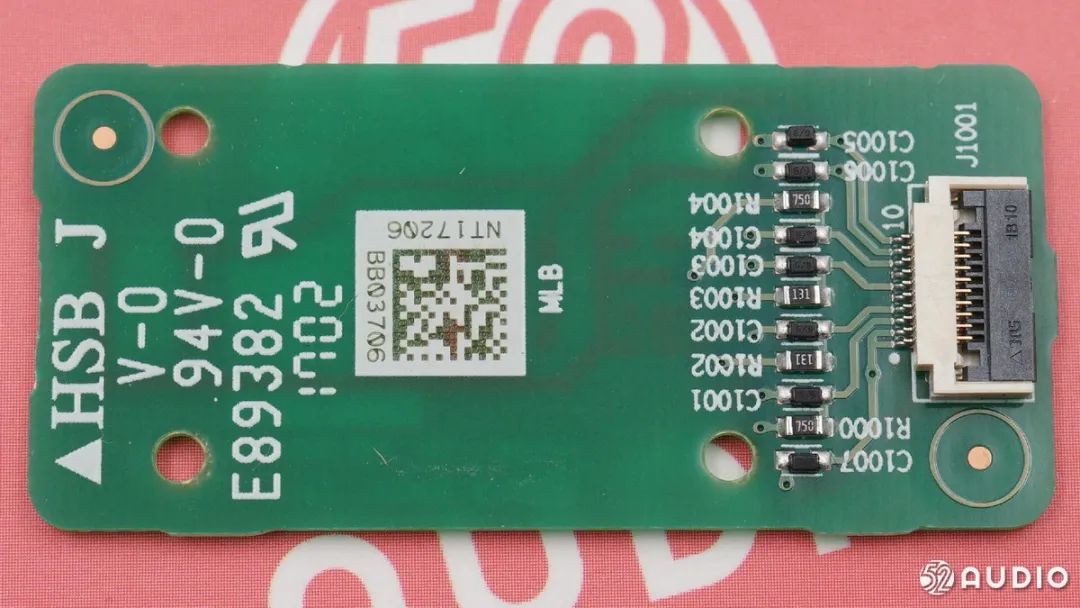
A close-up of the back of the PCBA shows the connector for the ribbon cable on the right side.
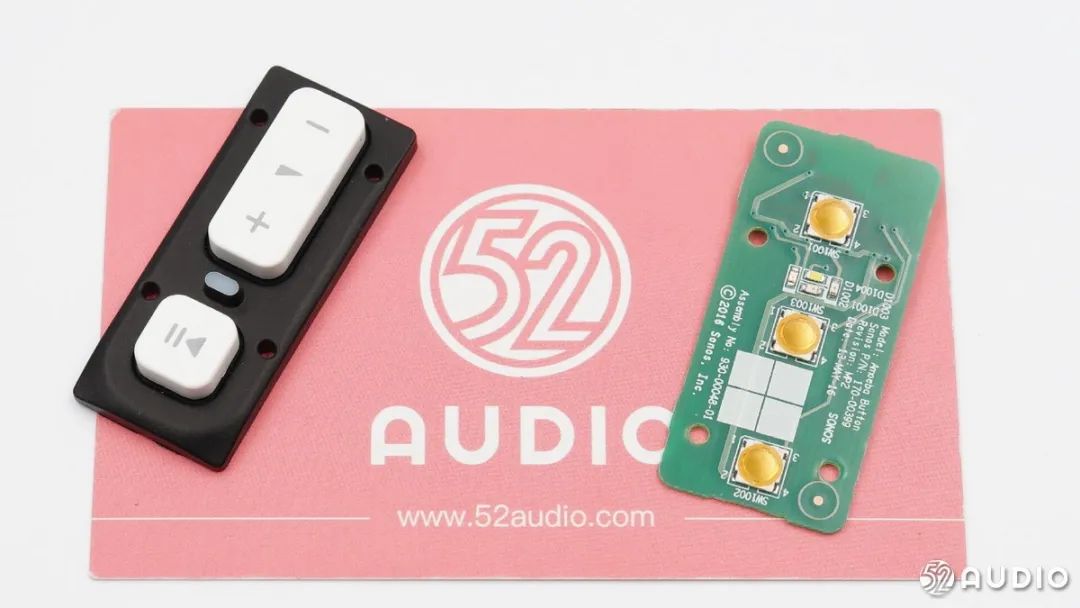
A view of the front of the PCBA.
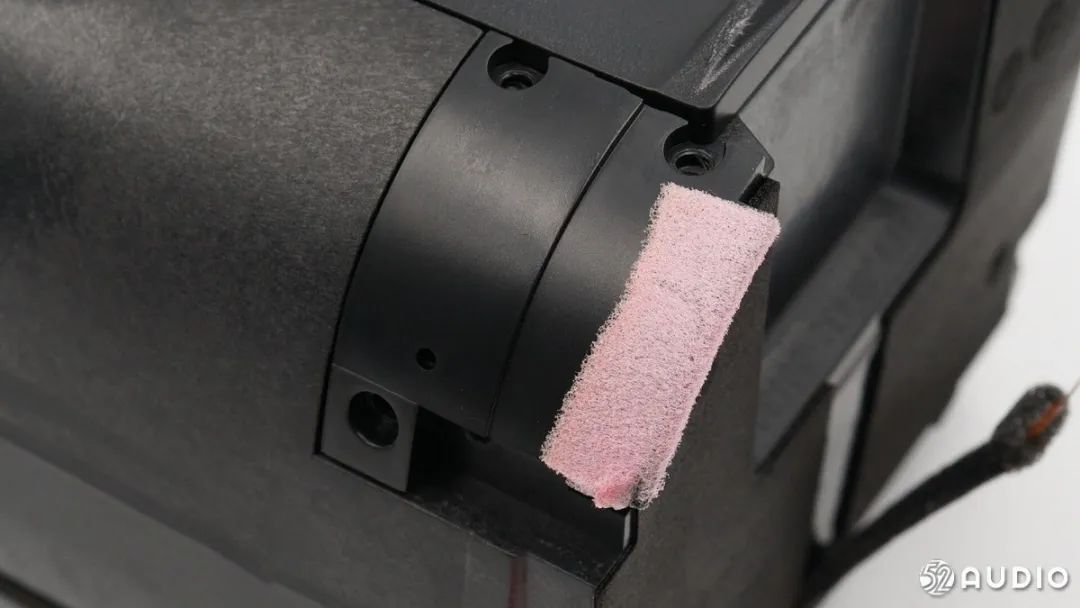
Close-up of the metal tactile buttons.
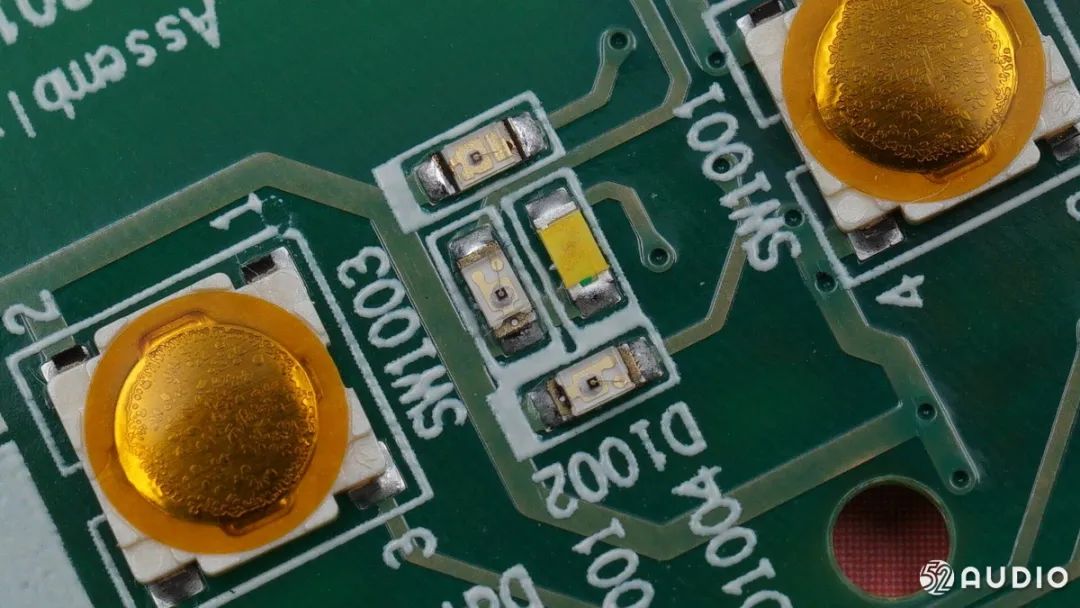
Close-up of the four LED indicator lights.
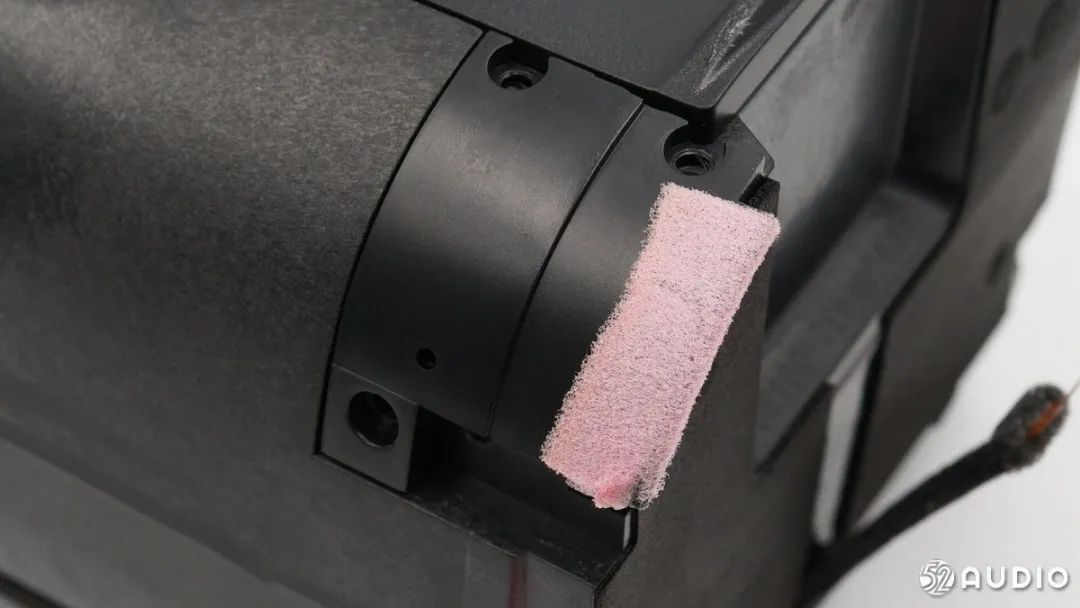
The edges of the speaker cavity shell are removable, with a signal antenna attached inside, and foam is used where it contacts the top shell to reduce resonance.
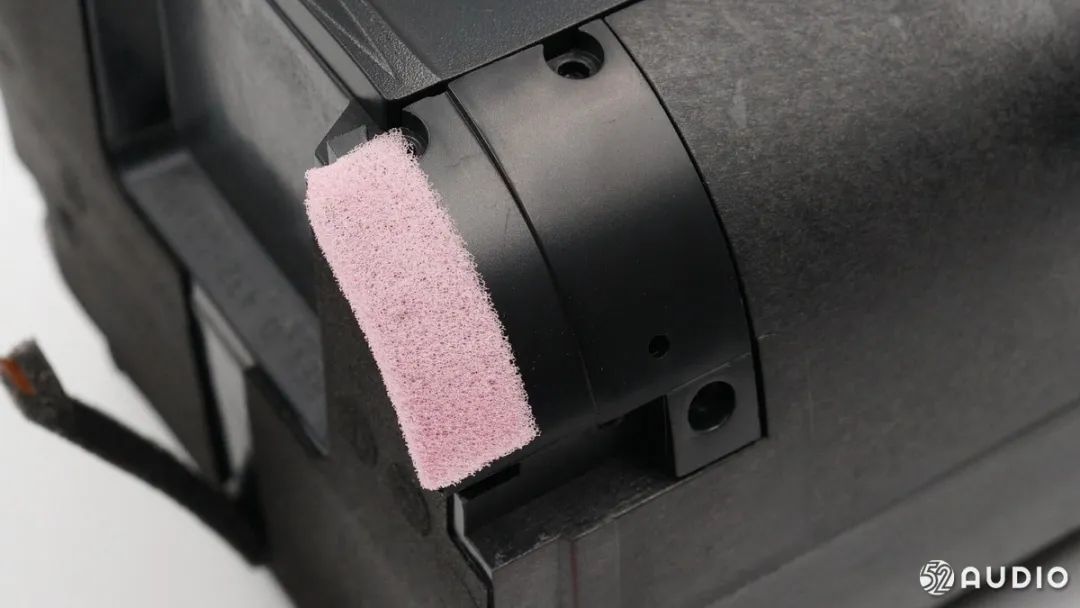
Another adjacent corner is also removable, with a signal antenna and cushioning foam equipped inside.
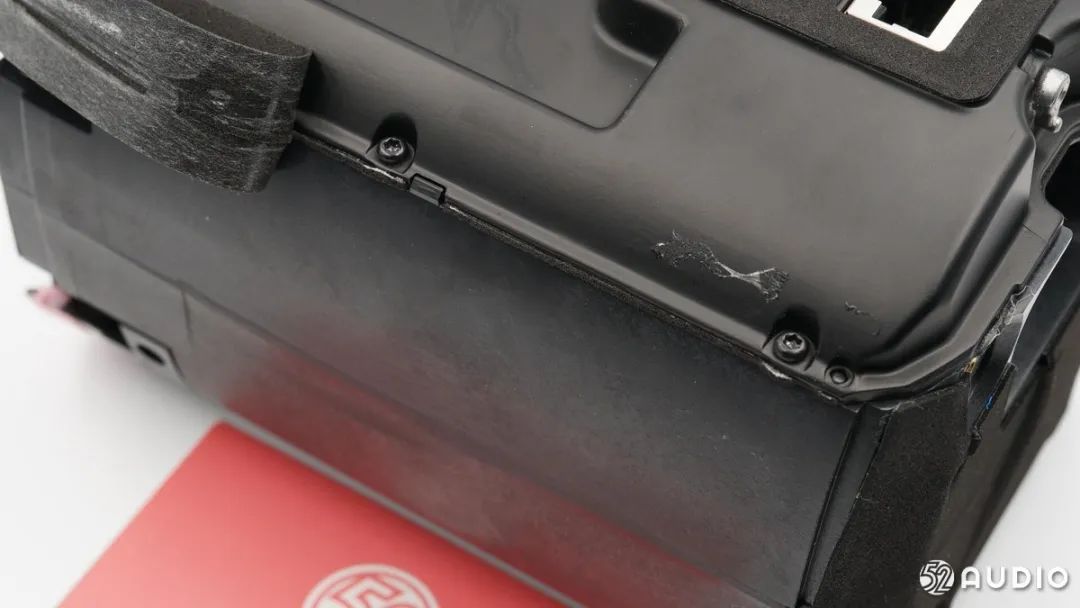
Peeling off the tape at the seams of the speaker cavity shell reveals the screws securing the outer shell.
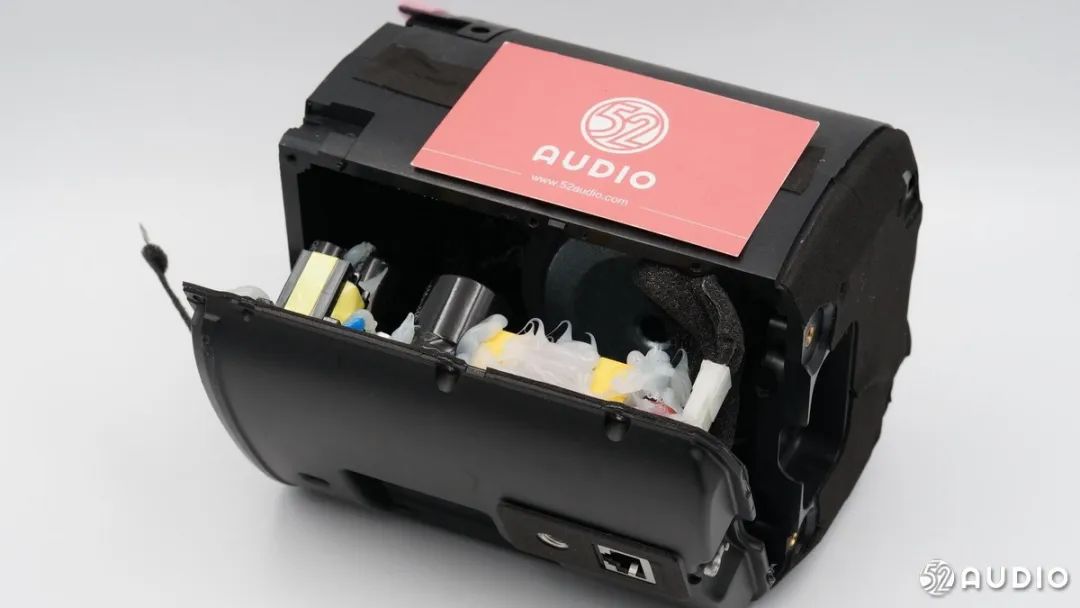
Removing the screws reveals the internal structure of the speaker cavity.
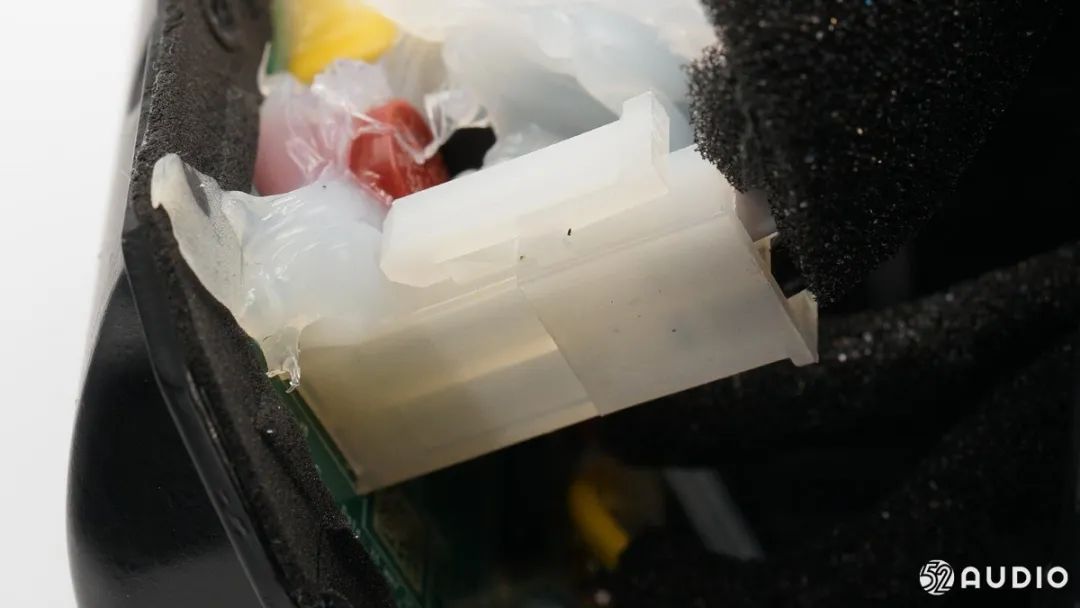
The mains power interface and its connecting socket to the main board.
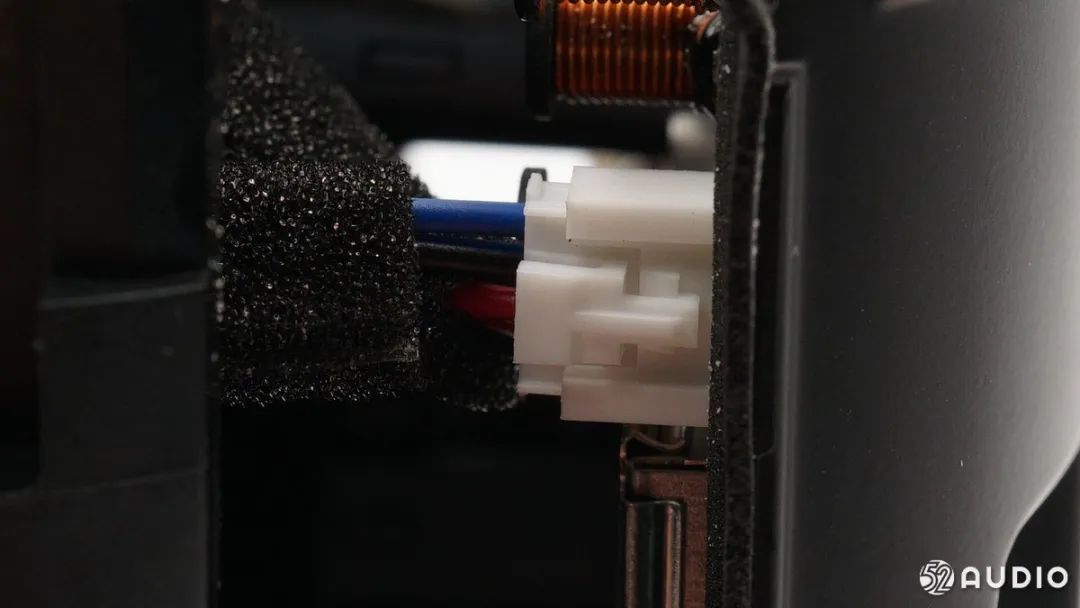
The speaker is connected to the main board via connectors.
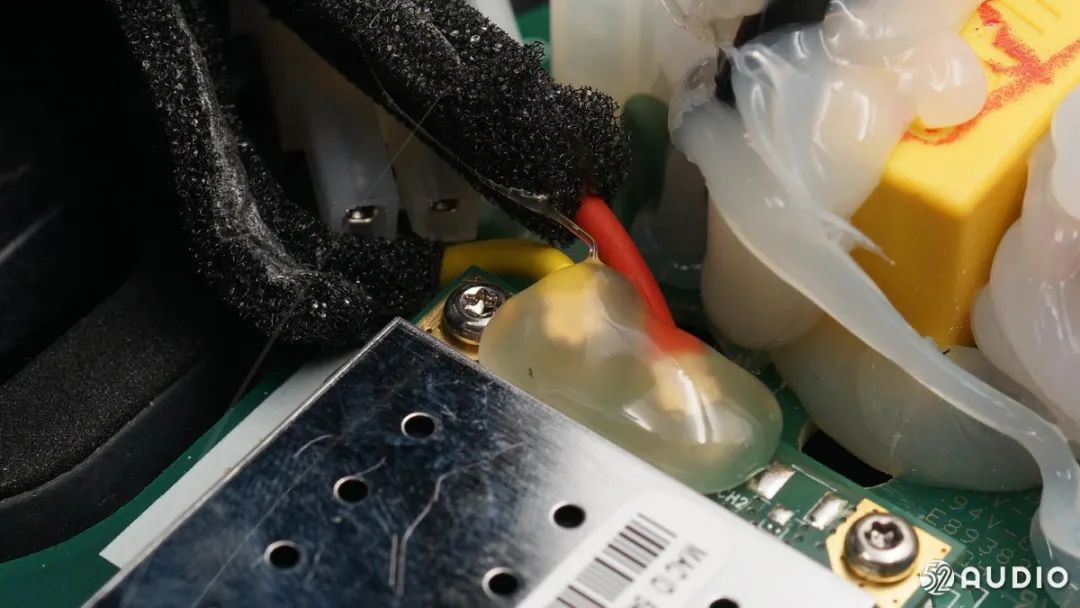
The WiFi antenna is connected to the wireless network card on the main board via a coaxial cable.
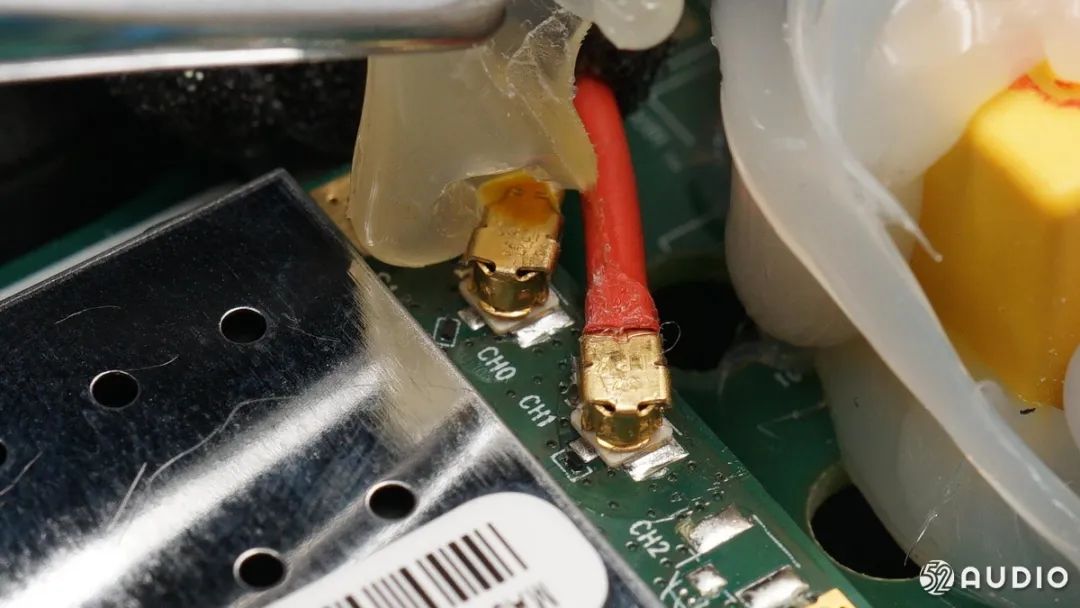
Removing the adhesive on the coaxial line socket ensures that it stays secure.
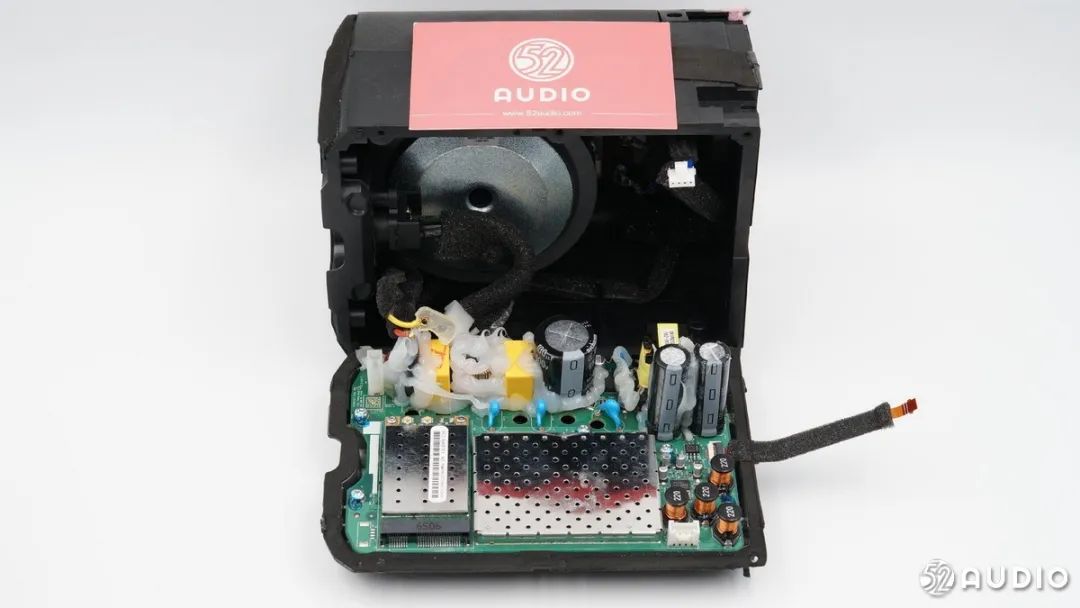
Disconnecting all connectors allows for the removal of the main board circuit from the speaker cavity.
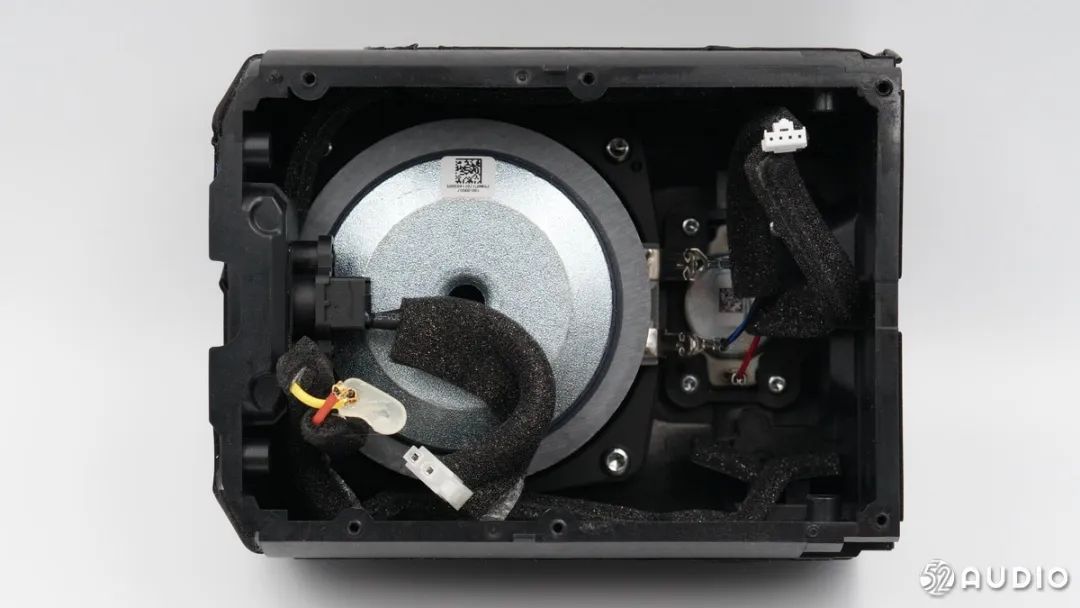
A view of the internal structure of the speaker cavity shows two speaker units, with the left side being the power input interface at the bottom. The internal wires are wrapped in foam to reduce resonance, and there is sound-absorbing cotton around the cavity.
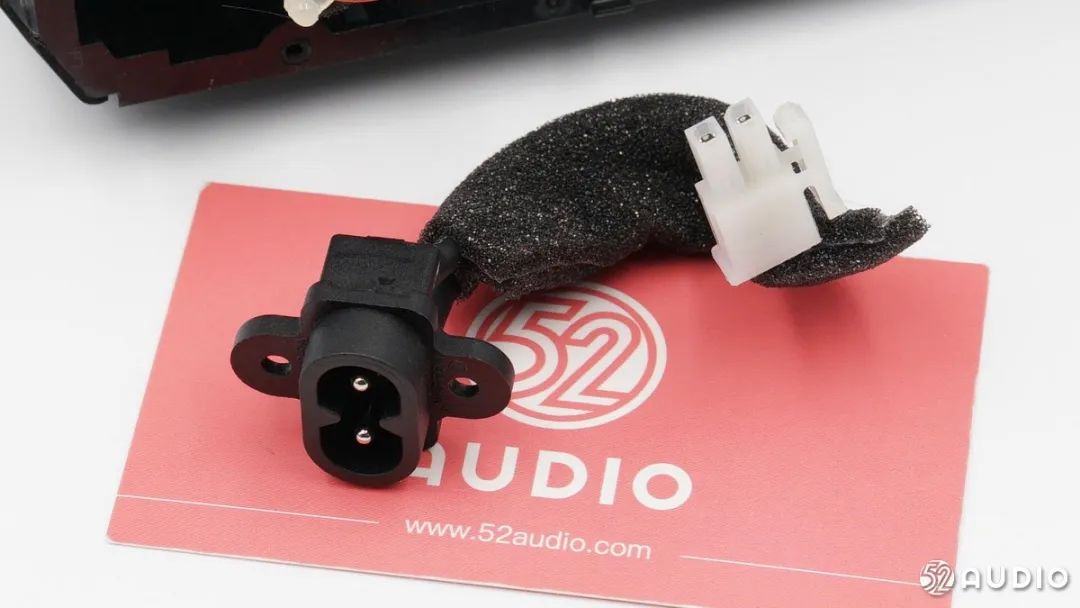
The mains power interface and its cable.
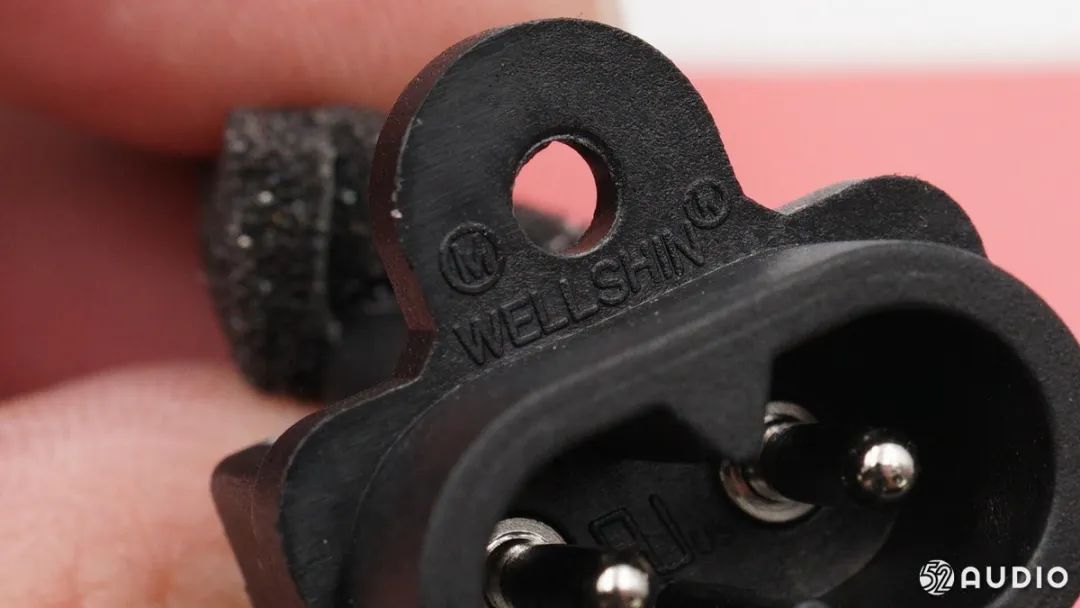
The supplier of the mains power interface is Weijia Technology.
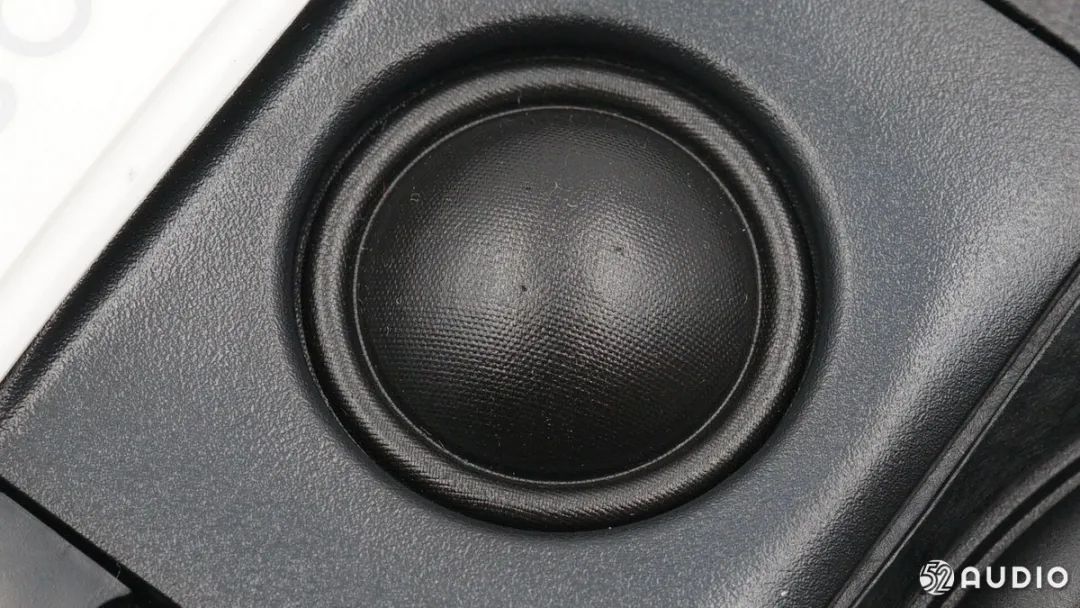
A small high-frequency driver.
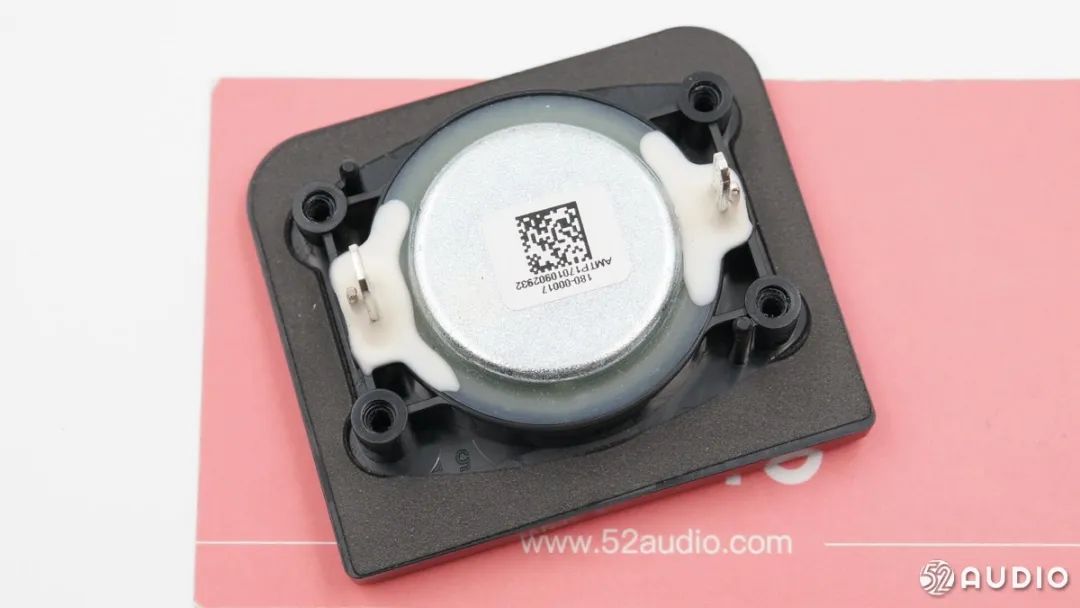
The back of the driver has a QR code label, with positive and negative terminals for wire connections on both sides.
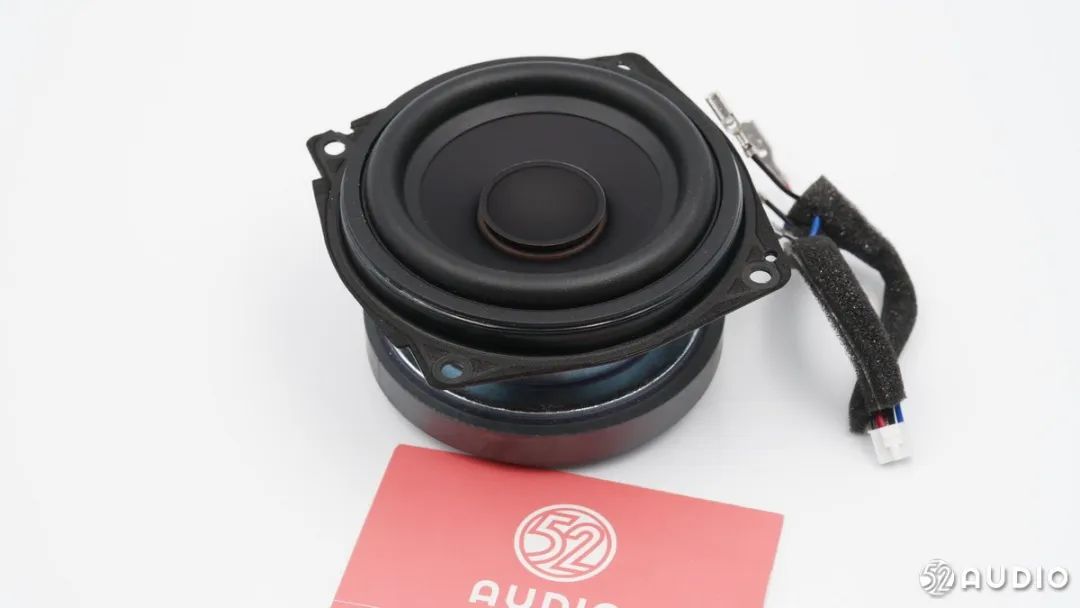
A larger mid-bass driver.
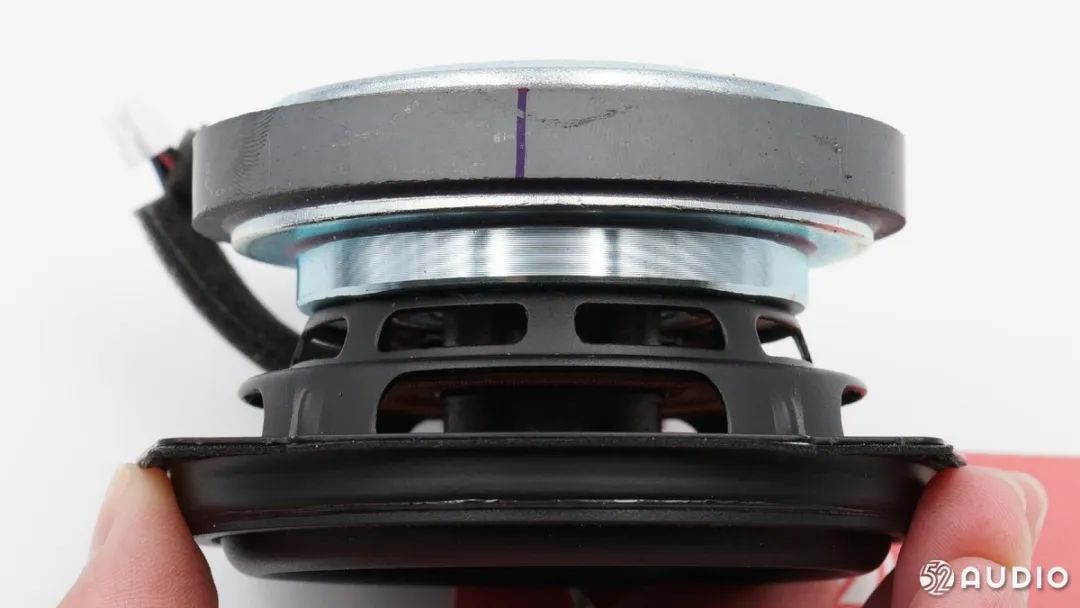
A display of the structure of the mid-bass driver unit, which has a large magnetic steel.
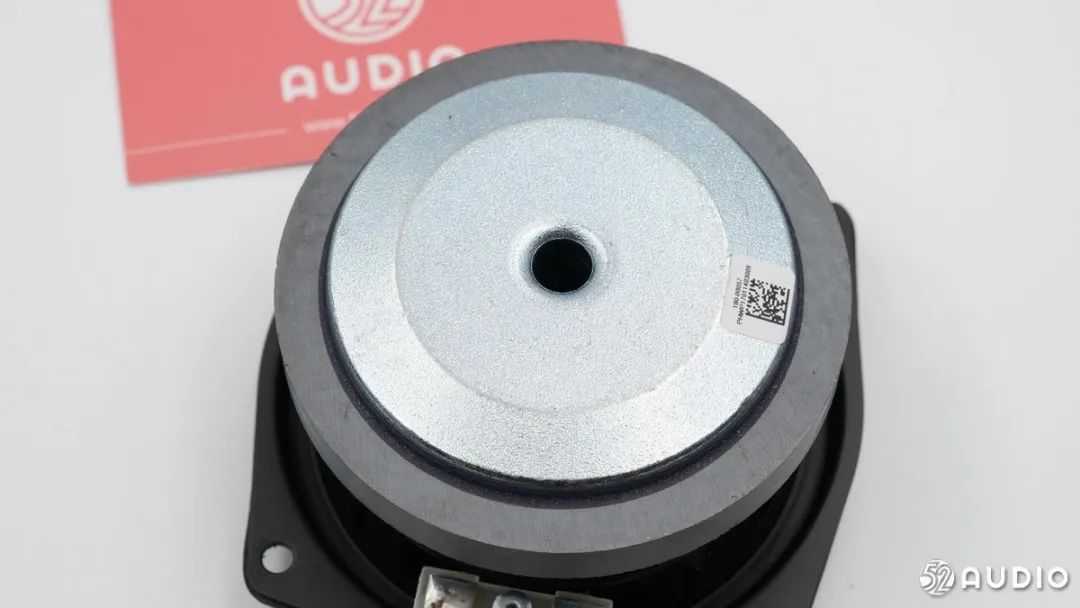
A low-frequency driver T-iron opening.
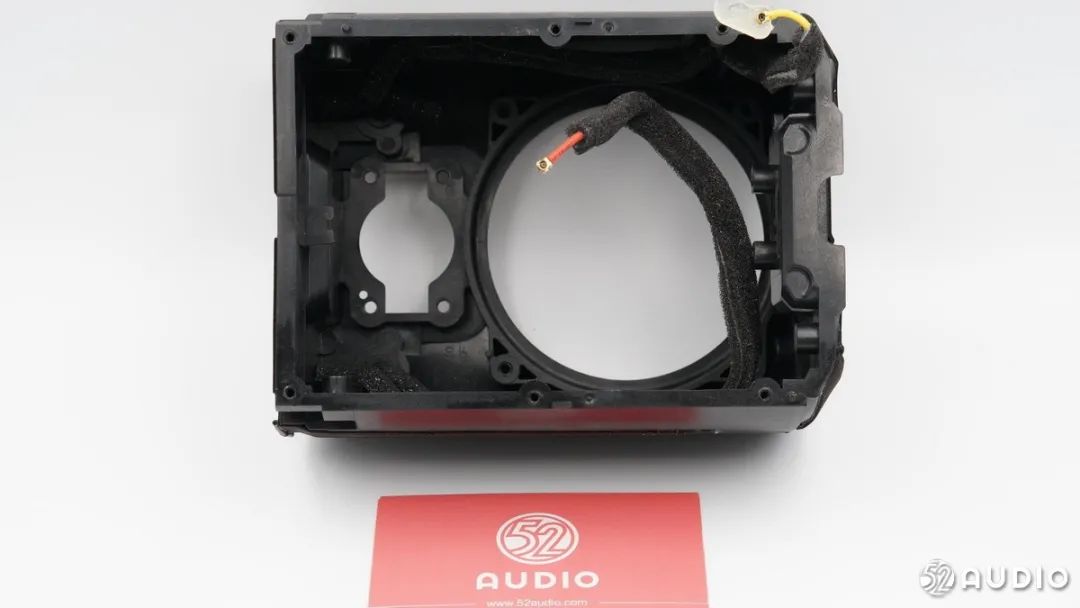
The shell after removing the driver unit. You can see that there are two cables at the corners inside the shell.
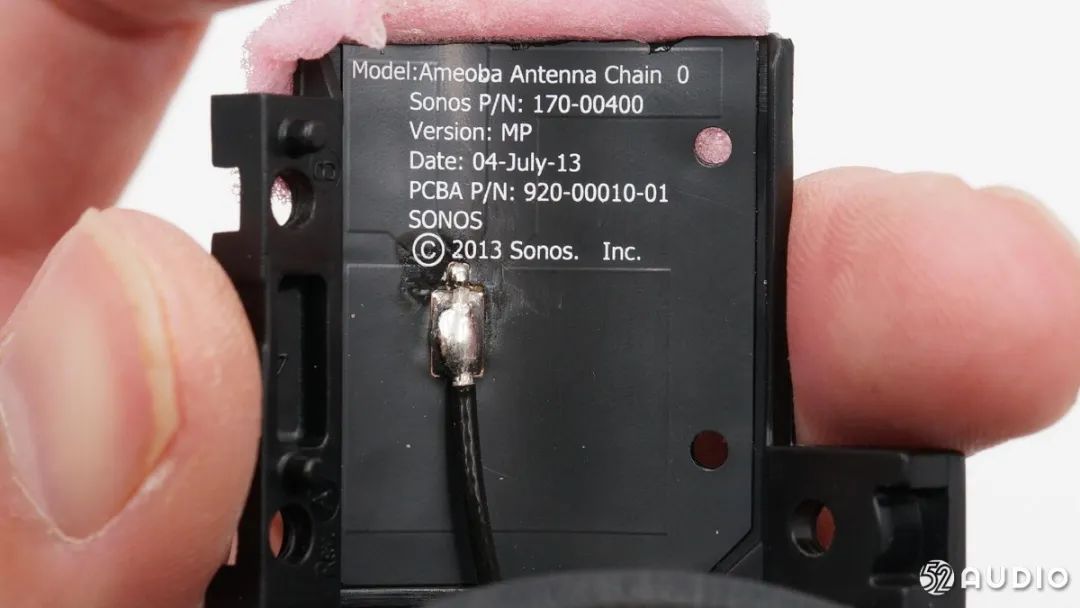
Removing the WiFi antenna module from the corners of the shell.
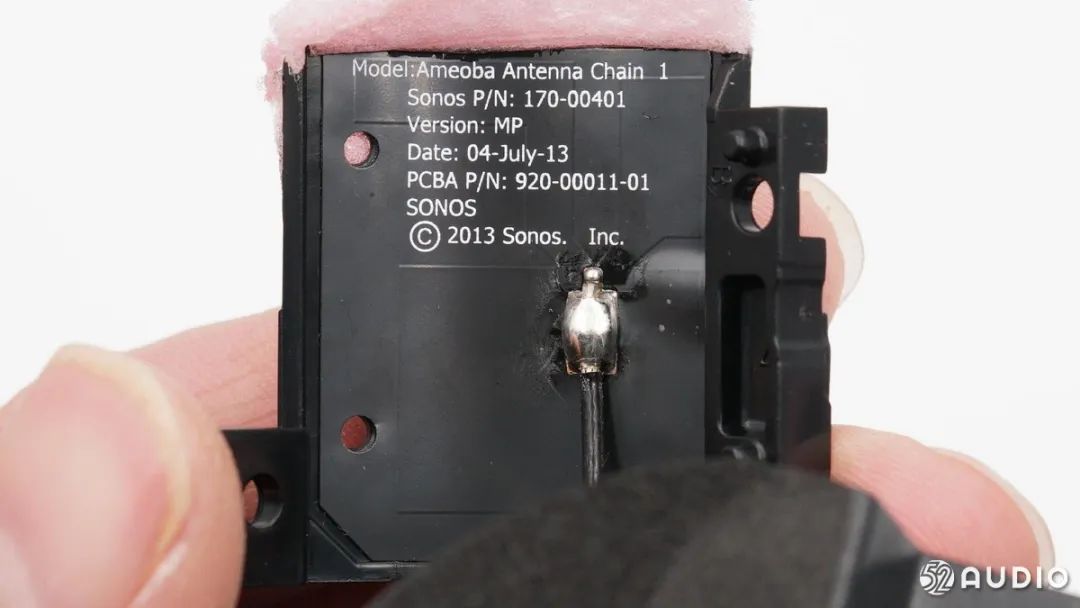
Another WiFi antenna module with a different number.
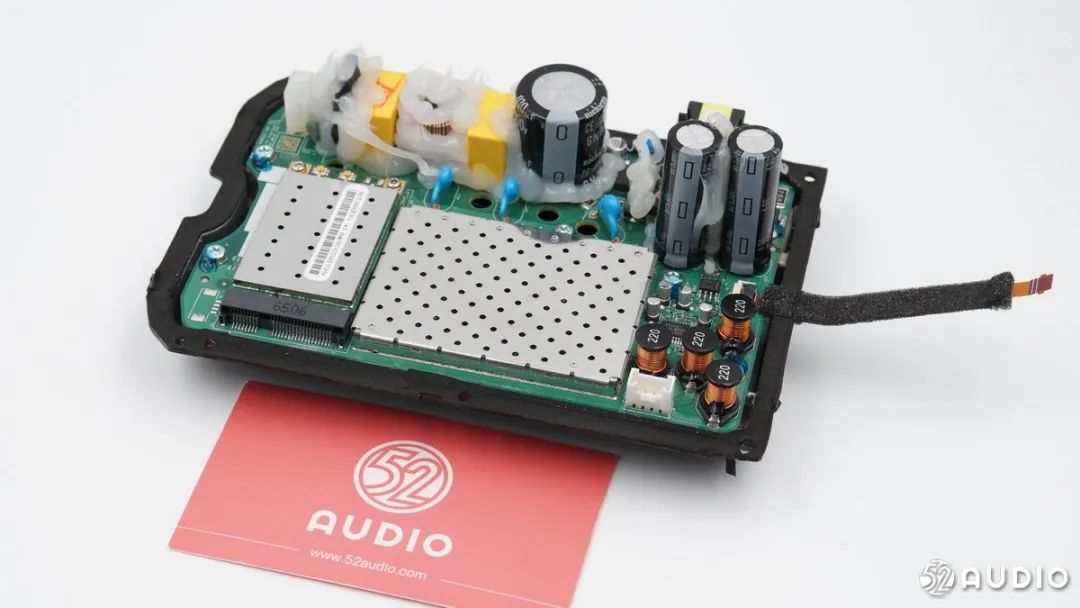
The main board circuit inside the speaker cavity is secured to the shell with screws.
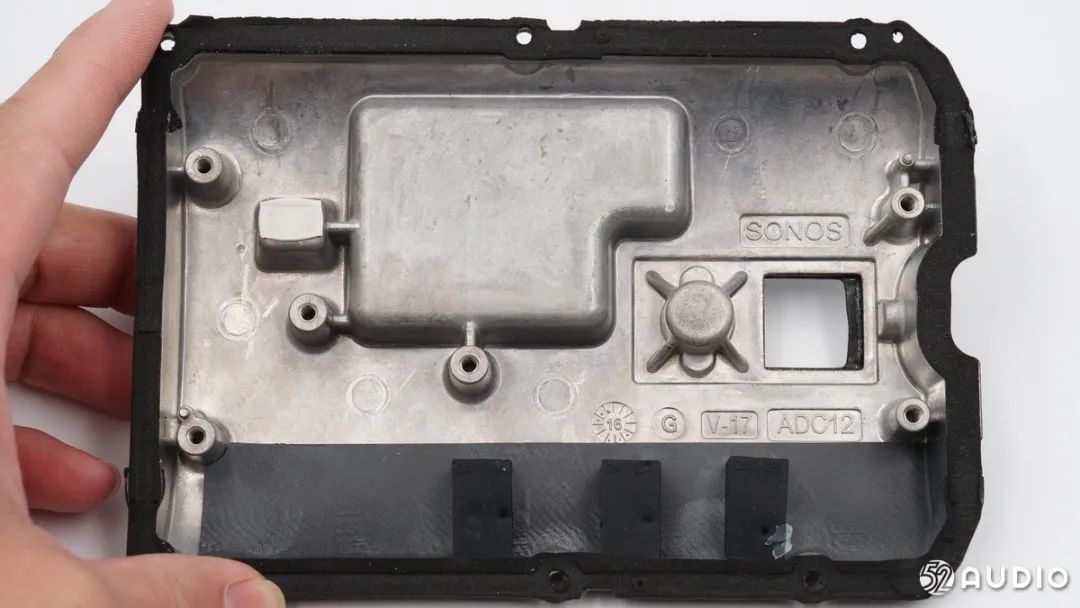
Removing the screws allows for a view of the inner side of the shell.
The shell is a metal heat sink.
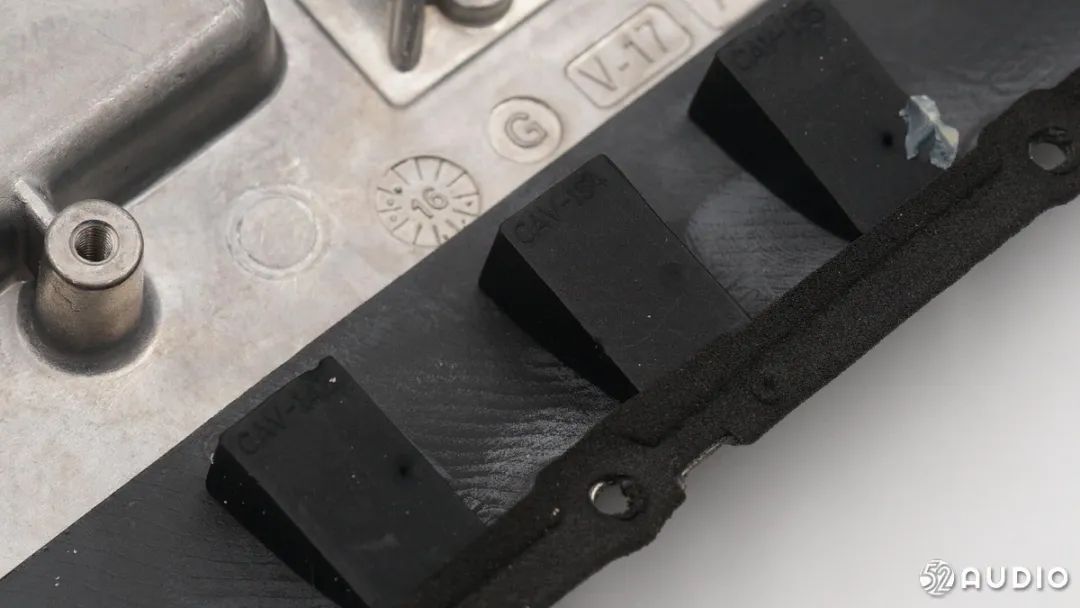
Three insulating rubber pads support the main board.

Thermal grease is applied to the chip area for heat dissipation.
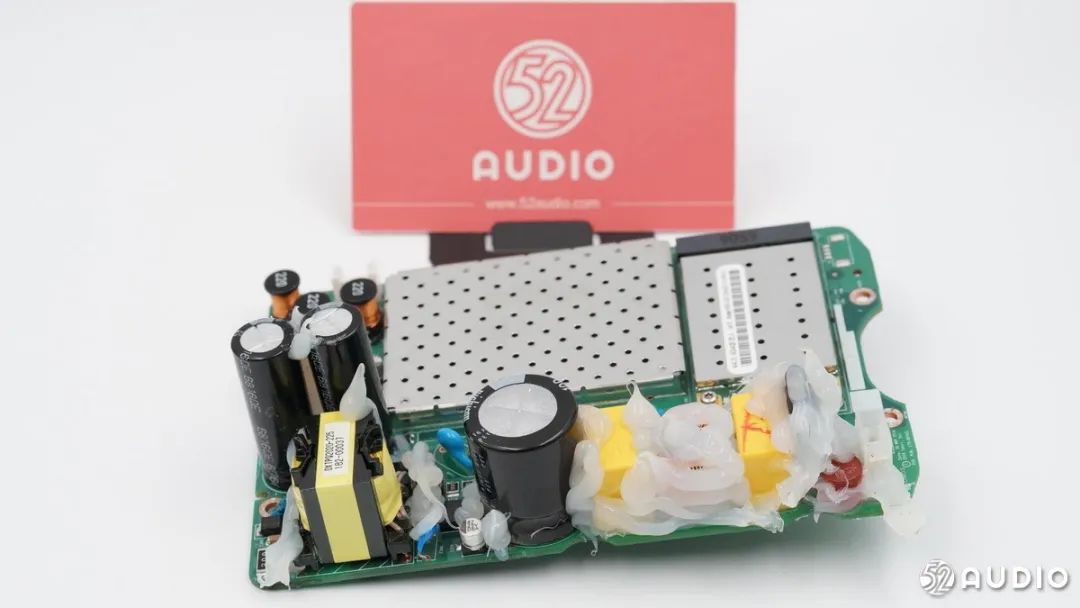
The front of the speaker’s main board shows that the vertical components in the high-voltage section are secured with a lot of insulating glue.
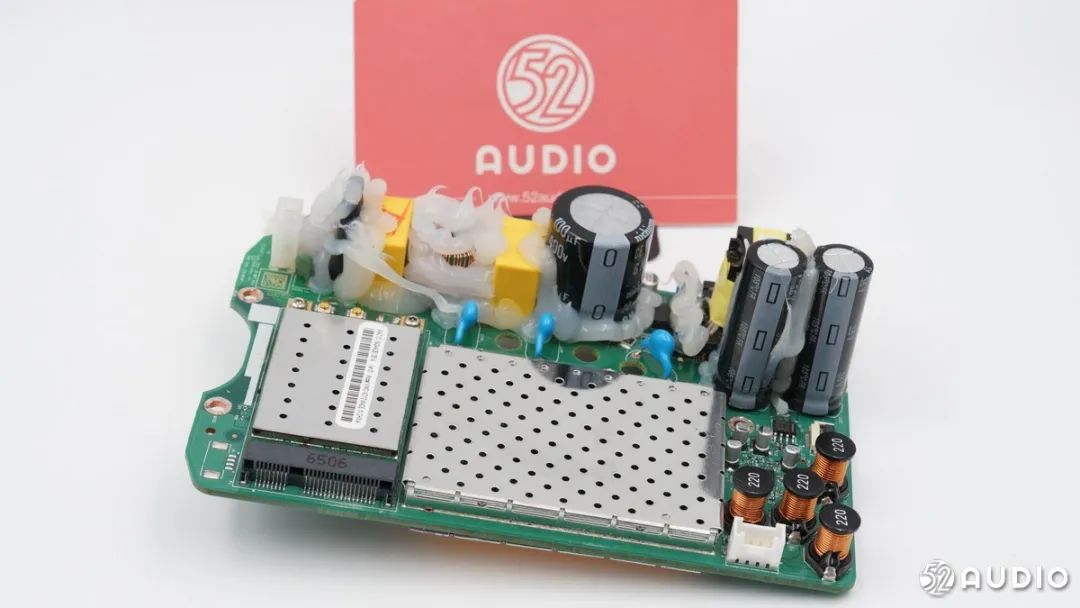
A wireless network card and a large shielding cover, with the right side being the filter inductor for the digital amplifier.
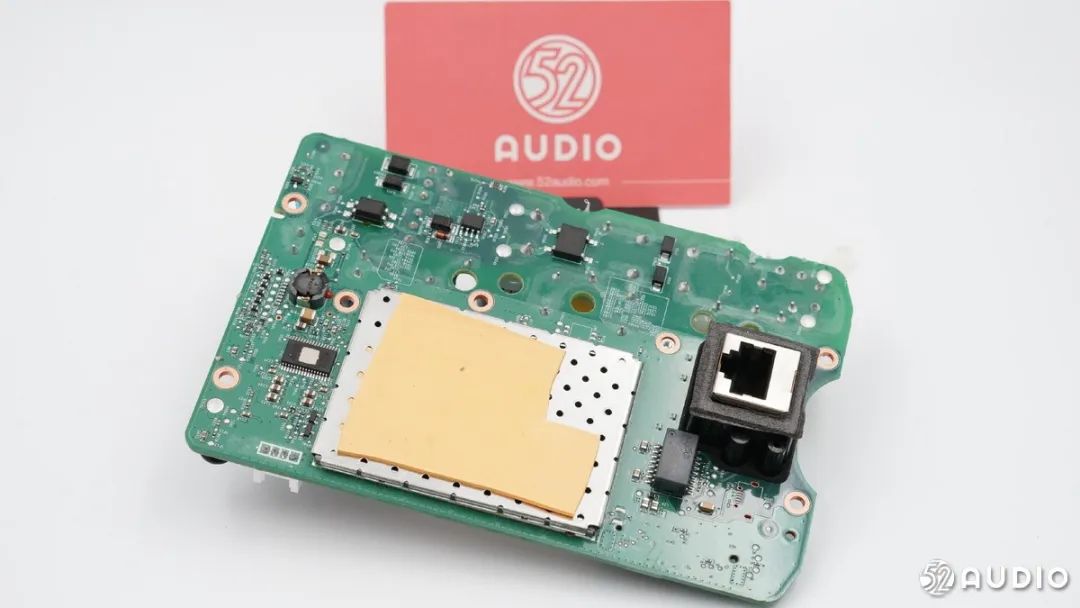
A large metal shielding cover on the back of the main board, with thermal pads on top.
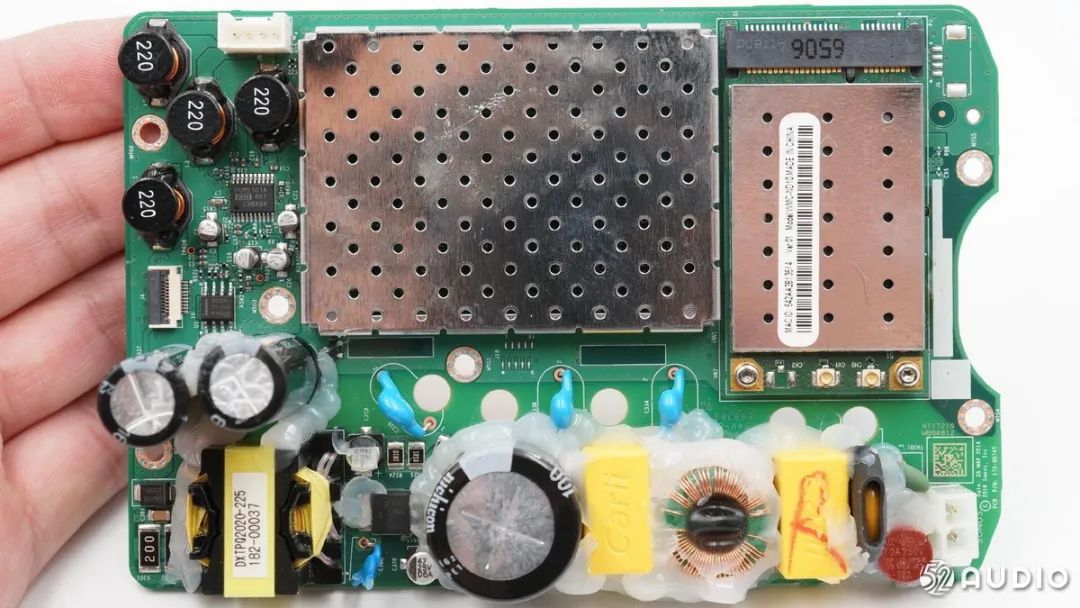
A view of the circuit on the front of the main board shows, from top to bottom, left to right: amplifier section, control circuit section, wireless module, power supply section for the speaker.
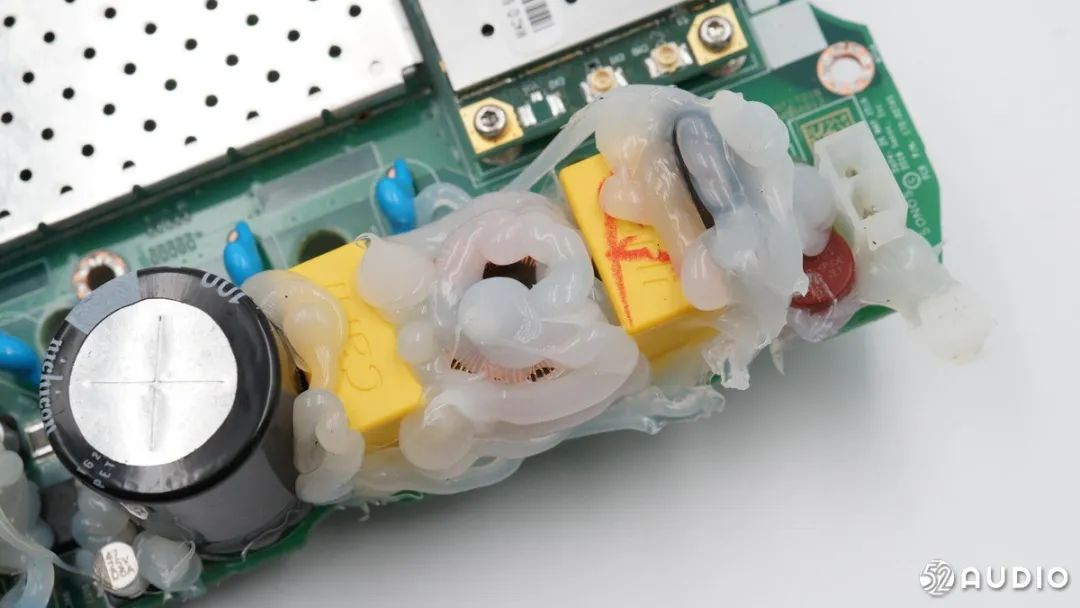
The EMI filtering section for the power input.
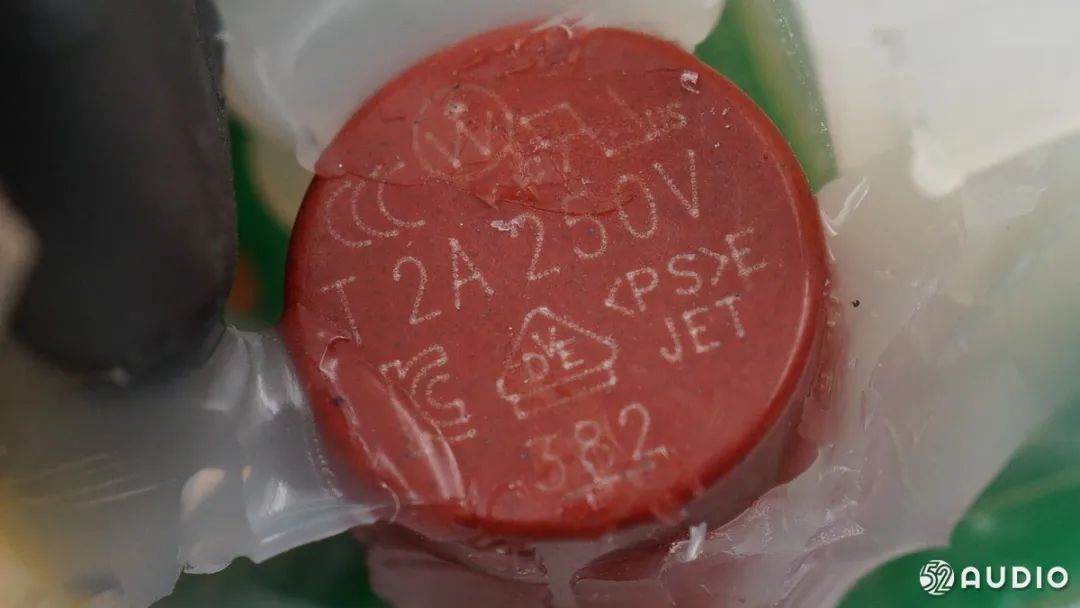
A 2A, 250V time delay fuse.
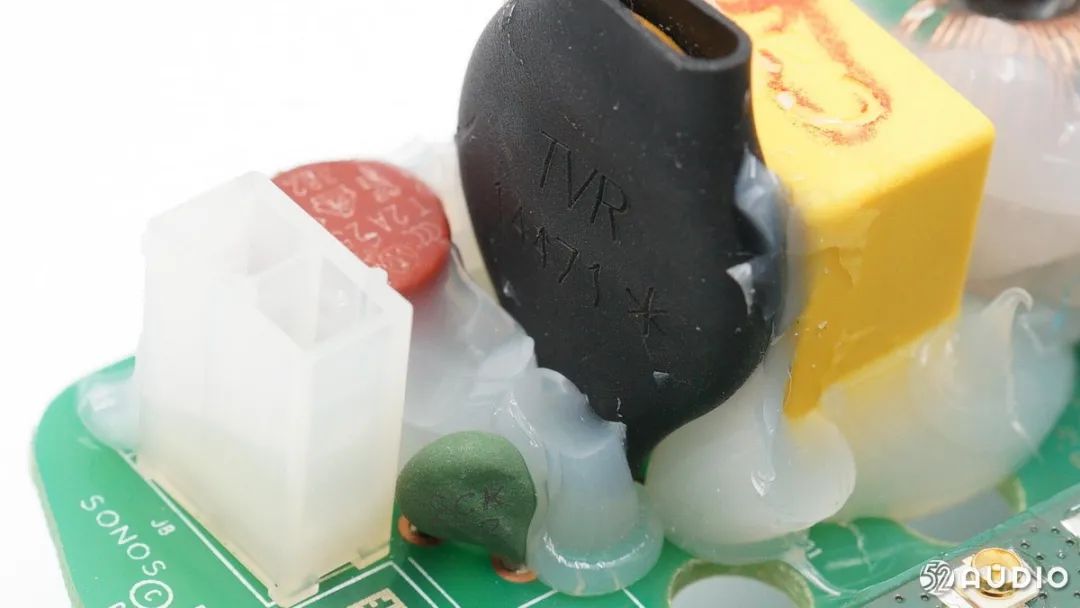
A green NTC thermistor to suppress inrush current, with the component encased in a black heat shrink tube being a TVR varistor. When input voltage is over, the varistor conducts and the fuse blows, protecting the downstream components.
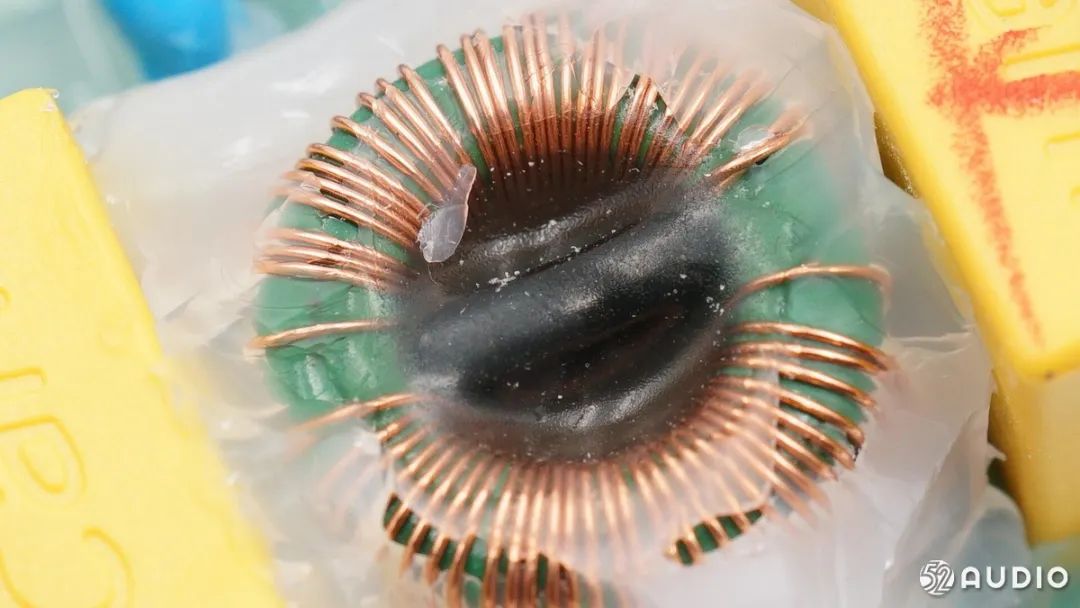
A common mode inductor used in conjunction with X capacitors to suppress interference.
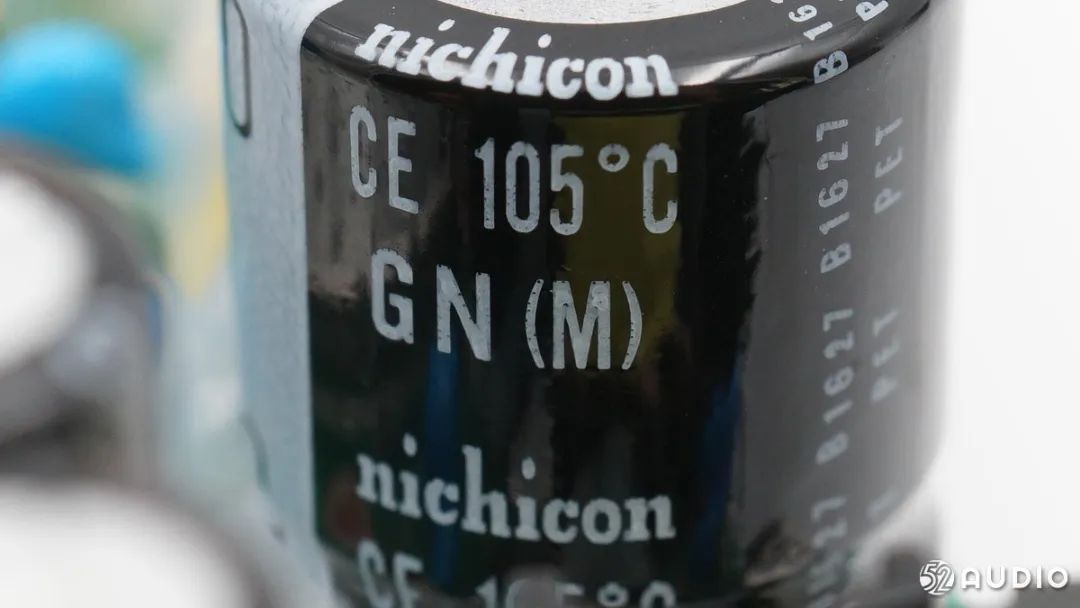
The primary filter capacitor is a Nichicon rated for 105°C.
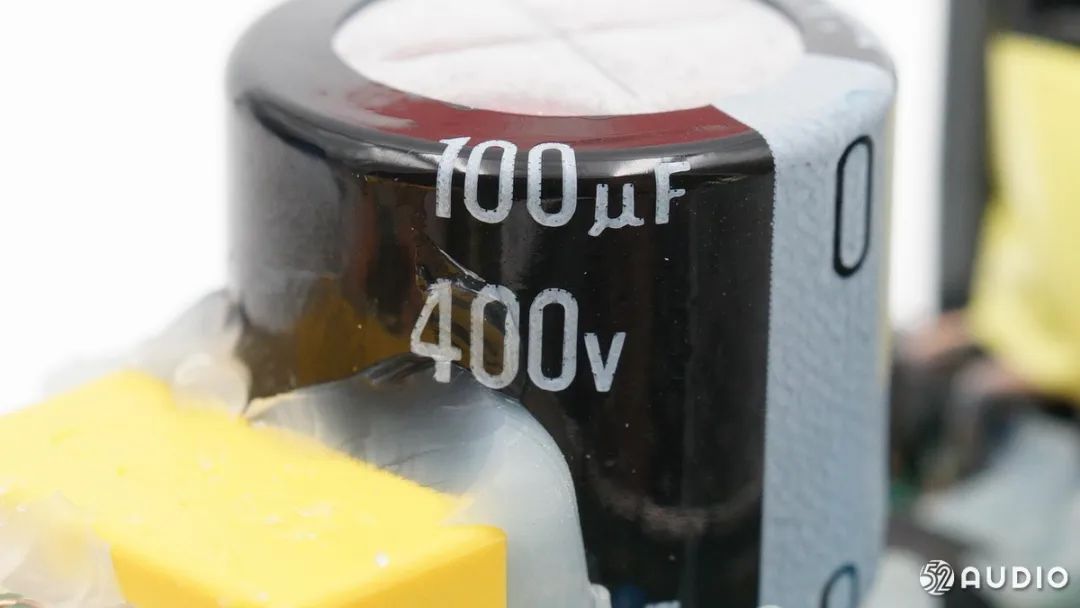
The primary filter capacitor has a capacity of 100μF and a voltage rating of 400V.
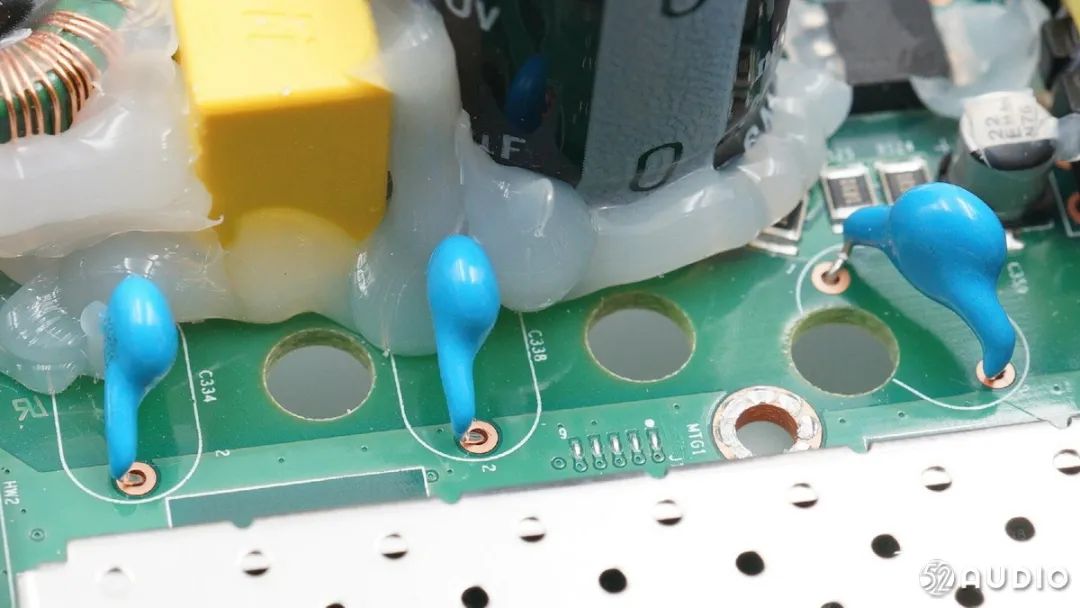
Several Y capacitors.
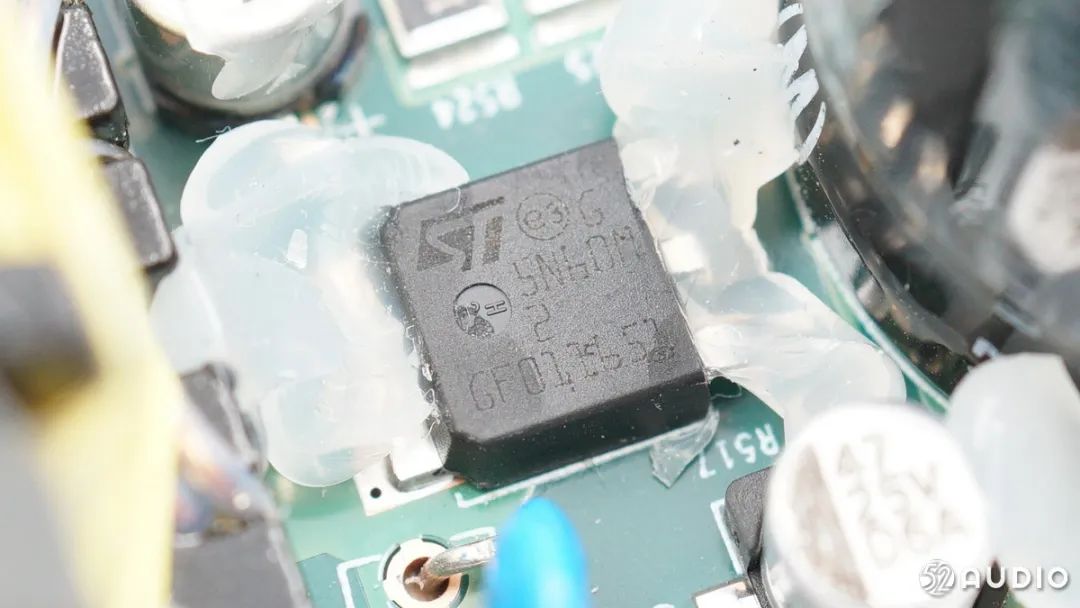
STMicroelectronics STD5N60M2 primary switching transistor, rated at 600V, with a resistance of 1.3Ω, in DPAK package.
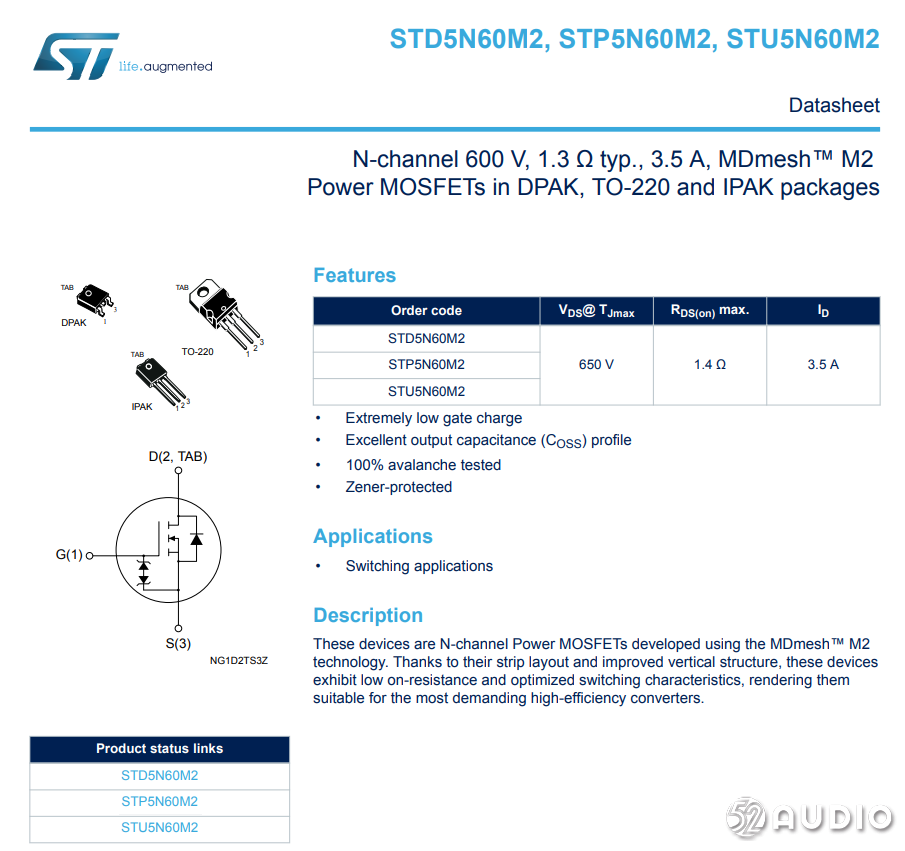
Detailed information on STMicroelectronics STD5N60M2.
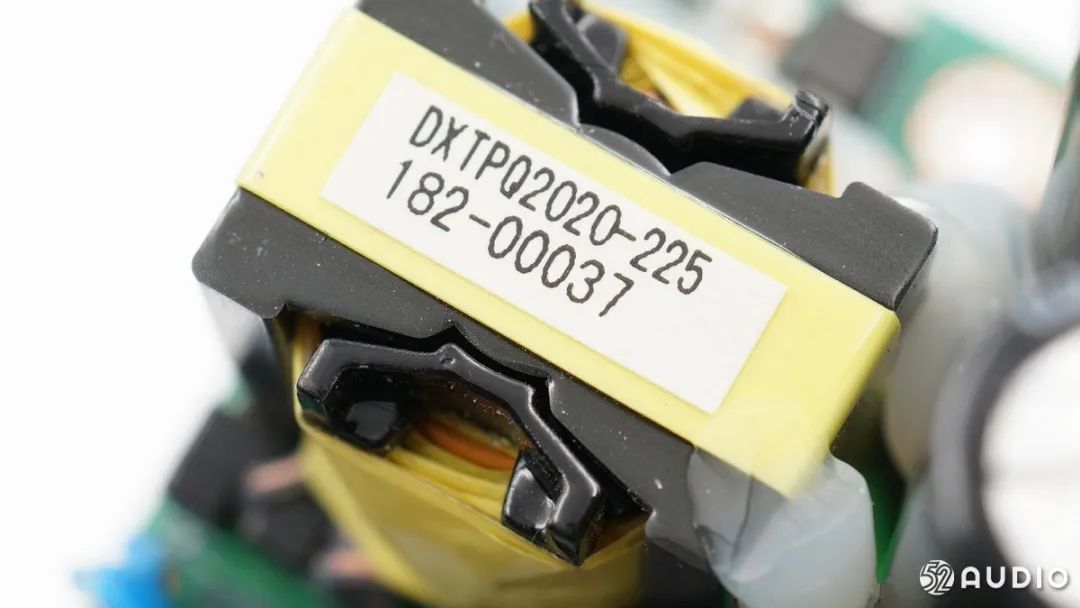
The transformer has an information label attached.
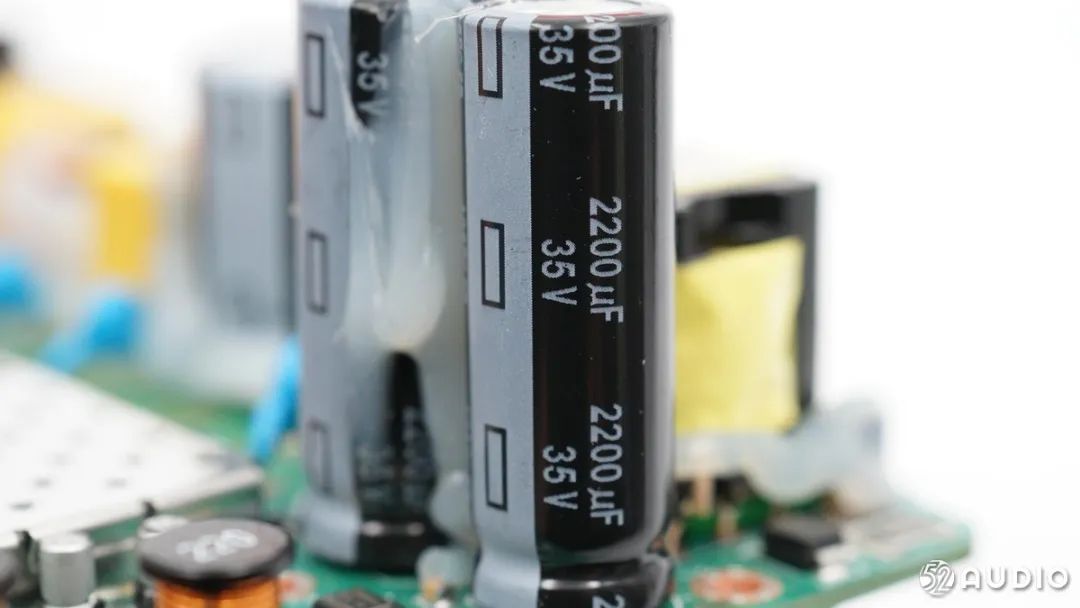
The output uses two 2200μF 35V electrolytic capacitors for filtering.
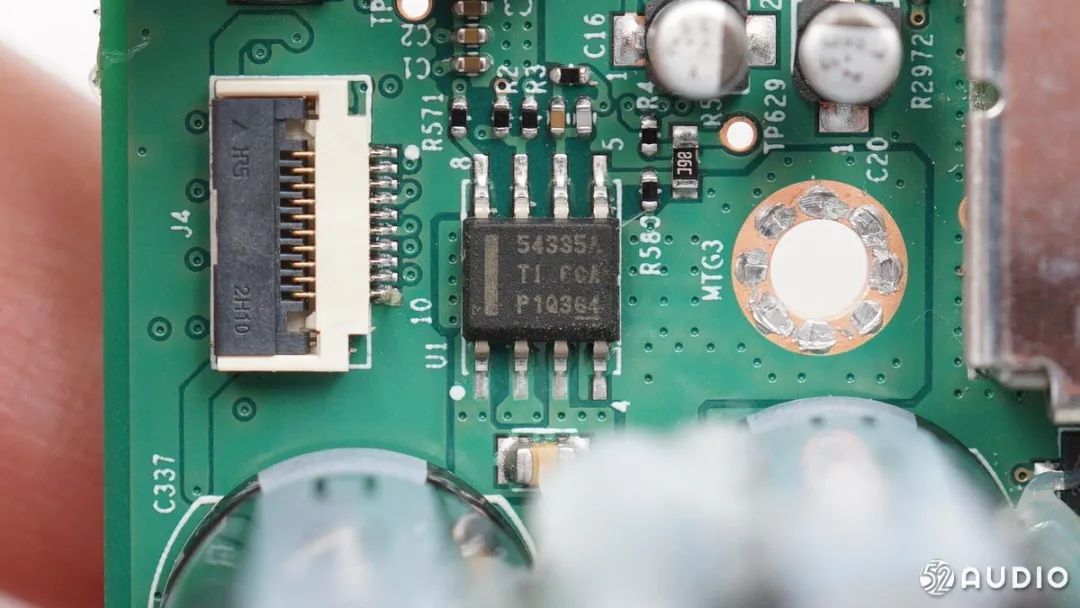
TI TPS54335A 3A synchronous rectification buck converter.
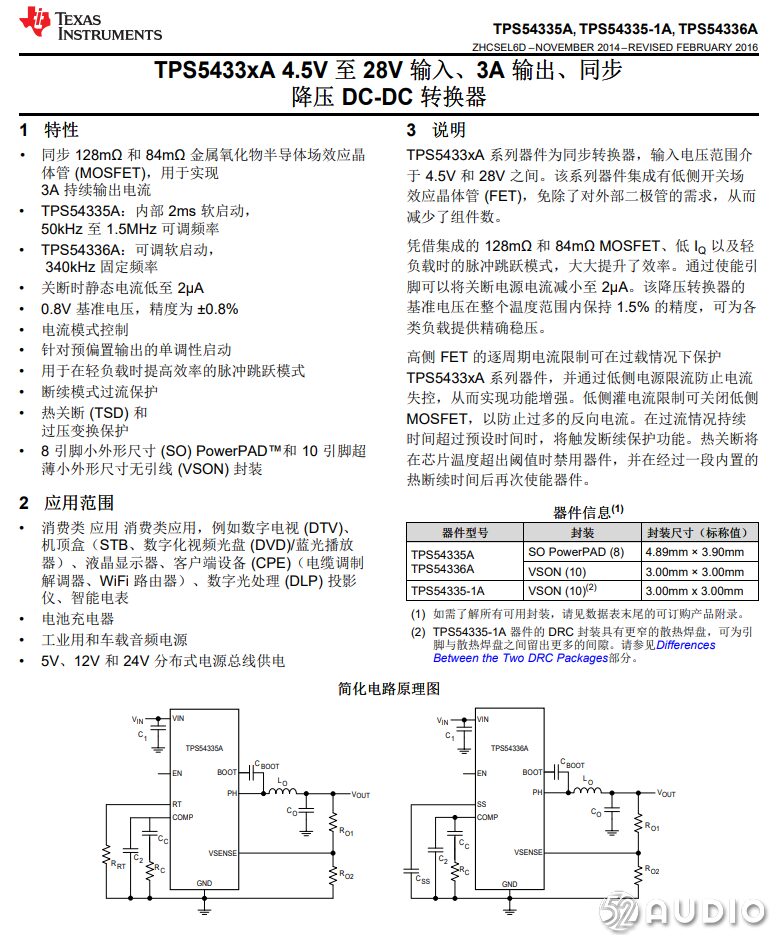
Detailed information on TI TPS54335A.
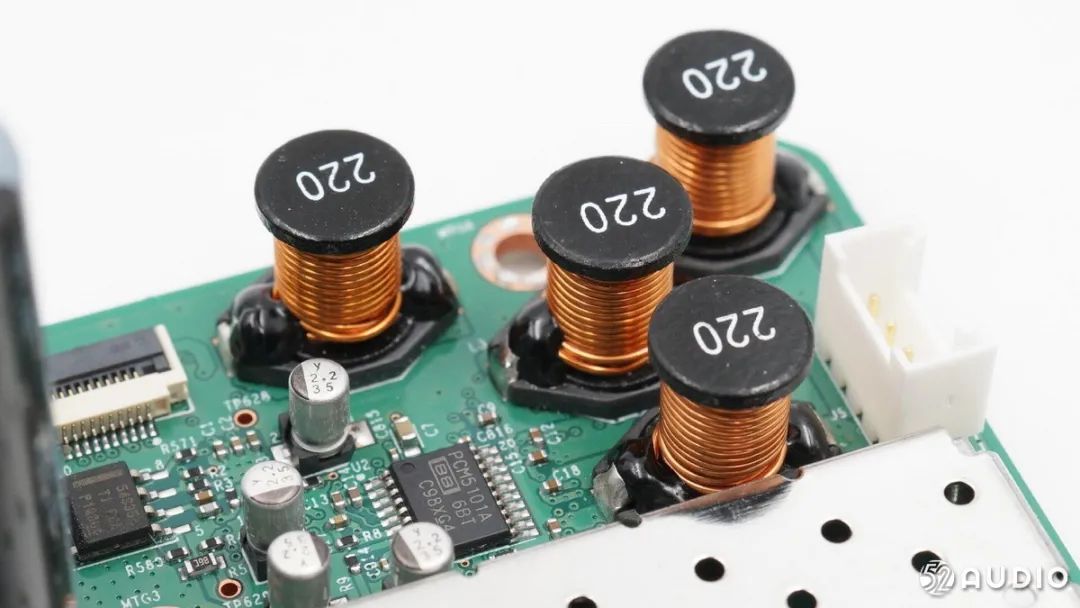
The filter inductor for the digital amplifier output, with a total of four for two independent channels.
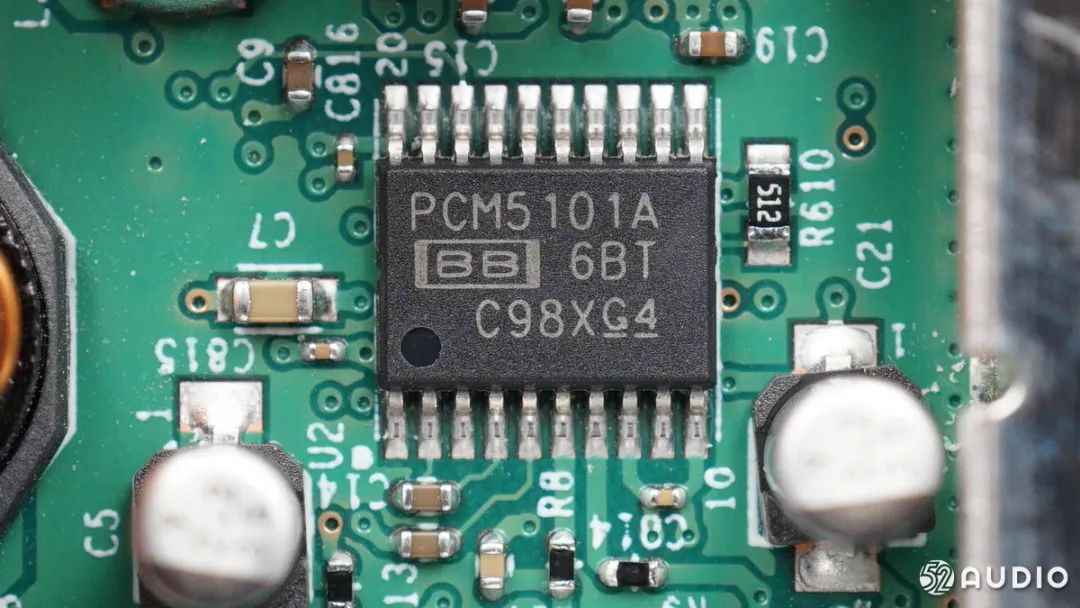
TI PCM5101A DAC for audio conversion.
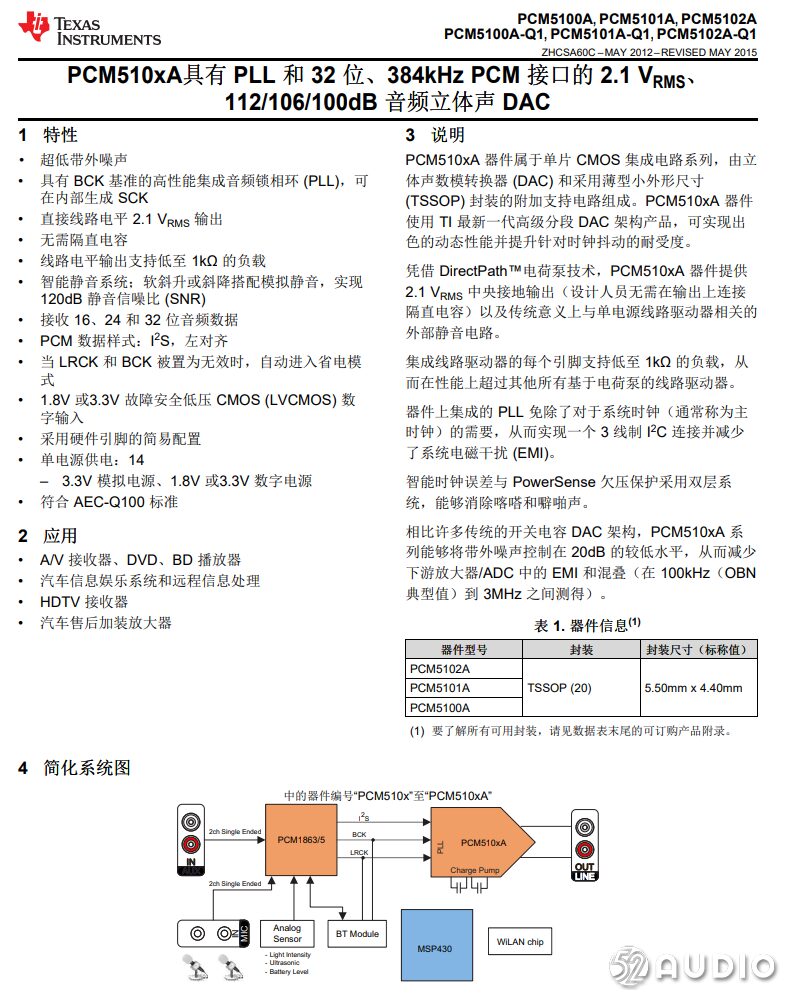
Detailed information on TI PCM5101A.
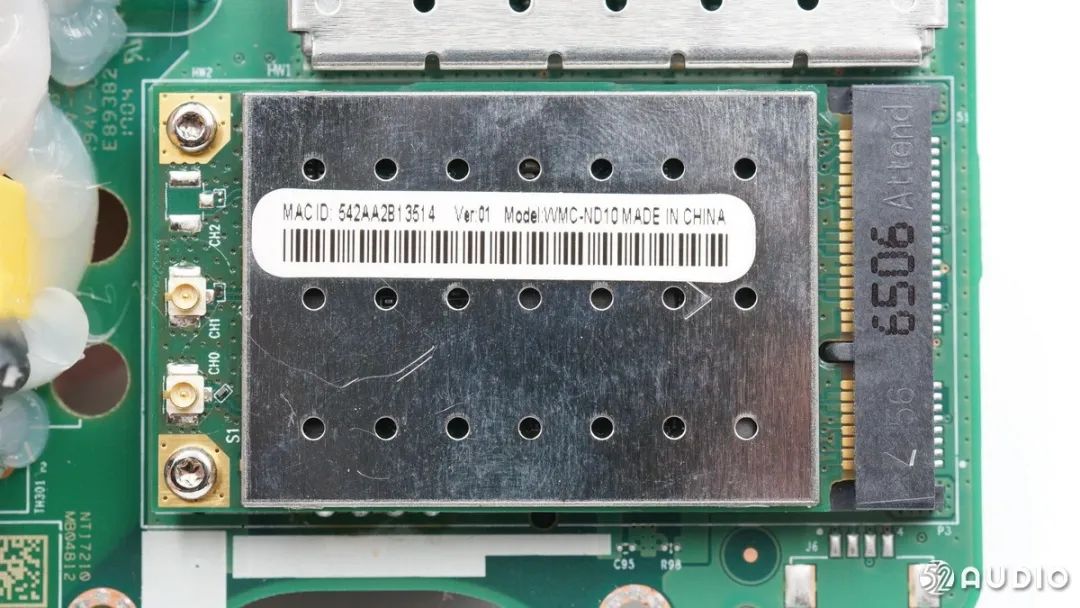
The wireless network card uses the same style as those in laptops, with a MINI PCI-E interface.
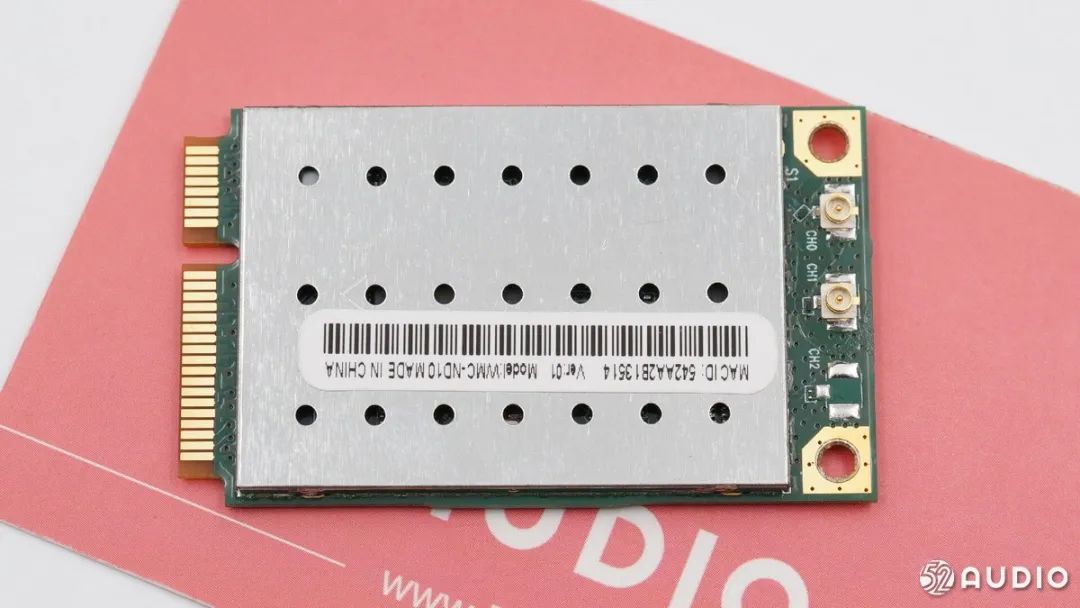
Removing the wireless network card.
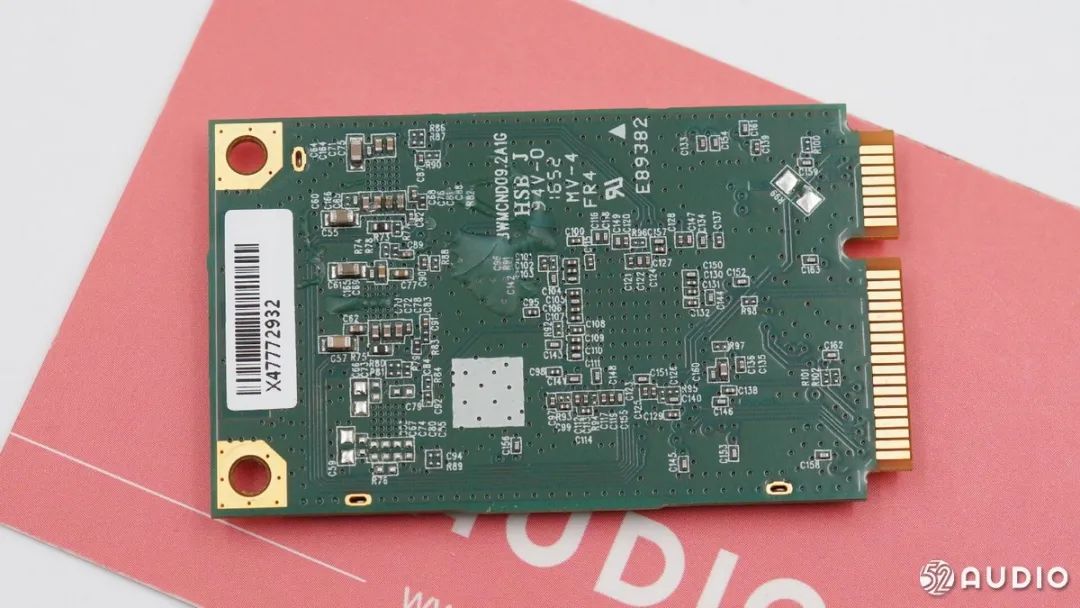
The back of the small board has some capacitors.
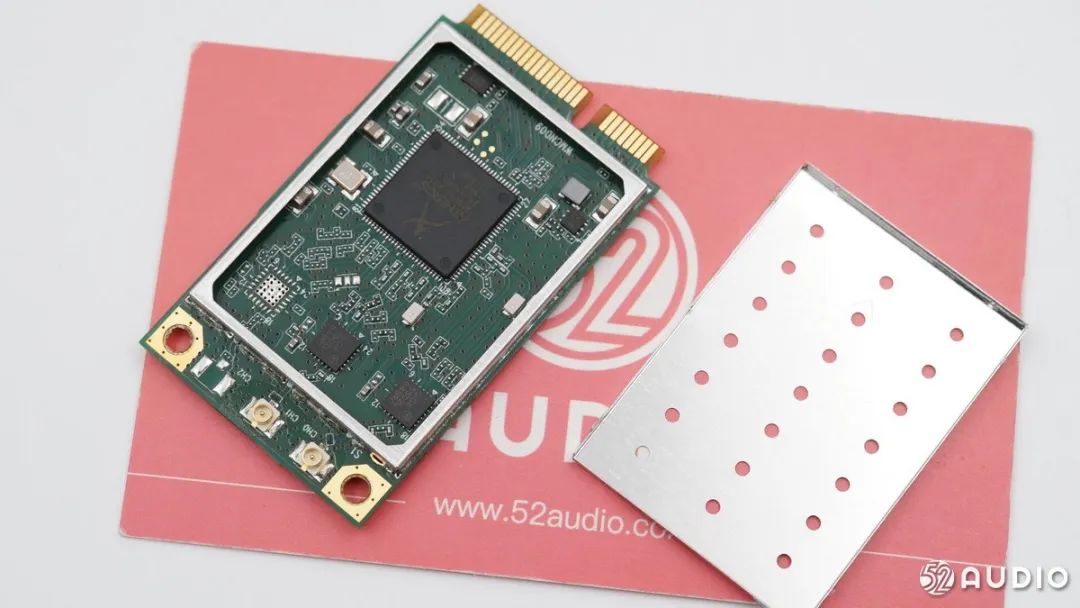
A view of the circuit after removing the metal cover.
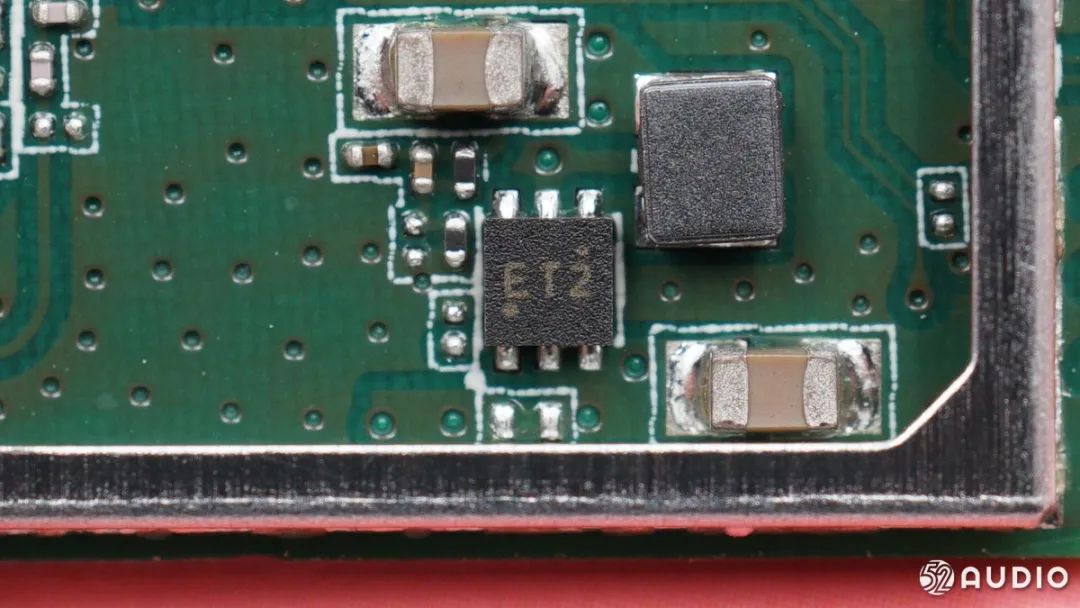
RICHTEK RT8010 1A high-efficiency synchronous rectification buck converter.
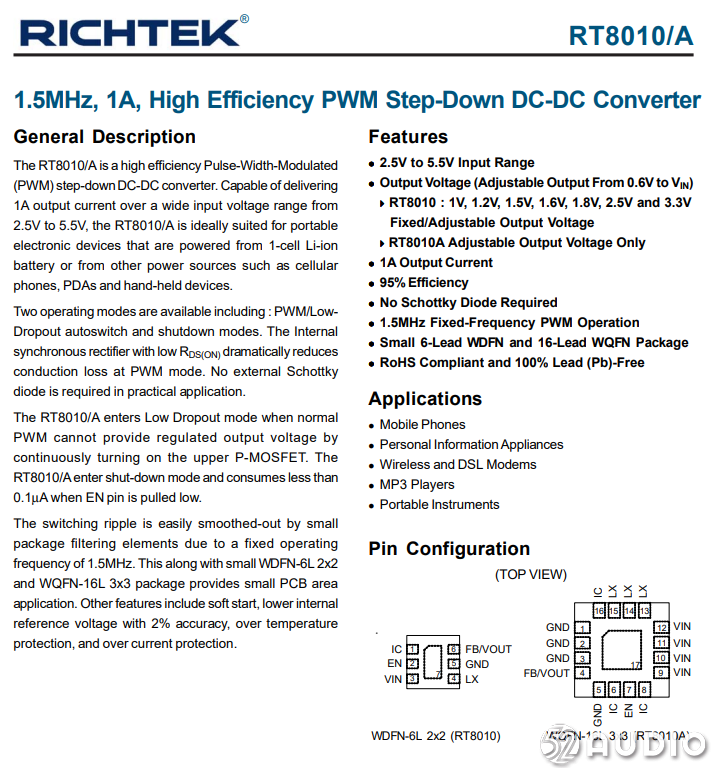
Detailed information on RICHTEK RT8010.
The chip’s external memory.

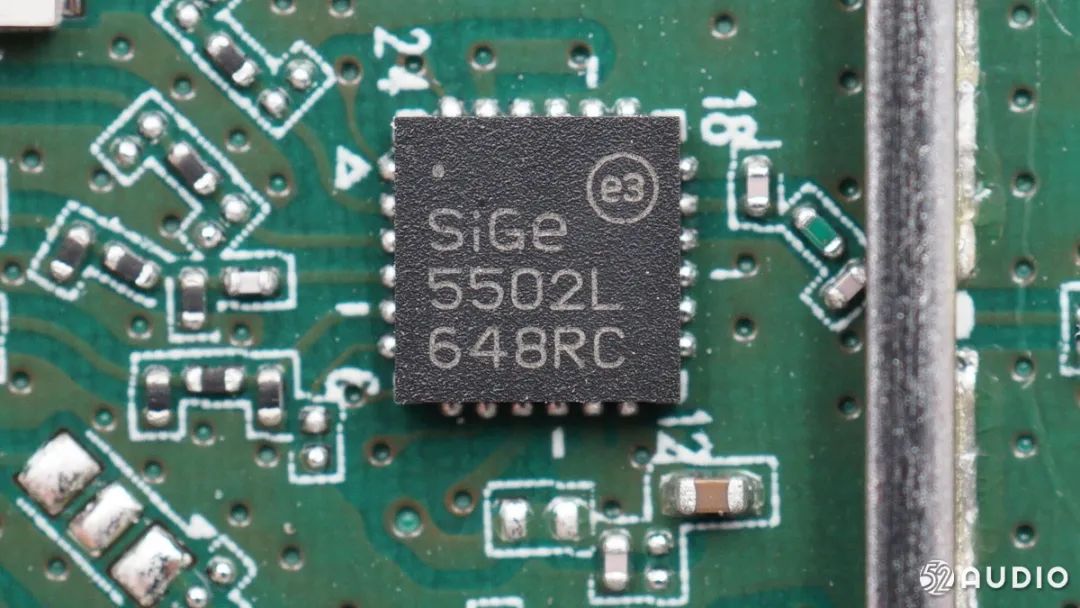
SiGe 5502L, now acquired by Skyworks. The SE5502L is a four-band WLAN frontend that supports 802.11a/b/g/n.
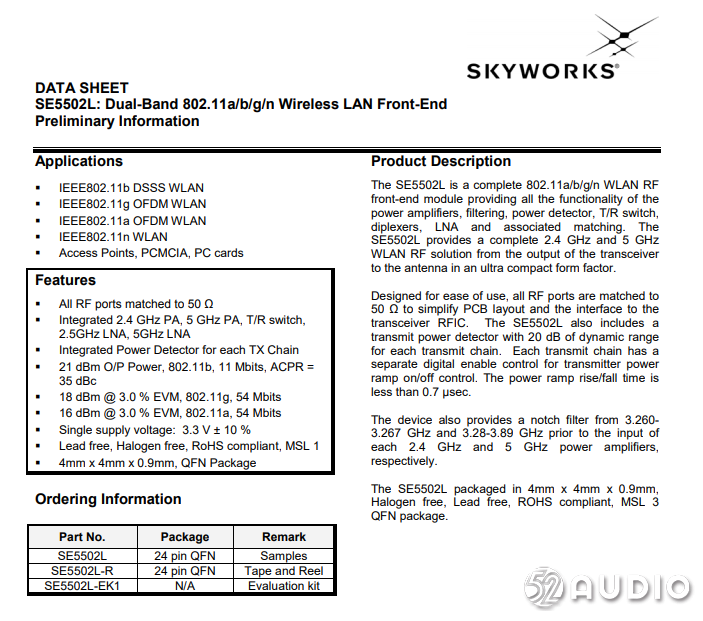
Detailed information on Skyworks SE5502L.
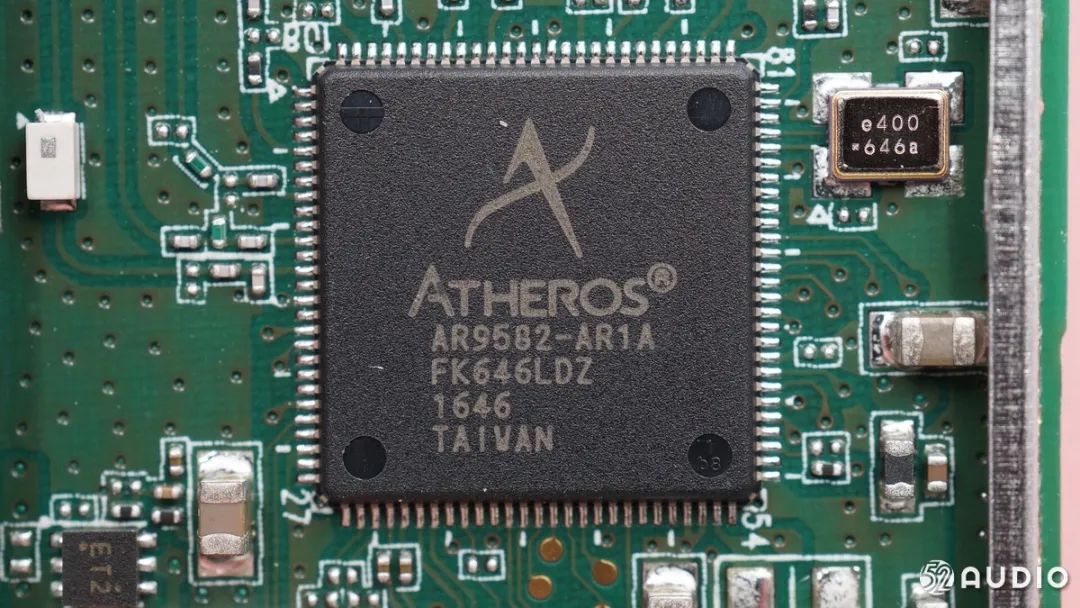
Atheros AR9582 network control chip.
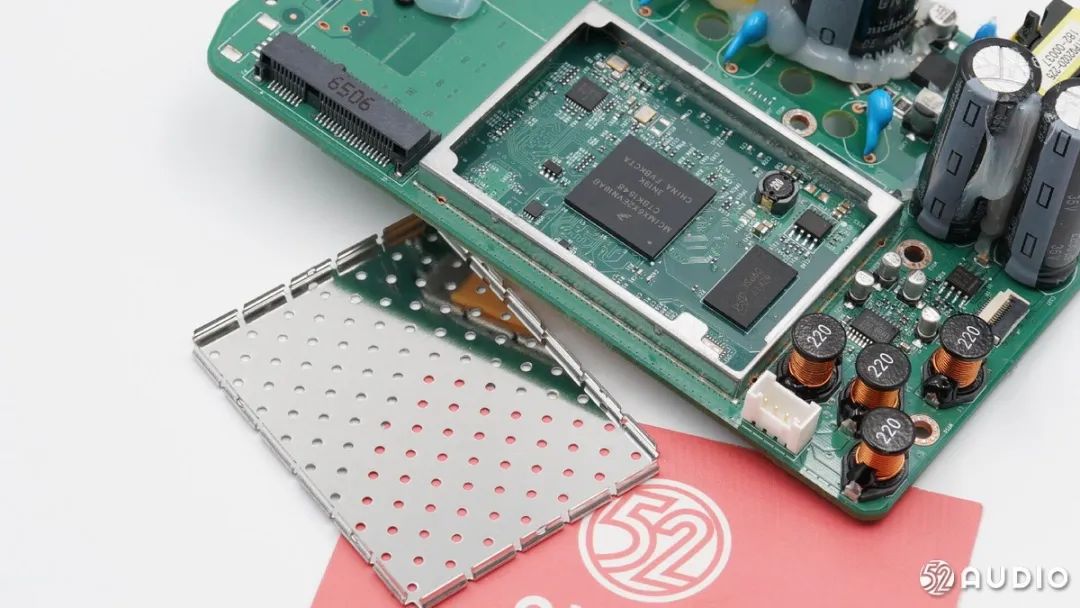
Next, let’s take a look at the ICs under the larger metal cover.
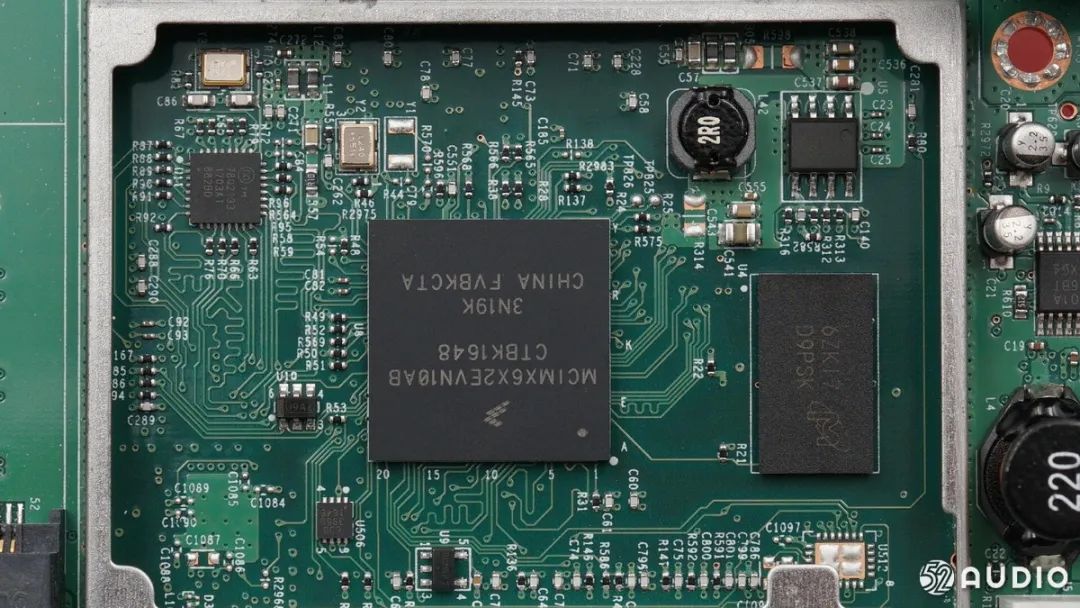
A view of the internal circuit.
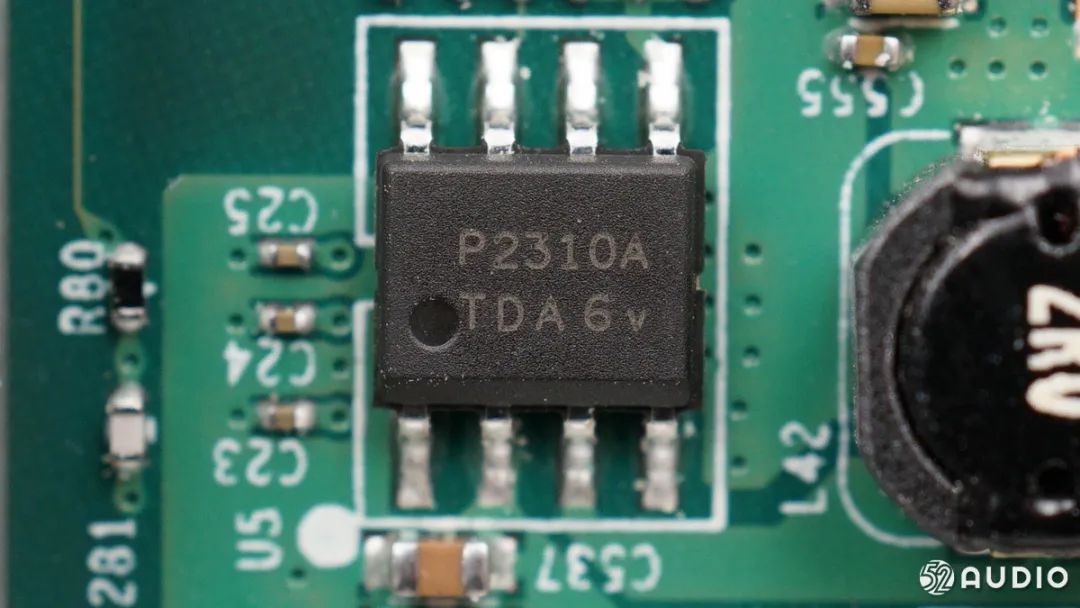
DIODES PAM2310 2A low-noise synchronous rectification buck converter.
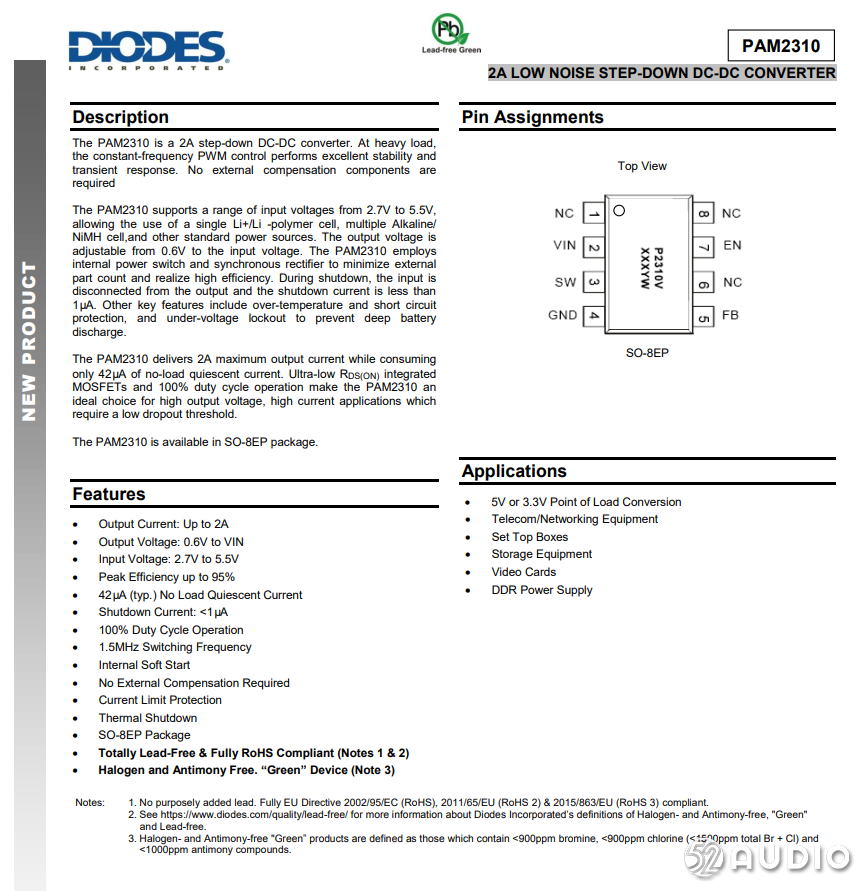
Detailed information on DIODES PAM2310.
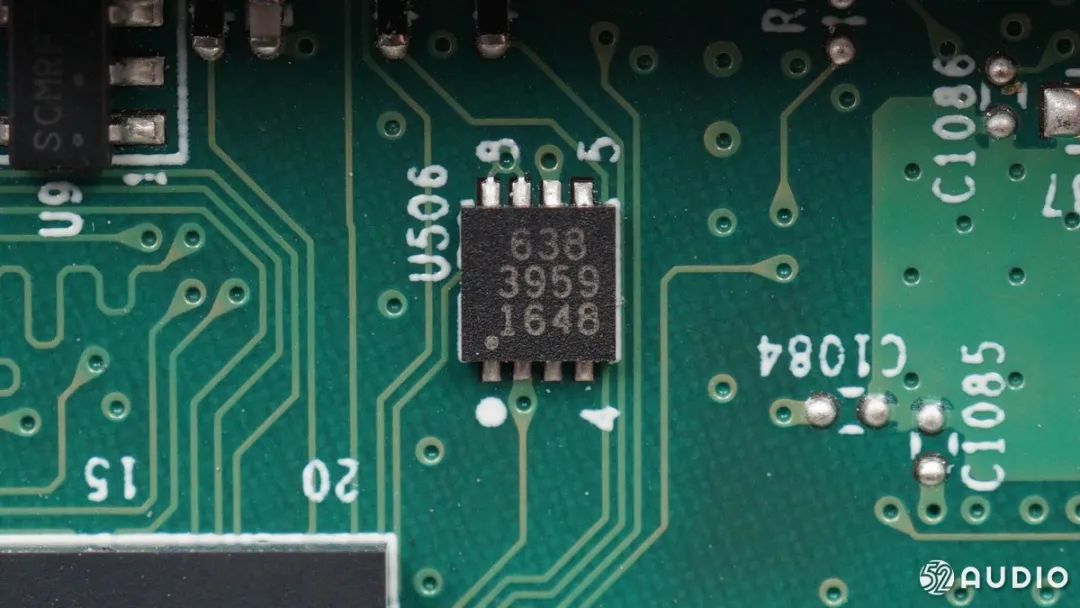
A chip used for authentication and decryption when connecting to Apple devices.
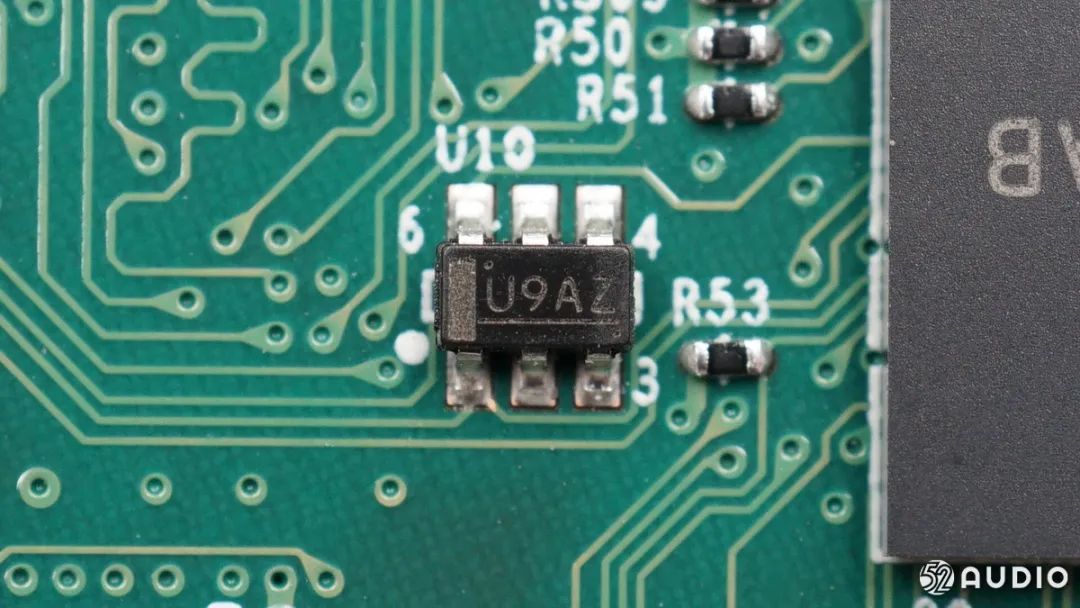
Appliance S5851A two-wire digital temperature sensor used to detect the internal temperature of the speaker.
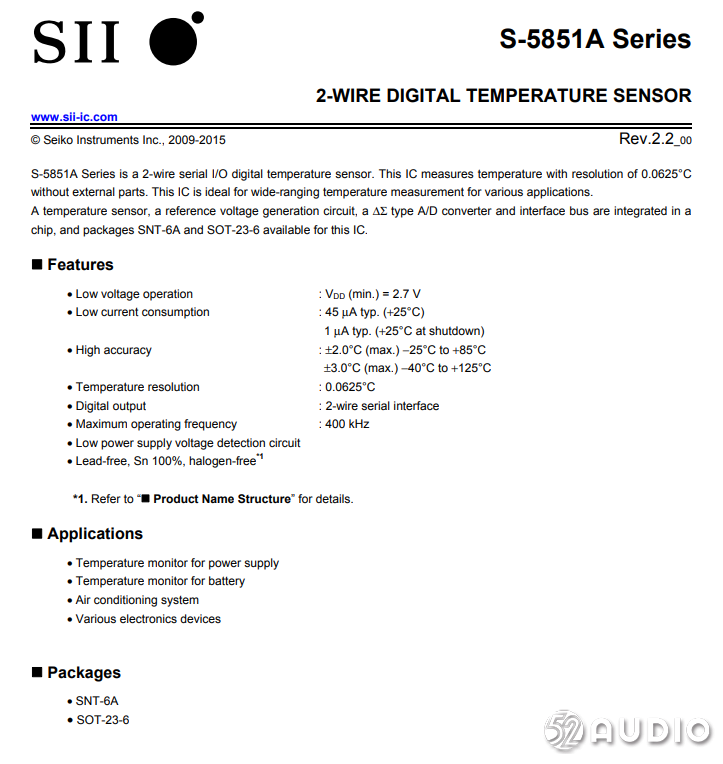
Detailed information on Applin S5851A.
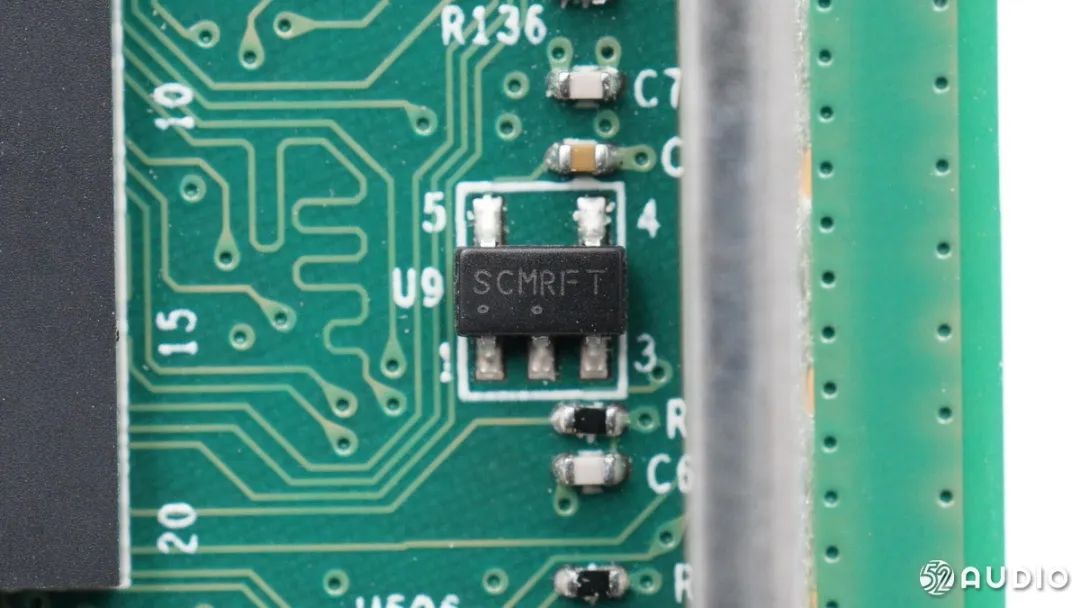
Onsemi NCP303 reset IC used for processor reset operations.
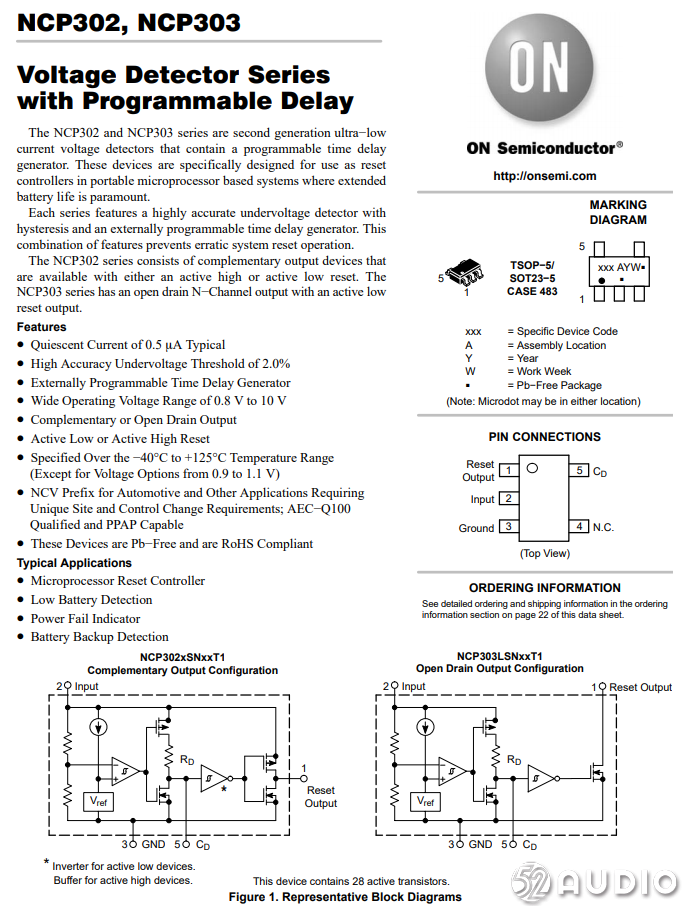
Detailed information on Onsemi NCP303.
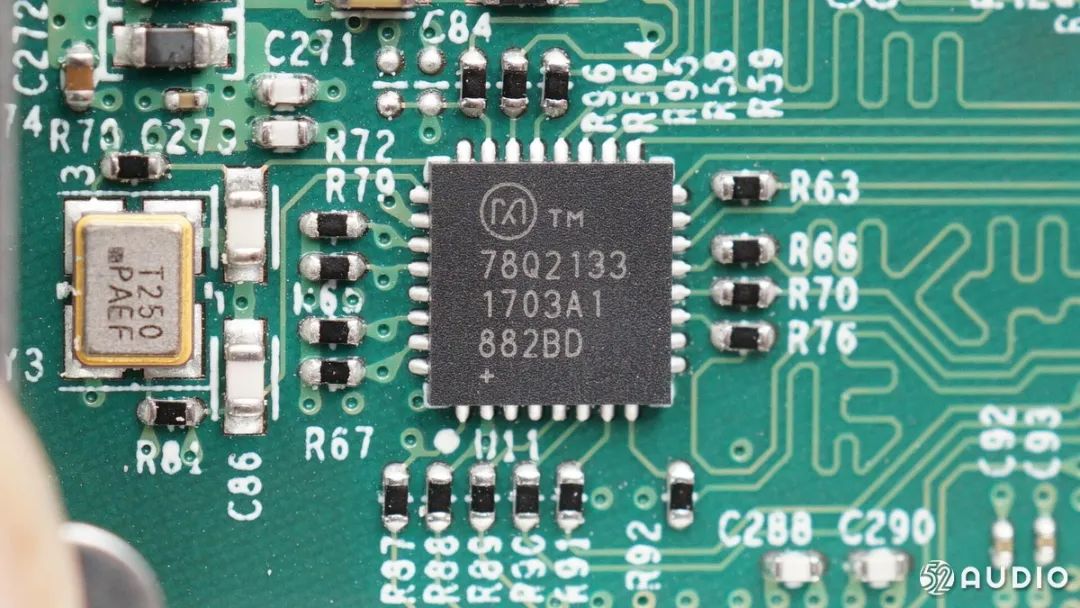
Maxim 78Q2133 10/100M Ethernet PHY transceiver chip, supports operating temperatures of -40~+85°C for wired network connections.
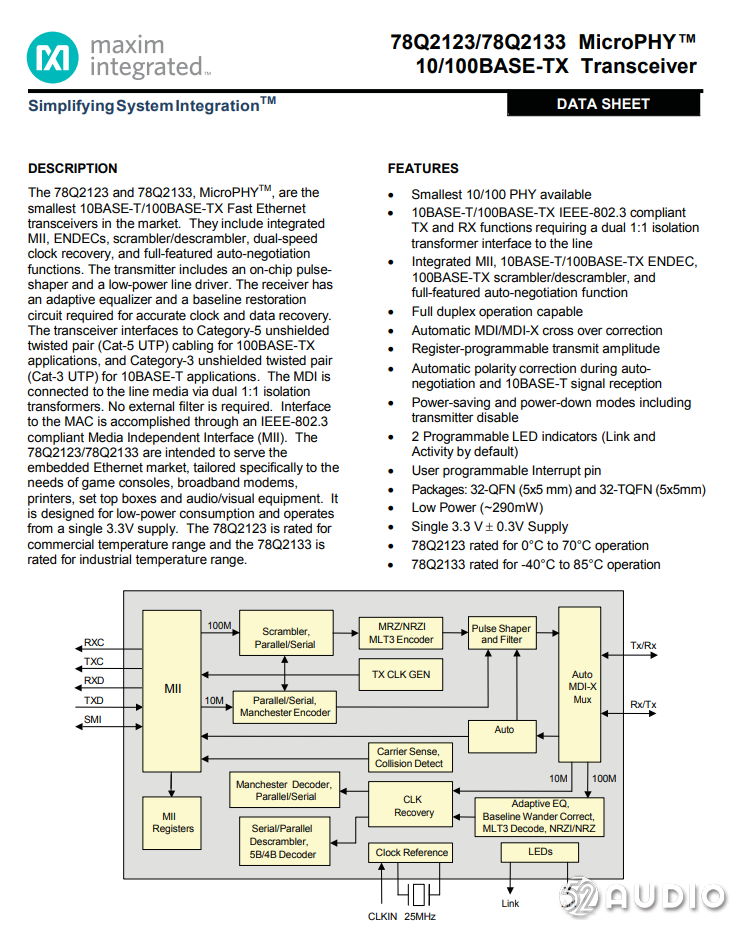
Detailed information on Maxim 78Q2133.
Micron MT41K128M16JT DDR3 1600 256M memory chip.
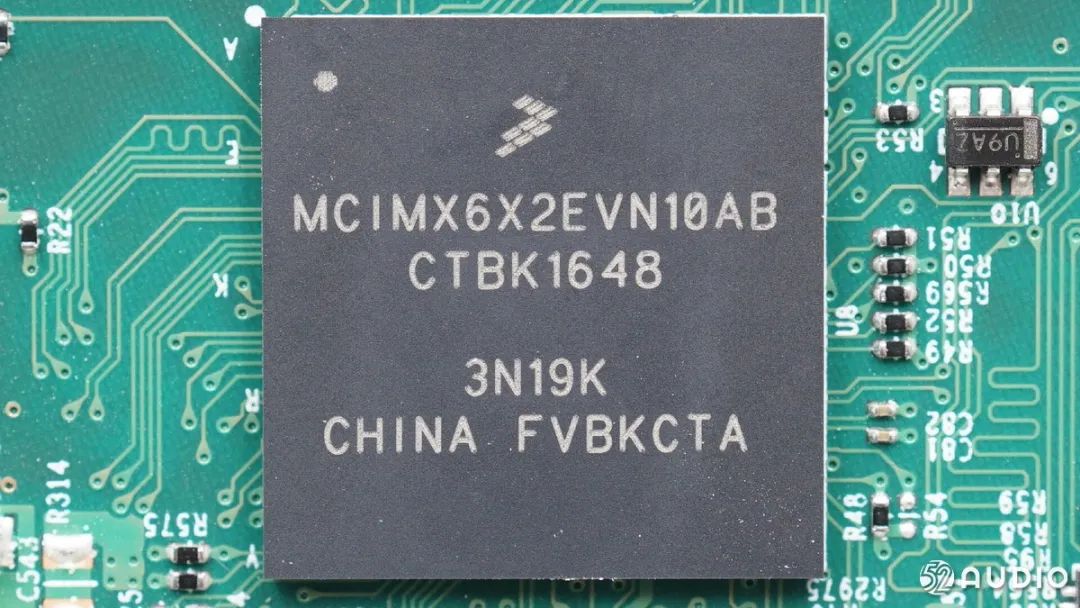
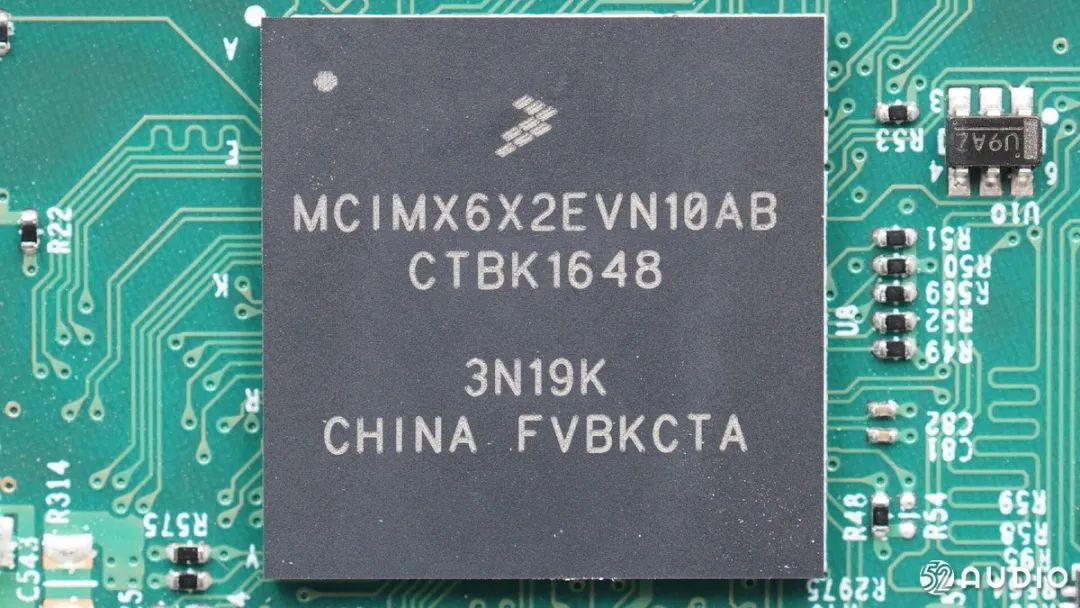
Freescale MCIMX6X2EVN10AB with a built-in 1GHz Cortex-A9 processor and a 227MHz Cortex-M4 processor.
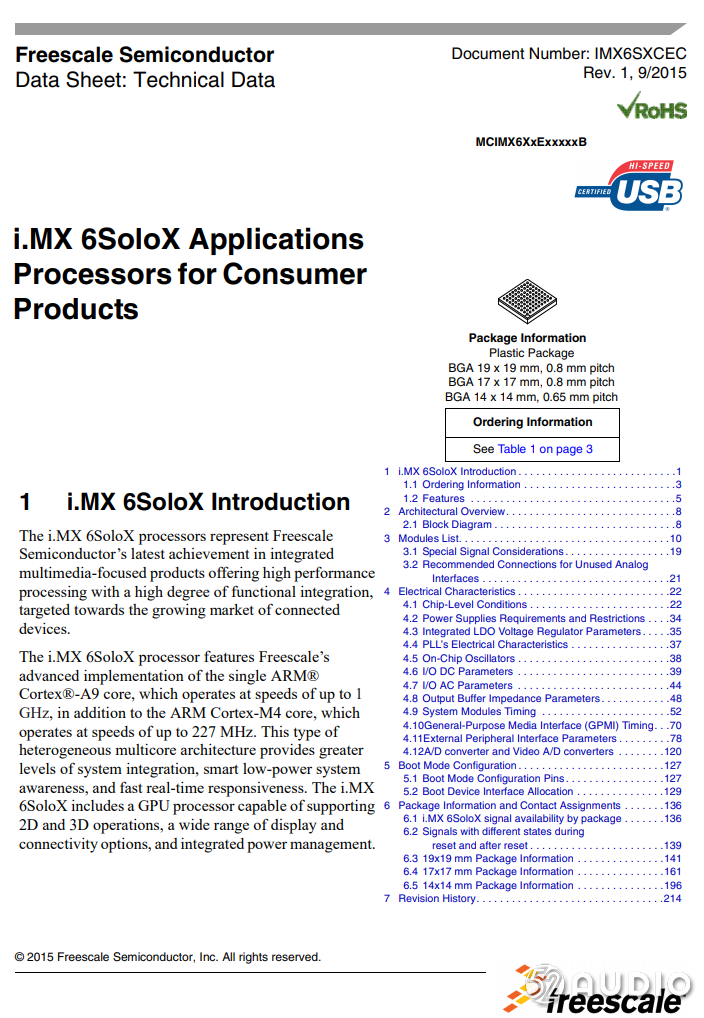
Detailed information on Freescale MCIMX6X2EVN10AB.
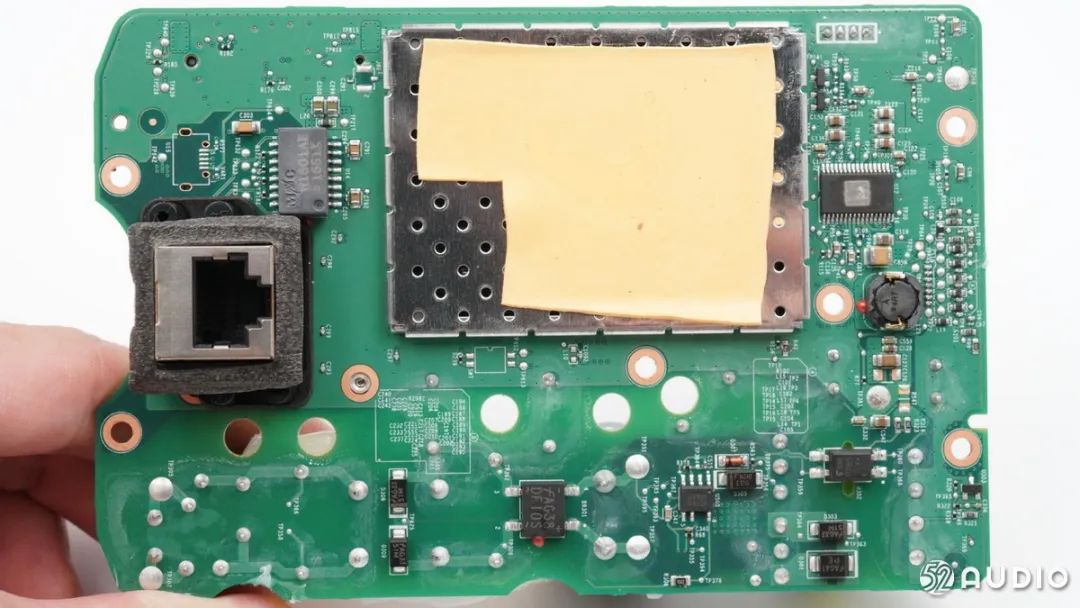
A view of the circuit on the back of the main board.
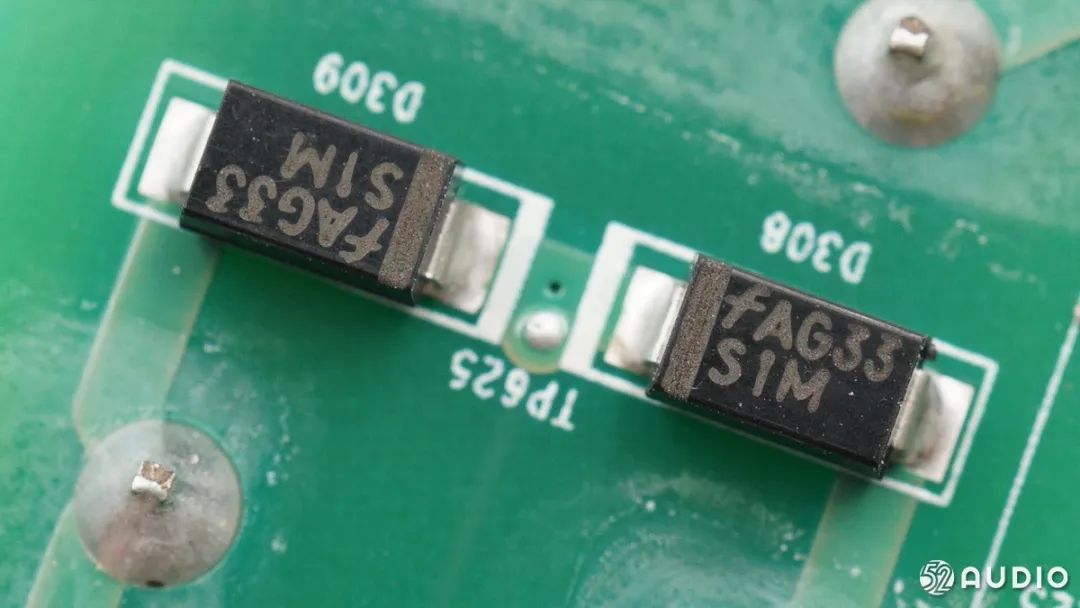
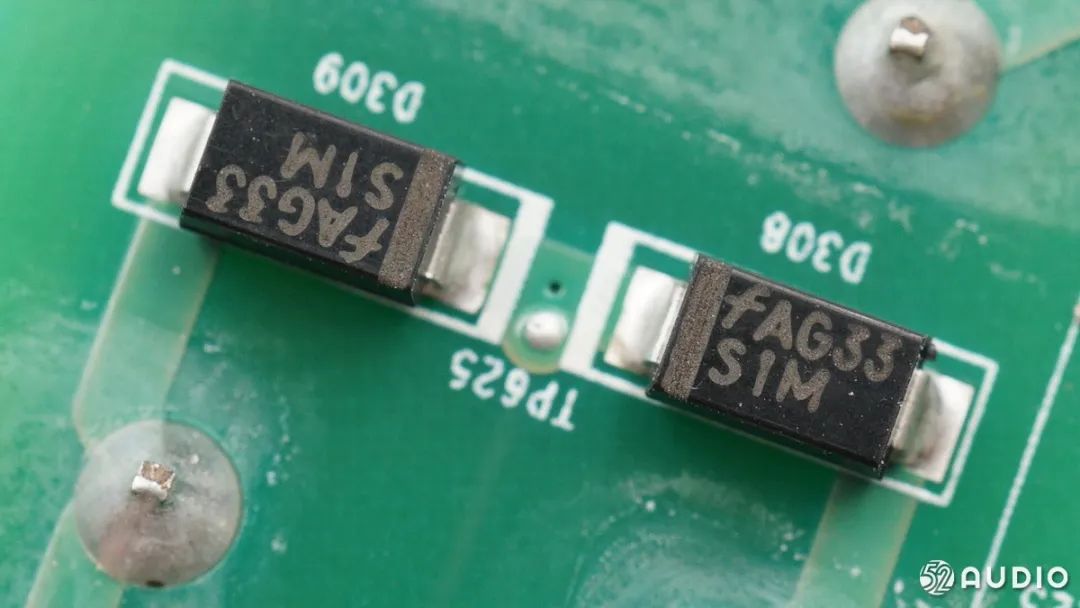
A diode providing AC input signals for the primary PWM chip.
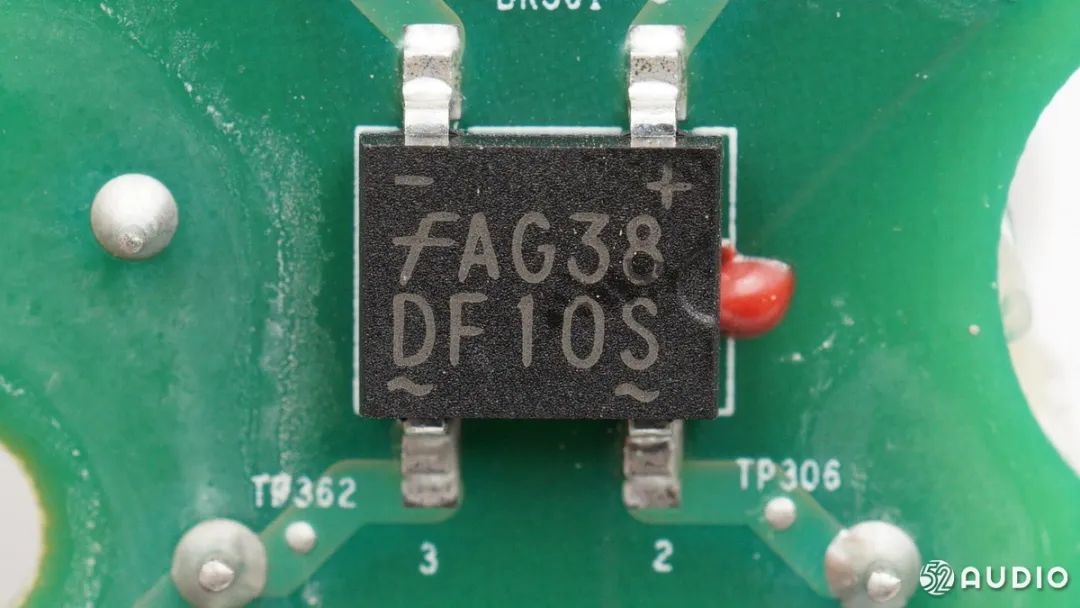
DF10S, 1000V 1A rectifier bridge.
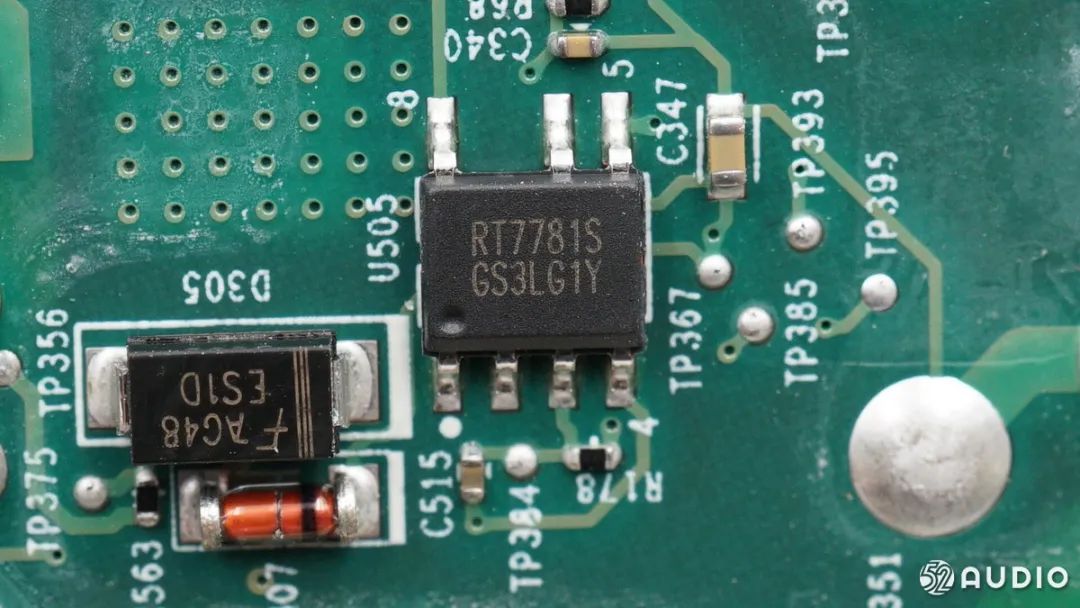
RICHTEK RT7781 flyback PWM controller used for primary control of the switching power supply.
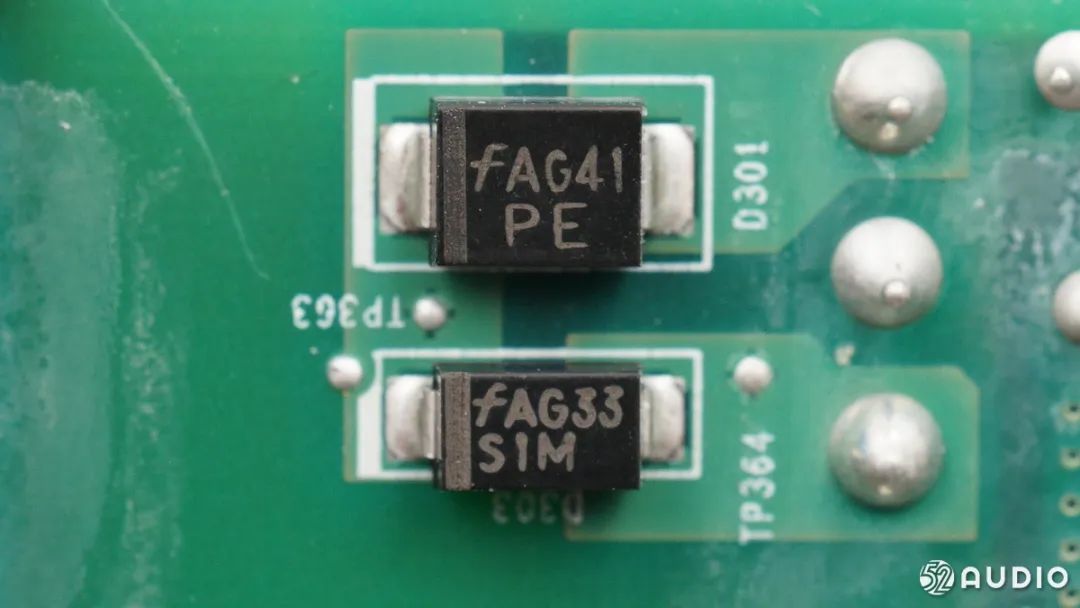
Secondary output rectifier diode for the switching power supply.
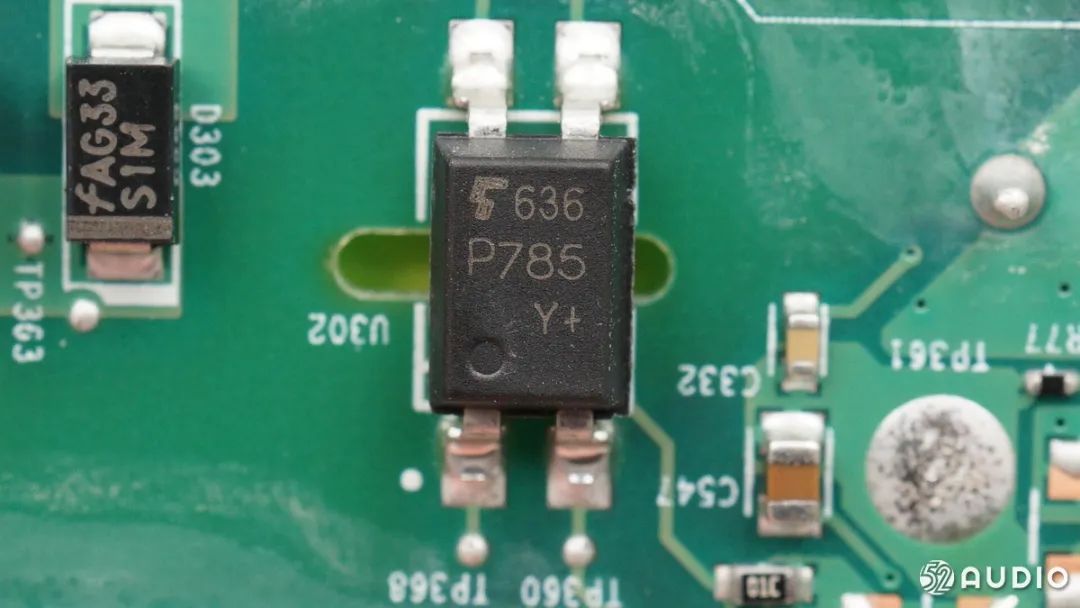
Optocoupler for feedback output voltage.
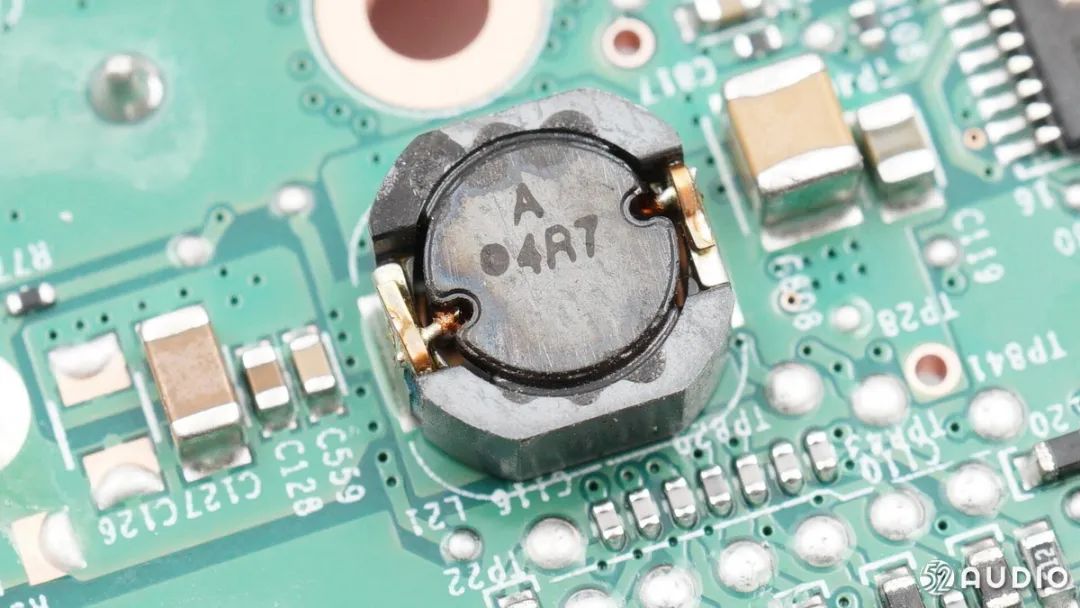
4R7 buck inductor.
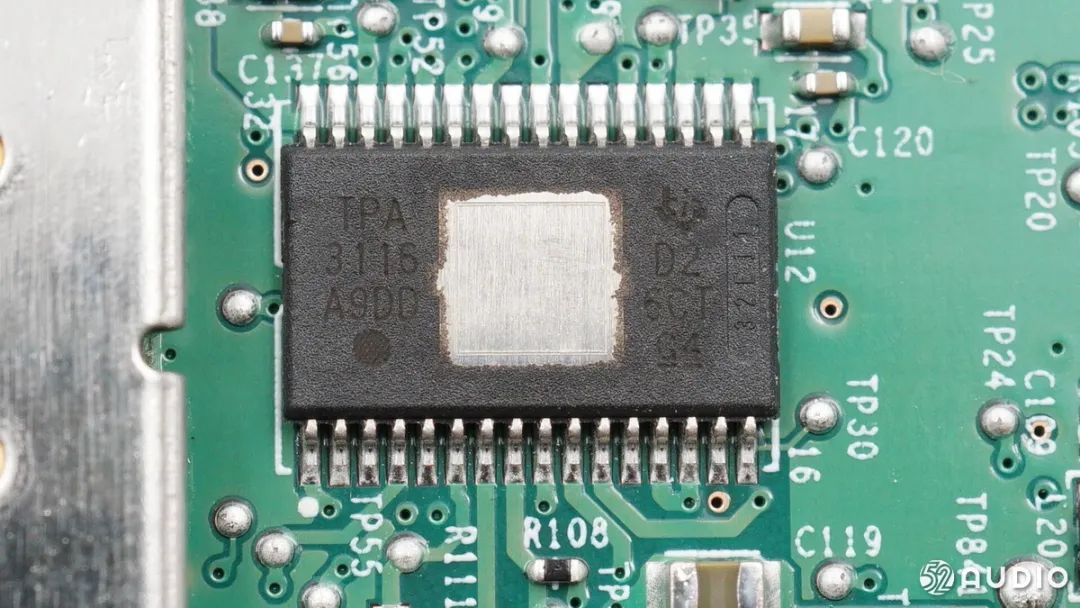
TI TPA3116D2, 50W stereo Class D audio power amplifier.
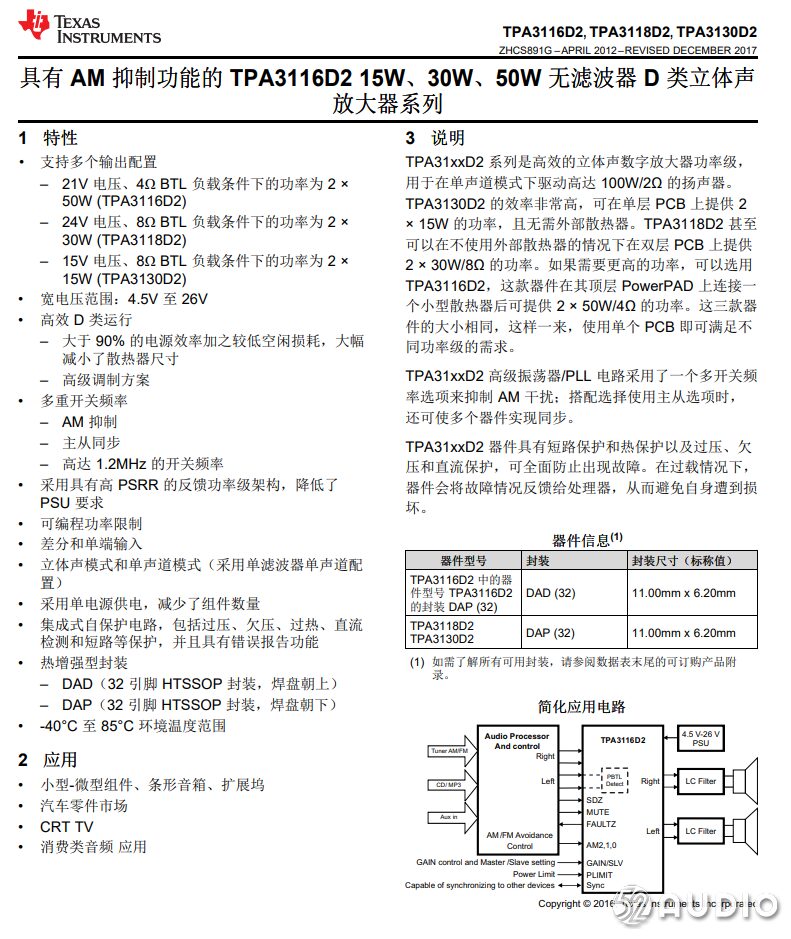
Detailed information on TI TPA3116D2.
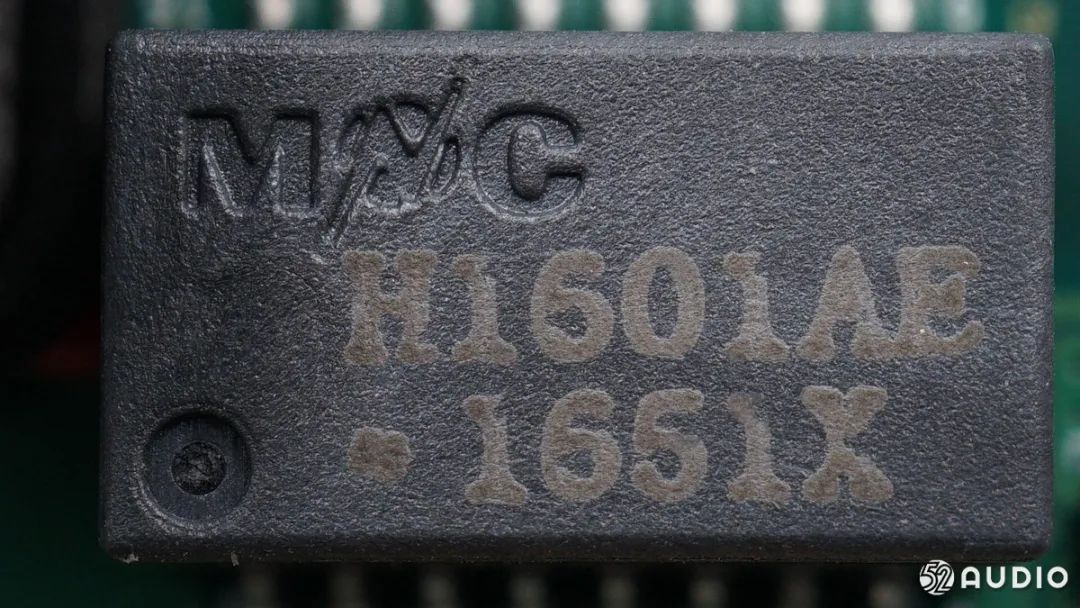
MNC H1601AE network isolation transformer used for wired network isolation.
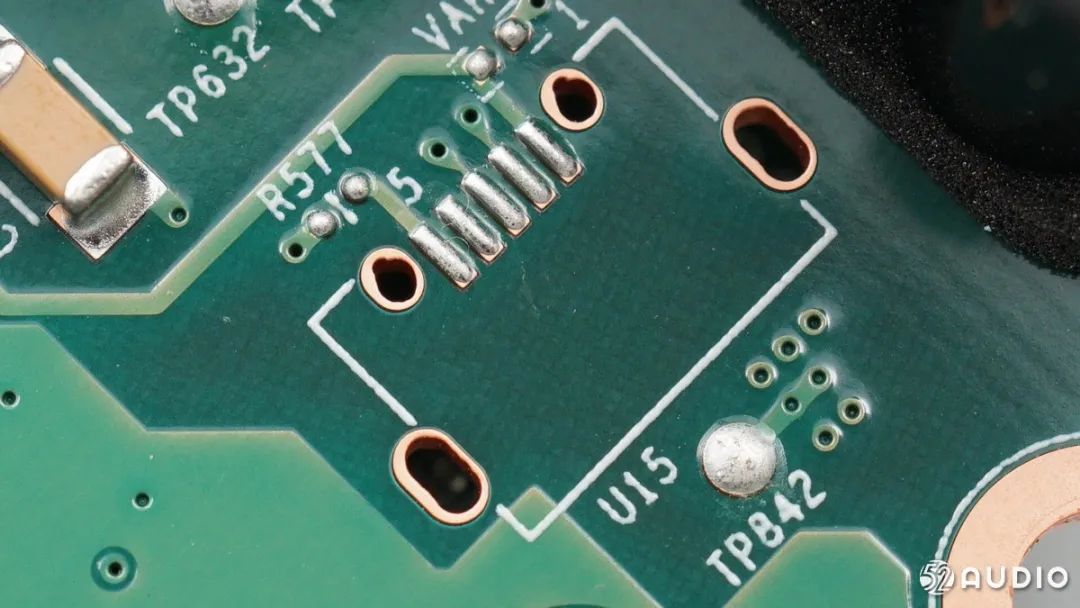
Reserved Micro-USB socket position.
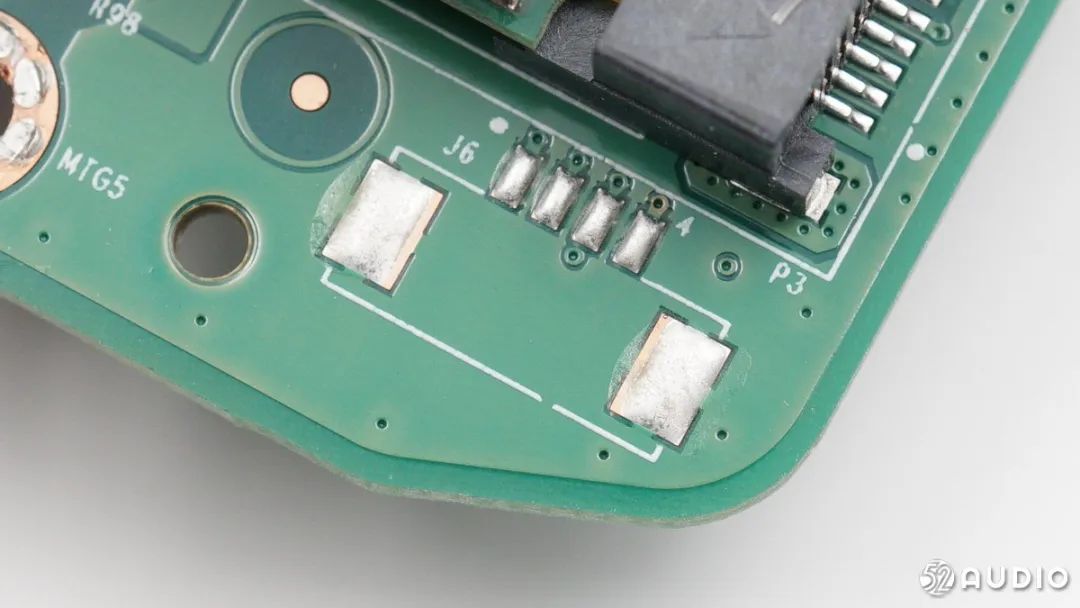
Reserved connector position.
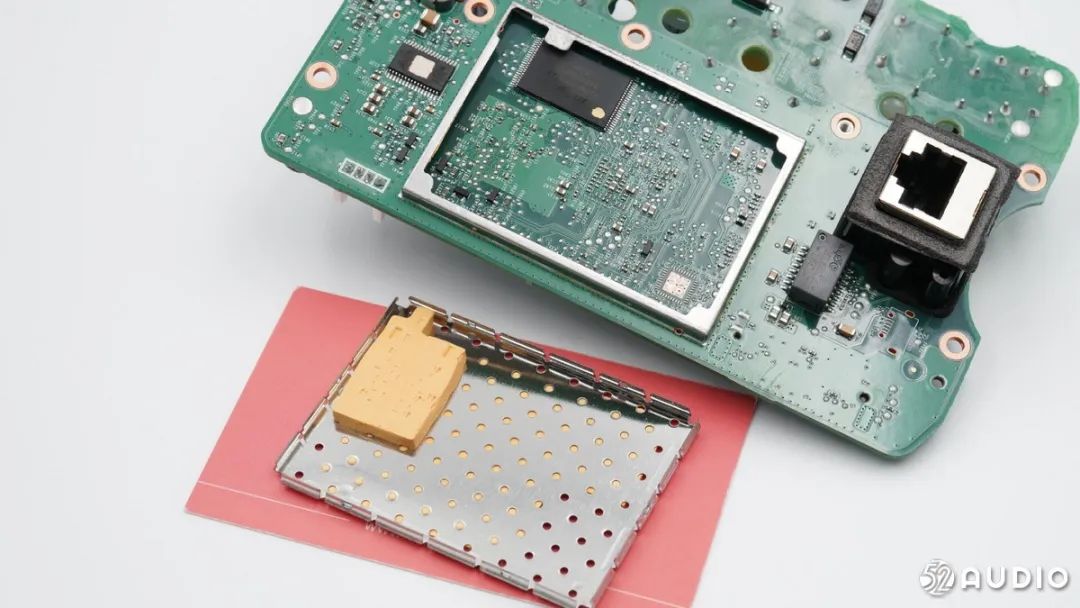
Finally, let’s take a look at the circuits under the metal shielding cover.
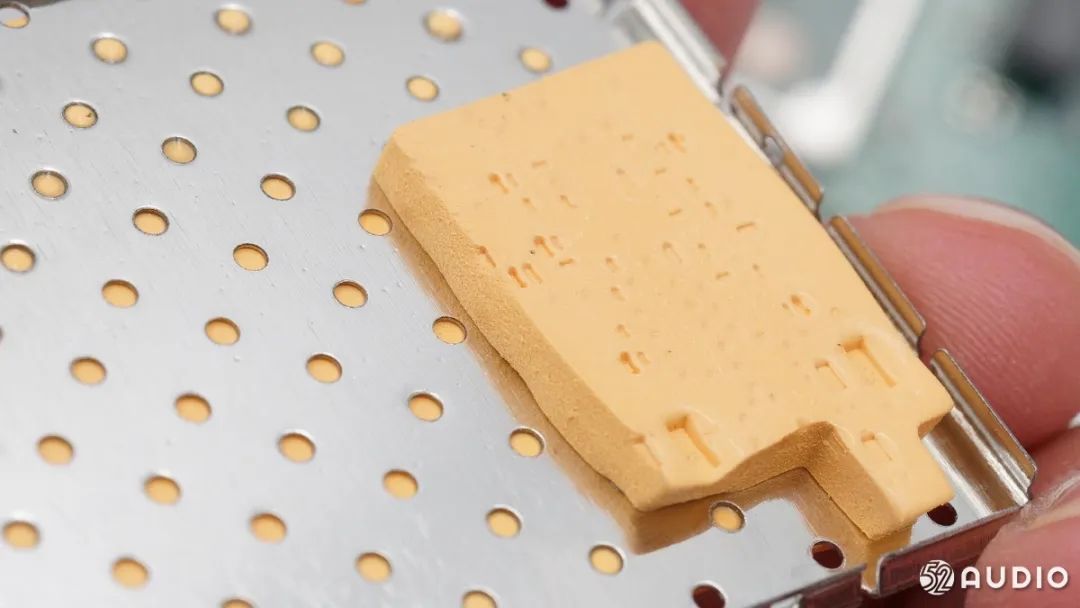
There is a thick thermal pad at the chip position on the inner side of the metal cover.
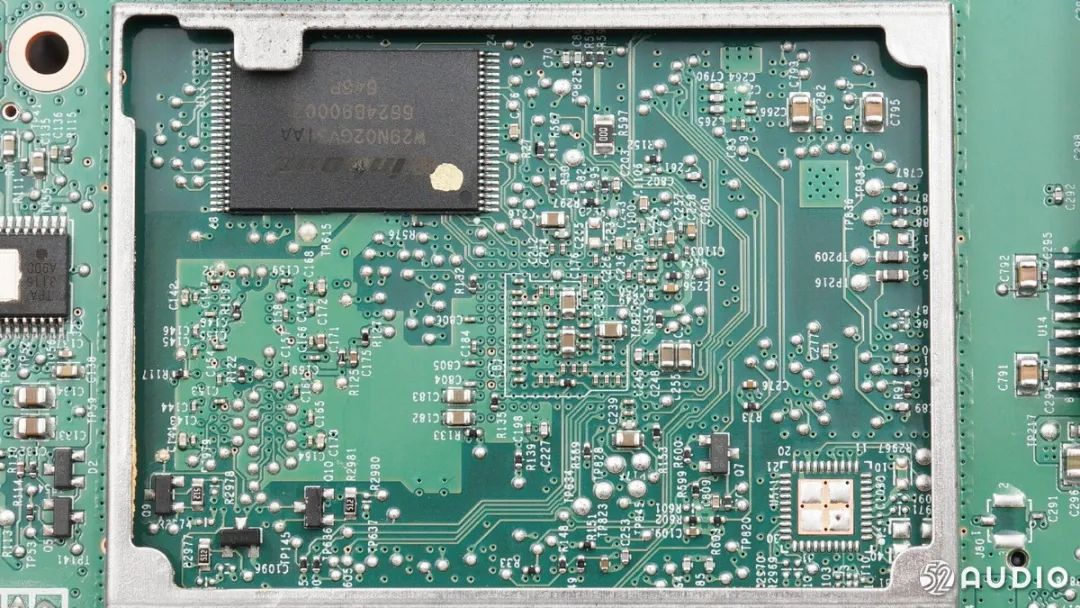
A view of the internal circuit.
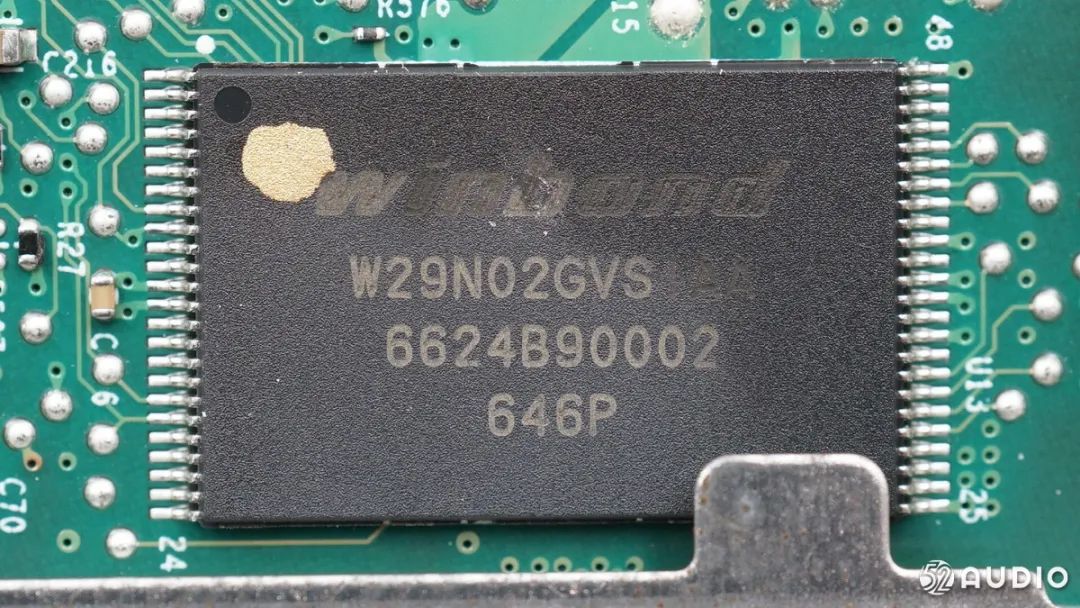
Winbond W29N02GVSIAA 2Gb/256M NAND flash memory.
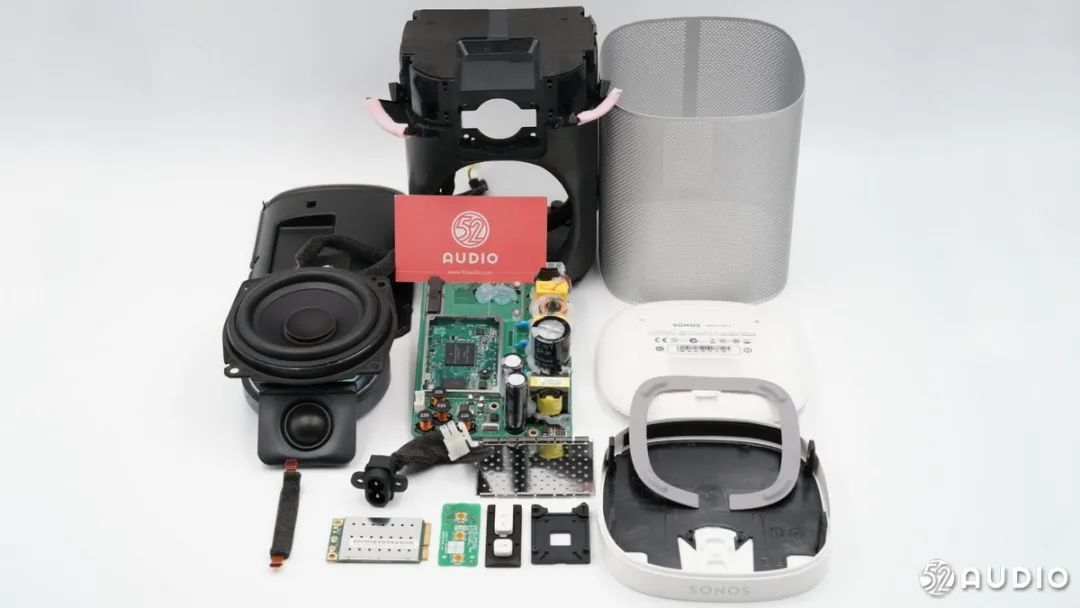
Disassembly family photo.
Summary by I Love Audio
The Sonos Play:1 wireless smart speaker has several significant differences from the Bluetooth speakers previously disassembled by I Love Audio: Firstly, in terms of appearance, the Sonos Play:1 has a threaded hole that supports wall mounting, suitable for various home audio layout options; the internal areas that may cause resonance are wrapped in cushioning foam, and the cavity structure is well-sealed to prevent moisture. Secondly, regarding the power system, the Sonos Play:1 integrates the power adapter’s related circuits into the internal structure of the speaker, using an L-shaped figure-eight plug for power input. The primary side of the switching power supply uses a RICHTEK RT7781 in conjunction with an STMicroelectronics switching MOSFET to achieve voltage reduction. The secondary side uses diodes for rectification to output a fixed voltage, which is then further reduced by multiple power chips to supply power independently to the control circuit, wireless module, wired module, etc. Thirdly, in terms of connectivity, the Sonos Play:1 connects to the network via 2.4GHz WiFi or Ethernet, and multiple speakers can pair via WiFi. It uses a MINI PCI-E interface wireless network card, similar to those in laptops, with the chip being Atheros AR9582; there are surface-mounted WiFi antennas on both the top and bottom of the body to expand the signal transmission range. In terms of wired networking, the Sonos Play:1 uses the Maxim 78Q2133 10/100M Ethernet PHY transceiver chip. For the speaker section, the Sonos Play:1 combines a high-frequency driver and a mid-bass driver, with high-quality driver units powered by the TI TPA3116D2, a 50W stereo Class D audio power amplifier. Two speakers can form a stereo pair and can be used as rear surround speakers in a home theater system. Additionally, the Sonos Play:1 uses Freescale’s MCIMX6X2EVN10AB main control chip, which has a built-in 1GHz Cortex-A9 processor and a 227MHz Cortex-M4 processor, with 256M flash and 256M memory, ensuring the stability of the system operation. Overall, the Sonos Play:1 is an outstanding wireless smart speaker with a unique appearance and solid internal design and craftsmanship, demonstrating Sonos’s technical accumulation and strength in the wireless audio field.
The annual report on the audio industry is continuously updated. If you want to learn about the latest trends in the consumer audio industry, feel free to follow I Love Audio 😀

Click on the blue words to learn about the following hot topics.
You can also reply with the following keywords in the I Love Audio WeChat backend to get special topics.
「Technical Topics」
LE Audio、TWS、Noise Reduction、Bone Conduction、HWA、Smart Speaker Reports、Headphone Reports、Hearing Aids、Bluetooth Market Reports
「Disassembly Summary」
300 Disassemblies、TWS Headphone Disassemblies、Charging Case Disassemblies、Smart Speaker Disassemblies、Neckband Headphone Disassemblies
「Quality Resources」
TWS Headphone High-End Chips、TWS Headphone Chips、Charging Case Chips (Wired)、Charging Case Chips (Wireless)、TWS Headphone Batteries、Charging Case Batteries
「Chip Manufacturers」
Qualcomm、Realtek、Silicon Labs、Nordic、Amphenol、Zhongke Lianxun
Jieli、LPS Micro、Si YuanSemiconductors、Shengsheng Micro
「Battery Manufacturers」
Superpoly、Penghui、Novi
「Brand Zone」
Apple、Huawei、SONY、OPPO、Edifier、Bird、1MORE、Baidu、Xiaomi、Tmall Genie
「Exhibition Reports」
Bluetooth Headset Asia Exhibition、CES、ComputeX、Global Sources、Hong Kong Electronics Fair、Apple Fan Carnival、Institute of Acoustics, CAS Summit、Bluetooth Asia、Realtek Press Conference、Unisoc Press Conference
「Potato Interviews」
Issue 1、Issue 2、Issue 3、Issue 4、Issue 5、Issue 6、Issue 7、Issue 8、Issue 9、Issue 10、Issue 11、Issue 12、Issue 13
「Potato Factory Tour」
Amphenol、Sibic、Yours、Shengyang
Content is continuously updated
Business cooperation contact: [email protected]


Be brave, share your thoughts in the comments!