The smart home system utilizes a multitude of IoT devices (such as temperature and humidity sensors, security systems, lighting systems) to monitor the internal state of the home in real-time, achieving intelligent adjustments and human-machine interaction. With the development of IoT technology, its application scope, data scale, and market share will further expand, making intelligent linkage between smart home devices increasingly difficult. Additionally, due to the privacy of home data, there are certain security issues regarding user data being uploaded to the cloud for processing.
Raspberry Pi 3b+ and higher versions
The Raspberry Pi 3 Model B+ (https://www.raspberrypi.org/products/raspberry-pi-3-model-b-plus/) is a microcomputer motherboard based on ARM architecture, using SD/MicroSD cards for storage. This motherboard provides USB and Ethernet interfaces, allowing connection of keyboards, mice, and network cables. The motherboard has the basic functions of a PC, and the Raspberry Pi integrates Wi-Fi, Bluetooth, and a large number of GPIOs, making it an ideal choice for a smart home gateway.
EMQ X Edge
The communication protocols between smart home devices include MQTT, Wi-Fi, Bluetooth, etc. Among them, the MQTT protocol (https://www.emqx.io/cn/mqtt) is an IoT communication protocol based on the publish/subscribe model. It is simple to implement, supports QoS, and has small message sizes. In this article, we will use the MQTT protocol as the communication protocol between smart home devices.
Due to the limited memory and processing capacity of the Raspberry Pi, we choose the open-source EMQ X Edge (https://www.emqx.io/cn/products/edge) as the MQTT broker. EMQ X Edge is a lightweight IoT edge computing message middleware that supports deployment on resource-constrained IoT edge hardware.
EMQ X Kuiper
Smart home devices have different data transmission formats, and the data is volatile. We need to process the data reported by the devices. In this article, we will use the open-source EMQ X Kuiper (https://www.emqx.io/cn/products/kuiper) to perform edge processing of smart home device data. EMQ X Kuiper is a lightweight edge stream processing engine based on SQL that can run on resource-constrained edge devices.
By analyzing various data from smart home devices in real-time, we can achieve instant status management and control of the devices.
Other Components
-
BH1750FVI Light Intensity Sensor
-
LED
-
330 Ω Resistor
-
Breadboard, Jumper Wires

Circuit Connection

Raspberry Pi Configuration
We choose raspbian 8 as the Raspberry Pi operating system and python 3 as the project programming language
# Create a project directory named smart-home-hubsmkdir ~/smart-home-hubsEMQ X Edge Installation and Running
$ cd ~/smart-home-hubs# Download the package$ wget https://www.emqx.io/downloads/edge/v4.1.0/emqx-edge-raspbian8-v4.1.0.zip$ unzip emqx-edge-raspbian8-v4.1.0.zip$ cd ./emqx# Run EMQ X Edge$ ./bin/emqx startEMQ X Kuiper Installation and Running
$ cd ~/smart-home-hubs# Download the package$ wget https://github.com/emqx/kuiper/releases/download/0.4.2/kuiper-0.4.2-linux-armv7l.zip$ unzip kuiper-0.4.2-linux-armv7l.zip$ mv kuiper-0.4.2-linux-armv7l ./kuiper$ cd ./kuiper# Create a rules directory to store rule files$ mkdir ./rules# Run EMQ X Kuiper$ ./bin/serverBH1750FVI Light Sensor Data Upload
Write code to read and calculate the light intensity data from the BH1750FVI sensor, and publish the light intensity data to the smartHomeHubs/light topic at a frequency of once per second.
# gy30.pyimport jsonimport time
import smbusfrom paho.mqtt import client as mqtt

# BH1750FVI configDEVICE = 0x23  # Default device I2C addressPOWER_DOWN = 0x00POWER_ON = 0x01RESET = 0x07CONTINUOUS_LOW_RES_MODE = 0x13CONTINUOUS_HIGH_RES_MODE_1 = 0x10CONTINUOUS_HIGH_RES_MODE_2 = 0x11ONE_TIME_HIGH_RES_MODE_1 = 0x20ONE_TIME_HIGH_RES_MODE_2 = 0x21ONE_TIME_LOW_RES_MODE = 0x23bus = smbus.SMBus(1)
# MQTT broker configbroker = '127.0.0.1'port = 1883topic = 'smartHomeHubs/light'
def read_light():    data = bus.read_i2c_block_data(DEVICE, ONE_TIME_HIGH_RES_MODE_1)    light_level = round((data[1] + (256 * data[0])) / 1.2, 2)    return light_level
def connect_mqtt():    client = mqtt.Client(client_id='light_01')    client.connect(host=broker, port=port)    return client
def run():    mqtt_client = connect_mqtt()    while True:        light_level = read_light()        publish_msg = {'lightLevel': light_level}        mqtt_client.publish(            topic,            payload=json.dumps(publish_msg)        )        print(publish_msg)        time.sleep(1)
if __name__ == "__main__":    run()
Configure EMQ X Kuiper Stream Processing Rules
We will create a stream named smartHomeHubs on EMQ X Kuiper and configure rules to perform real-time analysis of light intensity data to control the LED lights.
In this article, we will calculate the average light intensity, and when the average light intensity is less than 55 for 5 seconds, we will turn on the LED (and turn it off when it is greater than 55).
-
Create Stream
$ cd ~/smart-home-hubs/kuiper
$ ./bin/cli create stream smartHomeHubs '(lightLevel float) WITH (FORMAT="JSON", DATASOURCE="smartHomeHubs/light")'-
Write LED On Rule (./rules/onLed.rule)
When the average light intensity is less than 55 for 5 seconds, send a message
"{\"status\": \"on\"}"to thesmartHomeHubs/ledtopic to turn on the LED.
{ "sql":"SELECT avg(lightLevel) as avg_light from smartHomeHubs group by TUMBLINGWINDOW(ss, 5) having avg_light < 55;", "actions":[ { "mqtt":{ "server":"tcp://127.0.0.1:1883", "topic":"smartHomeHubs/led", "sendSingle":true, "dataTemplate": "{\"status\": \"on\"}" } } ]}-
Write LED Off Rule (./rules/offLed.rule)
When the average light intensity is greater than 55 for 5 seconds, send a message
"{\"status\": \"off\"}"to thesmartHomeHubs/ledtopic to turn off the LED.
{ "sql":"SELECT avg(lightLevel) as avg_light from smartHomeHubs group by TUMBLINGWINDOW(ss, 5) having avg_light > 55;", "actions":[ { "mqtt":{ "server":"tcp://127.0.0.1:1883", "topic":"smartHomeHubs/led", "sendSingle":true, "dataTemplate": "{\"status\": \"off\"}" } } ]}-
Add Rules
$ ./bin/cli create rule onLed -f ./rules/onLed.rule $ ./bin/cli create rule onLed -f ./rules/offLed.rule-
View Rules
$ ./bin/cli show rules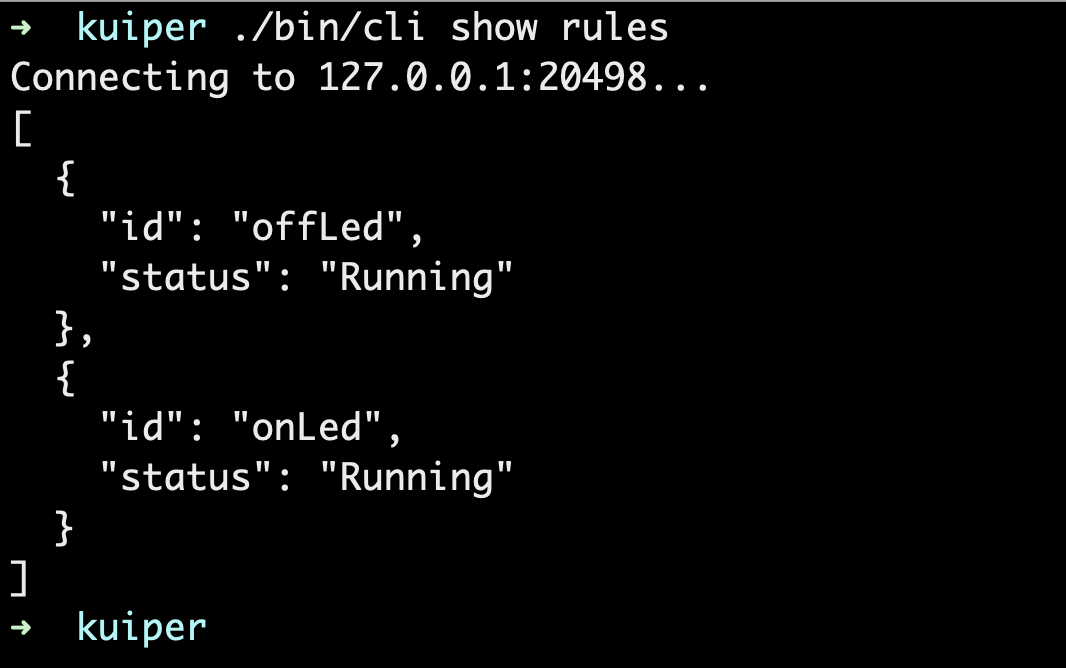
LED Light Control
Write code to connect to EMQ X Edge and subscribe to the smartHomeHubs/led topic. Listen to the subscribed MQTT message content, turning on the LED when the status is on and turning it off when the status is off.
# led.pyimport paho.mqtt.client as mqttimport RPi.GPIO as GPIOimport json

# MQTT broker configbroker = '127.0.0.1'port = 1883topic = 'smartHomeHubs/led'
def on_connect(client, userdata, flags, rc):    print("Connecting to the MQTT broker...")    if rc == 0:        print("Connection success")    else:        print("Connected with result code "+str(rc))    client.subscribe(topic)
def on_message(client, userdata, msg):    payload = json.loads(msg.payload)    led_status = payload.get('status')    gpio_status = GPIO.input(4)    if led_status == 'on' and gpio_status == 0:        GPIO.output(4, True)        print('LED on')    elif led_status == 'off' and gpio_status == 1:        GPIO.output(4, False)        print('LED off')    else:        pass
def run():    # connect MQTT broker    client = mqtt.Client()    client.on_connect = on_connect    client.on_message = on_message    client.connect(broker, 1883, 60)    # set Raspberry Pi GPIO pin    GPIO.setmode(GPIO.BCM)    GPIO.setwarnings(False)    GPIO.setup(4, GPIO.OUT)    try:        client.loop_forever()    except KeyboardInterrupt:        GPIO.cleanup()
if __name__ == "__main__":    run()
-
python gy30.pyto obtain light data and report the data to the smartHomeHubs/light topic.
-
python led.pyto subscribe to the smartHomeHubs/led topic and listen for LED control messages.
-
When we manually lower or raise the light level, we can see that the LED light turns on and off simultaneously.

Thus, we have successfully built a smart home gateway based on Raspberry Pi + EMQ X Edge + EMQ X Kuiper.
We used Raspberry Pi to provide rich external communication interfaces for the gateway, used EMQ X Edge to provide communication functions between devices, and used EMQ X Kuiper to provide data processing and analysis functions for the gateway.
Afterwards, we used the light sensor to obtain light intensity and control the LED’s on and off based on the light intensity. Throughout the process, all data was processed and analyzed locally, reducing the risk of private household data leakage.

Click “Read Original” to learn more
↓↓↓