1.
Document Overview
This document aims to provide system administrators or operations personnel with an operational guide for deploying Windows Server 2016 in a VMware virtualization environment. The content covers the entire process from creating a virtual machine to completing the initial installation of the operating system.
2.Scope of Application
This guide is applicable to mainstream VMware virtualization platforms such as VMware vSphere and VMware Workstation Pro.
3.Preparation Before Installation
3.1Deployment Platform
|
Component (VMware Virtualization) |
IP Address |
Version |
|
ESXi01 |
192.168.1.1 |
7.0.3(22348816) |
|
ESXi02 |
192.168.1.2 |
7.0.3(22348816) |
|
ESXi03 |
192.168.1.3 |
7.0.3(22348816) |
|
vCenter |
192.168.2.1 |
8.0.3(24022515) |
3.2Installation Media
|
System Name |
Image |
Version |
|
Windows Server 2016 |
Windows Server 2016 (Updated Feb 2018) (x64) – DVD (Chinese-Simplified) |
2016_updated_feb_2018_x64_dvd_11636703 |
3.3System Planning
The system installation requirements should be confirmed as follows.
|
Operating System Version |
Windows Server 2016 |
|||
|
Language |
Chinese |
|||
|
Keyboard |
US |
|||
|
Administrator Password |
/ |
|||
|
Other Users/Passwords |
/ |
|||
|
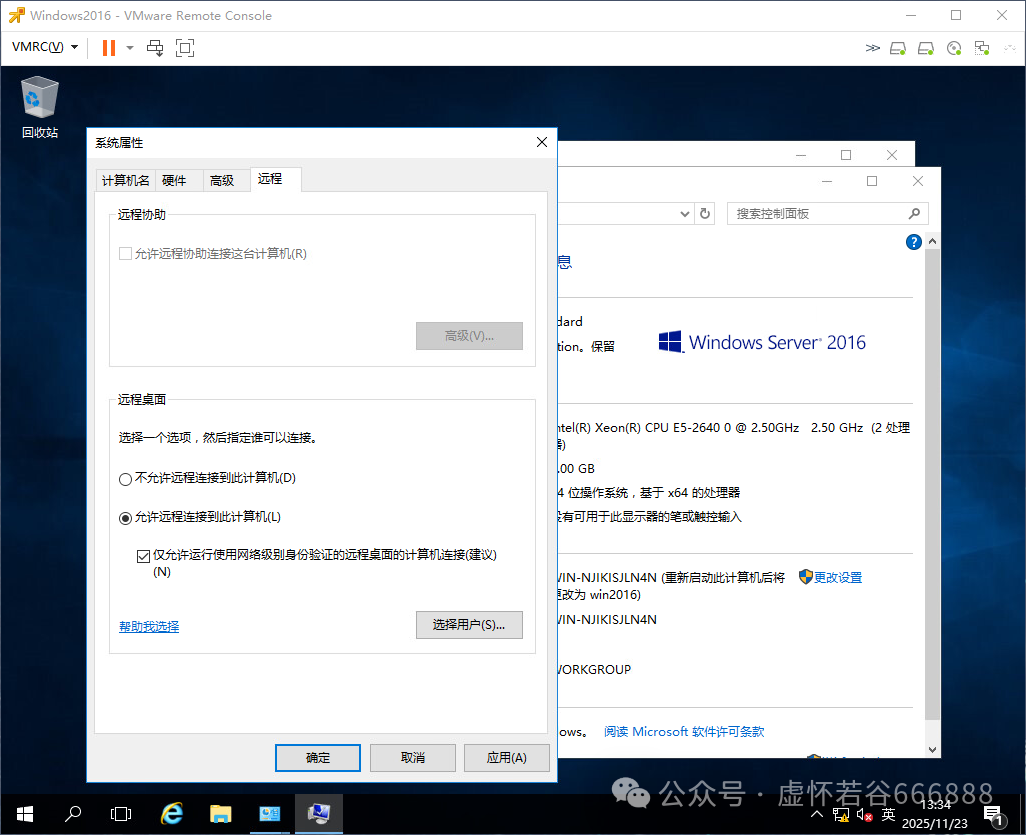
RDP Remote Port |
3389 |
|||
|
Remote Desktop Service |
Enabled |
|||
|
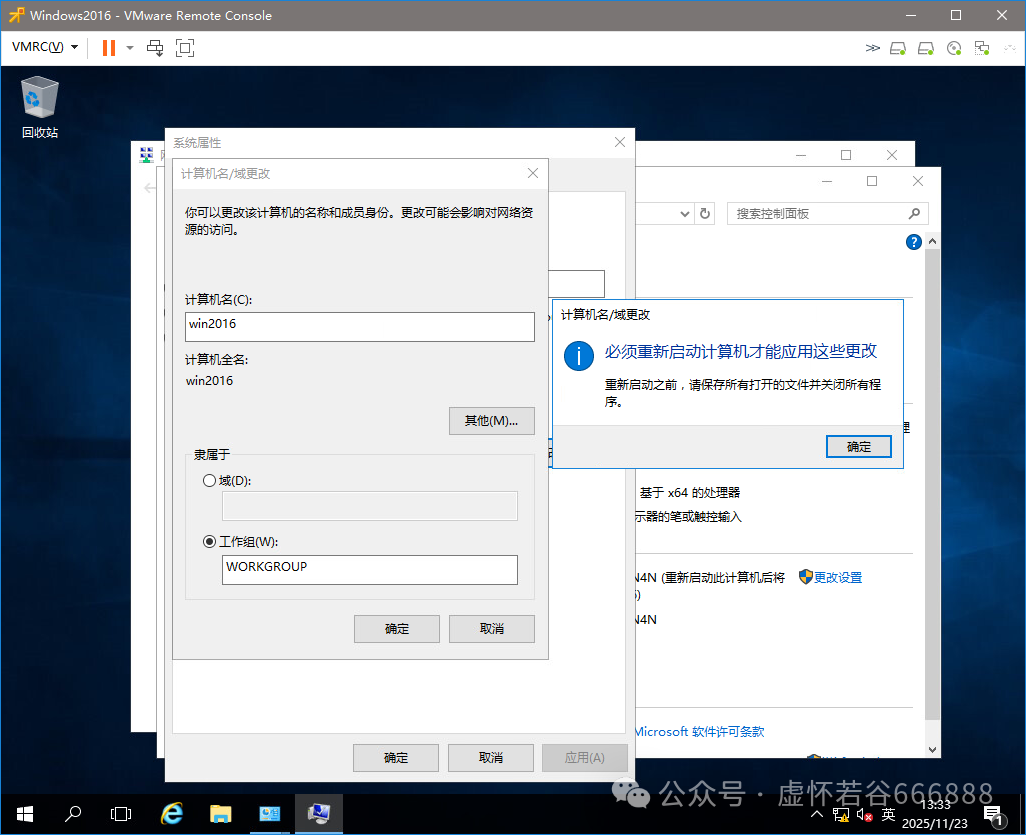
Hostname |
Win2016 |
|||
|
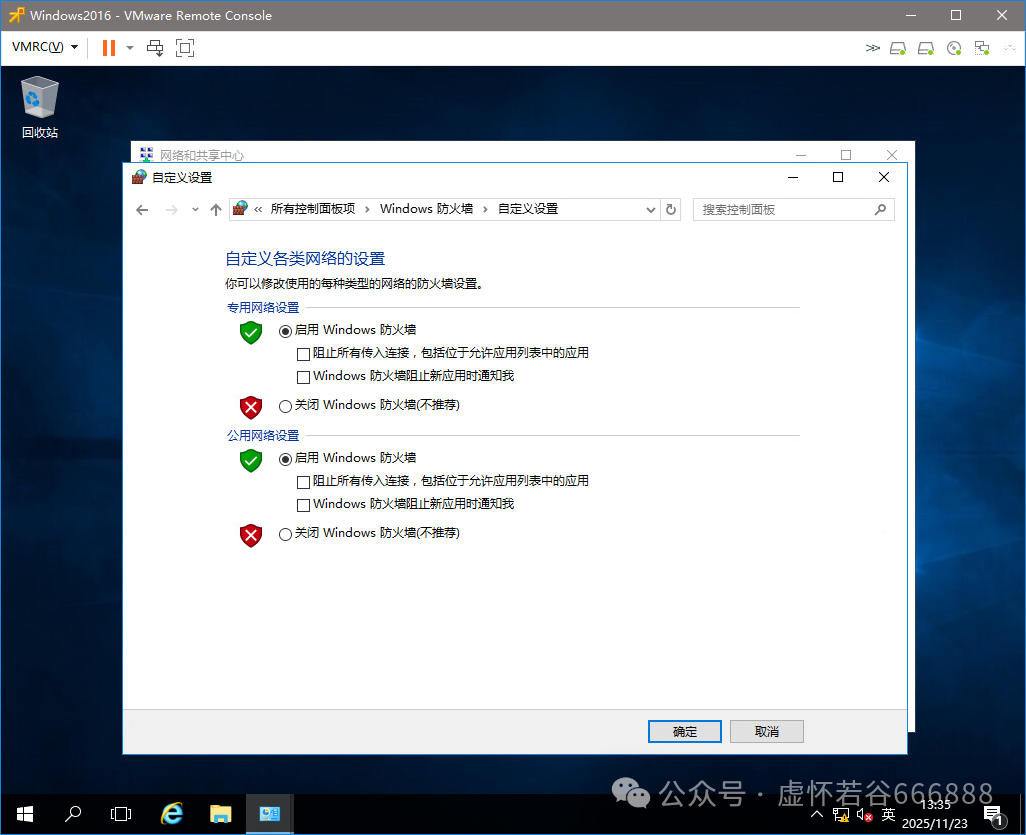
Firewall (On/Off) |
On |
|||
|
Allowed Ports or Services |
/ |
|||
|
File System |
Partition |
Format |
Type |
Size/GB |
|
C |
NTFS |
System |
50 |
|
|
D |
NTFS |
Data |
50 |
|
|
If there are other partition requirements, they need to be proposed separately |
||||
|
Business IP/Mask/Gateway/VLAN |
172.16.2.101/255.255.255.0/172.16.2.254/VLAN101 |
|||
|
Heartbeat IP/Mask/VLAN |
/ |
4Installation Process
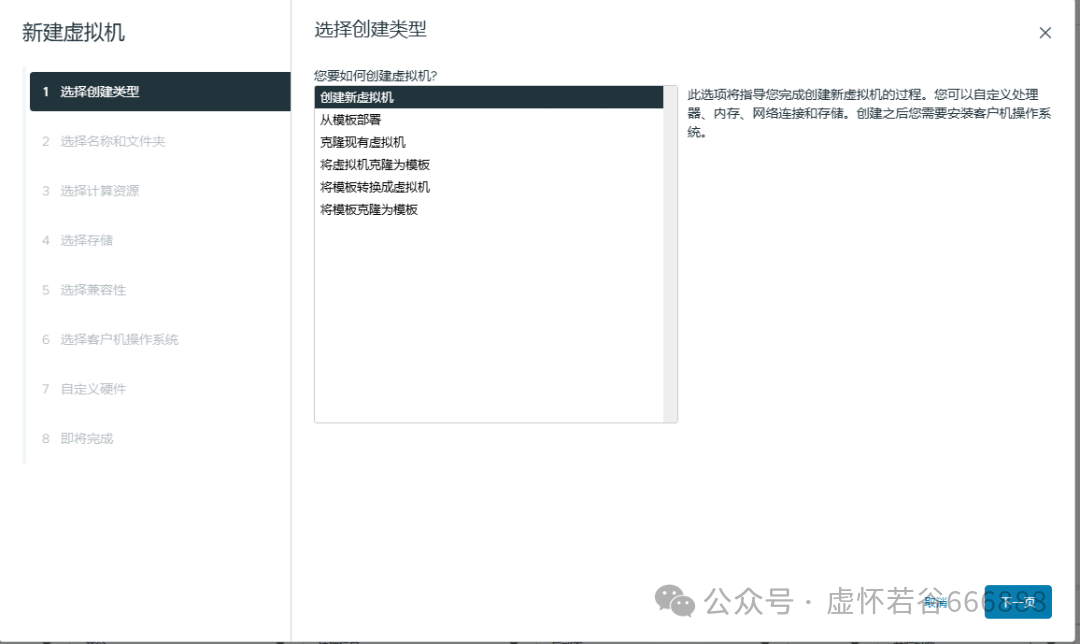
4.1Log in to the VMware virtualization platform, select the ESXi host or virtual machine folder, right-click to create a new virtual machine
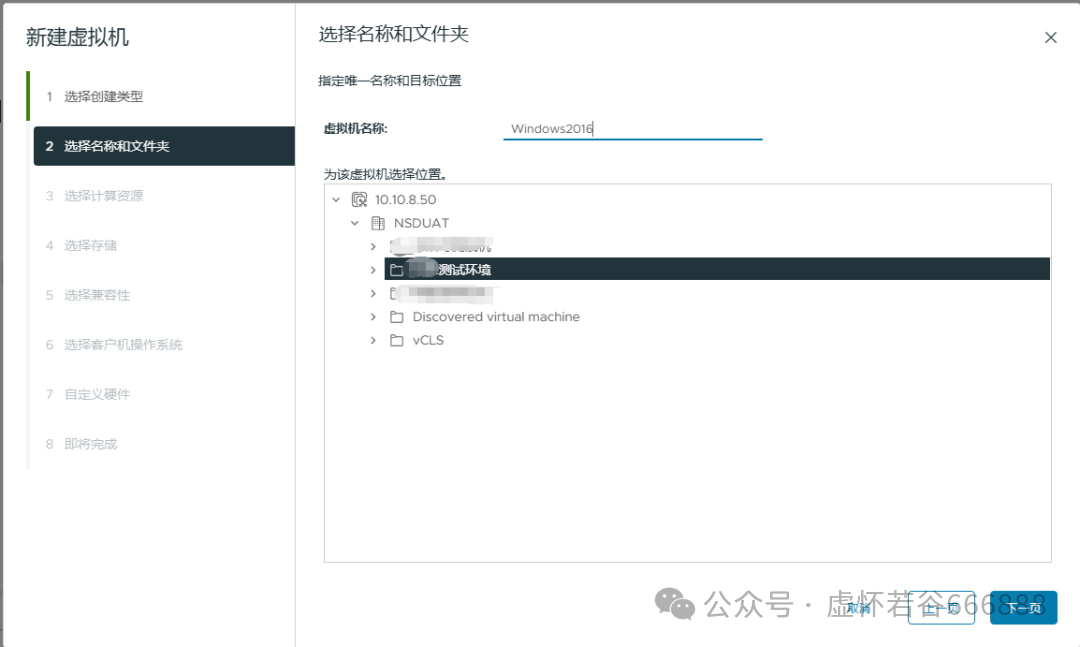
4.2Enter the virtual machine name, select the storage location for the virtual machine, and click next
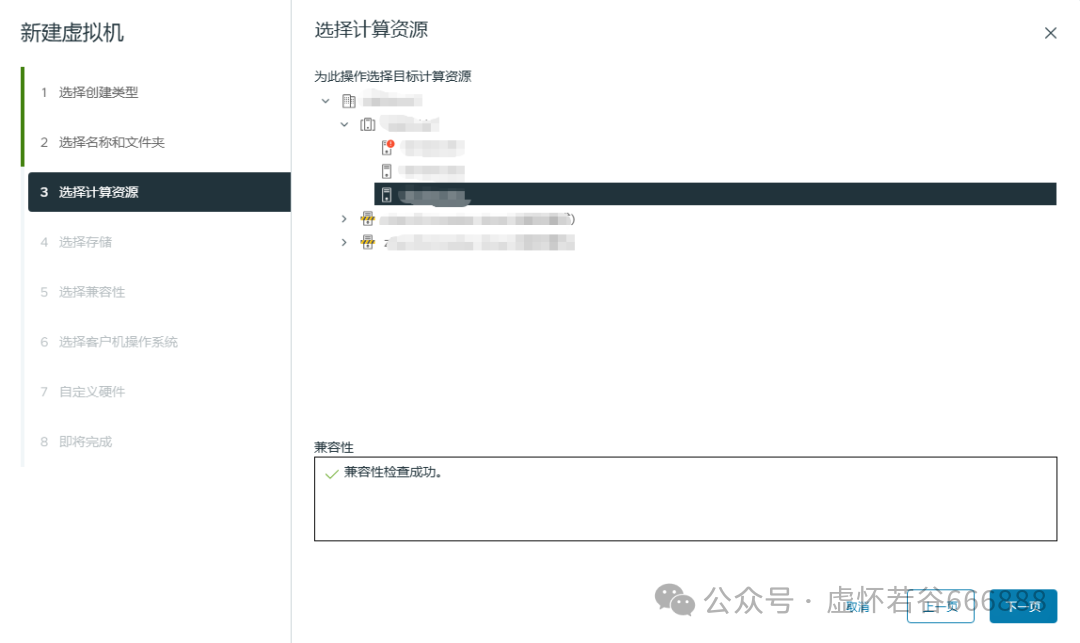
4.3Select compute resources, and click next
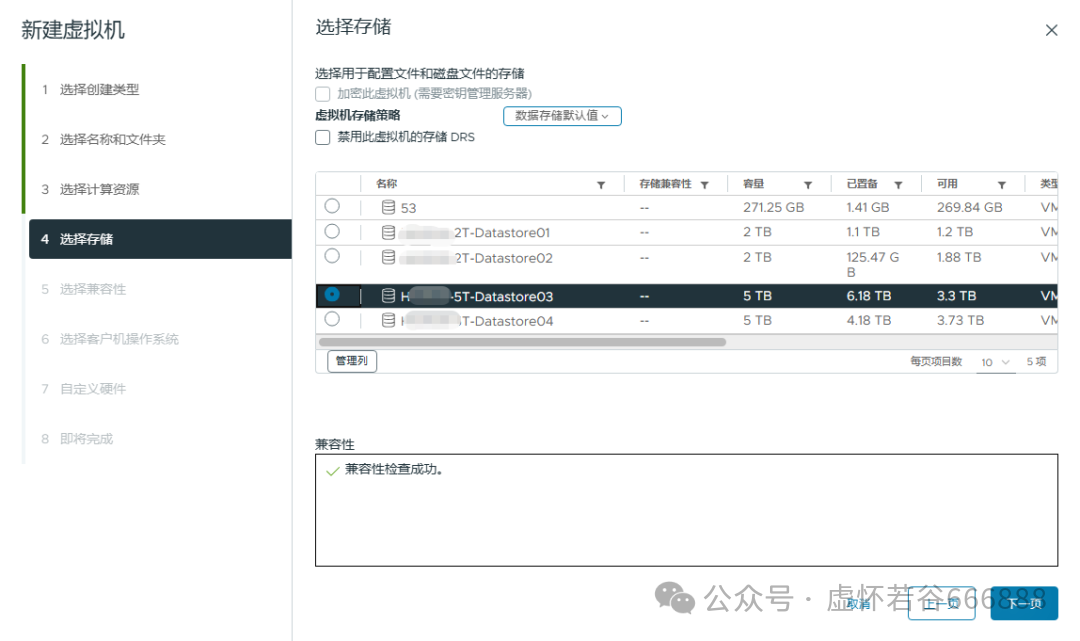
4.4Select storage, and click next
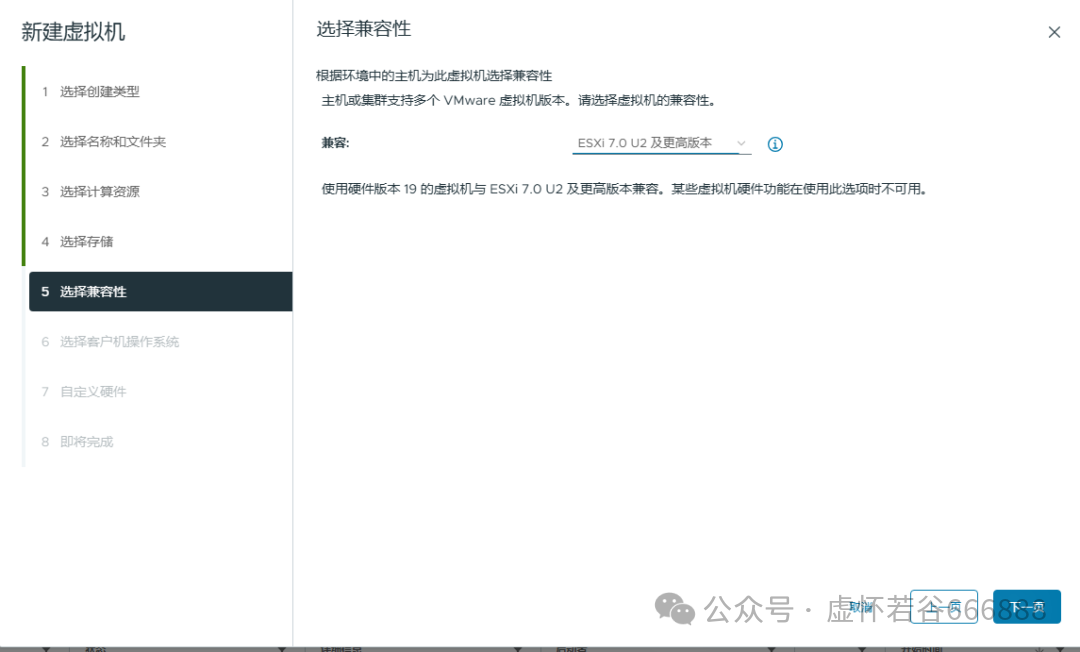
4.5Select compatibility, leave default, and click next
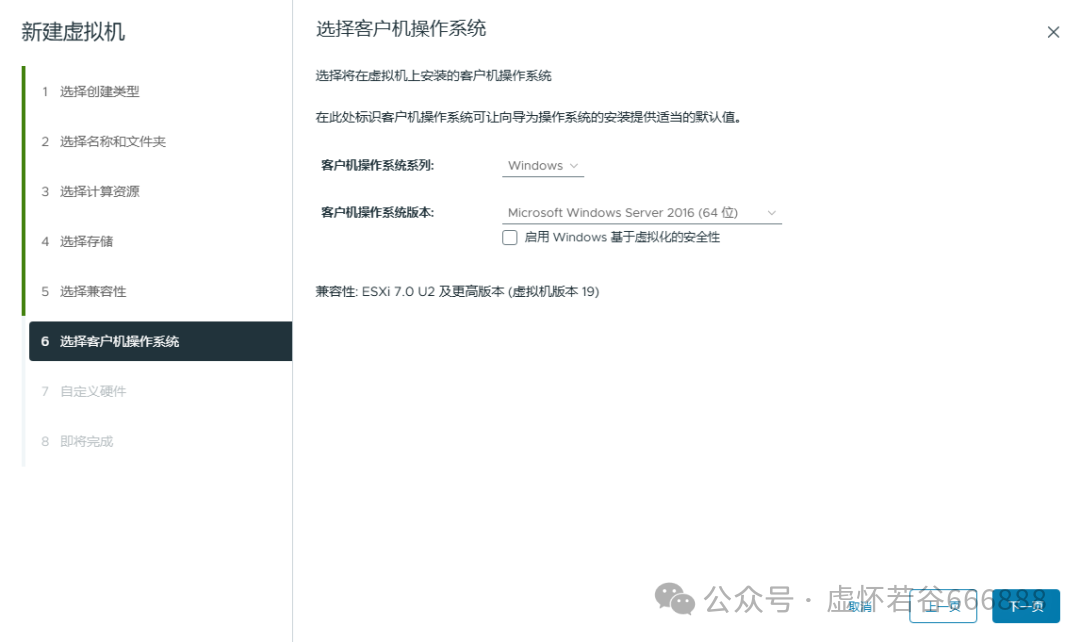
4.6Select the guest operating system family and version, and click next
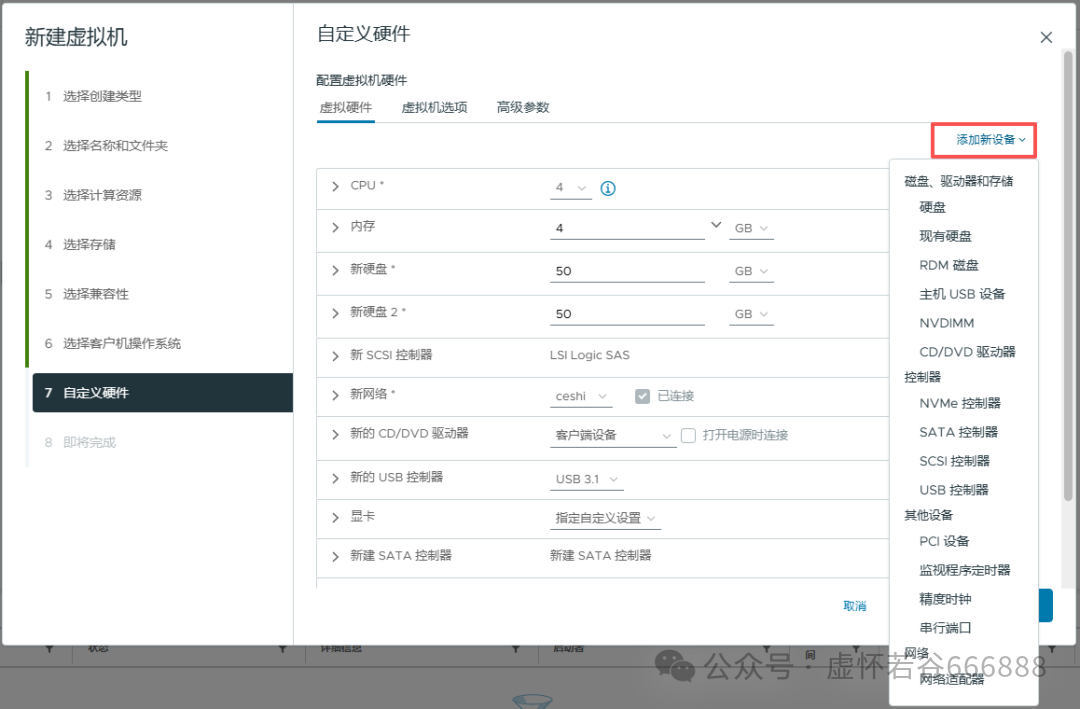
4.7Customize hardware:
Configure according to the plan
CPU: 4vCPU
Memory: 4GB
System Disk: 50GB (Thin Provisioned)
Data Disk: 50GB (Thin Provisioned)
Network: ceshi (select the corresponding port group)
Note: If you need to add new hardware devices, click “Add New Device” in the upper right corner and select the corresponding hardware
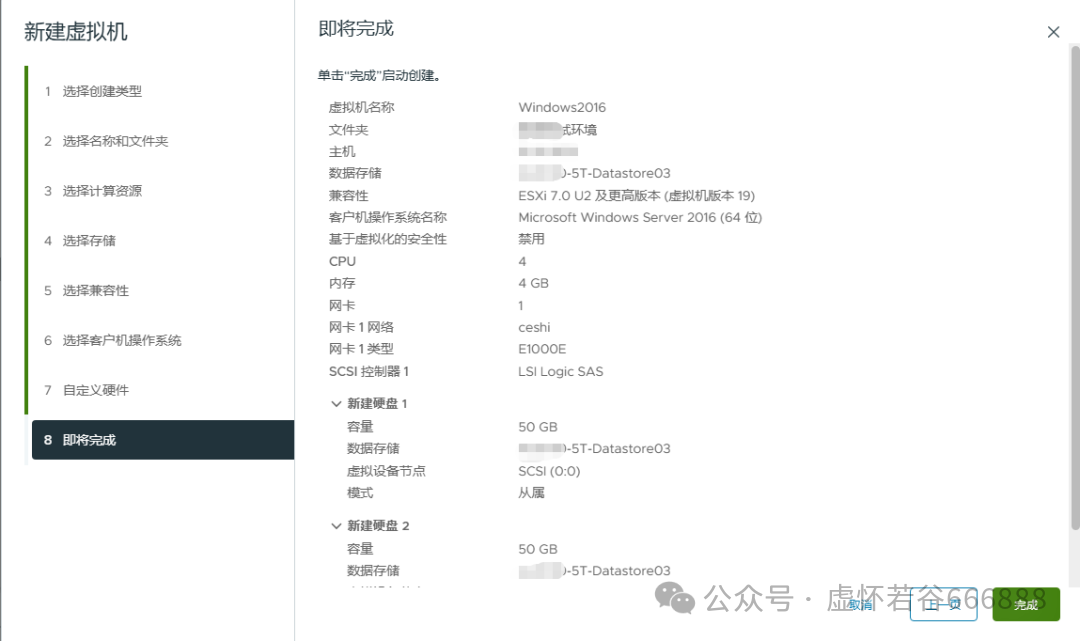
4.8Check the configuration of the newly created virtual machine, if there are no issues, click finish
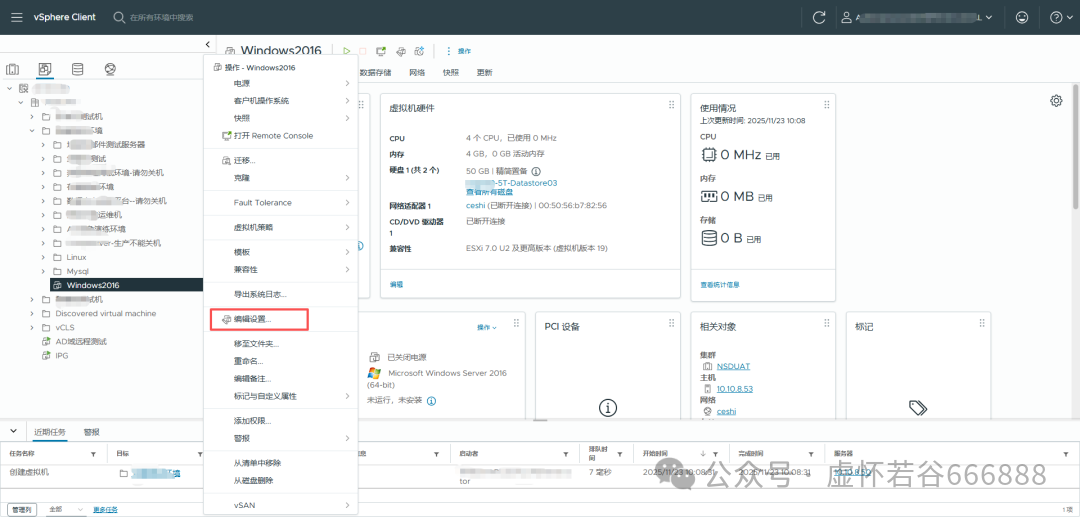
4.9Load the installation image, right-click the virtual machine, and click “Edit Settings”
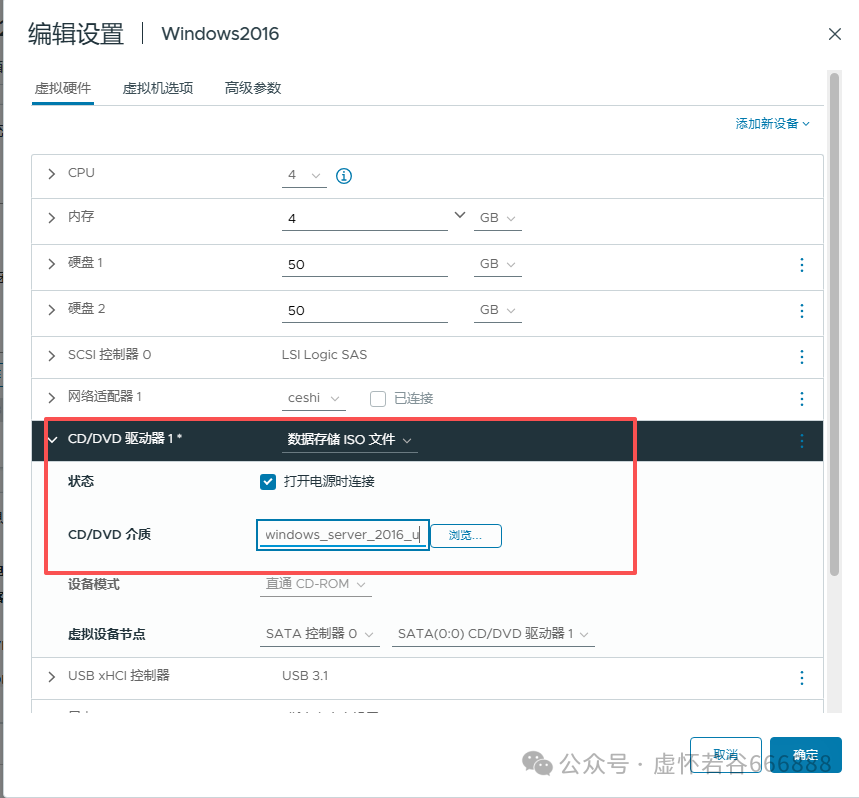
In the “CD/DVD Drive” click browse, select the system image, check “Connect at power on”, and click OK
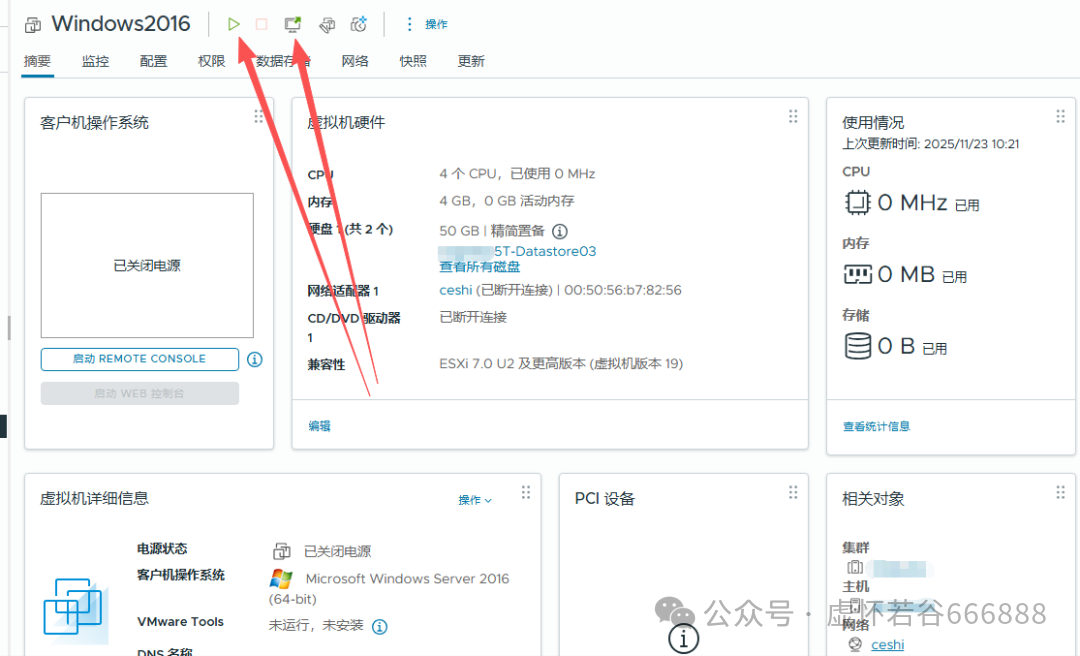
4.10Power on the virtual machine and open the console
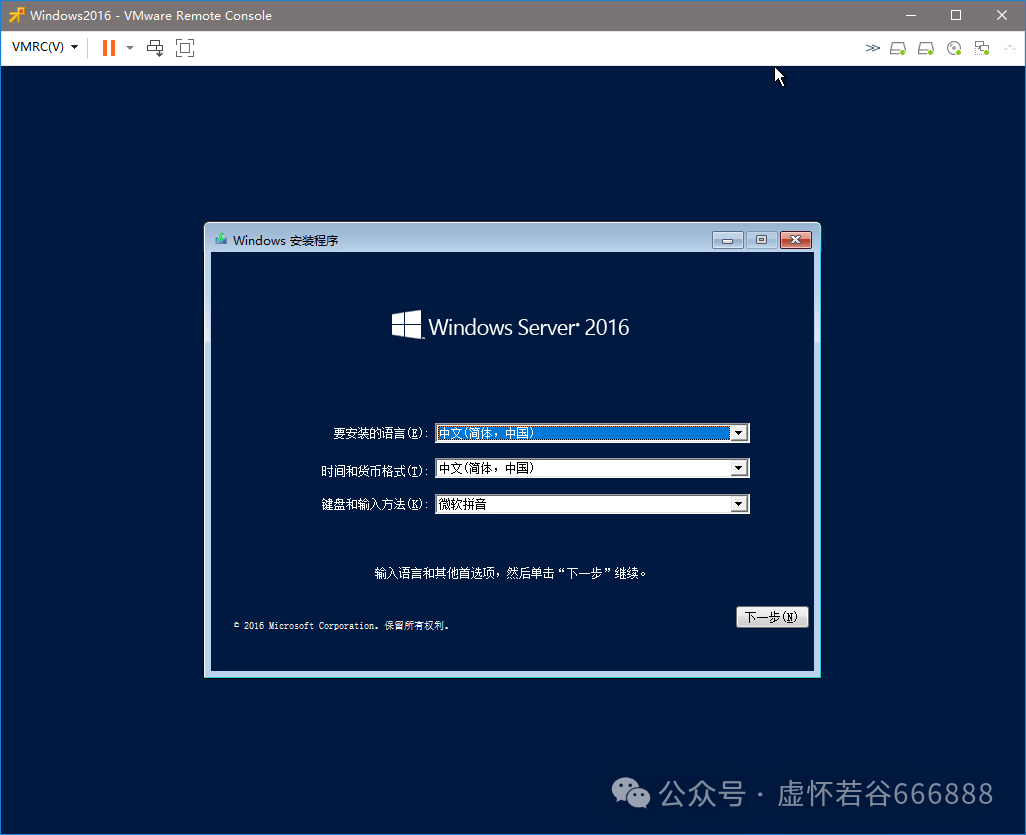
4.11Set the installation language to “Chinese”, keyboard input method to “Microsoft Pinyin”, default settings, and click next
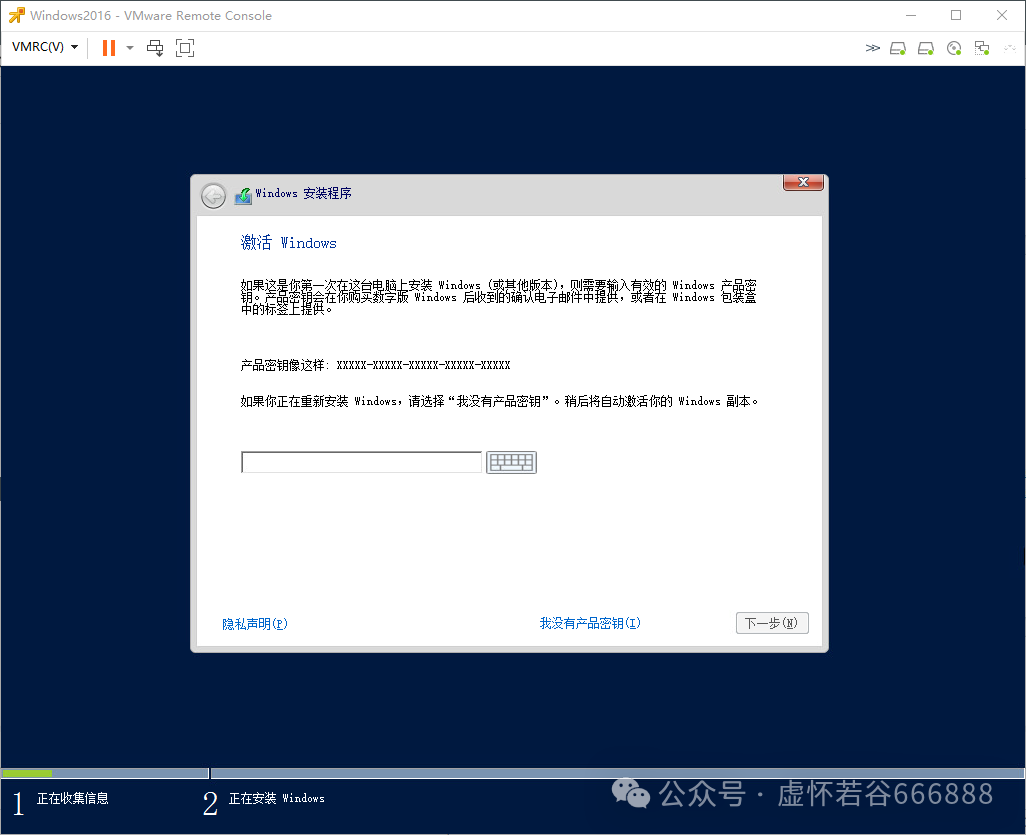
4.12Activate Windows, click “I don’t have a product key”
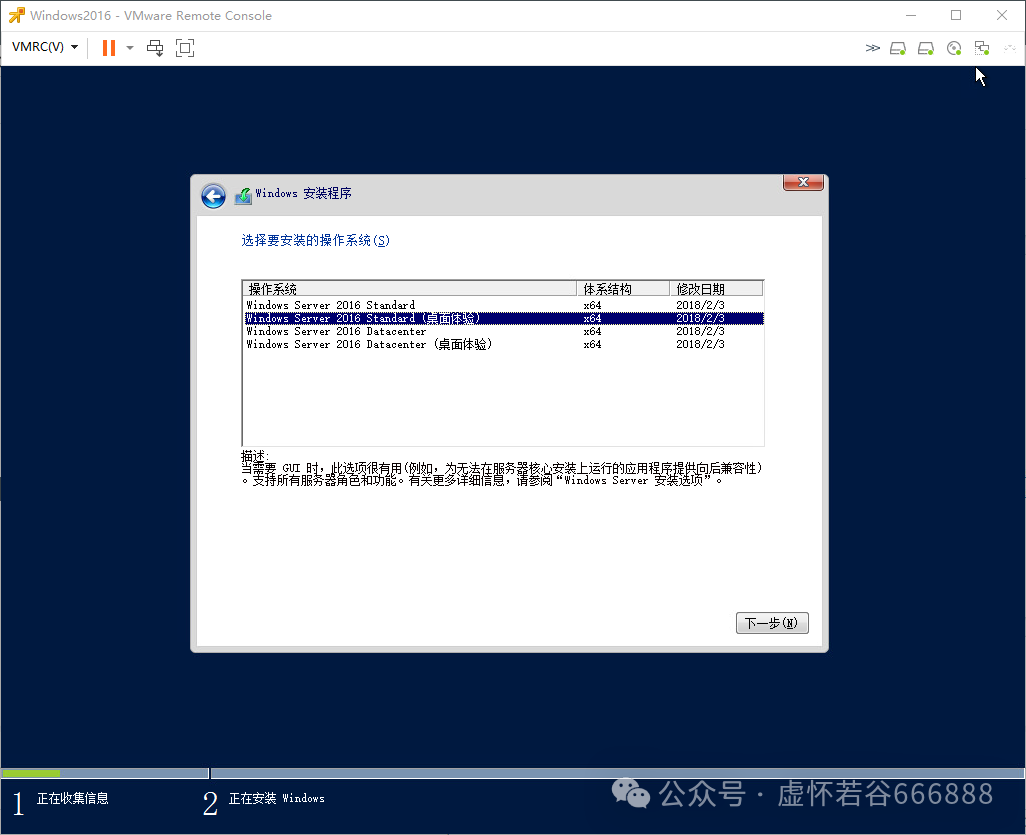
4.13Select Standard Edition (Desktop Experience), click next.
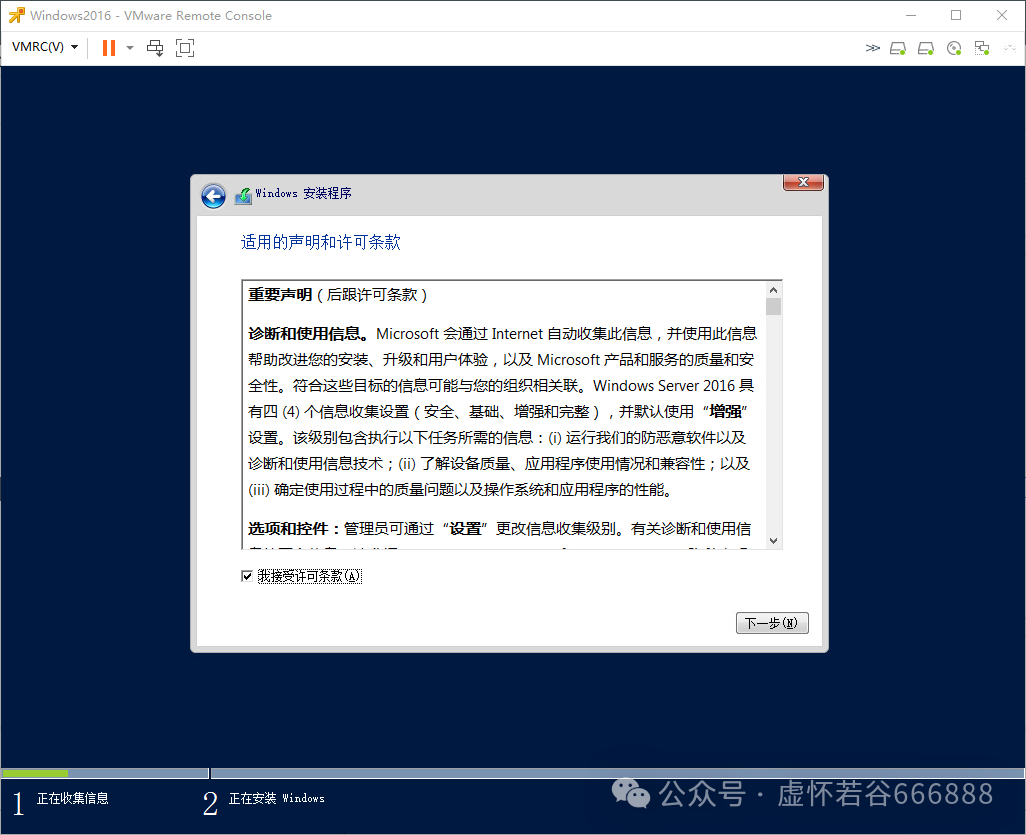
4.14Check “I accept the license terms”, click next
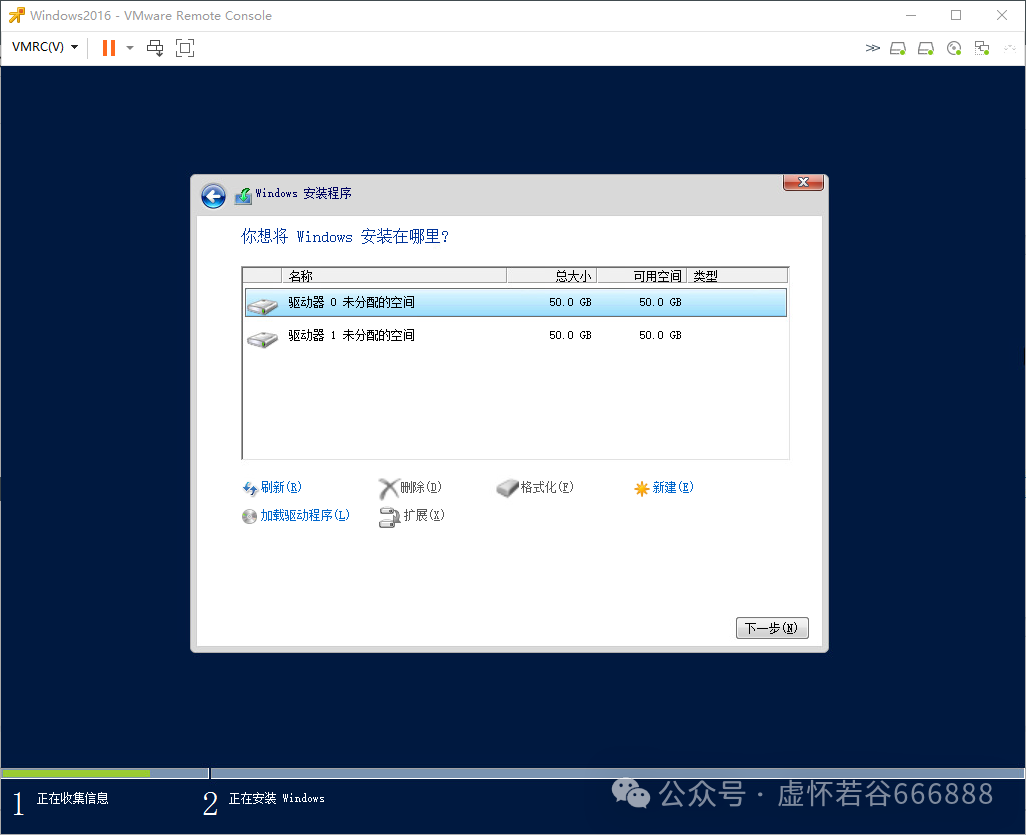
4.15Select “Custom” installation, press Enter, select the system installation location, and click next
4.16Start the system installation
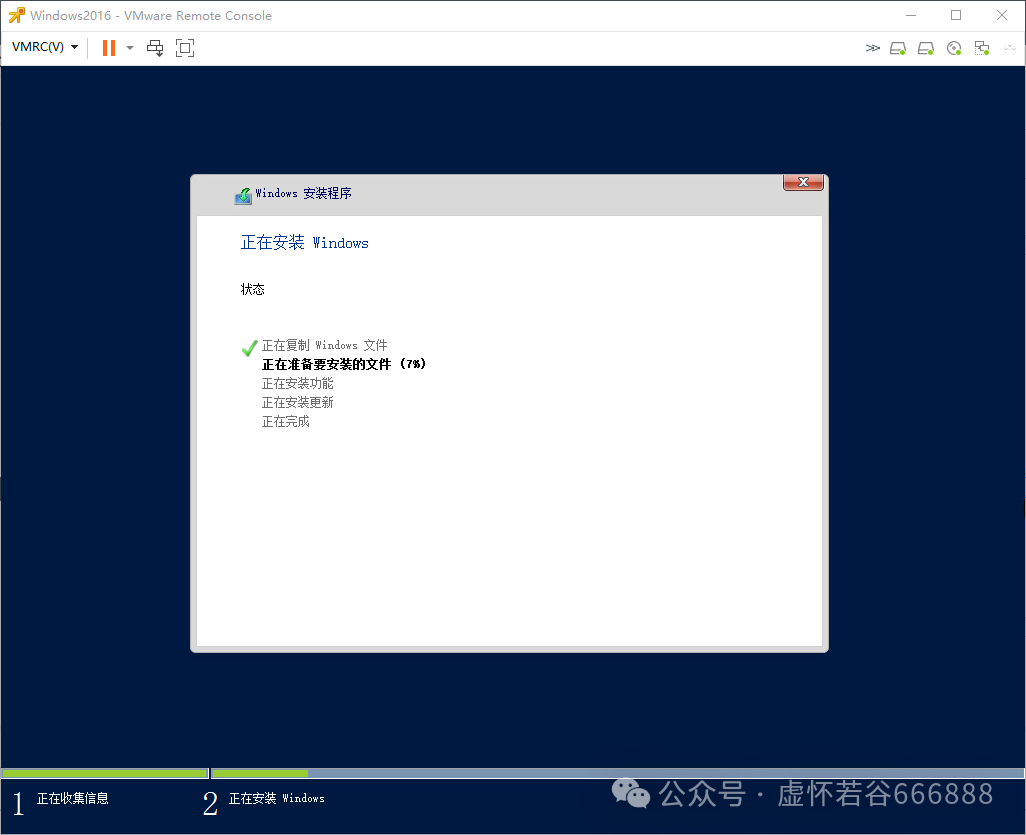
4.17Complete the system installation
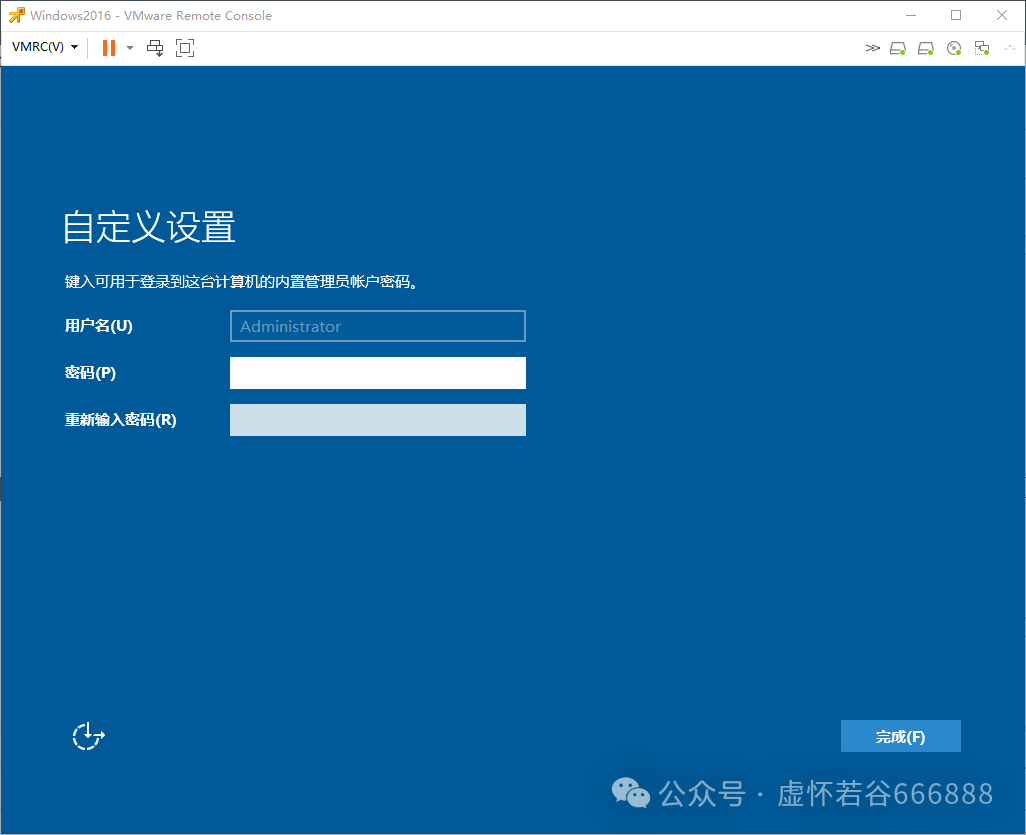
5System Initialization
5.1Set the system administrator password
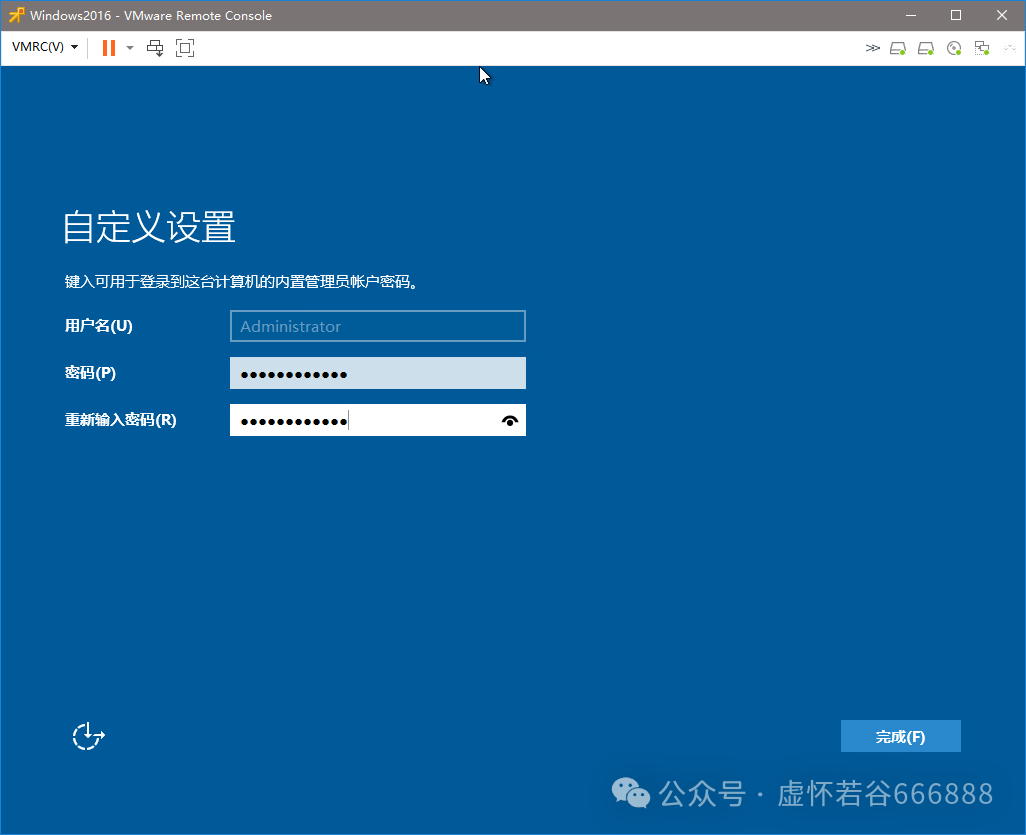
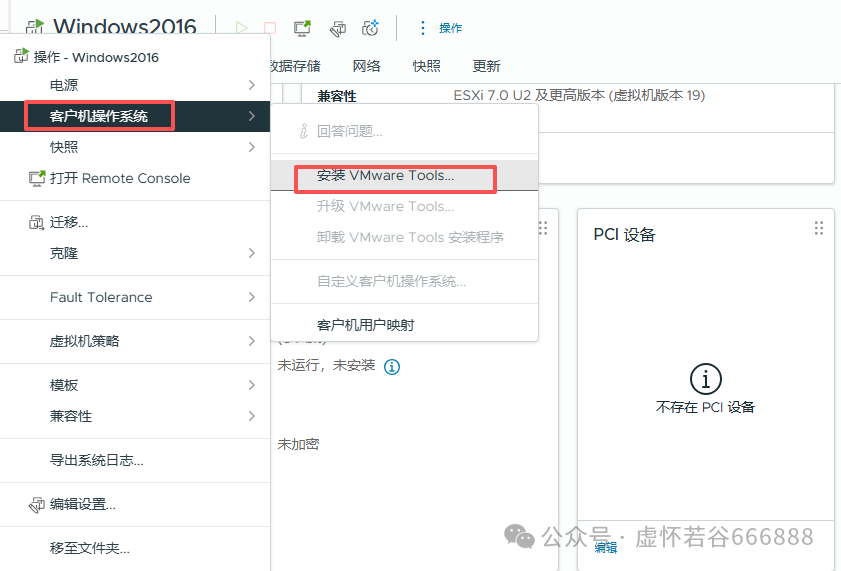
5.2Install VMware Tools, right-click the virtual machine, select “Guest OS” and click “VMware Tools”
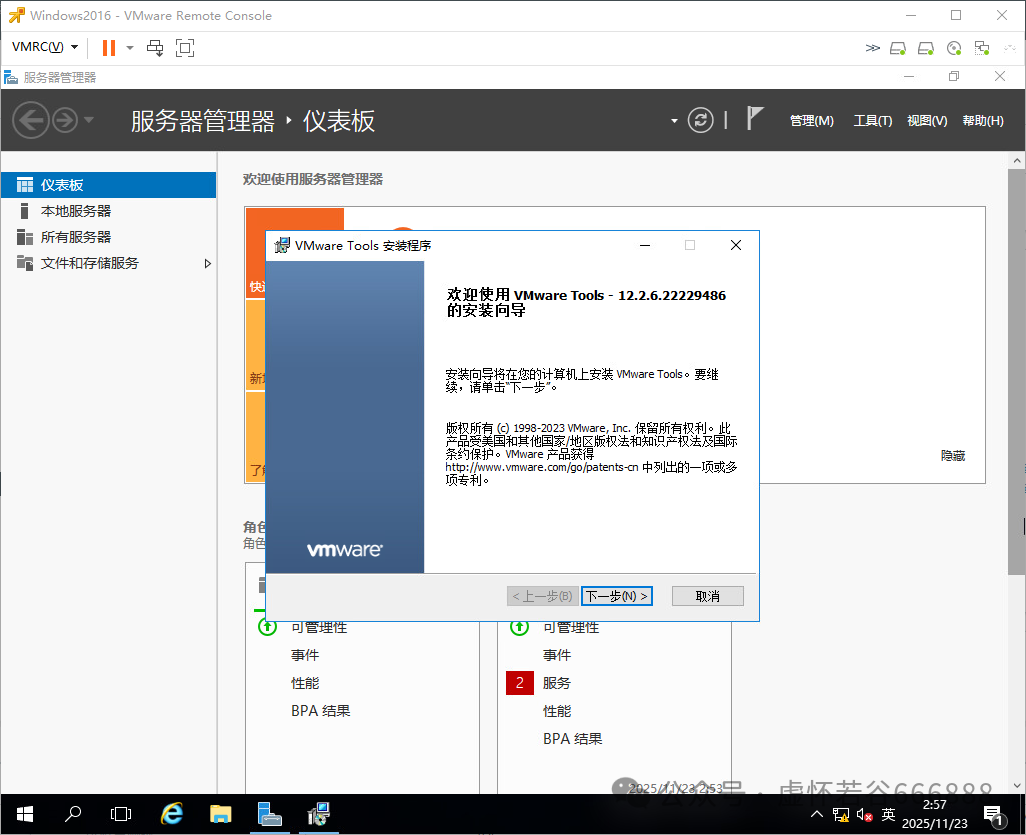
5.3Click next
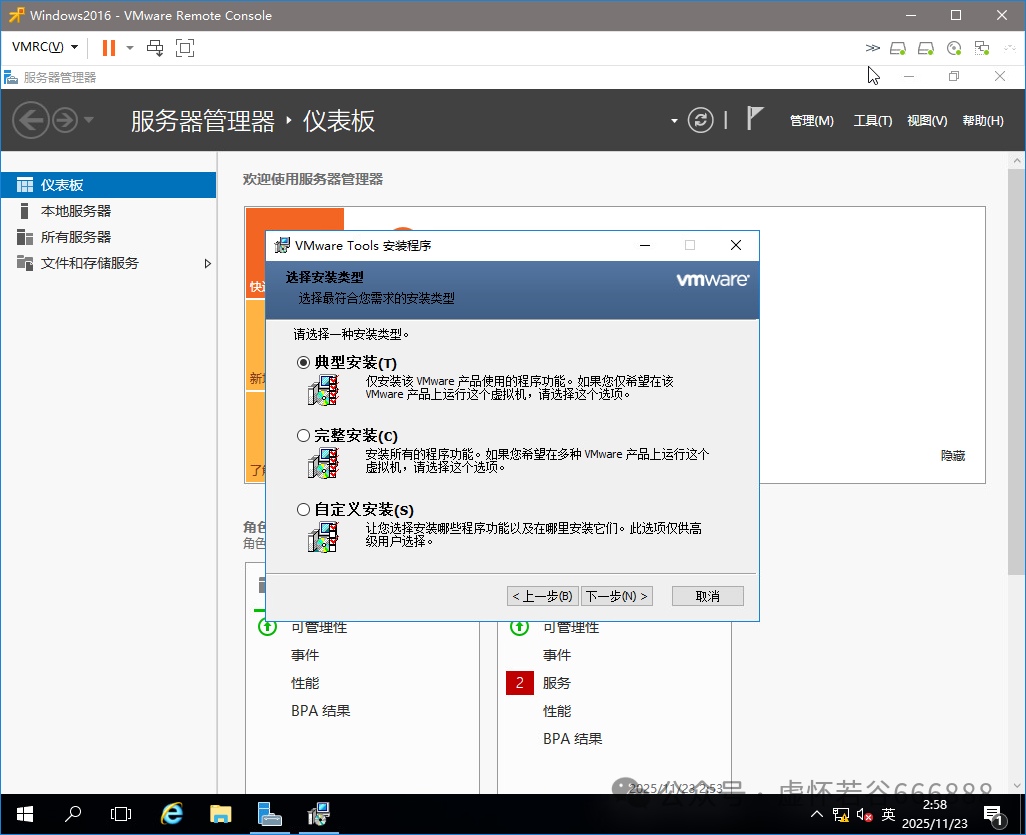
5.4Select “Typical Installation” and click next
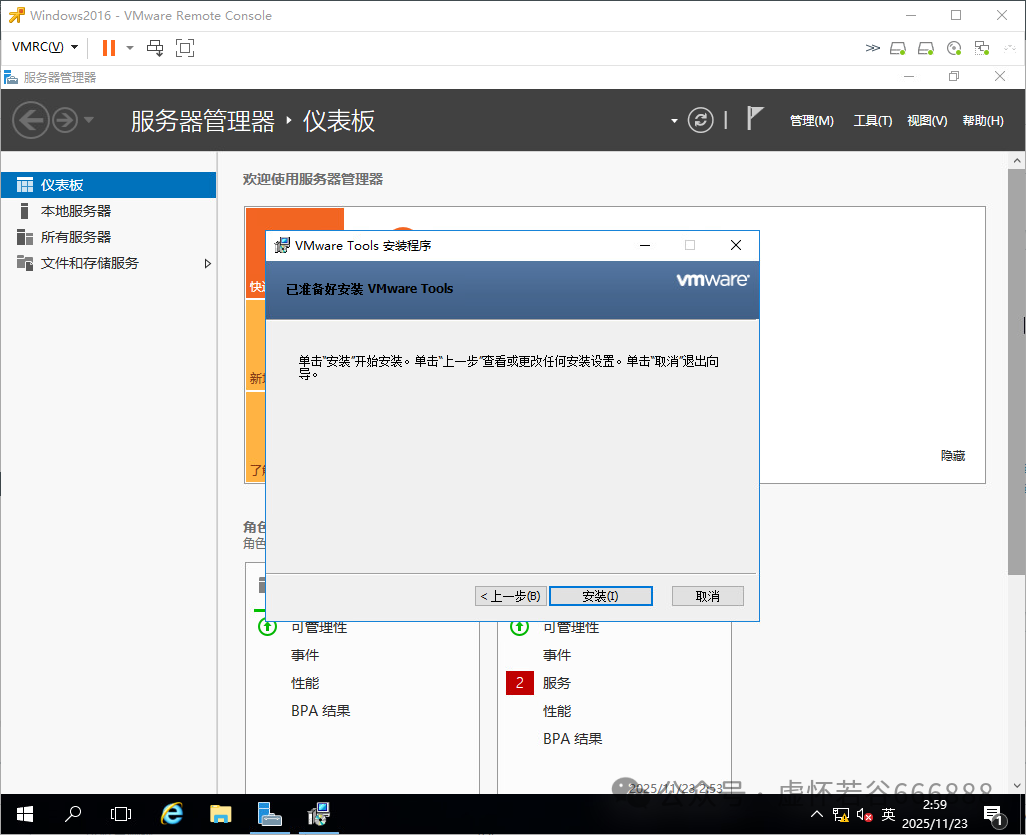
5.5Click install
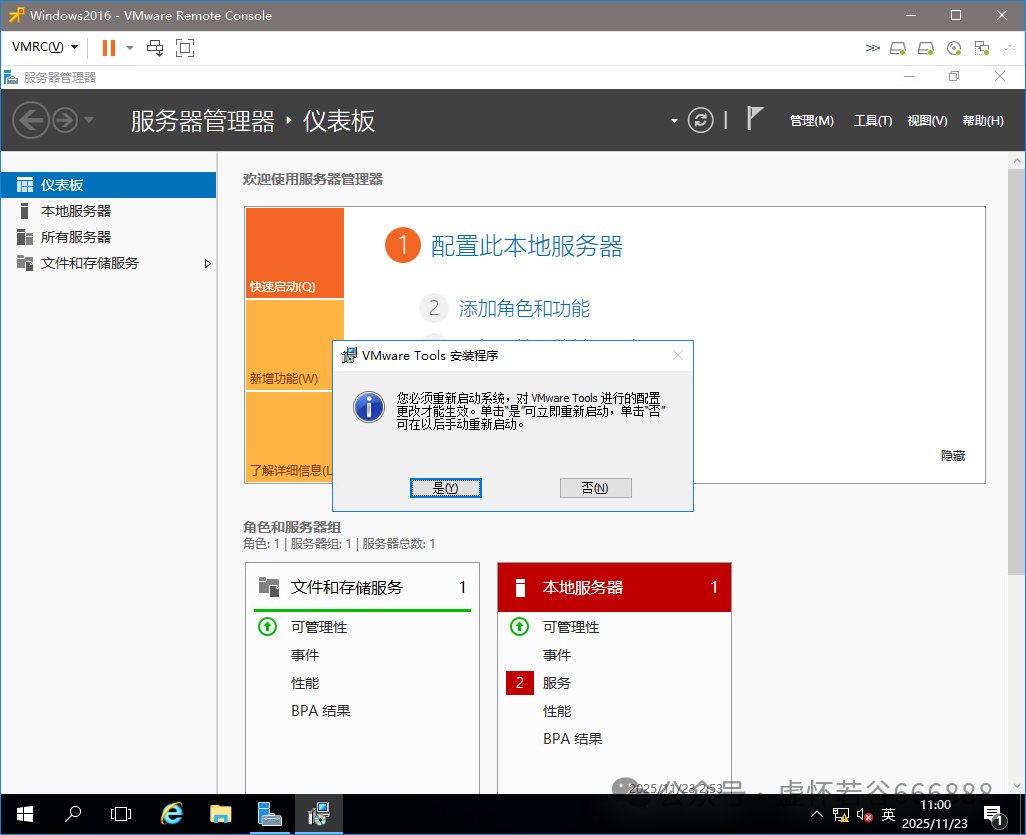
5.6Installation complete, click “Yes” to restart the system
5.7Set up the network
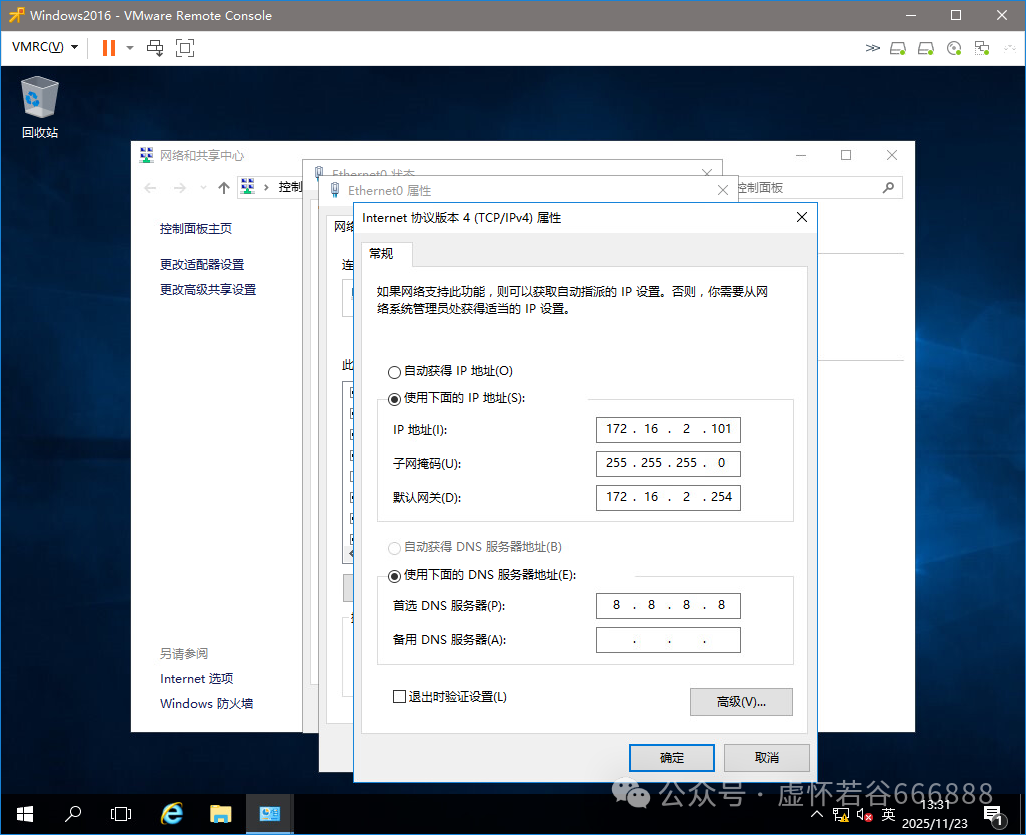
5.8Modify the hostname, reapply system configuration
5.9Enable RDP remote desktop service
5.10Firewall settings, enable/disable the firewall
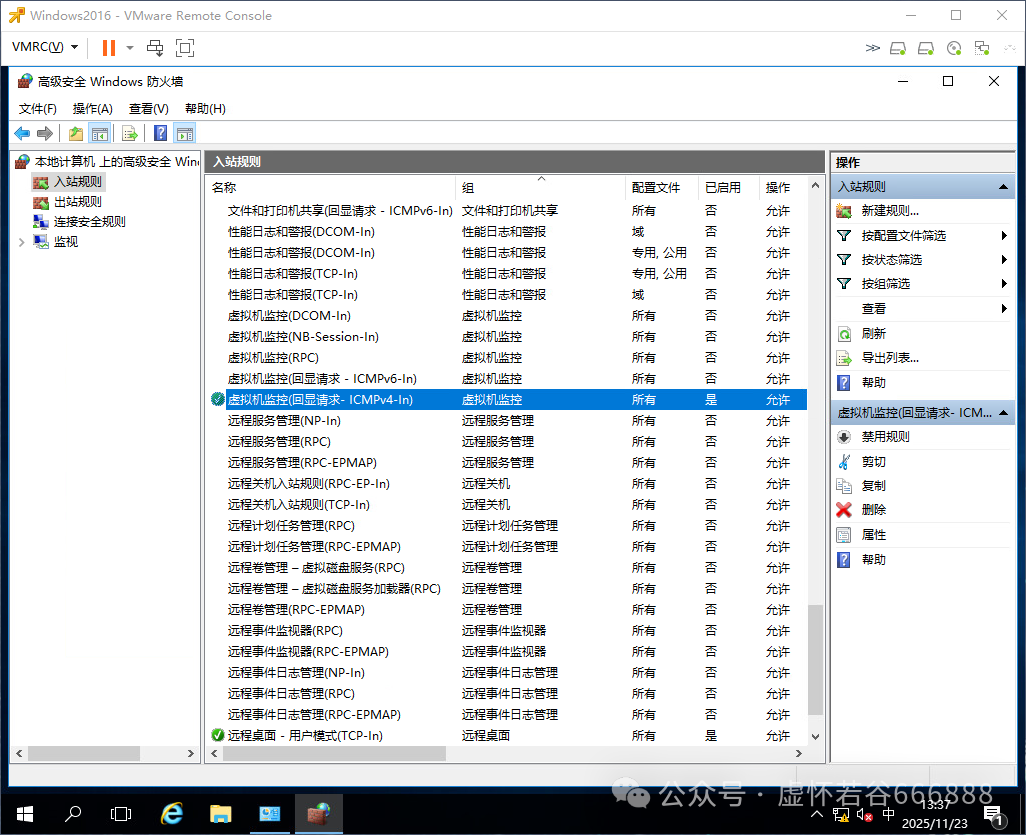
5.11Enable virtual machine monitoring (Echo Request – ICMPv4-In)
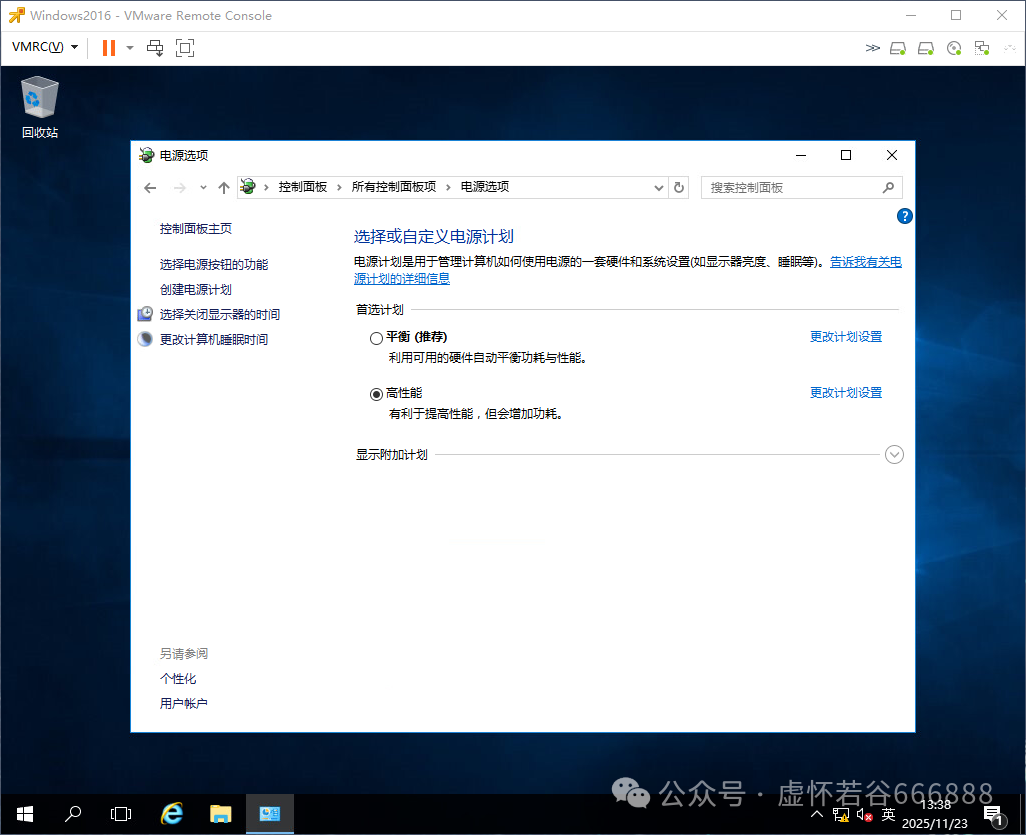
5.12Change power mode to high performance
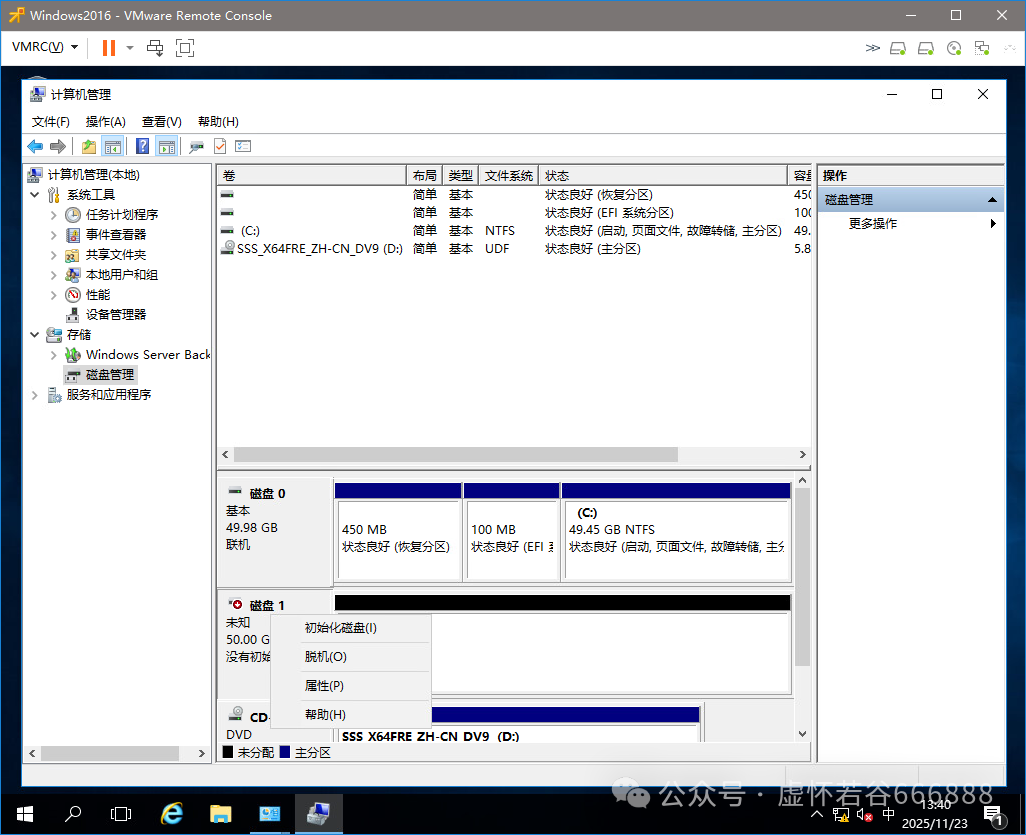
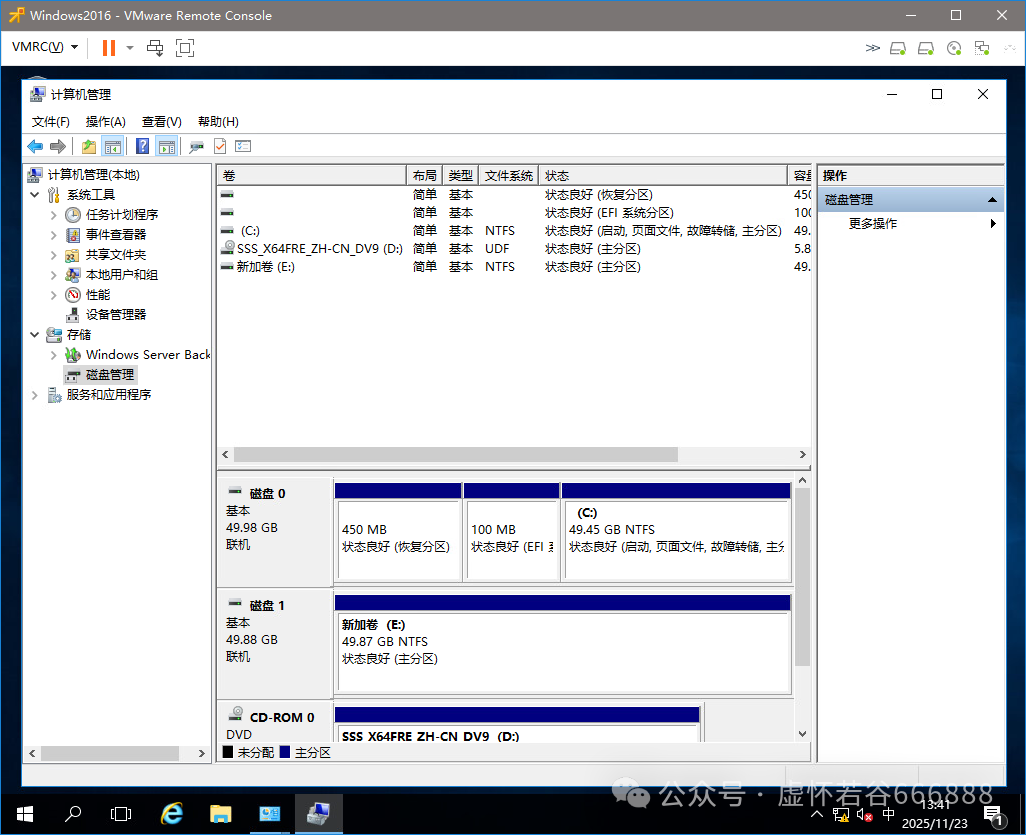
5.13Add data disk, open Computer Management – Disk Management – bring the data disk online, initialize the disk, create a simple volume.
6Post-Installation Check
After installation, check key items one by one, including but not limited to the following:
|
Serial Number |
Check Item |
Completed |
Remarks |
|
1 |
Set Administrator Password |
Yes |
|
|
2 |
InstallVMware Tools |
Yes |
|
|
3 |
Set Network |
Yes |
|
|
4 |
Modify Hostname |
Yes |
|
|
5 |
EnableRDP |
Yes |
|
|
6 |
Firewall Settings |
Yes |
|
|
7 |
Modify Power Mode |
Yes |
|
|
8 |
Add Data Disk |
Yes |
|
7Remarks
1.Copyright Statement: This document is copyrighted by the author.
2.Usage License: You are granted a limited, non-exclusive license to use this document for personal, non-commercial learning and reference purposes only. Any form of commercial use is expressly prohibited.
3.Disclaimer: This document is provided “as is” without any representations or warranties regarding its accuracy, applicability, or defects. All express or implied warranties, including but not limited to warranties of merchantability, fitness for a particular purpose, and non-infringement, are hereby disclaimed.
4.Limitation of Liability: In no event shall the author be liable for any direct, indirect, incidental, special, or consequential damages arising from the use or inability to use this document.