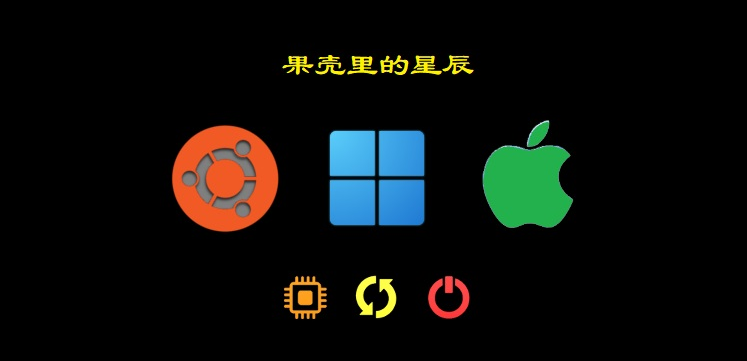
I posted a video of switching between Ubuntu, Win11, and macOS in my circle of friends, and I didn’t expect so many friends to like it and ask how I made it. I used to think this was very simple and didn’t need to write a special article about it, but now I realize: what to write has nothing to do with complexity; as long as enough friends like it, it’s worth writing.
I made a video of switching between three systems.
Although most people only have one Windows system on their computers, with the increasing performance and storage capacity of computers, and the continuous development of various operating systems, more and more friends are installing dual, triple, or even more systems on their computers. Not to mention Apple’s macOS, the Linux series such as Ubuntu and Deepin are becoming more mature and user-friendly. Android systems suitable for desktops are also continuously innovating, such as Androidx86, RemixOS, LineageOS, PhoenixOS, etc.
Some say that one Windows or macOS can meet all daily needs, but I still recommend trying Ubuntu and Deepin. They take the open-source route, and there is an extremely rich variety of good open-source software available online to support them, making it very convenient to obtain and install. They can fully meet all daily needs, and many amazing software products cannot be found on Windows. Additionally, these systems do not experience the slowdown or lag that Windows does, and they also save you the hassle of antivirus. Speaking of this, I can’t help but mock Microsoft’s past ridicule of open-source software.
When multiple systems are installed on a computer, there is naturally the problem of selecting the system at boot time. There are many implementation solutions, and rEFInd is a great choice.
rEFInd is a commonly used boot manager for computers in EFI and UEFI boot modes, suitable for multi-system boot management. Its functionality is extremely powerful, and I haven’t studied it in depth; what I will discuss today is just a bit of practical experience I have in implementing triple-system boot management with it. It’s quite one-sided but very practical. Friends who want to know more about rEFInd can visit http://www.rodsbooks.com/refind/.
First, let’s talk about the prerequisites: your computer must support UEFI and be set to UEFI boot mode (not sure if your computer supports it? Go into BIOS settings to see if there is this option). You must also have installed several systems on your computer, such as Ubuntu + Windows + macOS, and they should be installed on different partitions of the same hard drive (how to install multiple systems? This is beyond the scope of this article; go ask Baidu).
Reminder: Not all desktop computers can install macOS. Due to Apple’s technical restrictions, normally macOS can only be installed on machines produced by Apple. However, some experts have developed installation methods for non-official machines, which we call “Hackintosh.” Not all machines can install Hackintosh; some fail to install, while others lack drivers for essential devices and cannot function normally. If you want to install it, it’s best to ask the seller first.
Now, let’s get to the main point. In general, the work to be done is only three steps: install rEFInd, create icons, and modify the configuration file.
1. Install rEFInd
My cloud disk provides rEFInd for download. The old method: visit my public account “Stars in the Shell” and send the six English letters “refind” to get the download link.
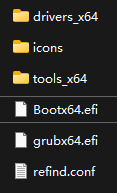
After downloading, unzip it, and you will get three folders and three files, as shown below:
If your computer meets the prerequisites mentioned above, there will be an ESP partition on the hard drive, which is the UEFI boot partition. We will need to copy those three folders and three files to this partition shortly. However, this partition is hidden by default, so we need to use a tool to operate it; I recommend DiskGenius.

Start the computer and enter Windows, find and download DiskGenius online (no registration is required; the basic functions provided by the unregistered version can meet our needs). Open it, and it will display the partition situation of your computer’s hard drive. Below is the partition layout on my computer:

The red circle on the left shows the ESP; partition 3 is Ubuntu 20.04, partition 4 is Ubuntu 14.04, then Windows 11, and the far right is macOS. Don’t laugh at me for having two Ubuntus; it’s not because I have too many supplies, but because I actually need them.
Select the EFI folder in the ESP partition and see its contents:
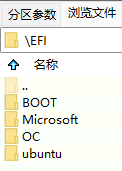
There are four folders; the second one stores Windows boot files, the third is for macOS, and the fourth is for Ubuntu. The folders depend on which systems you have previously installed, but regardless of which systems are installed, the first folder, BOOT, will always be there.
Backup the entire EFI folder (remember, do not overlook this! In case of failure, you can restore the ESP). Then enter BOOT:
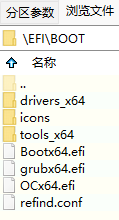
This is the content in my BOOT folder; yours may be different. Apart from Bootx64.efi, delete all other files and folders. This Bootx64.efi should be the startup file for macOS, assuming you have installed the Apple system, but this is not universally applicable; you need to judge the specific situation yourself. Rename Bootx64.efi to something else; for example, I renamed it to OCx64.efi (the second-to-last file in the above image is the one I renamed from macOS’s Bootx64.efi), and then drag the three folders and three files from rEFInd into DiskGenius’s \EFI\BOOT folder.
2. Create Icons
The icons folder has a lot of icons for you to choose from, but you may not be satisfied with any of them. For example, I only found an icon for Ubuntu, and there were no icons for Win11 and macOS, so I had to search online.
Finding preferred images online is not difficult, and it’s also easy to adjust them to a suitable square size. However, there is a problem: the backgrounds of the images are often not transparent, making them look bad as boot startup icons. This is when you need to edit them yourself.
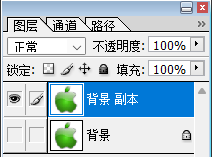
Open the downloaded image file in Photoshop (referred to as PS).
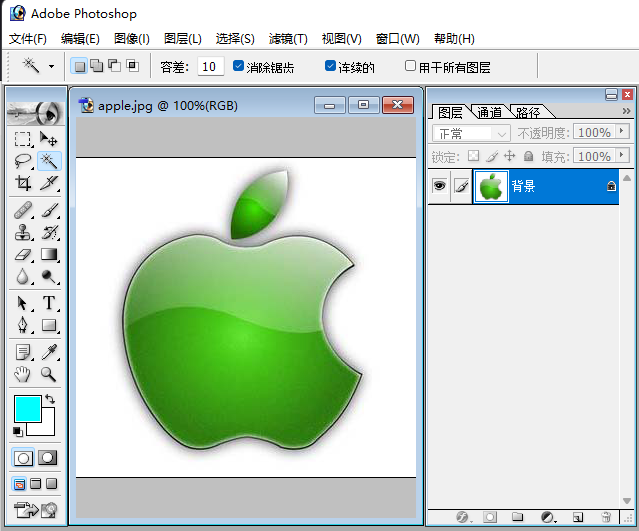
You can see that the “Background” layer on the right is locked and cannot be edited. Right-click this layer, select “Duplicate Layer,” then uncheck the “eye” icon on the original layer on the far left, and select the newly duplicated layer, which is not locked and can be edited. See the image below:
Select the “Magic Wand” tool from the upper left toolbar and click on the blank area of the image. PS will automatically draw a dashed line around the edge of the image. If you think it’s not accurate, you can adjust the “Tolerance” in the upper menu and redraw.
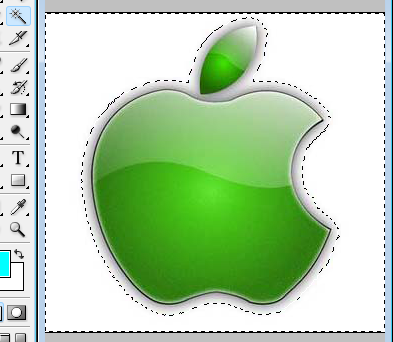
Then press the “Delete” key on your keyboard, and it will change to the style shown below:

Save it as a PNG file, and the icon is ready! Drag this PNG file into DiskGenius’s icons folder.
3. Modify the Configuration File
Open refind.conf with Notepad, and you will see my configured content as follows (where “//” and the content after it are my comments; please delete them before use):
timeout 10                              //How many seconds to wait for system selection at boot; if no action is taken when the countdown ends, the default system will start automatically
banner icons/logo.png                   //Top title image; if not needed, it can be replaced with a solid color image
                                        //Note: The pixel color at the top left of this logo.png will determine the background color of the entire desktop

small_icon_size 48                      //Represents the size of the small icons for functional items
big_icon_size 128                       //Represents the size of the large icons for operating systems; no matter how large the icons you create are, they will be automatically resized to this size
scanfor manual                          //Whether to automatically search for available systems on the machine; set it to not search here
showtools firmware, reboot, shutdown    //Display which functional item small icons; here I choose "Enter BIOS, Reboot, Shutdown"
enable_mouse true                       //Whether to allow the use of the mouse
default_selection 1                     //Which system to start by default; here I choose the first one
menuentry "Ubuntu" {                    //Set the first system, mine is Ubuntu
    icon \EFI\boot\icons\os_ubuntu.png  //Icon; choose the desired icon
    loader \EFI\ubuntu\grubx64.efi      //Startup file; this file is generally located in the corresponding system folder under the "EFI" folder, but there are exceptions, such as macOS; also, the file name may vary, so you need to judge yourself
}

menuentry "Windows" {                   //Set the second system, mine is Win11
    icon \EFI\boot\icons\Win11.png
    loader \EFI\Microsoft\Boot\bootmgfw.efi
}

menuentry "MacOS" {                     //Set the third system, mine is macOS
    icon \EFI\boot\icons\apple.png
    loader \EFI\boot\OCx64.efi
}
                                        //Similarly, you can set N systems...
Modify this file according to your needs, save it, and drag it into DiskGenius’s \EFI\BOOT folder, replacing the original file.
Thus, the boot manager is set up. Close DiskGenius, restart the computer, and the cool boot startup interface will appear! Isn’t it simple? Hurry up and DIY one!
Supplementary Note: All the above operations are performed on the ESP partition and will not affect the already installed systems unless you modify or delete partitions other than the ESP. Therefore, if there are issues booting the system, do not panic, as important data has not been lost. If you cannot boot, you can send “Xiaomi Tablet” to my public account to get a download link for a clean PE, refer to the Xiaomi Tablet 2 flashing tutorial to create a bootable USB drive, boot the computer into the clean PE, and use the built-in DiskGenius to copy the previously backed-up EFI back to the ESP partition to restore to the previous state.
Even so, I still need to make a Disclaimer: Flashing has risks, please evaluate carefully, and you bear the risks.