Object detection is of great significance in the field of computer vision. YOLOv5 (You Only Look One-level) is a representative method among object detection algorithms, renowned for its efficiency and accuracy, and has shown outstanding performance in various object detection tasks. This article will detail how to train the YOLOv5 model on a more powerful computer and deploy the trained model on Raspberry Pi 4B for real-time animal target detection using the Raspberry Pi camera.
1. Training the YOLOv5 Model on a Computer
1. Install Anaconda
Install Anaconda on a more powerful computer to facilitate the management of Python environments and dependencies.
1. Download the installation package suitable for your operating system from the Anaconda official website (https://www.anaconda.com/products/distribution).
2. Run the installation package and follow the prompts to complete the installation.
3. After installation, open the terminal or command prompt and enter the following command to verify if the installation was successful:
conda --version
2. Create a Virtual Environment
Create an independent virtual environment to install YOLOv5 and its dependencies:
conda create -n yolov5 python=3.9 -yconda activate yolov5
3. Download YOLOv5 Code
Clone the YOLOv5 code repository from GitHub:
git clone https://github.com/ultralytics/yolov5.gitcd yolov54. Install Dependency Packages
Install the required dependency packages for YOLOv5 in the virtual environment:
pip install -r requirements.txt
5. Prepare Training Data
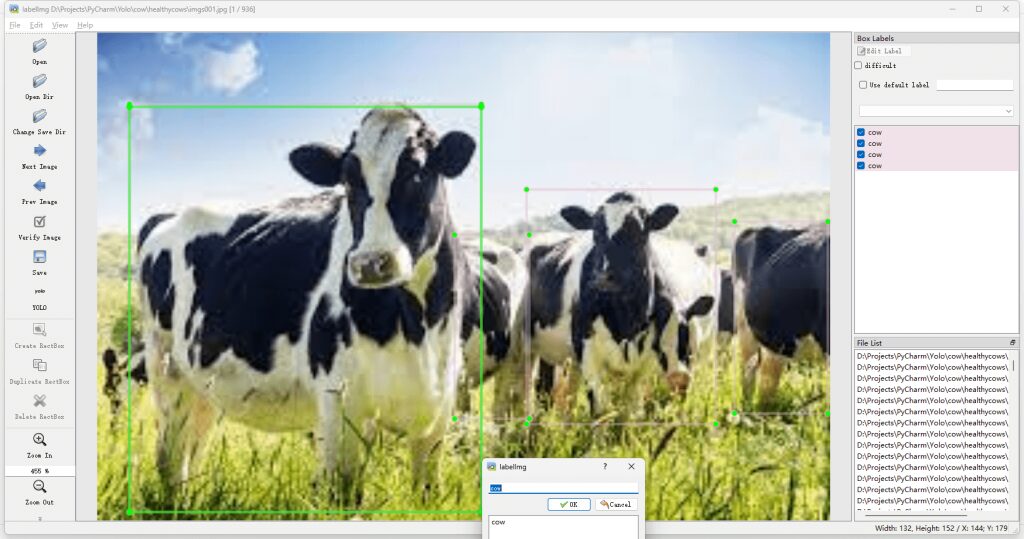
Prepare your dataset and ensure it is organized in the format required by YOLOv5. YOLOv5 training data typically includes image files and corresponding label files, with the label files in YOLO format, where each line represents an object, including category ID and normalized bounding box coordinates.
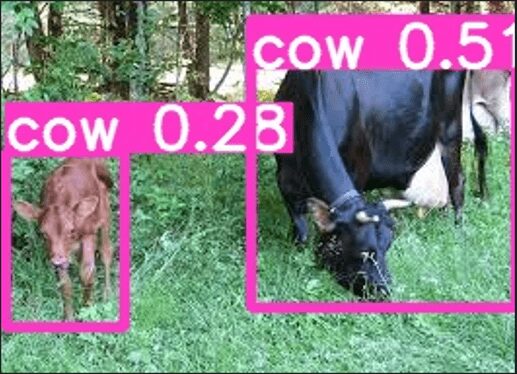
The process of data annotation is essentially the process of drawing boxes around the parts that need to be recognized in the images and labeling them. For example, if there is a cow in the image, you would draw a box around the cow and label it as ‘cow’.
6. Start Training
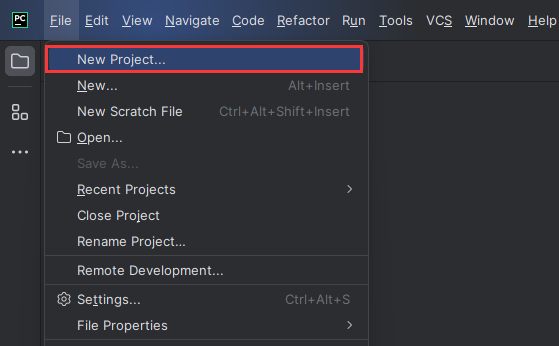
Open the yolov5 project in PyCharm.
Create a new project with the project path set to the path of the downloaded yolov5 project from GitHub.
Modify the virtual environment.
After creating the project, we need to open the settings.

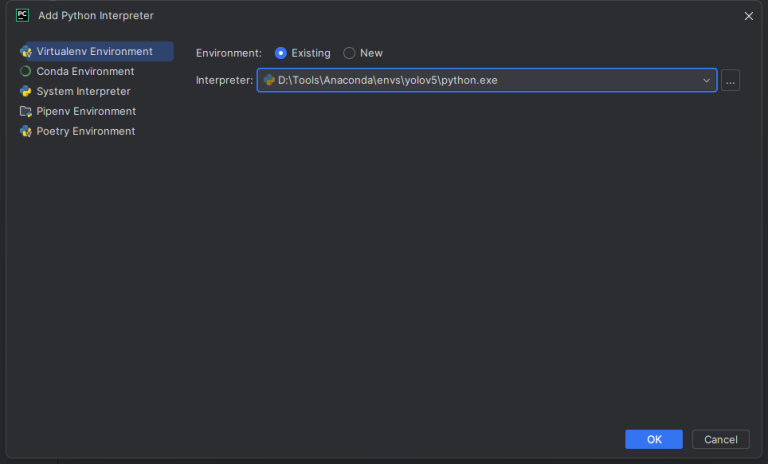
Find the Python Interpreter and change it to the yolov5 virtual environment we created in Anaconda.
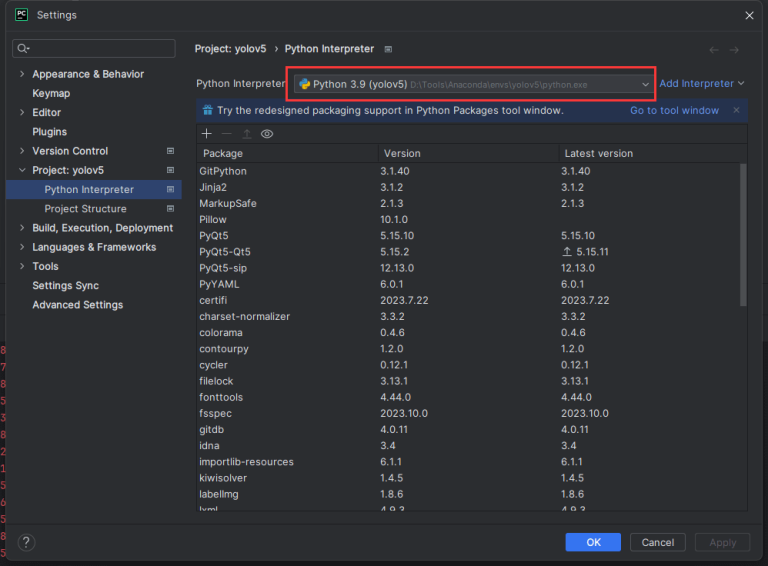
If it is not in the dropdown, we can add it in Add Interpreter.
Train the test data.
① Download the pre-trained model.
Pre-trained model address: https://github.com/ultralytics/
Select the model you need to download; here, I choose to download yolov5s.pt.
After downloading, place it in the yolov5 project directory.
② Training data.
Right-click train.py and click run to execute.

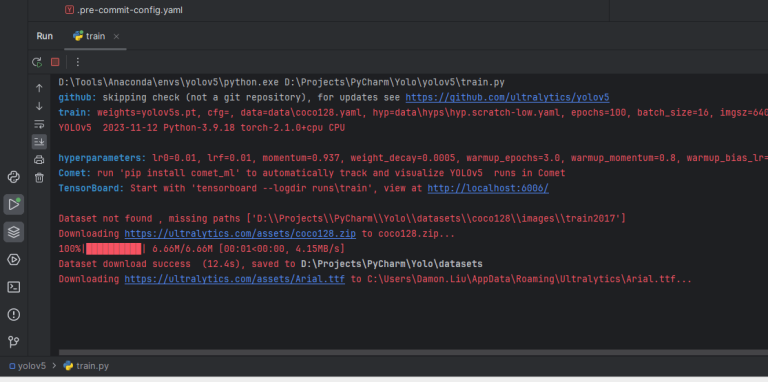
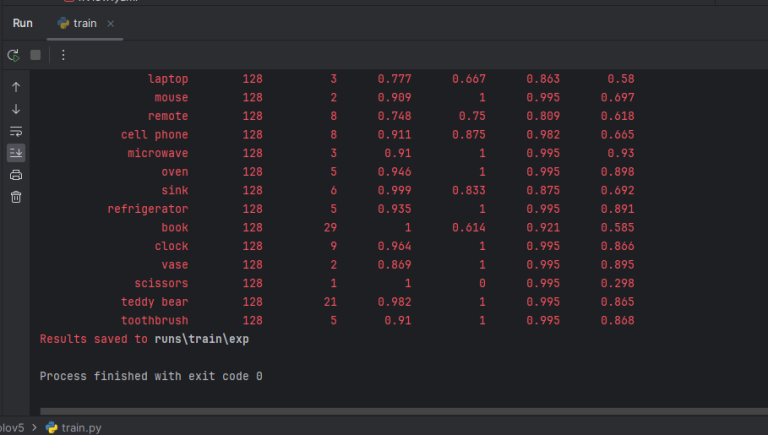
If the run is successful, as shown in the figure, the training results will be saved in the runs\train\exp folder.

The weights folder stores two trained models, namely best.pt and last.pt. As the names suggest, best.pt is the model with the best performance.
2. Deploying the Model on Raspberry Pi
1. Copy the Model to Raspberry Pi
Copy the trained model file best.pt to Raspberry Pi. You can use the SCP command or directly copy the file to the SD card. For example, using the SCP command:
scp runs/train/exp/weights/best.pt pi@<your-raspberry-pi-ip>:/home/pi/yolov5/2. Configure the Raspberry Pi Environment
Install the necessary dependencies and configure the environment on Raspberry Pi. First, ensure that Raspberry Pi has Raspberry Pi OS installed.
Install Anaconda
Download and install Anaconda (or Miniconda) for managing Python environments:
wget https://repo.anaconda.com/archive/Anaconda3-2021.05-Linux-x86_64.shbash Anaconda3-2021.05-Linux-x86_64.shFollow the prompts during installation and add Anaconda to the system PATH.
Create a Virtual Environment and Install YOLOv5
conda create -n yolov5 python=3.9 -yconda activate yolov5git clone https://github.com/ultralytics/yolov5.gitcd yolov5pip install -r requirements.txt3. Real-Time Detection via Camera
1. Configure the Camera
Ensure that the Raspberry Pi is connected to the camera module and enable the camera interface. Run the following command in the Raspberry Pi terminal to enter the Raspberry Pi configuration tool:
sudo raspi-configSelect Interface Options, then select Camera, and enable the camera interface. Restart the Raspberry Pi to apply the configuration.
2. Run Real-Time Detection
In the YOLOv5 project directory, run the following command to execute the real-time detection script:
python detect.py --weights best.pt --source 0–source 0 specifies using the camera as the input source. The detection results will be displayed in real-time on the screen and saved to the runs/detect/exp directory.

4. Conclusion
Through the above steps, we successfully trained the YOLOv5 model on a more powerful computer and deployed the trained model on Raspberry Pi 4B, achieving real-time animal target detection using the Raspberry Pi camera. This process demonstrates the complete workflow from environment configuration, data preparation, model training, to model deployment and real-time inference. With the introduction in this article, readers should be able to master the complete process of deploying YOLOv5 for animal target detection on Raspberry Pi. This technology has broad application prospects in smart homes, security monitoring, agricultural monitoring, and other fields. We hope this article can provide help and reference for your project development.