Note: For each step, you only need to look at the specific part in the corresponding article. Although many articles write about other parts, the author encountered various bugs, so the parts that work without issues have been extracted.
1. Image Burning, Connecting Raspberry Pi with Ethernet, and Basic Configuration
(1) System Image Burning
Installing Ubuntu 18.04 on Raspberry Pi 4B
(2) Changing User Password
Changing user password in Ubuntu
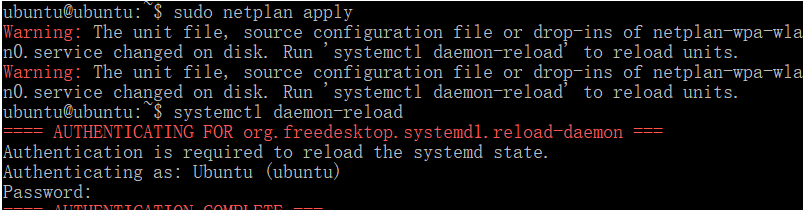
(3) Configuring Wireless Network and Auto-Connect on Boot (Verified Working)
First, back up your network configuration files! Make sure to back up, otherwise, if you make a mistake, you may need to re-flash the system without the original file!
# Backup operation (only this command is needed for backup)sudo cp /etc/netplan/50-cloud-init.yaml /etc/netplan/50-cloud-init.yaml.bak
# If you find that your original file has errors later, delete the original file and rename the backup file to the original file.sudo rm /etc/netplan/50-cloud-init.yamlsudo mv /etc/netplan/50-cloud-init.yaml.bak /etc/netplan/50-cloud-init.yaml
# This completes the restoration of the backup file (normally not needed!).
Specific operation method:
Wireless network configuration for Raspberry Pi 4B (Ubuntu)
It is normal to encounter the following situation; as long as the first step sudo netplan try does not produce an error, then restart the Raspberry Pi to see if the configuration is successful!
After configuring WiFi, if there is a need for static IP configuration (otherwise skip this), please check:
https://a.r.sn.cn/qJYbZy
2. Installing ROS
Installing Ubuntu 18.04.4 and ROS on Raspberry Pi 4B:
https://blog.csdn.net/qq_35898865/article/details/105065259
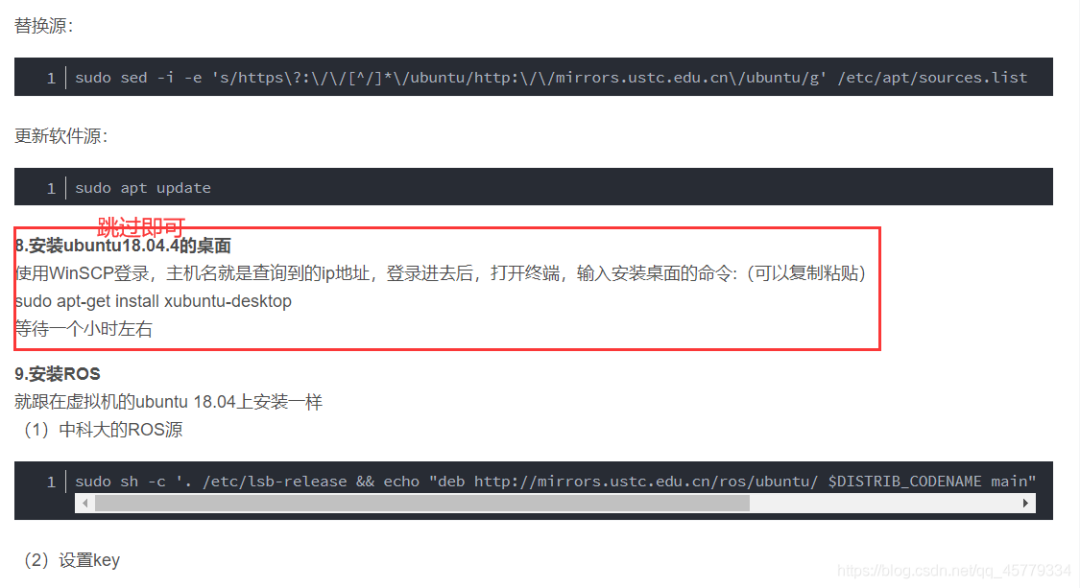
Note: In the third step, we will inform you about the installation of the desktop and remote access; this step does not require desktop installation for now.
Problem Solving
1. Error with sudo rosdep init
Solution: Execute the following command:
cd /etcsudo gedit hostsAt the end of the file, add:
151.101.84.133 raw.githubusercontent.comAnd connect the computer to the mobile hotspot; when changing WiFi connections, just change the WiFi name and password directly.
Reference: The blog mentioned above on configuring WiFi can be referred to, Wireless network configuration for Raspberry Pi 4B (Ubuntu): https://a.r.sn.cn/rT6DgF
Retry multiple times; you can also use an infinite loop script to keep retrying.
2. Error with rosdep update
Or the following error occurs:
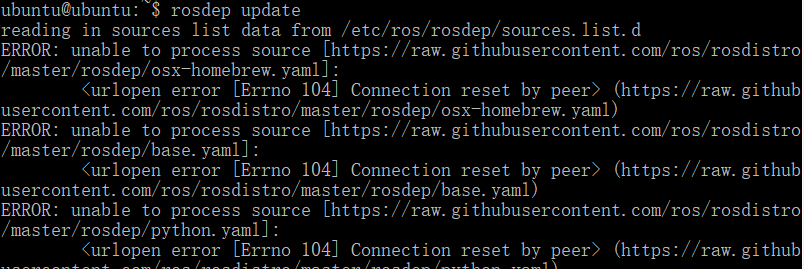
Solution:
Step 1: Connect the computer to the mobile hotspot, the method is the same as in problem one.
Step 2: Solve the GitHub blocking issue with the following commands:
sudo sed -i "s/raw.githubusercontent.com/raw.ctl.app/g" /usr/lib/python2.7/dist-packages/rosdistro/__init__.py
sudo sed -i "s/raw.githubusercontent.com/raw.ctl.app/g" /usr/lib/python2.7/dist-packages/rosdistro/manifest_provider/github.py
sudo sed -i "s/raw.githubusercontent.com/raw.ctl.app/g" /usr/lib/python2.7/dist-packages/rosdep2/rep3.py
sudo sed -i "s/raw.githubusercontent.com/raw.ctl.app/g" /usr/lib/python2.7/dist-packages/rosdep2/gbpdistro_support.py
Then execute rosdep update again.
It is recommended to use an infinite loop script to repeatedly execute rosdep update to avoid having to keep an eye on the terminal.
At this point, the update is complete; you can interrupt the script.

3. Installing Desktop and Achieving Remote Desktop Connection, and Setting Up Auto-Connect WiFi on Boot
(1) Installing Desktop
Install the full desktop version; xubuntu may encounter some strange issues, so just install the full version:
sudo apt-get install ubuntu-desktop(2) Configuring Remote Desktop
After installation, configure the remote desktop environment:
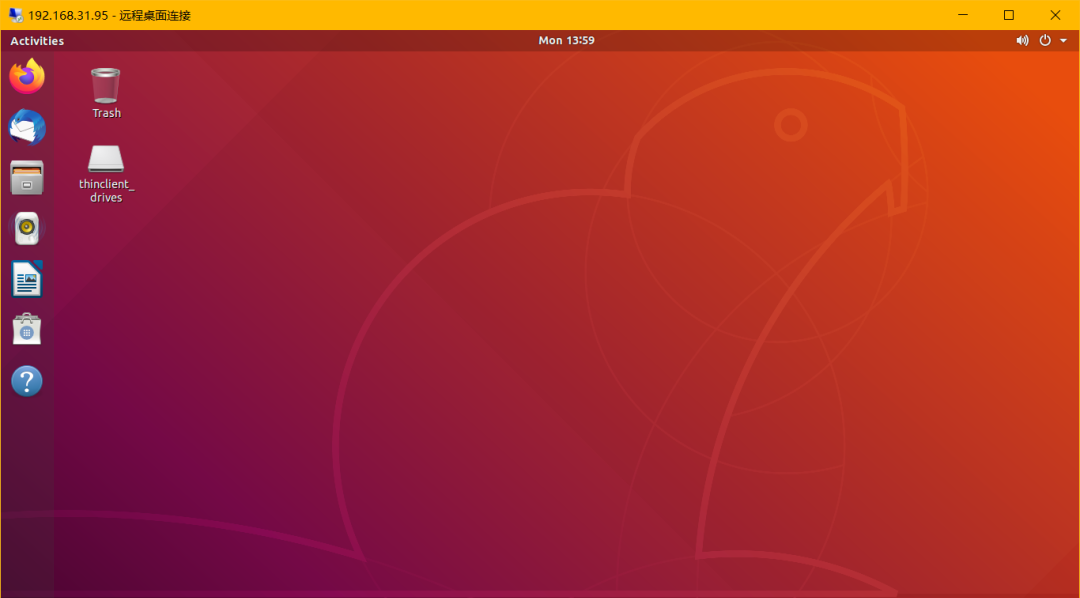
Installing XRDP remote desktop on Ubuntu 18.04.4
Tested and verified to be effective: (successful connection screenshot)
(3) Setting System to Auto-Connect to WiFi on Boot
Insert the Raspberry Pi’s SD card into the computer; here I am using Ubuntu 18.04, the Windows operation is the same!
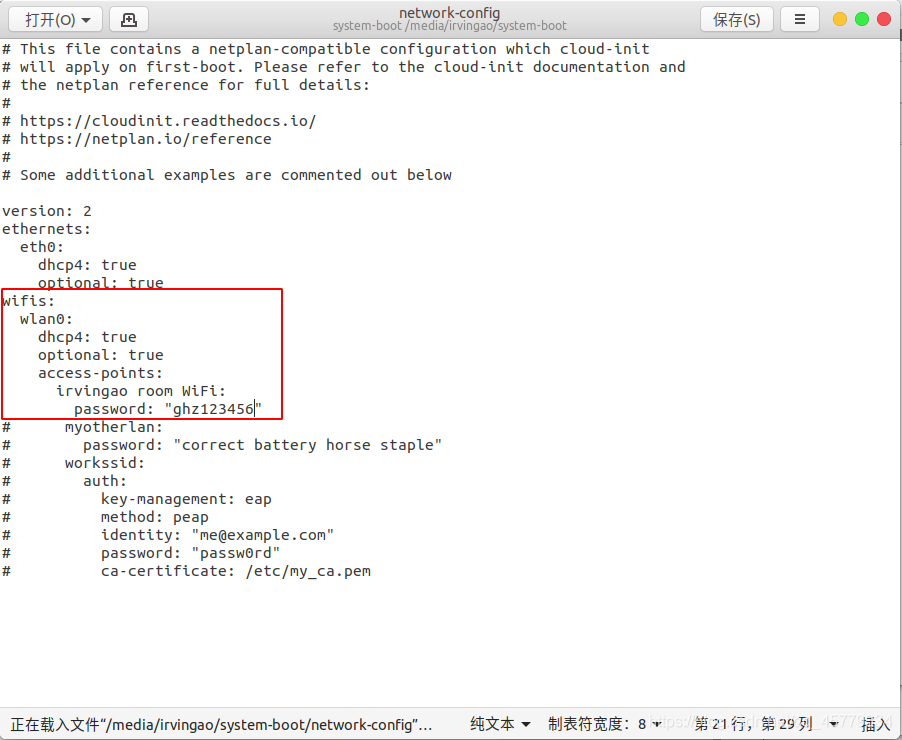
In that drive letter, you can directly see the network-config file, open that file.

The original network-config file is as follows:

Uncomment and modify the WiFi information to your own:
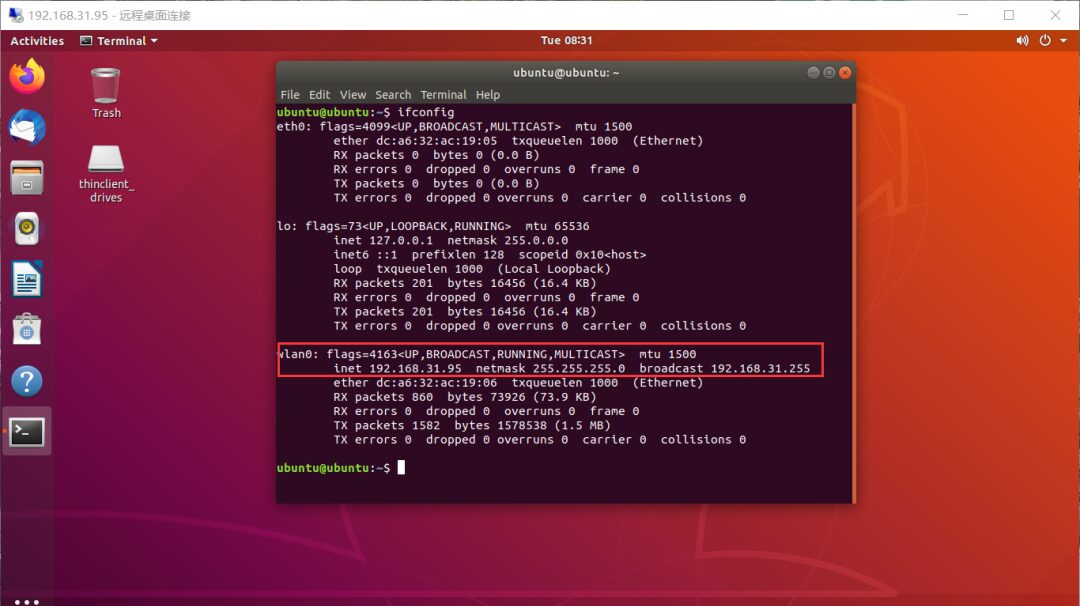
Save and exit; the configuration is complete. Then you can access the Raspberry Pi’s IP through that WiFi.
Effect Diagram:
Connecting to Raspberry Pi via SSH on the Ubuntu side:

Windows side connected via WiFi for remote desktop:
4. Configuring ROS Master and Slave
If you do not have a host Ubuntu environment, first set up an Ubuntu virtual machine:
https://blog.csdn.net/qq_45779334/article/details/113484623
Once configured or if you already have an environment, refer to the blog for configuring ROS master and slave:
https://blog.csdn.net/Ai_Smith/article/details/110557447?utm_medium=distribute.pc_relevant.none-task-blog-BlogCommendFromMachineLearnPai2-6.control&depth_1-utm_source=distribute.pc_relevant.none-task-blog-BlogCommendFromMachineLearnPai2-6.control
If you encounter the following problem after configuring the IP

Solution:
https://blog.csdn.net/zzr1024/article/details/112558891
If you encounter the error “Network error: Software caused connection abort” when using putty with roscore

Solution:
https://blog.csdn.net/u011401496/article/details/38540939/
At this point, the configuration is complete~

Introduction to Object-Oriented Programming in Matlab
This course briefly introduces the advantages of object-oriented programming, followed by an introduction to its operations in Matlab, including basic concepts such as composition and inheritance, and then demonstrates the difference between procedural and object-oriented programming through an example. Finally, two case studies are provided to practice object-oriented programming methods, showcasing and validating the advantages of object-oriented programming.

(Scan the QR code to view course details)