Many people feel overwhelmed when they first encounter the extensive command codes in PLC programming, thinking it’s too abstract and difficult to learn. In fact, PLC programming is like ‘building blocks’; beginners do not need to learn complex commands first. By starting with ‘three basic steps’, one can write simple control programs (such as motor start/stop and indicator light cycles) in just two weeks.
Step 1: ‘Draw a flowchart’ to transform requirements into a ‘step diagram’. For example, to achieve ‘pressing the start button makes the motor run; pressing the stop button makes the motor stop’, first draw a simple flowchart: Start Button → PLC Input Module → Internal Relay → Output Module → Contactor → Motor, with the Stop Button in series in the circuit. This step helps clarify logic and avoids ‘confusion’ during later programming. Beginners can use hand-drawing or mind mapping tools to clearly outline the ‘conditions and results’ of each action, which is easier than writing code directly.
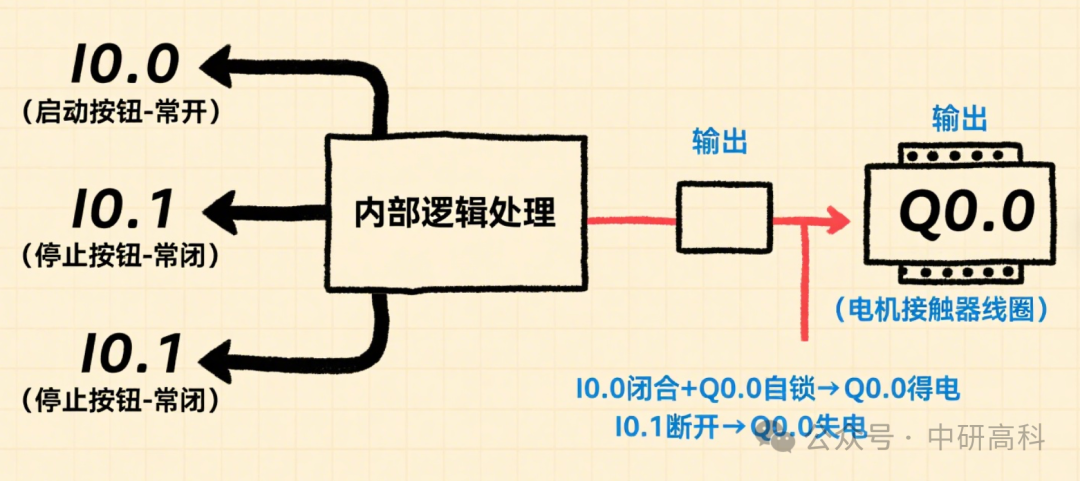
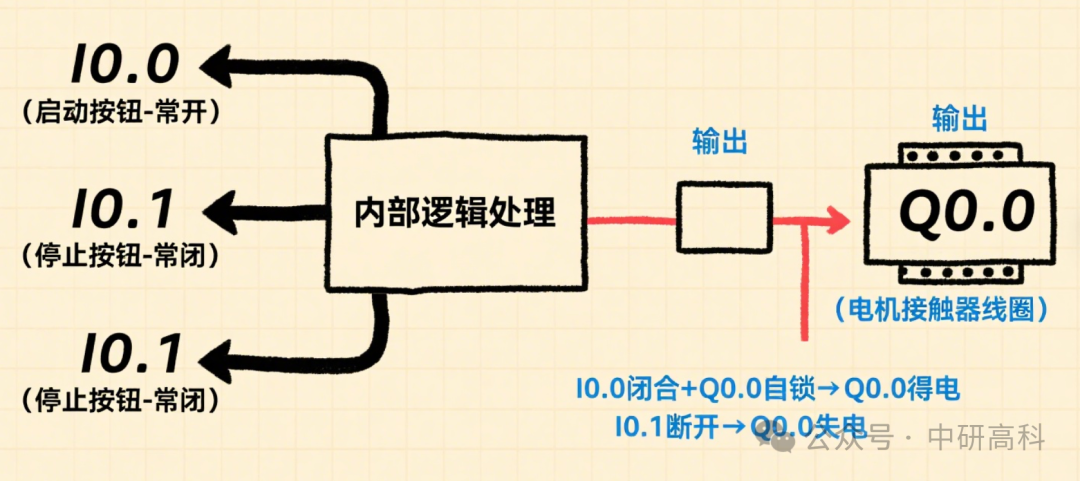
Step 2: ‘Select commands’, starting with the ‘three commonly used commands’. There are thousands of PLC commands, but beginners only need to master these ‘three basic commands’: Normally Open Contact (I), Normally Closed Contact (I NOT), and Output Coil (Q). For example, connect the Start Button to I0.0 (Normally Open), the Stop Button to I0.1 (Normally Closed), and the motor contactor to Q0.0. The program would be: I0.0 → I0.1 → Q0.0, plus the self-locking of Q0.0 (to keep the motor running after releasing the button). The beginners I have trained can write a motor start/stop program in as little as one day using these three commands, which gives them an immediate sense of achievement.
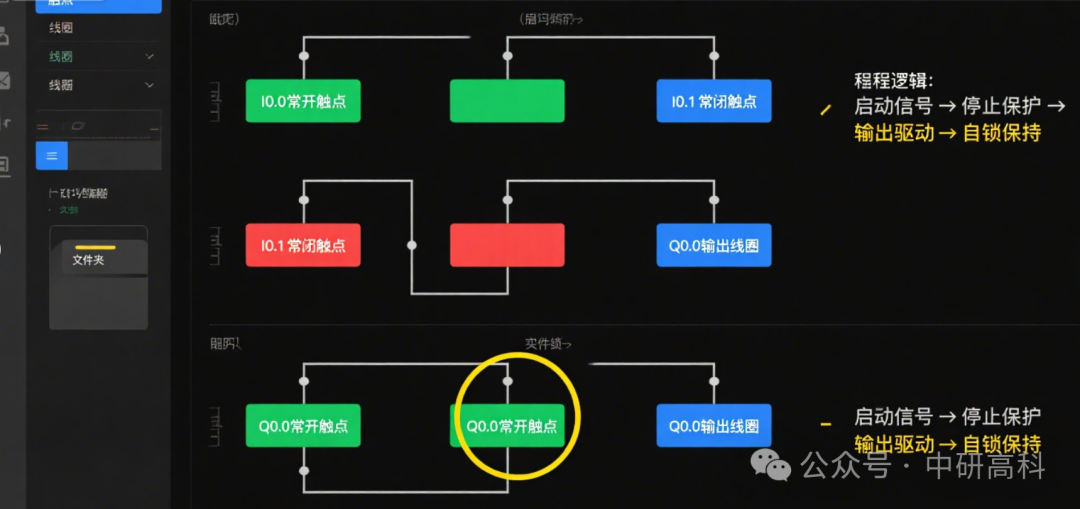
Step 3: ‘Simulation testing’ to avoid issues during on-site debugging. After writing the program, do not rush to download it to the PLC; first, use simulation software (such as the Siemens S7-200 SMART simulator) to test: click I0.0 to simulate pressing the start button and check if Q0.0 lights up (indicating the motor is running); then click I0.1 to simulate pressing the stop button and check if Q0.0 goes out. During simulation, intentionally ‘set incorrectly’ (for example, set the stop button as normally open) and observe the program’s response to understand the consequences of logical errors.
The key to PLC programming is to ‘first clarify the logic, then write the code’. Beginners should not be intimidated by complex commands. It is recommended to start with small projects like ‘single motor control’ or ‘flashing indicator lights’. After completing each project, try to add more features (such as overload protection) gradually—remember, even the most skilled engineers started by ‘writing the simplest programs’.