
Yaskawa Robot
Modifying IP Address

Introduction to Modifying IP Address of Yaskawa Robot

Yaskawa robots typically need to modify their IP address in the following situations:
- When communicating with other devices When the Yaskawa robot needs to communicate over the network with external devices (such as welding machines, vision systems, PLCs, etc.), it is necessary to ensure that the robot’s IP address is in the same subnet as the other devices or meets the requirements of the network topology. For example, when the Yaskawa robot communicates with the Funi TPSi welding machine via WELDCOM, the robot’s IP address (LAN2 should be set to an address in the same subnet as the welding machine’s IP address, such as 192.168.255.200, while the welding machine’s IP address is set to 192.168.255.210, etc.
- When the network topology changes If the factory’s network has been upgraded or modified, or if the robot has been moved to a different network area, the original IP address may no longer be applicable, and it will need to be modified according to the new network plan. For example, moving from one subnet to another, or if the network’s gateway, subnet mask, and other parameters have changed.
- When multiple robots are working together When multiple Yaskawa robots are working together on the same network, to ensure they can communicate and interact correctly, their IP addresses need to be set in the same subnet and must not conflict with each other. For example, when two Yaskawa robots with EtherNet/IP functionality are interacting, it is necessary to confirm that both robots’ IP addresses are in the same subnet and set the master and slave station IP addresses accordingly.
- To resolve IP address conflicts If there are other devices on the network using the same IP address as the Yaskawa robot, it will lead to network communication failures, and the robot’s IP address needs to be modified to avoid conflicts.
- When restoring default network settings If there are errors in the robot’s network settings, or if it is necessary to restore the network settings to factory defaults, the IP address can be modified to achieve this. The default IP address of the Yaskawa robot is 192.168.255.1; if the current IP address has been modified and issues arise, it can be reset to the default value.
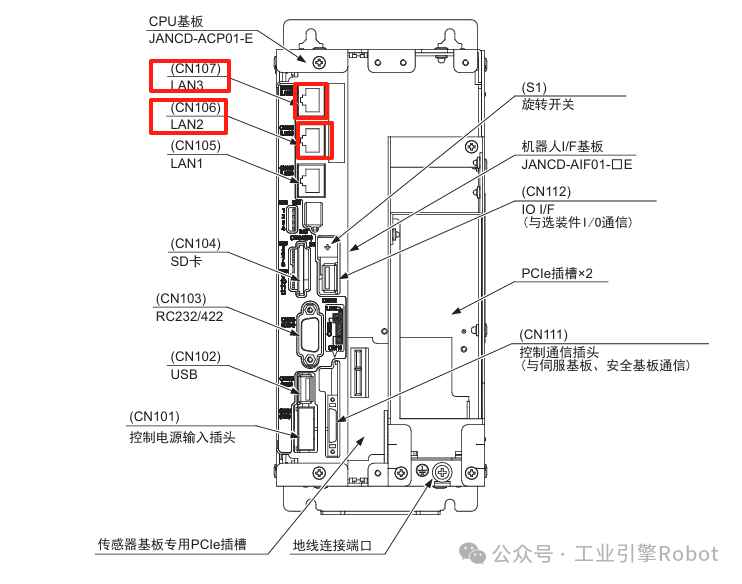
Yaskawa Robot Modifying IP Address
1. Long press the teach pendant’s 【Main Menu】 to power on and enter maintenance mode,
or enter maintenance mode via 【Online Mode】 – 【CPU Reset】.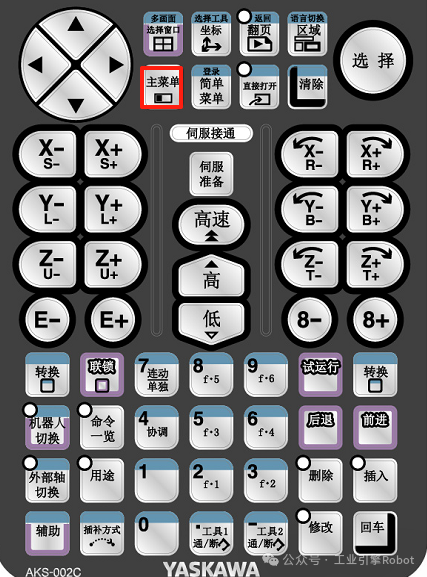
Note:
• If the 【Main Menu】 is not pressed when starting the robot, it will enter online mode.
2. Click 【System】 【Safe Mode
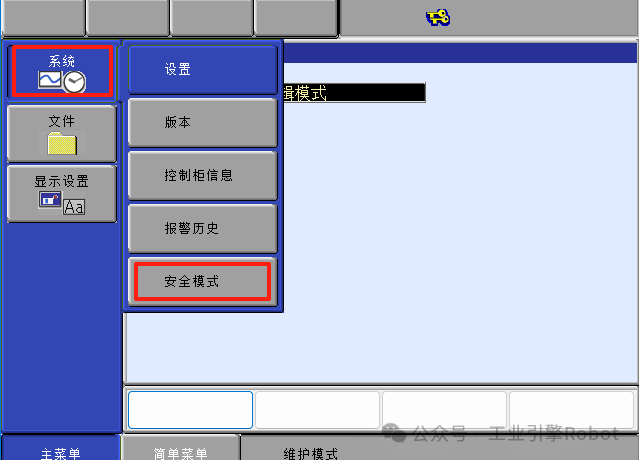
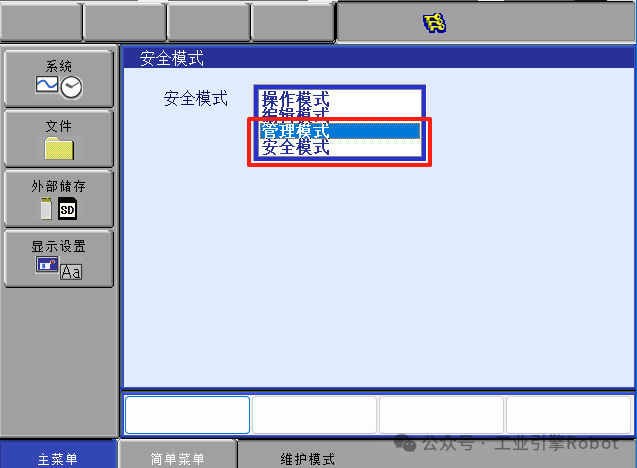
3. Enter the password in management mode (the default password is16 “9”), and click the Enter key to enter 【Management Mode】.
Enter the password in safe mode (the default password is16 “5”), and click the Enter key to enter 【Safe Mode】.
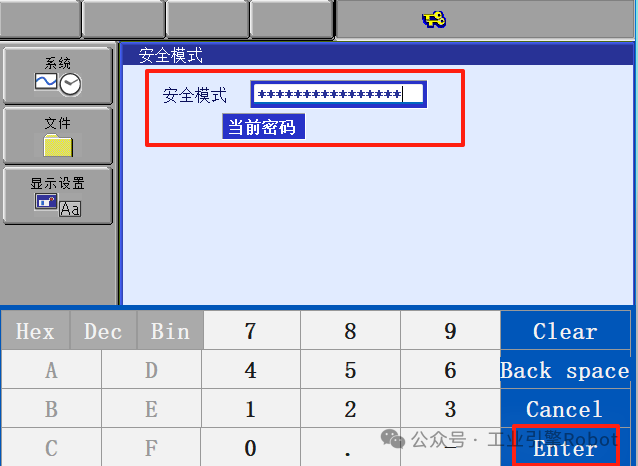
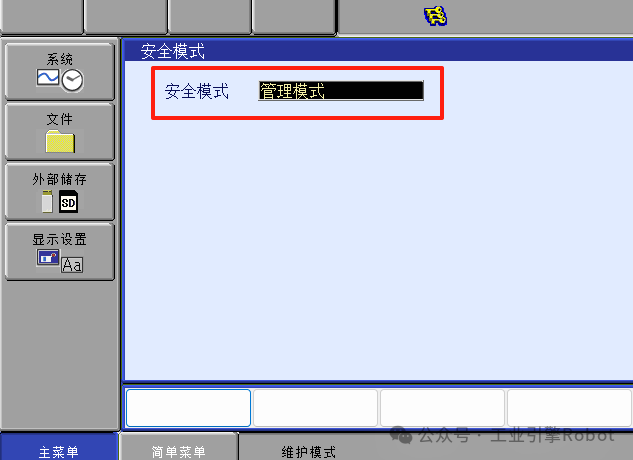
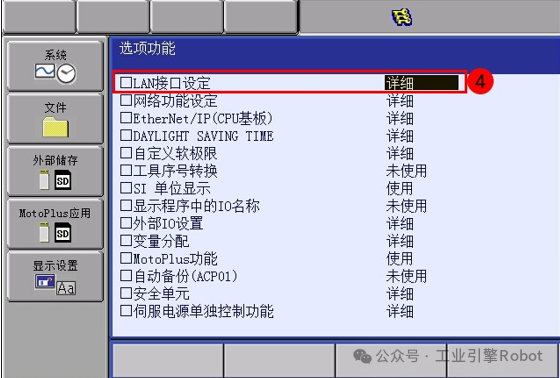
4. Click 【System】 – 【Settings – 【Option Functions】
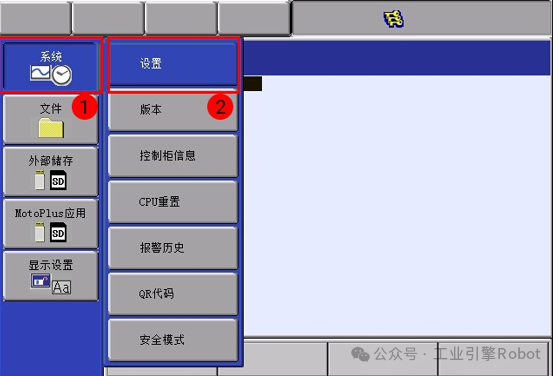
Enter the 【Option Functions】 interface
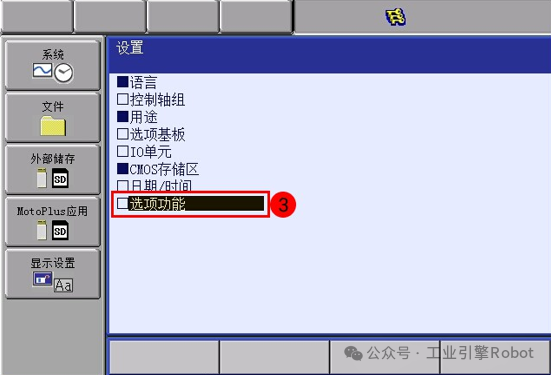
Enter the 【 LAN Interface Settings】.
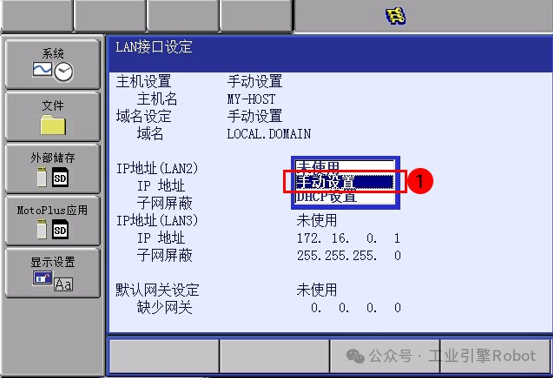
5.Set the IP address of LAN2 at the LAN2 port, please select manual setting from the drop-down menu, and be sure to set the correct IP address and subnet mask (subnet mask).
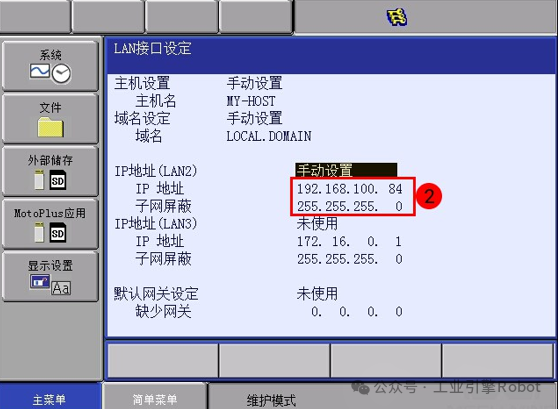
Set the IP address according to actual usage
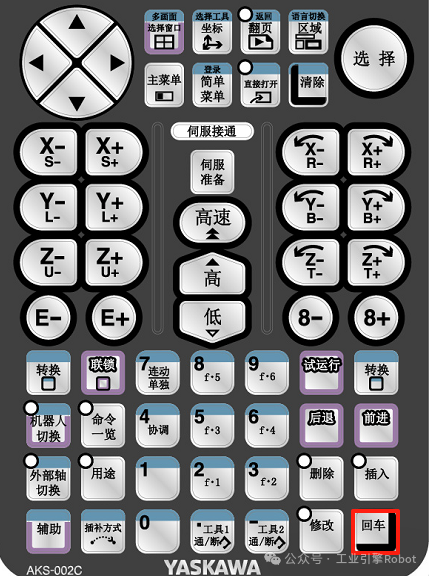
6. After modifying the IP address, press the 【Enter】 button on the lower right corner of the teach pendant
A pop-up will prompt for modification, select 【Yes】.
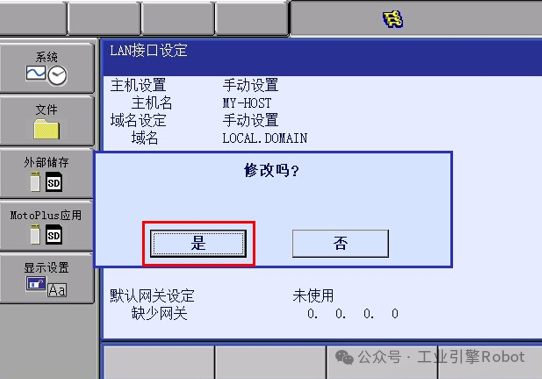
Restart the robot to complete the IP address modification.

END
 Click to follow, don’t get lost
Previous reviews
◆ Mecademic Camera – Communication Overview
◆ Yaskawa Robot – IO Simulation Release
◆ Types and Structures of Industrial Robots
◆ Yaskawa Robot – Teaching Point Adjustment Function
◆ Yaskawa Robot – Axis Separation Function
◆ Yaskawa Robot – Interrupt Program
◆ Yaskawa Robot – Load Abnormal Alarm Release
◆ Yaskawa Robot Ladder Diagram (10) Register Transfer to External Output, IO High-Low Conversion
◆ Yaskawa Robot – Inverted Parameter Settings

Click to share and let more people see

Share

Collect

Looking

Like