 Big Data Digest Work
Compiled by: Wan Jun, Molly, Jiang Bao Shang
Blockchain, as the core technology behind Bitcoin and other cryptocurrencies, has attracted global attention in recent years. However, countries have varying attitudes towards this disruptive technology. Its decentralized distributed structure allows users to communicate directly without the need for a central node, which has a significant impact on institutions such as banks and securities.
The technical model of blockchain and the attitudes of various countries towards blockchain:
-
Overview of G20 countries’ views on digital currencies, generally friendly
-
Ultimate Guide to Blockchain by Old Miners (5000 words)
In this article, aside from introducing the technical characteristics and application scenarios of blockchain, we will guide you step-by-step on how to implement a basic blockchain using Python and a blockchain client.
Our implemented blockchain has the following features:
-
Multiple nodes can be added to the blockchain.
-
Proof of Work (PoW).
-
A simple conflict resolution mechanism between nodes.
-
Using RSA encryption for transactions.
Our blockchain client has the following functionalities:
-
Generate wallets using public/private key encryption technology (based on RSA algorithm).
-
Generate transactions using RSA encryption algorithm.
We also implemented two display interfaces:
-
The “Blockchain Frontend” used by miners
-
The “Blockchain Client” for users to generate wallets and issue coins
I made some modifications to the original code, adding RSA encryption to transactions and implementing wallet generation and transaction encryption. The two interfaces are implemented using HTML/CSS/JS.
Complete project code:
https://github.com/adilmoujahid/blockchain-python-tutorial
Please note that this implementation is for educational purposes only and is not suitable for production environments due to insufficient confidentiality and lack of some important features.
Implementation of Blockchain Client
You can start the blockchain client from the terminal. Enter the blockchain_client folder and type the command: python blockchain_client.py.
Open http://localhost:8080 in your browser, and you will see the following display interface.
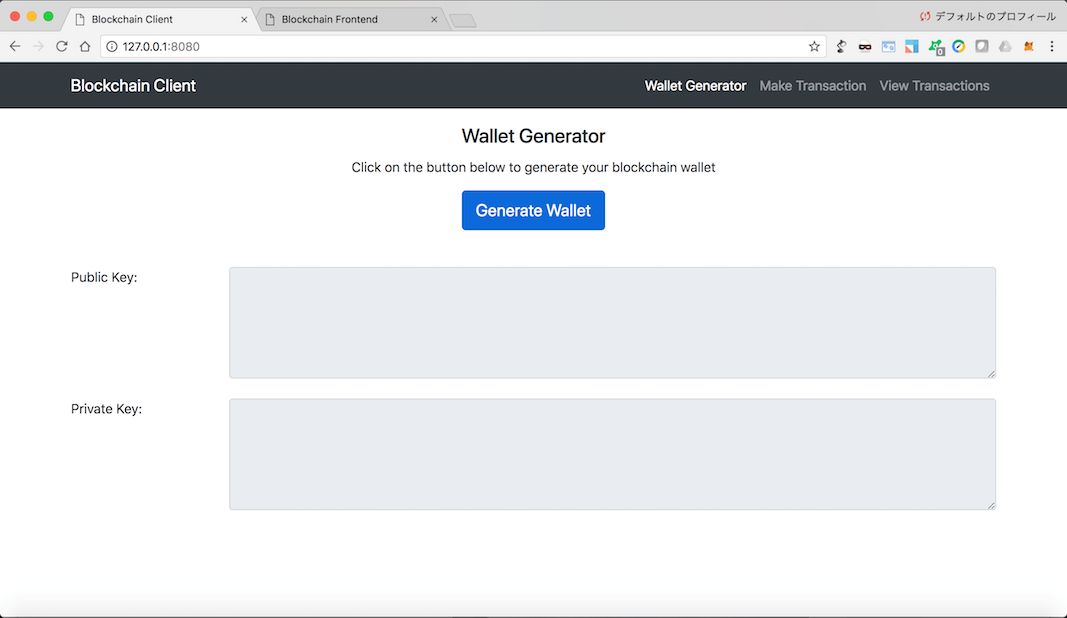
The navigation bar of the display interface has 3 tabs:
-
Wallet Generator: Generates wallets using RSA encryption algorithm (public/private key pair).
-
Generate Transaction: Generates transactions and sends them to blockchain nodes.
-
View Transactions: View transactions on the blockchain.
To generate or view transactions, at least one blockchain node must be running (to be introduced in the next section).
Explanation of some important parts of the blockchain_client.py file code:We define a Python class with four attribute fields: sender_address, sender_private_key, recipient_address, value.
These are the four pieces of information required for the sender to create a transaction.
The to_dict() method returns transaction information in Python dictionary format (without the sender’s private key).
The sign_transaction() method receives transaction information (without the sender’s private key) and then signs it using the sender’s private key.
class Transaction:
    def __init__(self, sender_address, sender_private_key, recipient_address, value):
        self.sender_address = sender_address
        self.sender_private_key = sender_private_key
        self.recipient_address = recipient_address
        self.value = value

    def __getattr__(self, attr):
        return self.data[attr]

    def to_dict(self):
        return OrderedDict({'sender_address': self.sender_address,
                            'recipient_address': self.recipient_address,
                            'value': self.value})

    def sign_transaction(self):
        """
        Sign transaction with private key
        """
        private_key = RSA.importKey(binascii.unhexlify(self.sender_private_key))
        signer = PKCS1_v1_5.new(private_key)
        h = SHA.new(str(self.to_dict()).encode('utf8'))
        return binascii.hexlify(signer.sign(h)).decode('ascii')
Below is the line of code to initialize a Python Flask application, which we will use to create different APIs to interact with the blockchain and its clients.
app = Flask(__name__)
Next, we define three Flask routes that return HTML pages, each tab having an HTML page.
@app.route('/')
def index():
  return render_template('./index.html')

@app.route('/make/transaction')
def make_transaction():
    return render_template('./make_transaction.html')

@app.route('/view/transactions')
def view_transaction():
return render_template('./view_transactions.html')
Next, we define an API to generate wallets (private/public key pairs).
@app.route('/wallet/new', methods=['GET'])
def new_wallet():
  random_gen = Crypto.Random.new().read
  private_key = RSA.generate(1024, random_gen)
  public_key = private_key.publickey()
  response = {
    'private_key': binascii.hexlify(private_key.exportKey(format='DER')).decode('ascii'),
    'public_key': binascii.hexlify(public_key.exportKey(format='DER')).decode('ascii')
  }
  return jsonify(response), 200
Next, we define an API that takes sender_address, sender_private_key, recipient_address, and value fields as input and returns the transaction (without the private key) and signature.
@app.route('/generate/transaction', methods=['POST'])
def generate_transaction():
  sender_address = request.form['sender_address']
  sender_private_key = request.form['sender_private_key']
  recipient_address = request.form['recipient_address']
  value = request.form['amount']
  transaction = Transaction(sender_address, sender_private_key, recipient_address, value)
  response = {'transaction': transaction.to_dict(), 'signature': transaction.sign_transaction()}
  return jsonify(response), 200
Implementation of Blockchain
You can start the blockchain node from the terminal by entering the blockchain folder and typing the command: python blockchain_client.py or python blockchain_client.py -p <PORT NUMBER>. If you do not specify a port number, the default port number will be 5000. Open http://localhost:<PORT NUMBER> in your browser to see the blockchain frontend display interface.
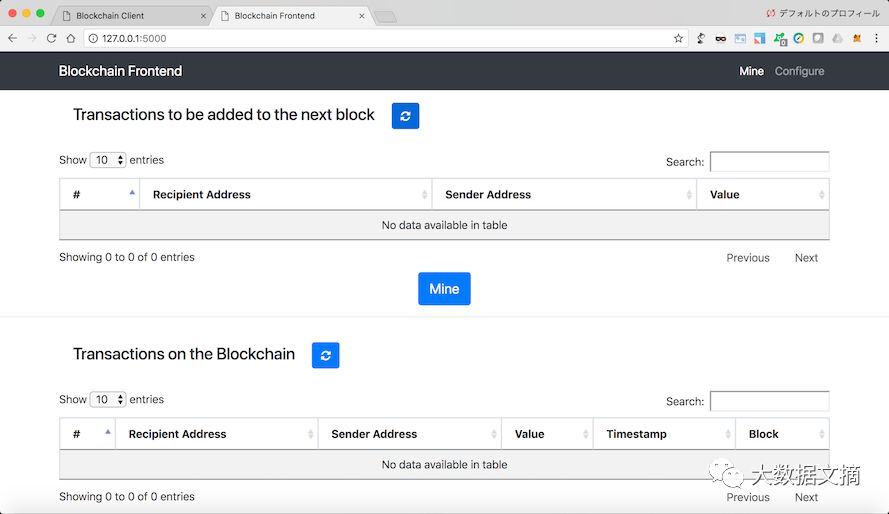
The navigation bar of the display interface has two tabs:
-
Mining: Used to view transactions and blockchain data, as well as to mine new transaction blocks.
-
Configuration: Used to configure connections between different blockchain nodes.
Below is an explanation of some important parts of the blockchain.py file code.
We first define a Blockchain class with the following attributes:
-
transactions: A list of transactions to be added to the next block.
-
chain: The actual blockchain, which is an array of blocks.
-
nodes: A set containing the URLs of nodes. The blockchain uses these nodes to retrieve blockchain data from other nodes and updates its blockchain when it detects they are not synchronized.
-
node_id: A random string that identifies the blockchain node.
This Blockchain class also implements the following methods:
-
register_node(node_url): Adds a new blockchain node to the list of nodes.
-
verify_transaction_signature(sender_address, signature, transaction): Checks if the provided signature corresponds to the transaction signed by the public key (sender_address).
-
submit_transaction(sender_address, recipient_address, value, signature): If the signature is verified, adds the transaction to the list of transactions.
-
create_block(nonce, previous_hash): Adds a block of transactions to the blockchain.
-
hash(block): Creates a SHA-256 hash of a block.
-
proof_of_work(): Proof of work algorithm. Searches for a random number that meets the mining conditions.
-
valid_proof(transactions, last_hash, nonce, difficulty=MINING_DIFFICULTY): Checks if a hash value satisfies the mining conditions. This function is used within the proof_of_work function.
-
valid_chain(chain): Checks if a blockchain is valid.
-
resolve_conflicts(): Resolves conflicts between blockchain nodes by replacing our chain with the longest one in the network.
class Blockchain:
    def __init__(self):
        self.transactions = []
        self.chain = []
        self.nodes = set()
        #Generate random number to be used as node_id
        self.node_id = str(uuid4()).replace('-', '')
        #Create genesis block
        self.create_block(0, '00')

    def register_node(self, node_url):
        """
        Add a new node to the list of nodes
        """
        ...

    def verify_transaction_signature(self, sender_address, signature, transaction):
        """
        Check that the provided signature corresponds to transaction

        signed by the public key (sender_address)
        """
        ...

    def submit_transaction(self, sender_address, recipient_address, value, signature):
        """
        Add a transaction to transactions array if the signature verified
        """
        ...

    def create_block(self, nonce, previous_hash):
        """
        Add a block of transactions to the blockchain
        """
        ...

    def hash(self, block):
        """
        Create a SHA-256 hash of a block
        """
        ...

    def proof_of_work(self):
        """
        Proof of work algorithm
        """
        ...

    def valid_proof(self, transactions, last_hash, nonce, difficulty=MINING_DIFFICULTY):
        """
        Check if a hash value satisfies the mining conditions. This function is used within the proof_of_work function.
        """
        ...

    def valid_chain(self, chain):
        """
        check if a bockchain is valid
        """
        ...

    def resolve_conflicts(self):
        """
        Resolve conflicts between blockchain's nodes
        by replacing our chain with the longest one in the network.
        """
        ...
Next, we initialize a Python Flask application to create APIs for interacting with the blockchain.
app = Flask(__name__)
CORS(app)
Next, we initialize a blockchain object.
blockchain = Blockchain()
Next, we define two Flask routes that return HTML pages for our blockchain frontend display interface.
@app.route('/')
def index():
    return render_template('./index.html')

@app.route('/configure')
def configure():
return render_template('./configure.html')
Next, we define Flask APIs to manage transactions and mine the blockchain.
This API takes ‘sender_address’, ‘recipient_address’, ‘amount’, and ‘signature’ as input, and if the signature is valid, adds the transaction to the list of transactions that will be added to the next block.
-
‘/transactions/get’: This API returns all transactions that will be added to the next block.
-
‘/chain’: This API returns all blockchain data.
-
‘/mine’: This API runs the proof of work algorithm while adding new transaction blocks to the blockchain.
@app.route('/transactions/new', methods=['POST'])
def new_transaction():
    values = request.form
    # Check that the required fields are in the POST'ed data
    required = ['sender_address', 'recipient_address', 'amount', 'signature']
    if not all(k in values for k in required):
        return 'Missing values', 400
    # Create a new Transaction
    transaction_result = blockchain.submit_transaction(values['sender_address'], values['recipient_address'], values['amount'], values['signature'])
    if transaction_result == False:
        response = {'message': 'Invalid Transaction!'}
        return jsonify(response), 406
    else:
        response = {'message': 'Transaction will be added to Block '+ str(transaction_result)}
        return jsonify(response), 201

@app.route('/transactions/get', methods=['GET'])
def get_transactions():
    #Get transactions from transactions pool
    transactions = blockchain.transactions
    response = {'transactions': transactions}
    return jsonify(response), 200

@app.route('/chain', methods=['GET'])
def full_chain():
    response = {
        'chain': blockchain.chain,
        'length': len(blockchain.chain),
    }
    return jsonify(response), 200
@app.route('/mine', methods=['GET'])
def mine():
    # We run the proof of work algorithm to get the next proof...
    last_block = blockchain.chain[-1]
    nonce = blockchain.proof_of_work()
    # We must receive a reward for finding the proof.
    blockchain.submit_transaction(sender_address=MINING_SENDER, recipient_address=blockchain.node_id, value=MINING_REWARD, signature="")
    # Forge the new Block by adding it to the chain
    previous_hash = blockchain.hash(last_block)
    block = blockchain.create_block(nonce, previous_hash)
    response = {
        'message': "New Block Forged",
        'block_number': block['block_number'],
        'transactions': block['transactions'],
        'nonce': block['nonce'],
        'previous_hash': block['previous_hash'],
    }
return jsonify(response), 200
Next, we define Flask APIs to manage blockchain nodes.
-
‘/nodes/register’: This API takes a list of node URLs as input and adds the URL to the node list.
-
‘/nodes/resolve’: This API resolves conflicts between blockchain nodes by replacing the local chain with the longest available chain in the network.
-
‘/nodes/get’: This API returns the list of nodes.
@app.route('/nodes/register', methods=['POST'])
def register_nodes():
    values = request.form
    nodes = values.get('nodes').replace(" ", "").split(',')
    if nodes is None:
        return "Error: Please supply a valid list of nodes", 400
    for node in nodes:
        blockchain.register_node(node)
    response = {
        'message': 'New nodes have been added',
        'total_nodes': [node for node in blockchain.nodes],
    }
    return jsonify(response), 201

@app.route('/nodes/resolve', methods=['GET'])
def consensus():
    replaced = blockchain.resolve_conflicts()
    if replaced:
        response = {
            'message': 'Our chain was replaced',
            'new_chain': blockchain.chain
        }
    else:
        response = {
            'message': 'Our chain is authoritative',
            'chain': blockchain.chain
        }
    return jsonify(response), 200
@app.route('/nodes/get', methods=['GET'])
def get_nodes():
    nodes = list(blockchain.nodes)
    response = {'nodes': nodes}
return jsonify(response), 200
Conclusion
In this article, we introduced some core concepts behind blockchain and learned how to implement a blockchain using Python. For simplicity, this article does not cover some technical details, such as wallet addresses and Merkle trees. If you want to learn more about this topic, I recommend reading the original Bitcoin white paper and following the excellent books by Andreas Antonopoulos: Mastering Bitcoin: Programming the Open Blockchain.
Original link:
http://adilmoujahid.com/posts/2018/03/intro-blockchain-bitcoin-python/?utm_source=wanqu.co&utm_campaign=Wanqu+Daily&utm_medium=website
[Today’s Machine Learning Concept]
Have a Great Definition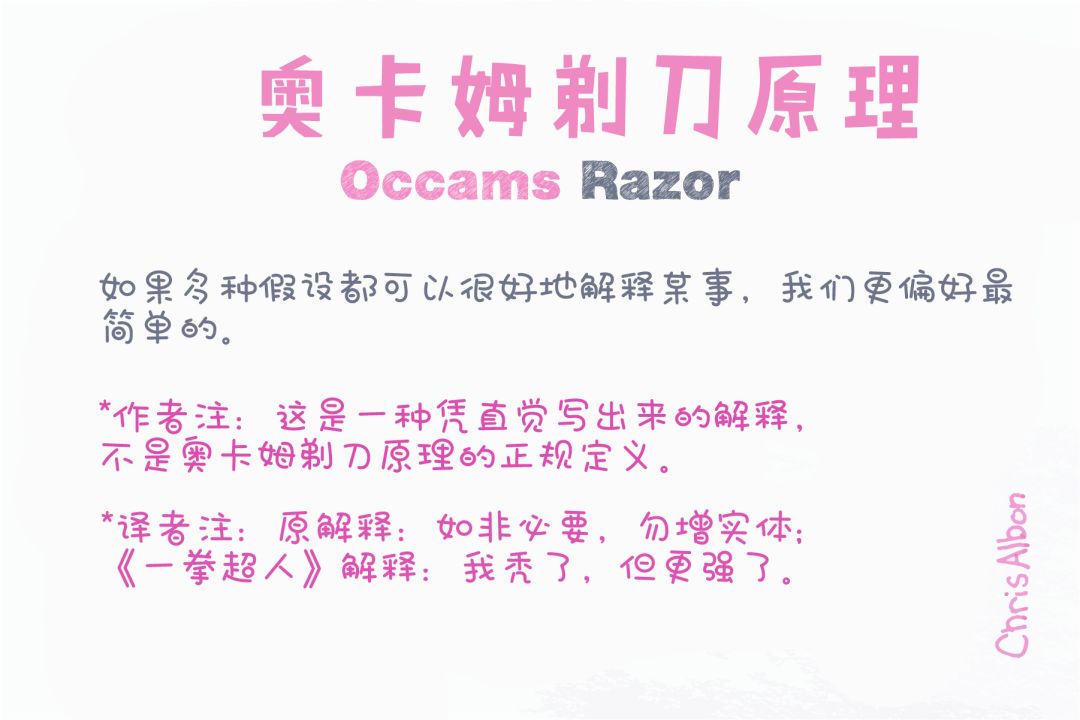
Volunteer Introduction
Reply “Volunteer” to join us