Click the “Blue Word: IoT Guesthouse” above to follow us
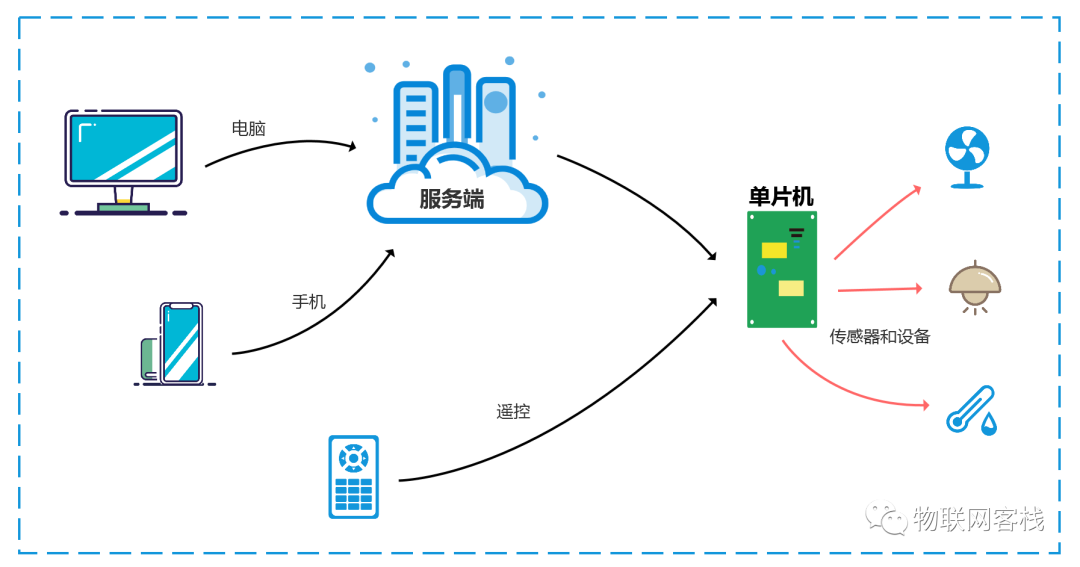
Starting today, we will learn about the smart dormitory system. For the front end, we will use WeChat Mini Programs for development, and for the server, we will choose the open-source IoT platform – Wumei Smart. After completing this series of courses, I believe everyone can DIY and connect smart lights, smart sockets, smart environmental detectors, etc., to achieve their own smart home.
1Introduction to Wumei Smart Open-source IoT
1. Wumei Smart (wumei-smart) is an open-source software and hardware system that can be used for secondary development and learning, allowing you to quickly build your own smart home system.Hardware engineers can integrate their devices into the system; software engineers can familiarize themselves with hardware-software interaction using the devices in the project.Demo video >
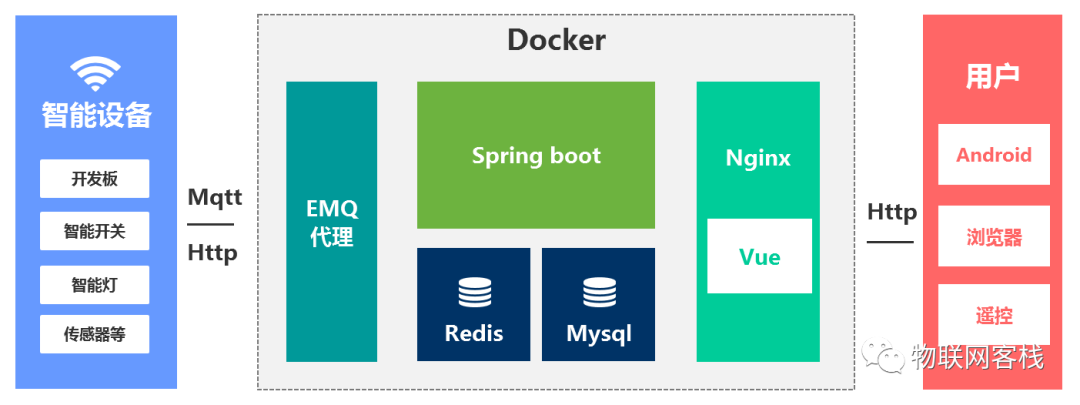
2. The server uses Spring Boot, MySQL and Redis for the database, Vue for the front end, Android for the mobile end, and ESP-IDF and Arduino for the hardware end. The hardware-software interaction is based on the MQTT protocol, using the EMQ broker. The system architecture diagram is as follows:
2Preparation
In this section, we will first use the mqtt.fx tool to connect to the MQTT server and quickly experience the overall functionality of Wumei Smart. First, let’s introduce the overall interaction process of MQTT communication.
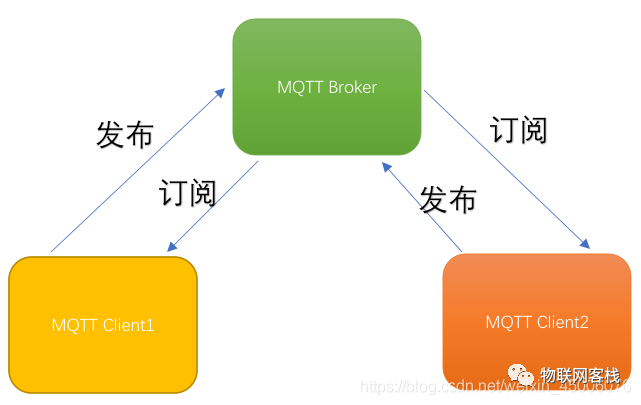
The MQTT Broker acts as a data forwarding agent, forwarding data published by an MQTT Client to another MQTT Client subscribed to the same topic.
1. Software Preparation:
The latest version download link (supports Windows, Linux, Mac): http://www.jensd.de/apps/mqttfx/1.7.1/
2. Server Preparation:
(1) Install Docker
(2) Run the following command in the command window (to complete the deployment of backend, frontend, database, and EMQX):
docker run \--name wumei-smart \--publish 80:80 \--publish 18083:18083 \--publish 1883:1883 \--publish 3306:3306 \--publish 6379:6379 \--restart always \--detach \registry.cn-chengdu.aliyuncs.com/kerwincui/wumei-smart:1.0By following the above steps, you can quickly deploy your own server. For those without server conditions, you can also use our server for testing at the address: http://106.12.9.213/, Username: test, Password: 123456. The interface after opening is as follows:
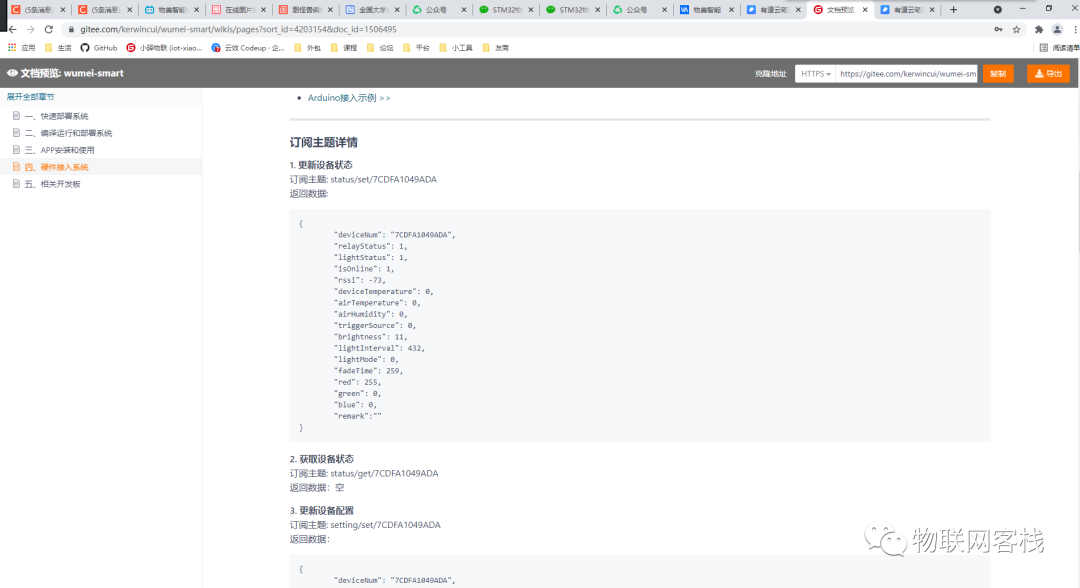
For connection data protocols, refer to the official documentation:
https://gitee.com/kerwincui/wumei-smart/wikis/pages?sort_id=4203154&doc_id=1506495
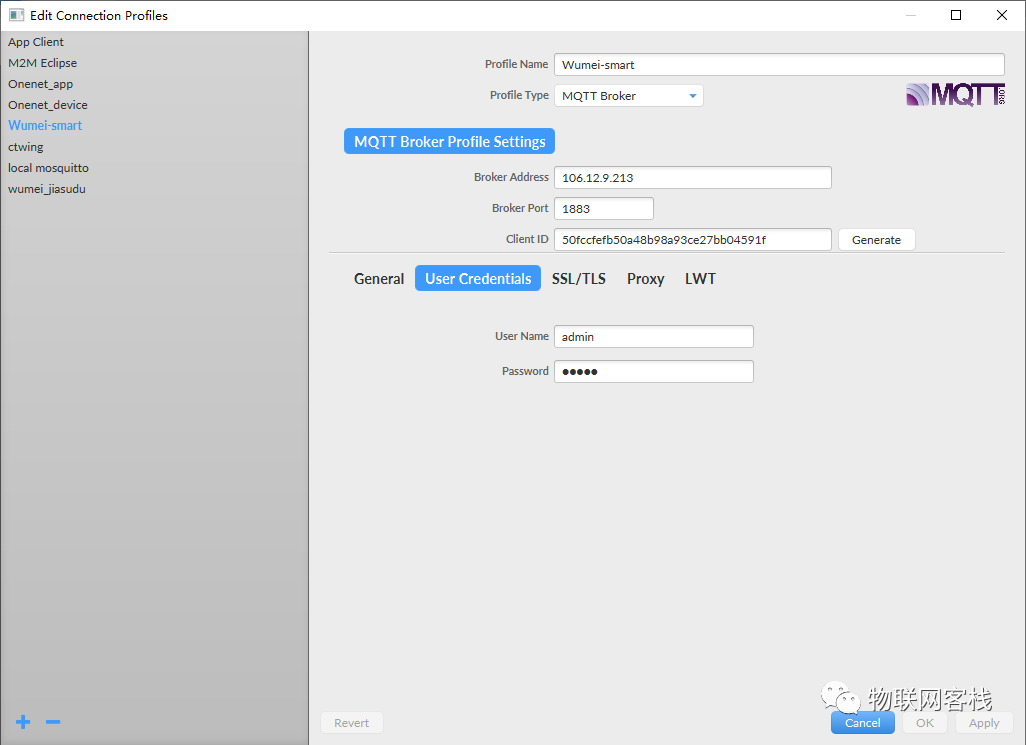
1Connect MQTT.fx to Wumei Server
The MQTT information is as follows: Host: 106.12.9.213 Port: 1883 Client ID: Random, click Generate Username: test (can be any, for testing use test) Password: 123456 (can be any, for testing use 123456)
2Create a Device Using MQTT.fx
After configuration, click the Connect button. If the light in the upper right corner turns green, it indicates a successful connection to the server. Next, we will create a new device by publishing a set of commands to create a device to the topic device_info.
{ "deviceNum": "E8DB84933008", "categoryId": 1, "firmwareVersion": "1.0", "ownerId": "1"}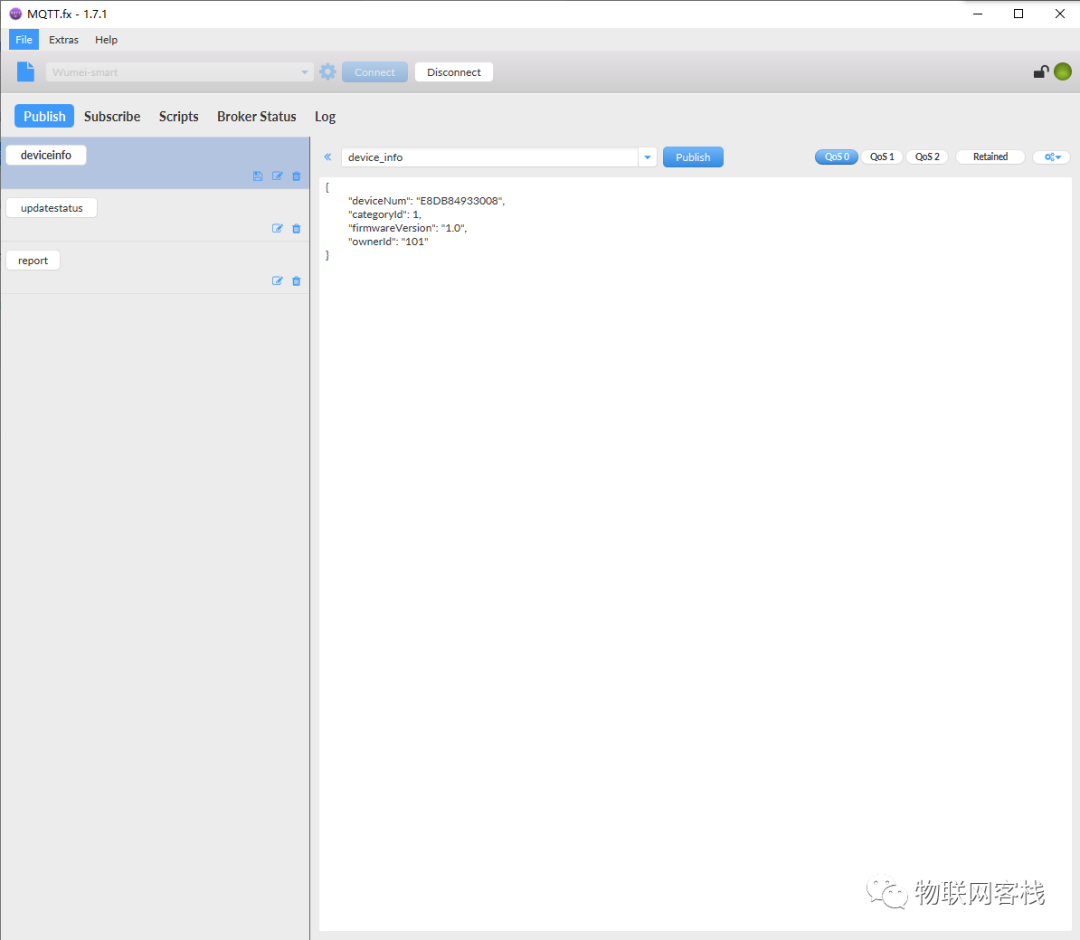
You can see that the device has been successfully created in the backend.

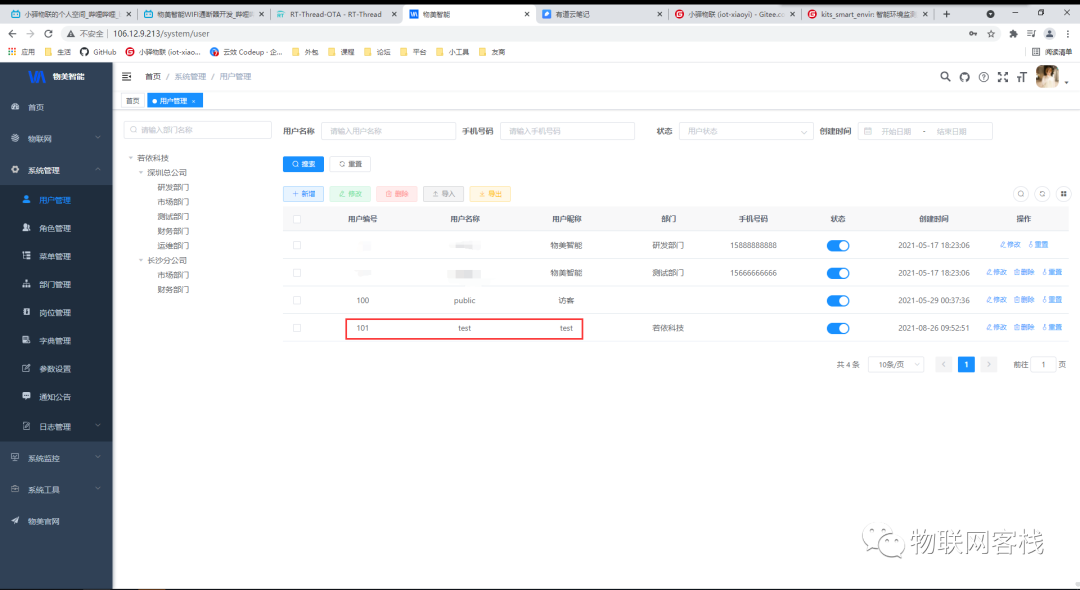
Note: How to fill in ownId? How to fill in the device category ID categoryId?
The user ID is related to the user role number; the test account is 101. If you deploy it yourself, you need to create a server, and you can use the default 1.
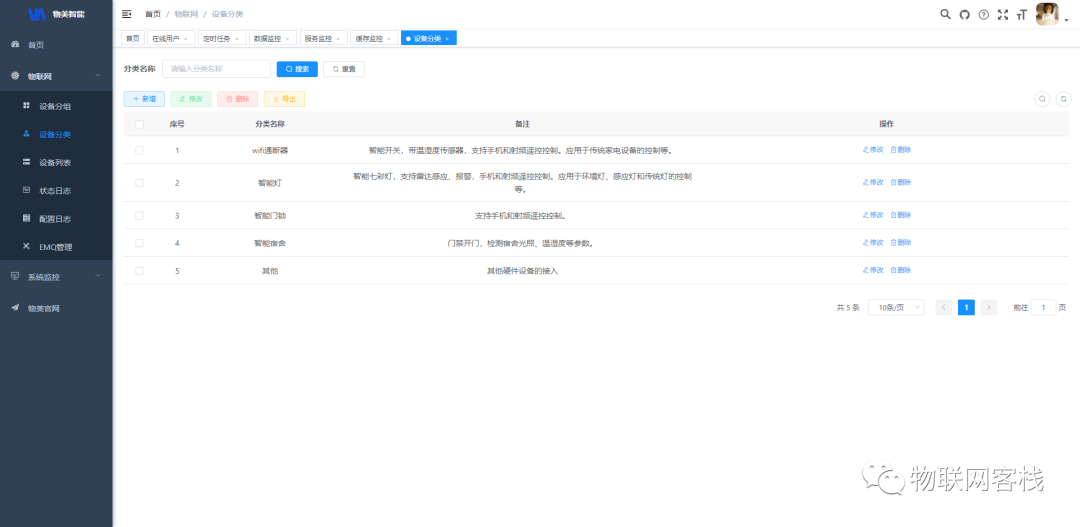
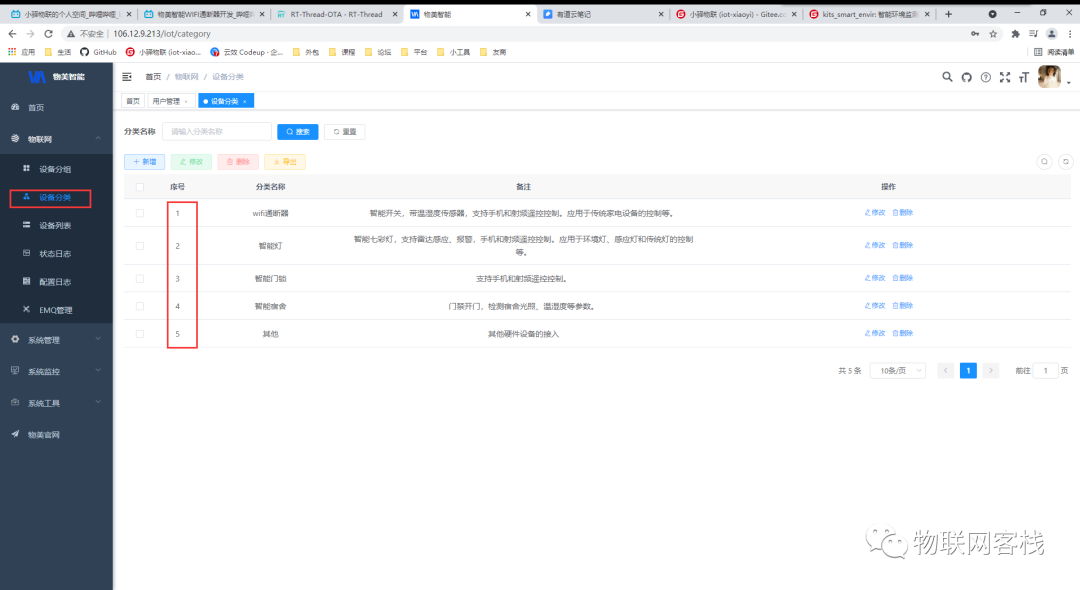
The category ID needs to be confirmed by checking the device category list. Here I use 1, corresponding to the WiFi switch.
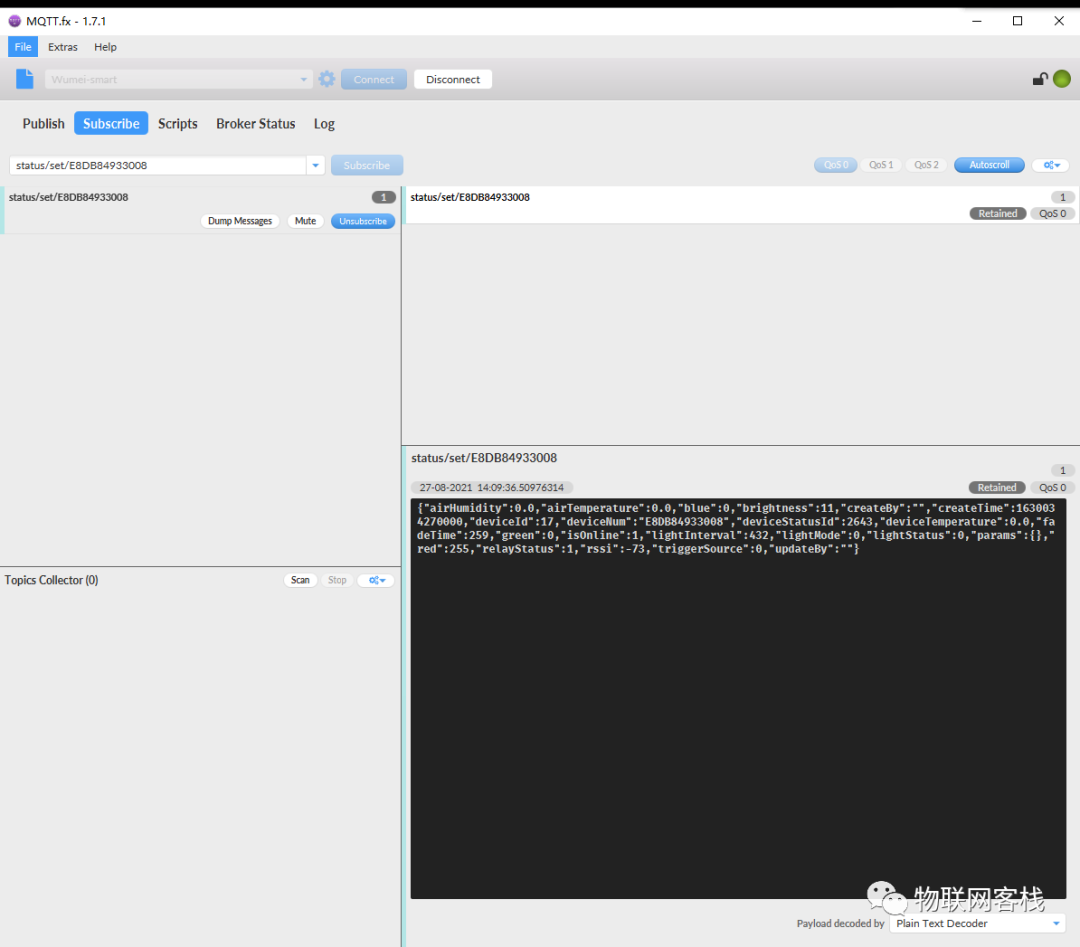
3Use MQTT.fx to Send Data
After the device is successfully created, publish a set of data to the topic status to update the data status in the backend list.
{ "deviceNum": "E8DB84933008", "relayStatus": 1, "lightStatus": 1, "isOnline": 1, "rssi": -73, "deviceTemperature": 0, "airTemperature": 0, "airHumidity": 0, "triggerSource": 0, "brightness": 11, "lightInterval": 432, "lightMode": 0, "fadeTime": 259, "red": 255, "green": 0, "blue": 0}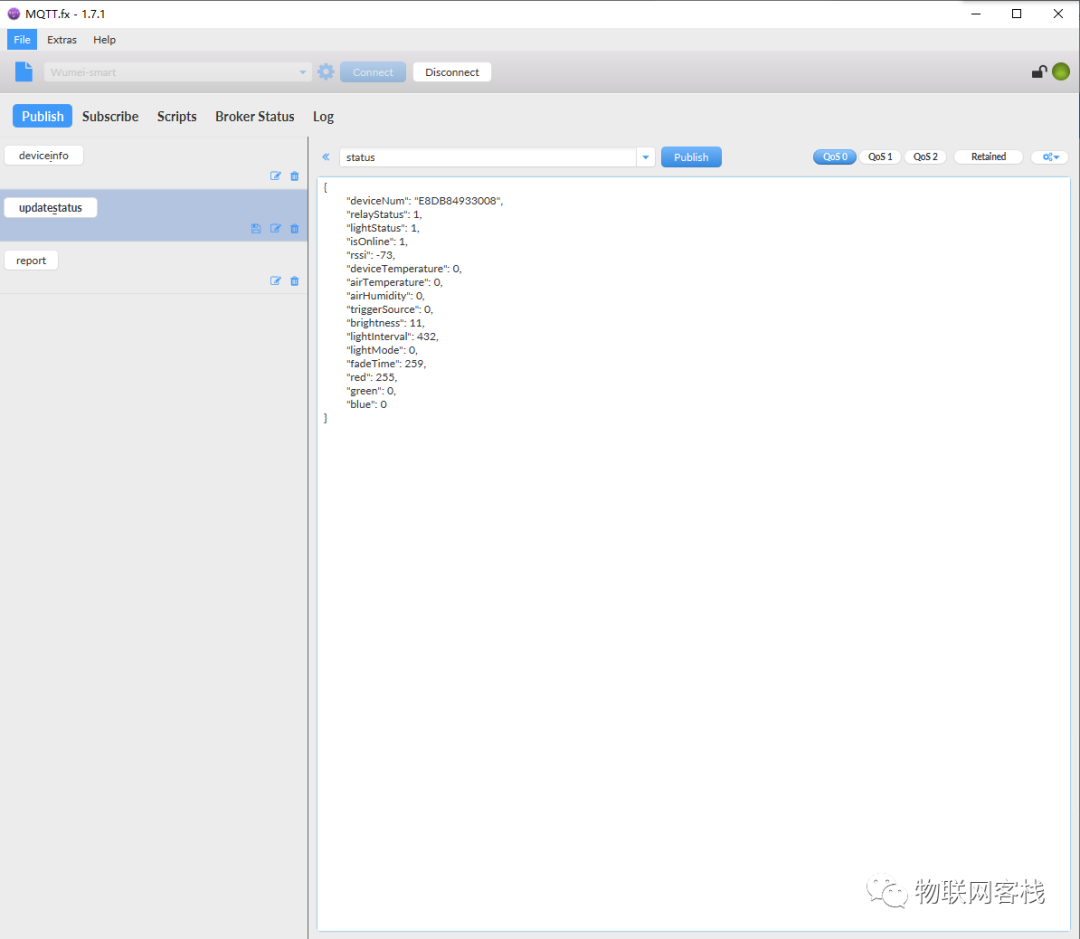
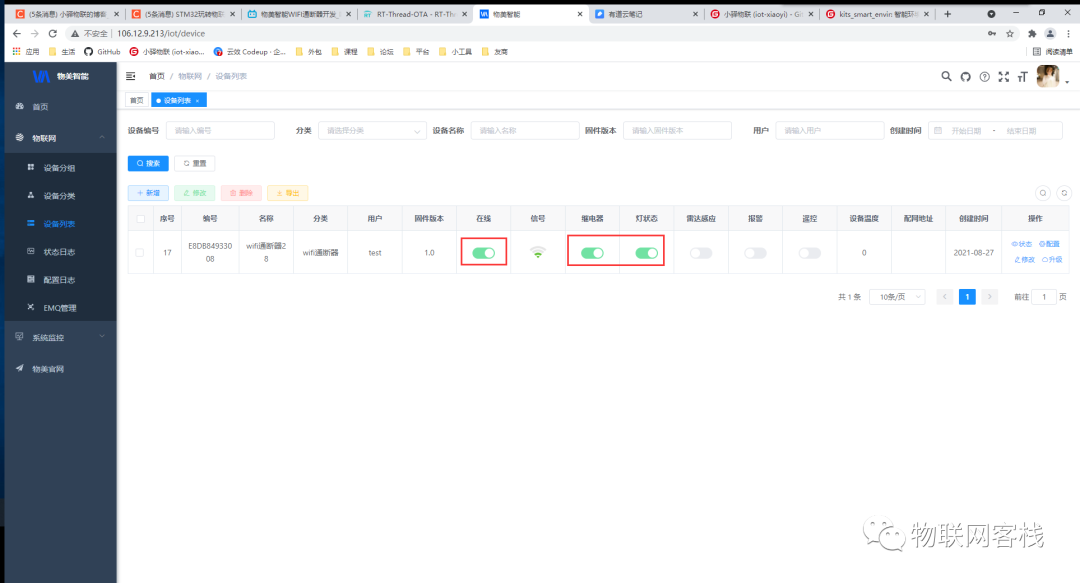
The device just created is offline by default. After sending, it shows online in the backend.
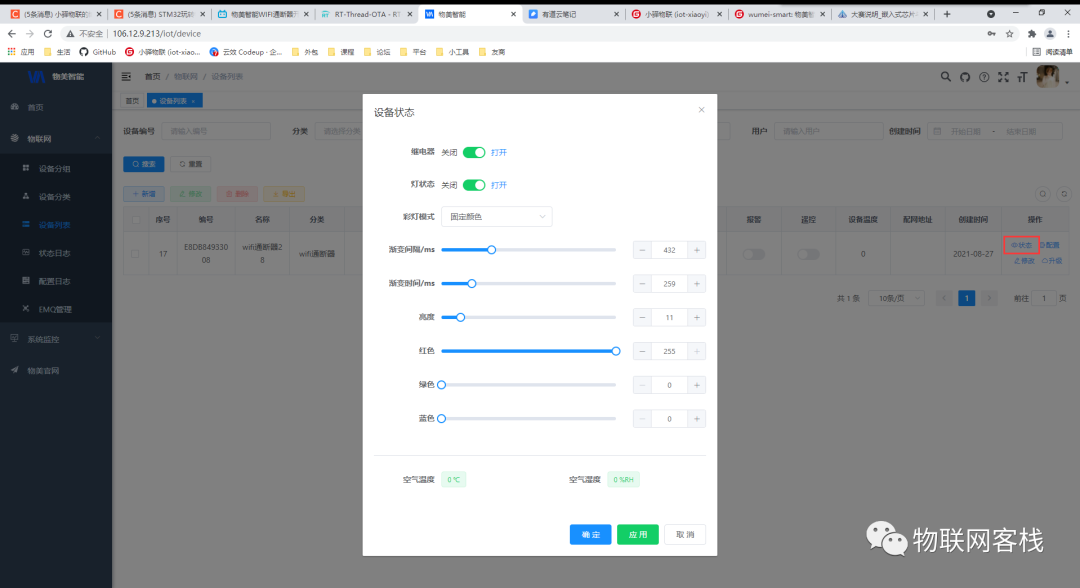
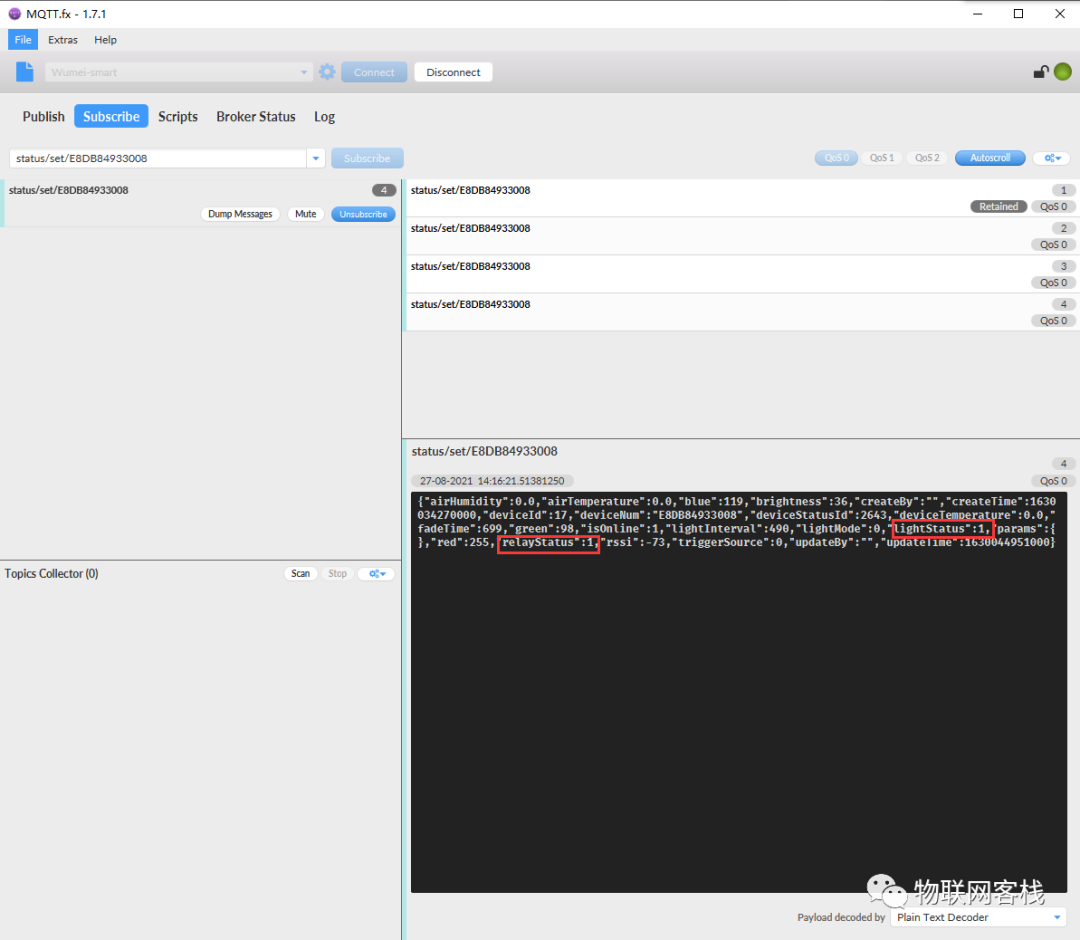
4Server Sends Data
Subscribe to status/set/E8DB84933008 topic to prepare to receive data sent by the server.
Then click the status tab in the backend, modify the status in the pop-up page, and click the confirm button to complete the sending task.
The mqtt.fx data reception interface is as follows:
If you encounter any problems during use, please join the QQ group for further communication.
QQ Group: 906015840 (Note: IoT Project Communication)
Hardware Acquisition: Search for “Xiao Yi IoT” on Taobao
Mini Program to Acquire Hardware
Xiao Yi IoT Production: One sand, one world; one leaf, one Bodhi