
Abstract: Why can neural networks run on STM32? In short, it is to use the X-Cube-AI extension pack in STM32CubeMX to convert currently popular AI frameworks into C code to support usage on embedded devices. Currently, using X-Cube-AI requires STM32CubeMX version 5.0 or higher. Supported models for conversion include Keras, TFlite, ONNX, Lasagne, Caffe, and ConvNetJS. Cube-AI converts the model into a bunch of arrays, and then these array contents are parsed into models, which is similar to the principle of converting models to arrays in Tensorflow.
1. Environment Installation and Configuration
-
STM32CubeMX -
MDK/IAR/STM32CubeIDE -
F4/H7/MP157 Development Boards
2. Building AI Neural Network Models
Here we use the model provided by the official for testing, trained with the keras framework:
https://github.com/Shahnawax/HAR-CNN-Keras
Model Introduction
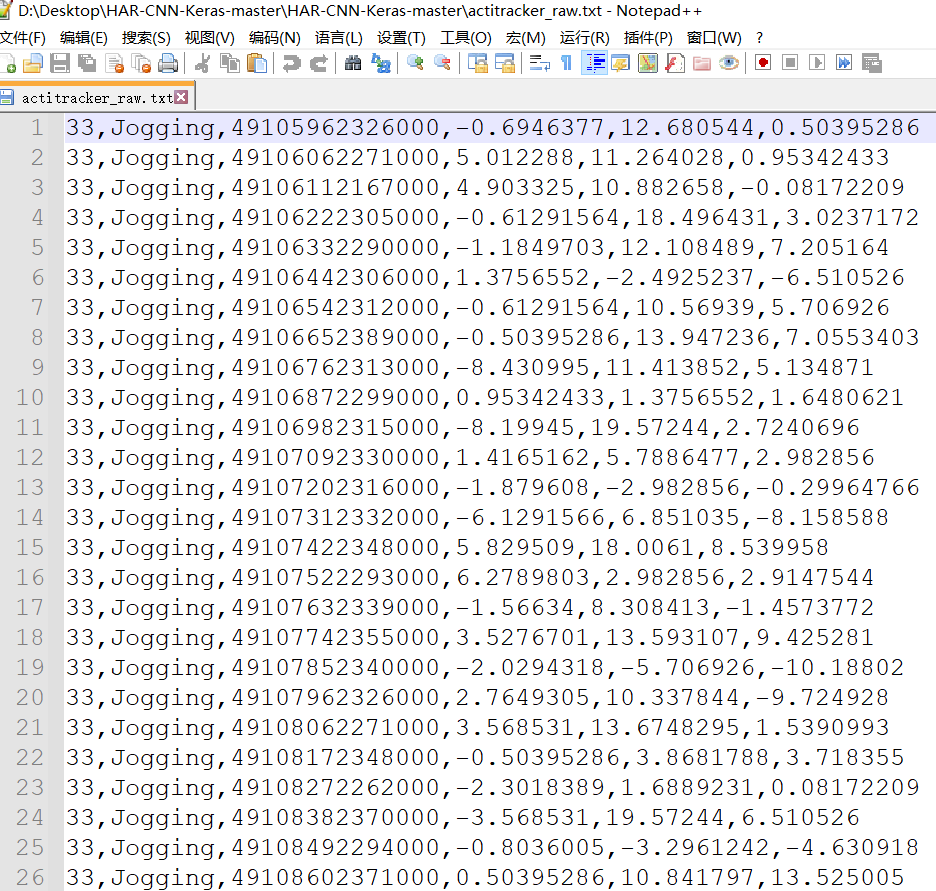
Using CNN in Keras for Human Activity Recognition: This repository contains code for a small project. The purpose of this project is to create a simple Human Activity Recognition (HAR) system based on Convolutional Neural Networks (CNN). This system uses sensor data from a 3D accelerometer to identify user activities, such as moving forward or backward. HAR stands for Human Activity Recognition system, which is to recognize human behavior. This model judges current behavior based on 3D acceleration data over a period of time, such as walking, running, going upstairs, and going downstairs, which is well-suited for the application scenarios of Cortex-M series MCUs. The data used is shown in the figure below.
The repository contains the following files:
-
HAR.py, a Python script file that contains the Keras implementation of the CNN-based Human Activity Recognition (HAR) model, -
actitracker_raw.txt, a text file containing the dataset used in this experiment, -
model.h5, a pre-trained model trained on the training data, -
evaluate_model.py, a Python script file that contains the evaluation script. This script evaluates the performance of the pre-trained network on the provided test data, -
testData.npy, a Python data file containing test data for evaluating the available pre-trained model, -
groundTruth.npy, a Python data file containing the ground truth corresponding to the test data outputs, and -
README.md.
Don’t panic with so many files; the model.h5 model obtained after model training is what we need.
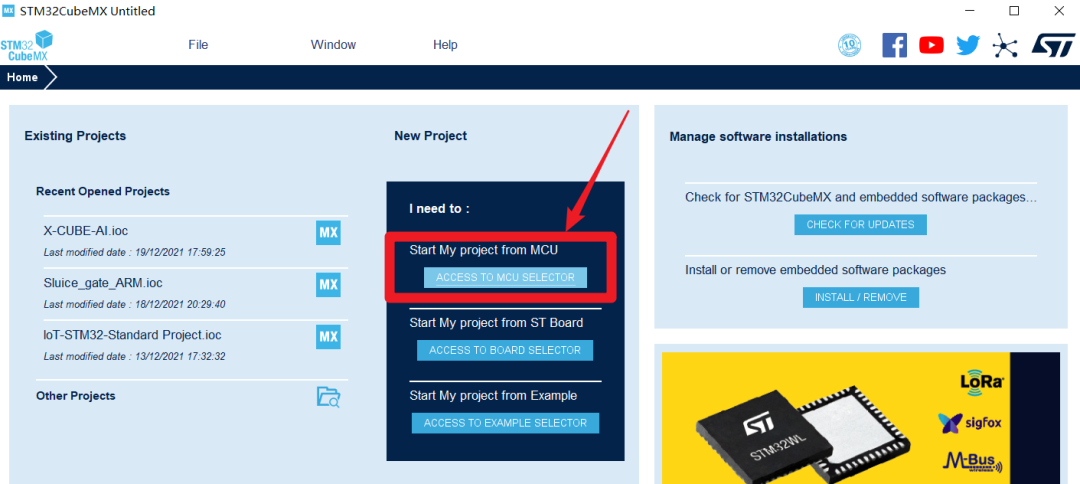
3. Creating a New Project
1. It is assumed that everyone has already installed the STM32CubeMX software.
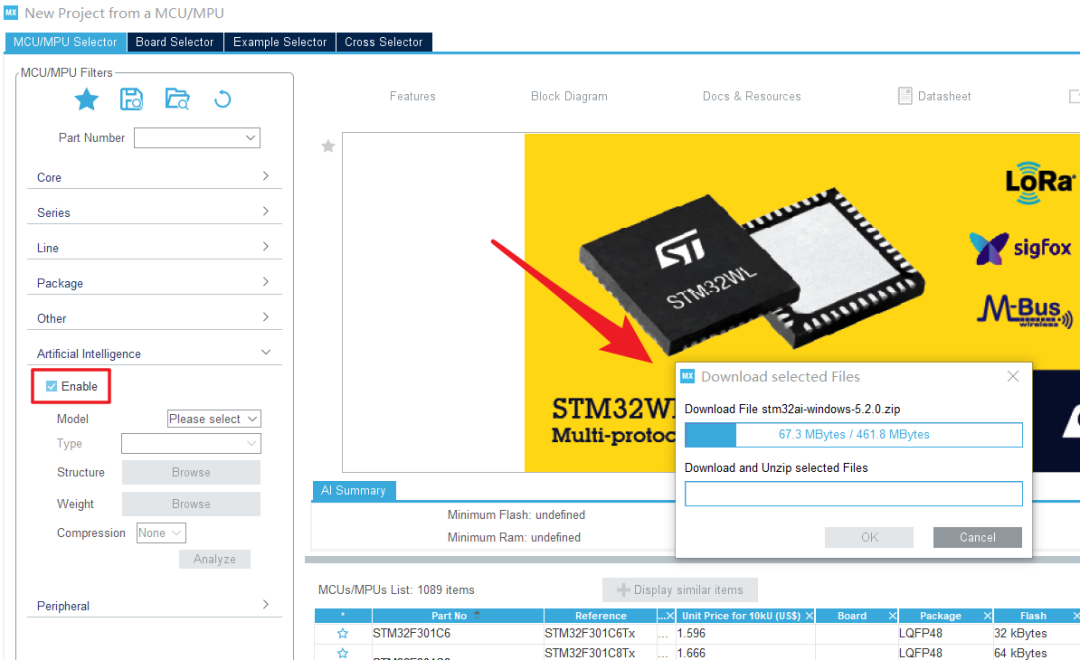
To verify the neural network model (HAR human activity recognition) on STM32, generally, high-performance microcontrollers from the STM32F3/F4/L4/F7/L7 series are required. Running the network model generally requires more than 3MB of flash memory space, and ordinary microcontrollers do not support such large space. CUBEMX provides a compression rate option, allowing selection of an appropriate compression rate, which actually compresses the neural network model’s weight coefficients, enabling the network model to run on the microcontroller. A compression rate of 8 reduces the model to 366KB, and verification can proceed;
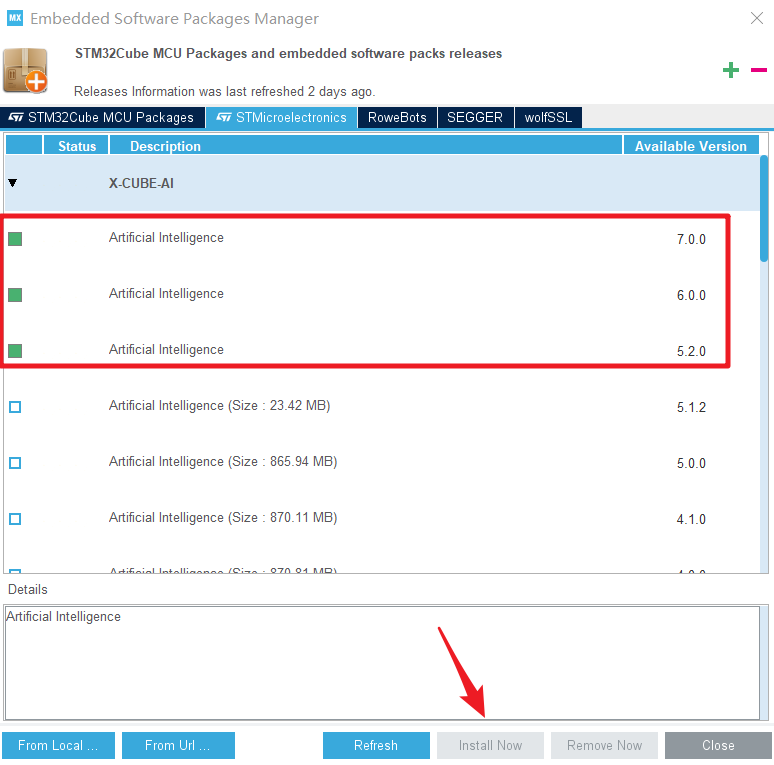
Then follow the steps below to install the CUBE.AI extension pack properly.

I have installed three; just installing the latest version is sufficient.
Next, it’s time to familiarize yourself with creating a new project.
Because the AI package has been installed, the option artificial intelligence will appear on this interface. Clicking Enable allows you to see which chips support AI.
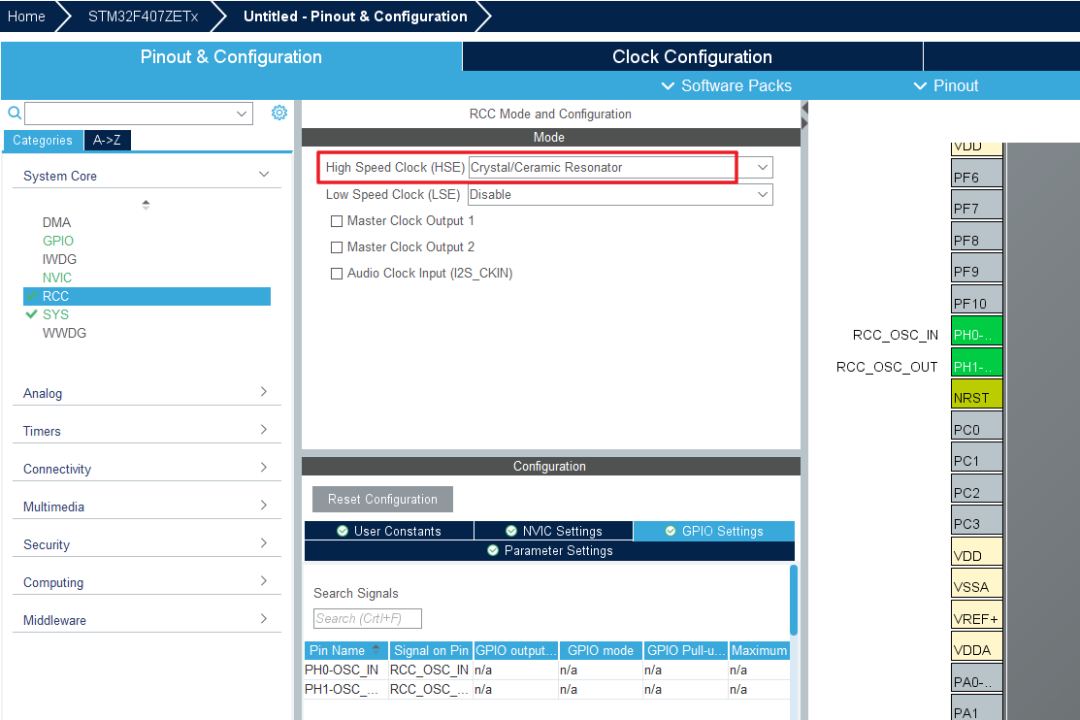
Next, configure the download interface and external crystal oscillator.
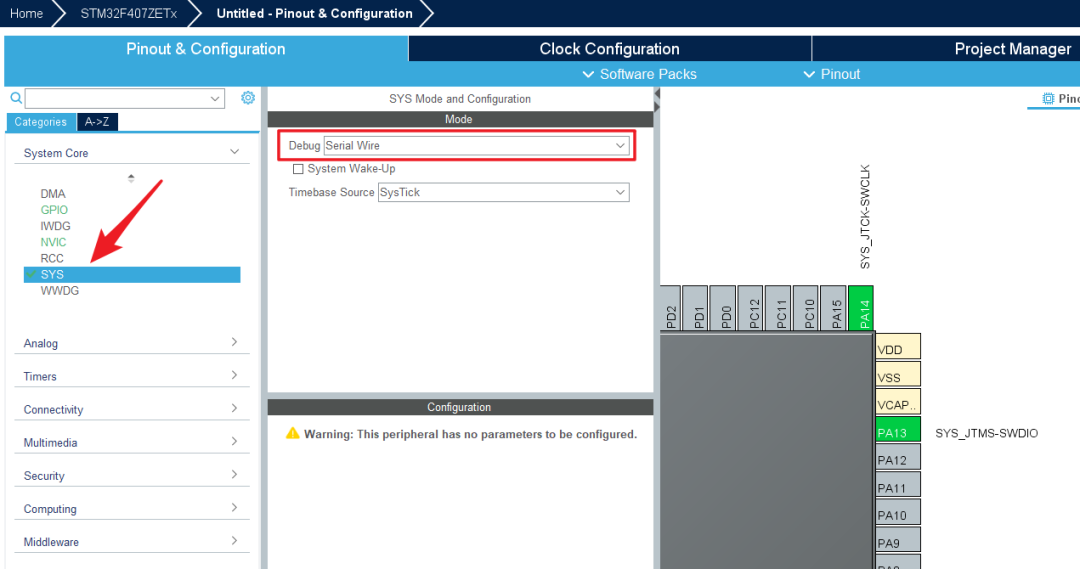
Then remember to select a serial port for debugging output.
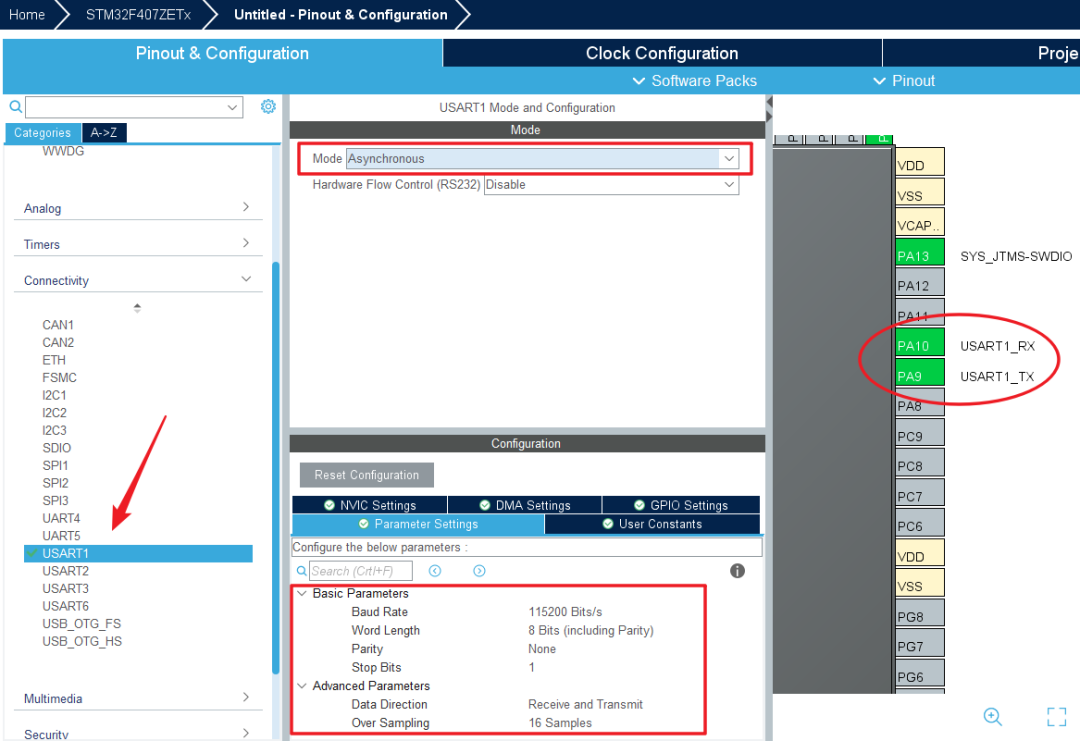
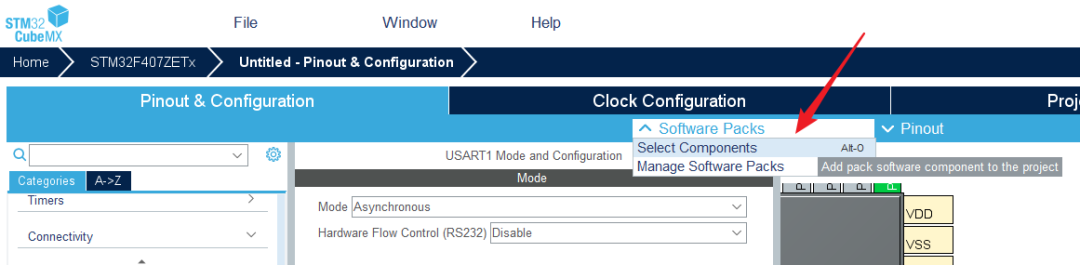
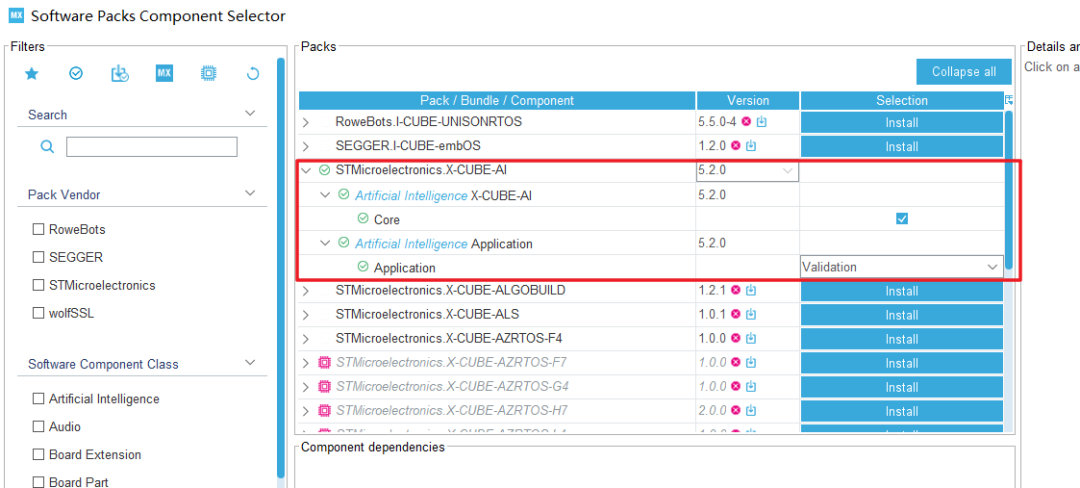
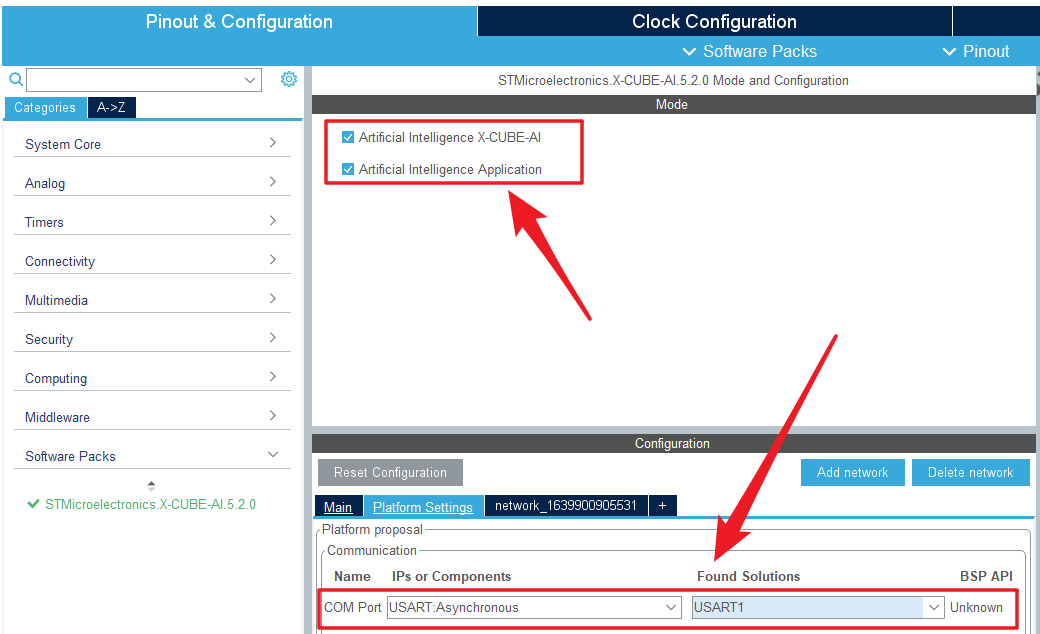
Select Software Packs, and then open the two packages related to AI in the sidebar. Check the first one, and select Validation in the first option.
-
System Performance Project: The entire application project runs on the STM32MCU and can accurately measure NN inference results, CPU load, and memory usage. Use a serial terminal to monitor results (e.g., Tera Term) -
Validation Project: A complete application that incrementally verifies the results returned by NN through random or user test data in a desktop PC and embedded environment based on STM32 Arm Cortex-m. Used with the X-CUBE-A validation tool. -
Application Template Project: Allows building applications with an empty template project, including multi-network support.
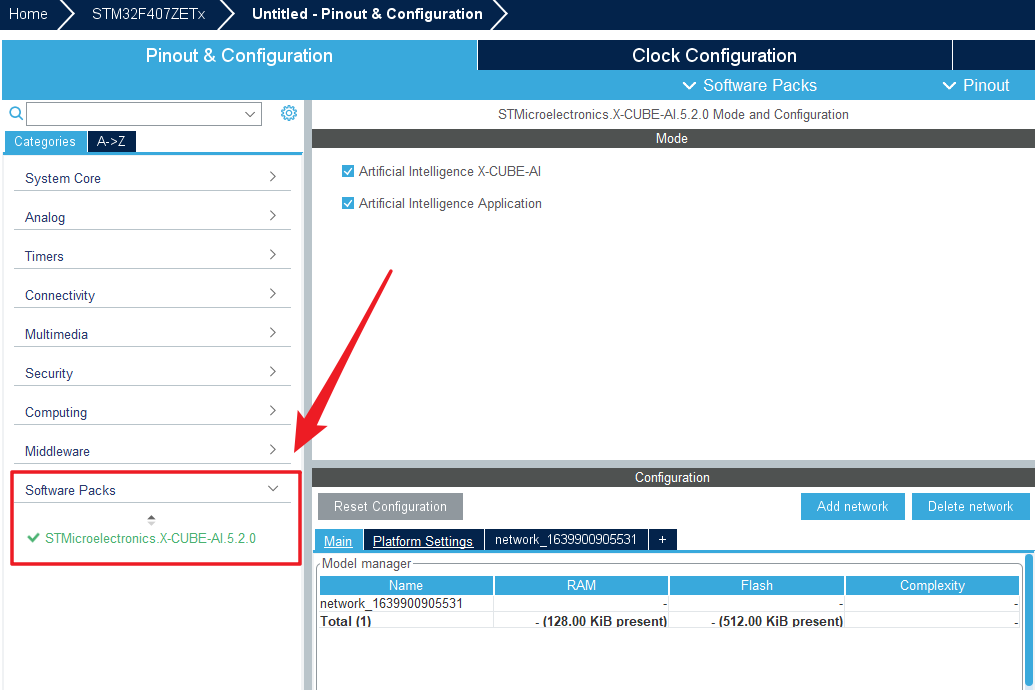
Then in the left sidebar, open Software Packs, select X-CUBE-AI, and check both checkboxes in the pop-up Mode window, then click on the network tab in the Configuration window.
Select the previously configured serial port for debugging.
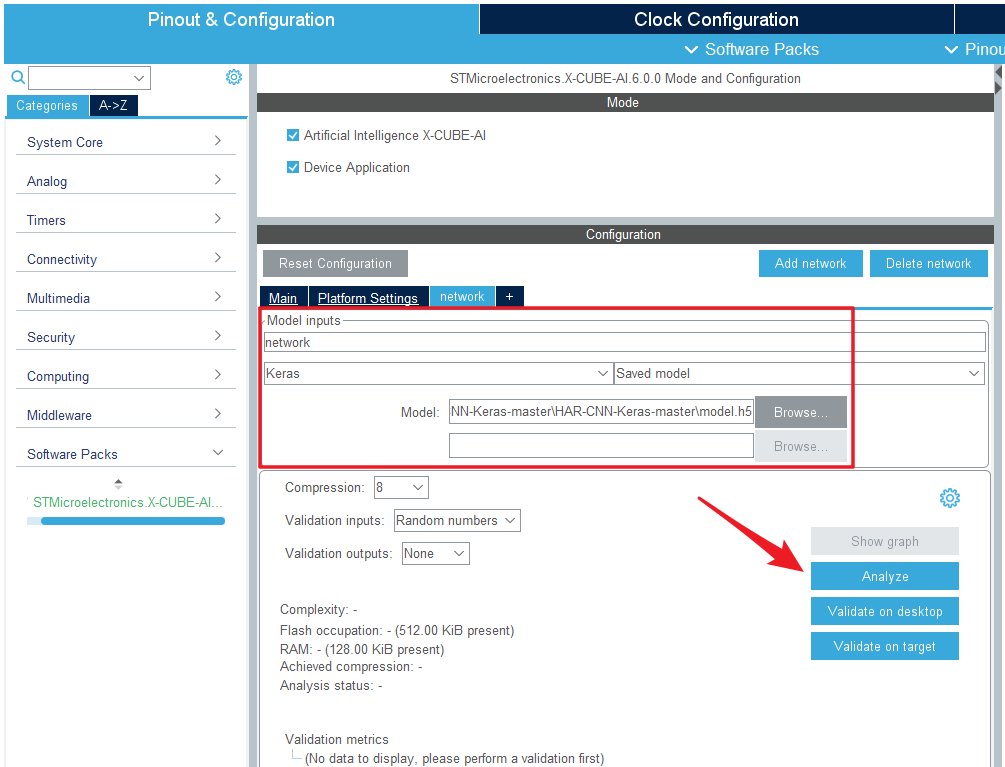
Click add network, select the downloaded model h5 file, and choose a compression factor of 8;
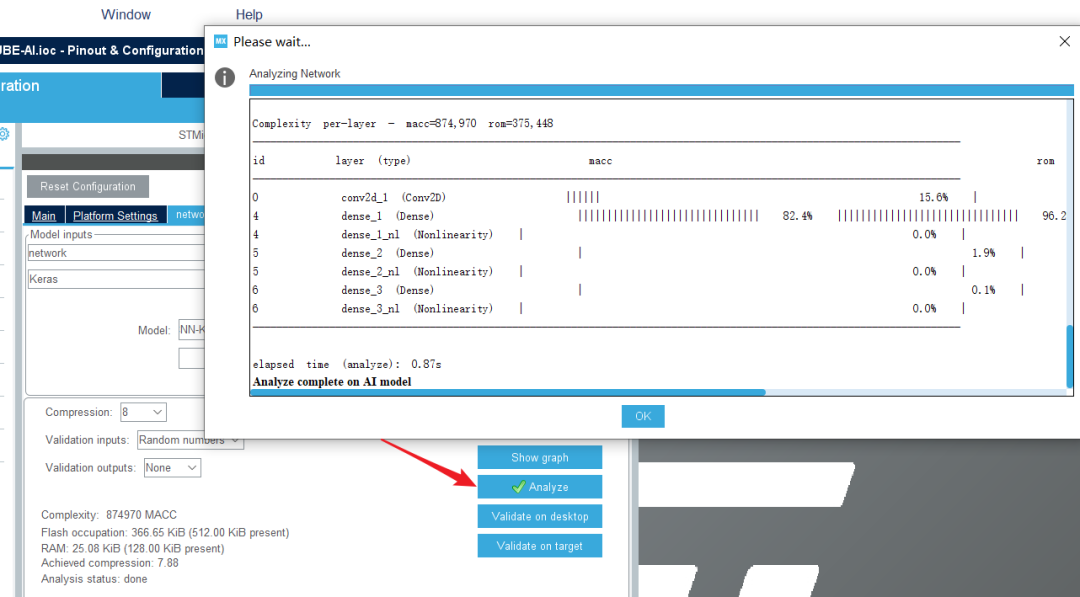
Click analyze to see the comparison of model parameters before and after compression.
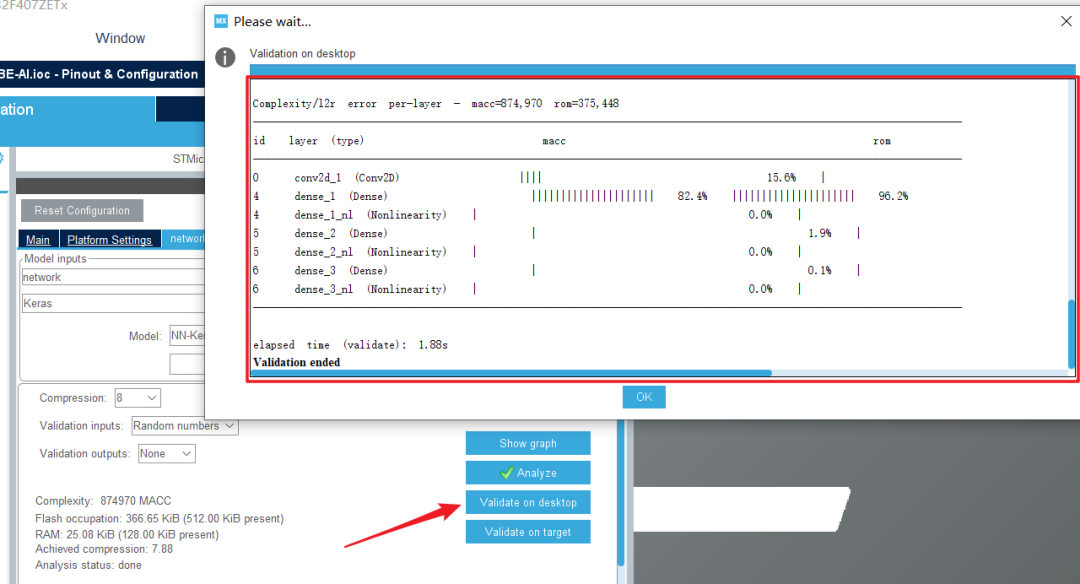
Click validation on desktop to perform model validation on the PC, including comparisons between the original model and the converted model, and the validation results will also be displayed below.
Thus, the model validation is completed, and we will now start the model deployment.
4. Model Conversion and Deployment
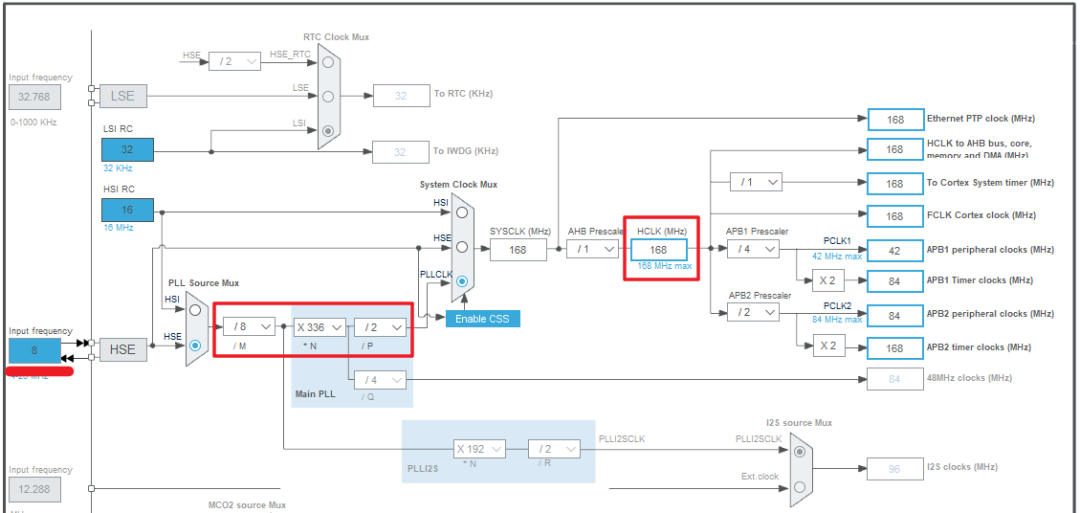
The clock configuration will be done automatically by the system. Just configure the clock according to your microcontroller’s actual model.

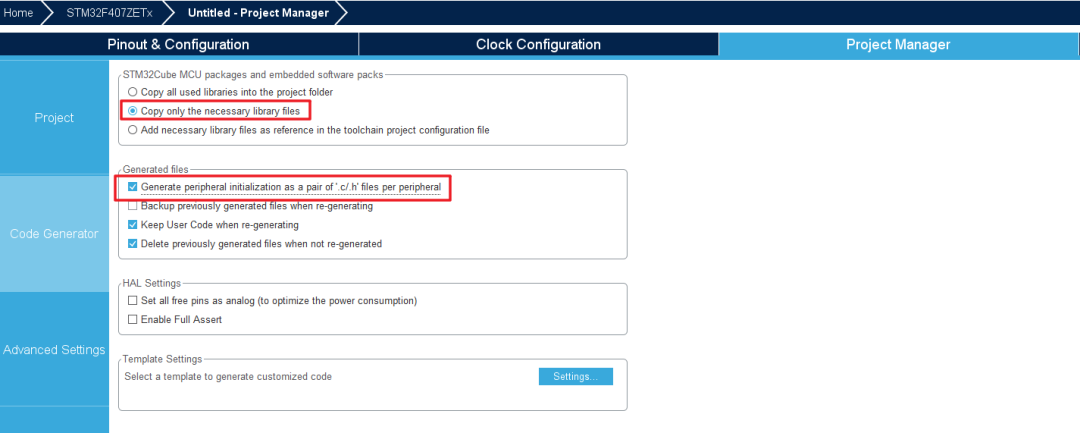
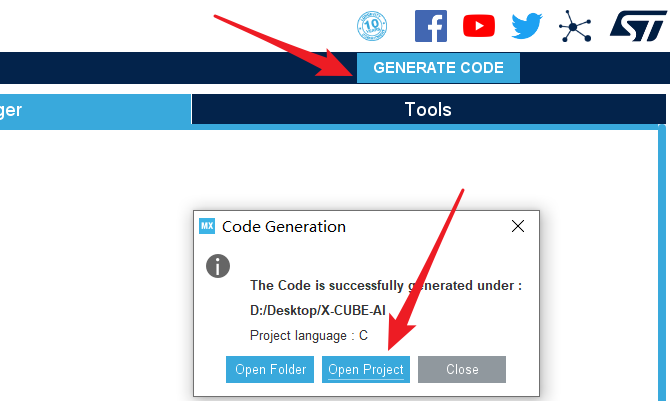
Finally, click GENERATE CODE to generate the project.
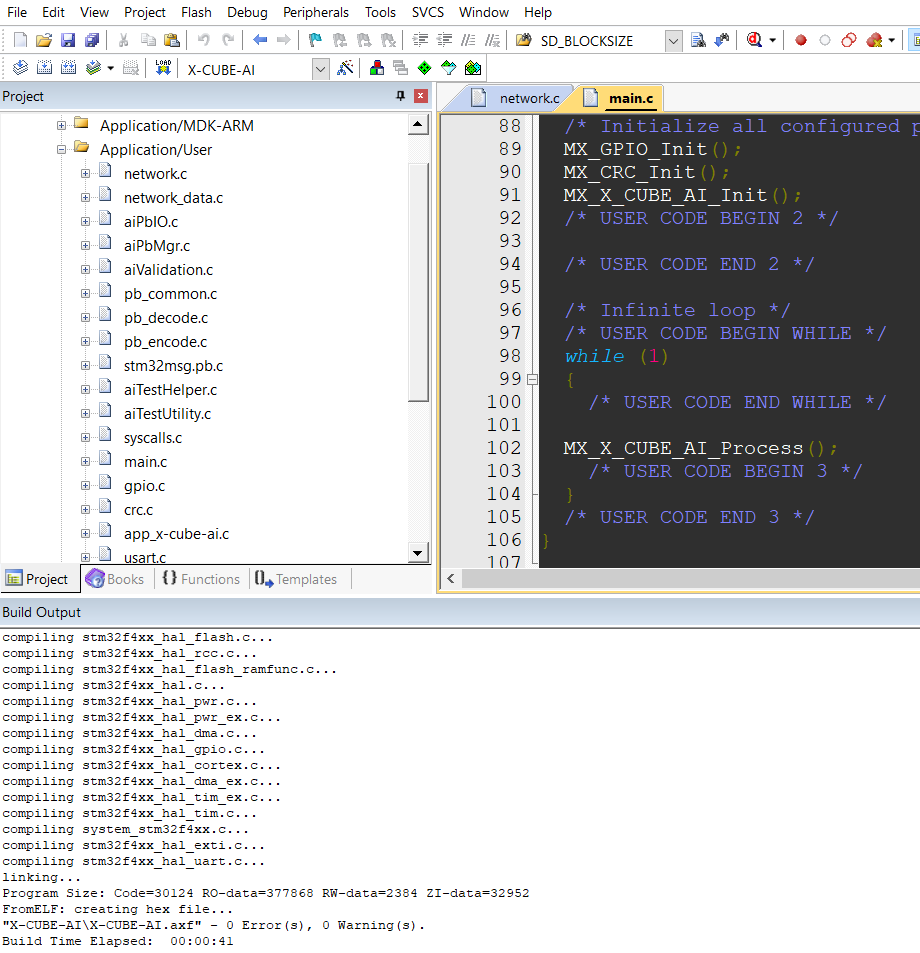
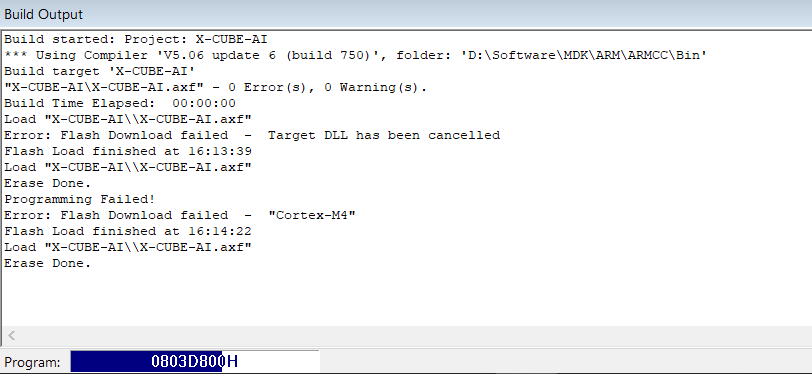
Then compile and link in MDK.
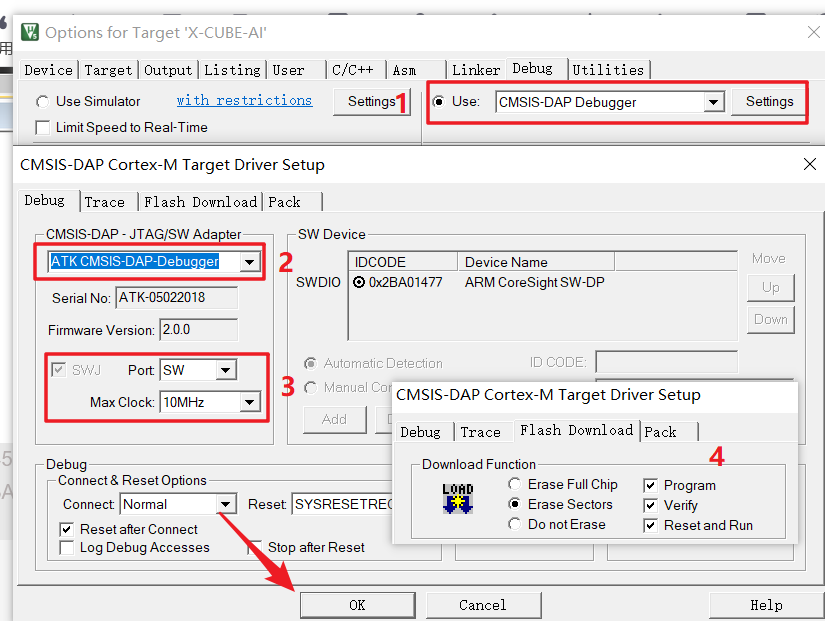
After selecting the downloader, you can download the code.
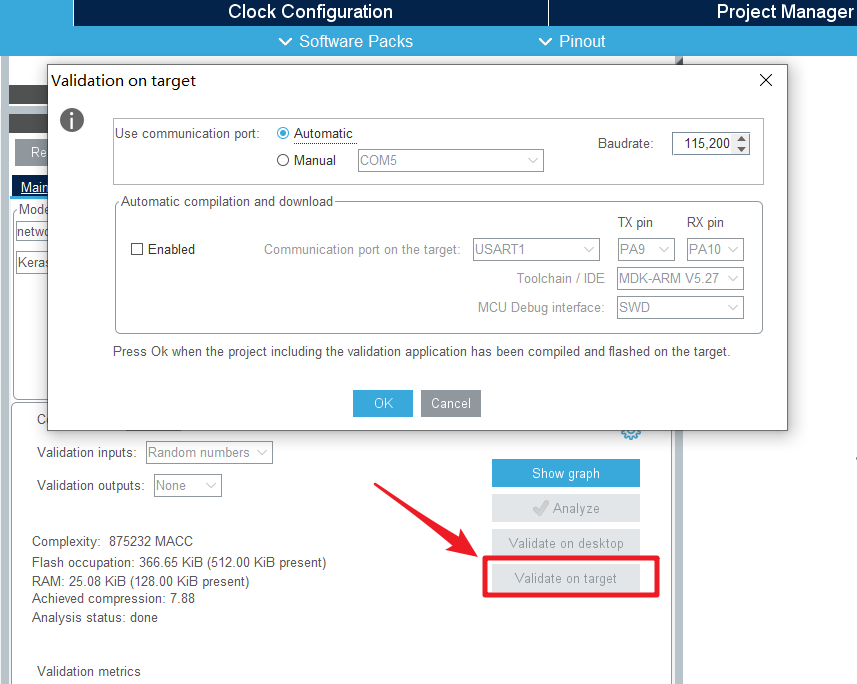
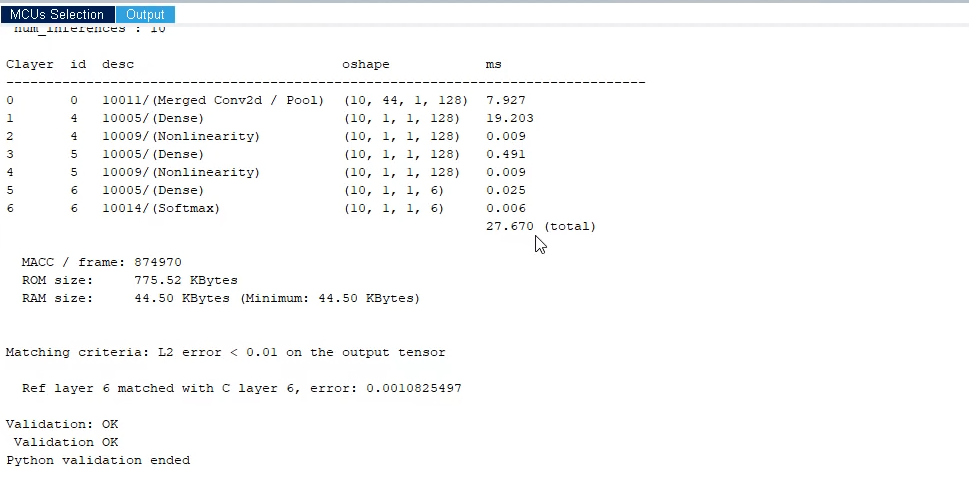
After the code is burned into the chip, return to CubeMX, and in the position shown in the figure below, we click Validate on target to run the validation program on the board. The effect is shown in the figure below, it can work, proving that the model has been successfully deployed on the MCU.
This time, let’s run the official example first, and then we can study and run our own models later.
References:
-
https://youtu.be/grgNXdkmzzQ?t=10 -
https://youtu.be/grgNXdkmzzQ?t=103
