Follow our public account to never miss any updates

In a previous article, I conducted a survey and found that a large number of people have never been exposed to RTOS. I hope this article can help those friends get started.
1Introduction
In the past, if you wanted to run the FreeRTOS operating system on STM32, you had to port the FreeRTOS code step by step.
Now, using the STM32CubeMX tool, you no longer need such complicated porting work; you can easily get FreeRTOS up and running in just a few steps.
This article takes the STM32L412 (NUCLEO-L412KB board) as an example, and other STM32 models are similar.
At the same time, the latest MDK and STM32CubeMX tools as of June 2019 are used. Therefore, you need to download and install the tools and software packages in advance.
2Preparation Work
There are mainly three categories:
-
MDK-ARM (including software packages)
-
STM32CubeMX (including software packages)
-
FreeRTOS source code (optional)
2.1 MDK-ARM (including software packages)
You need to download and install MDK-ARM, as well as the corresponding software package for STM32.
Official installation package address:
http://www.keil.com/download/product
Official software package address:
http://www.keil.com/dd2/Pack
For specific installation and usage, you can refer to my previous organized articles:【Column】Keil Series Tutorials
2.2 STM32CubeMX (including software packages)
Similarly, you need to download and install STM32CubeMX, as well as the corresponding software package for STM32.
Official download address:
www.st.com/stm32cubemx
For specific installation and usage, you can refer to my previous organized articles:【Column】STM32CubeMX Series Tutorials
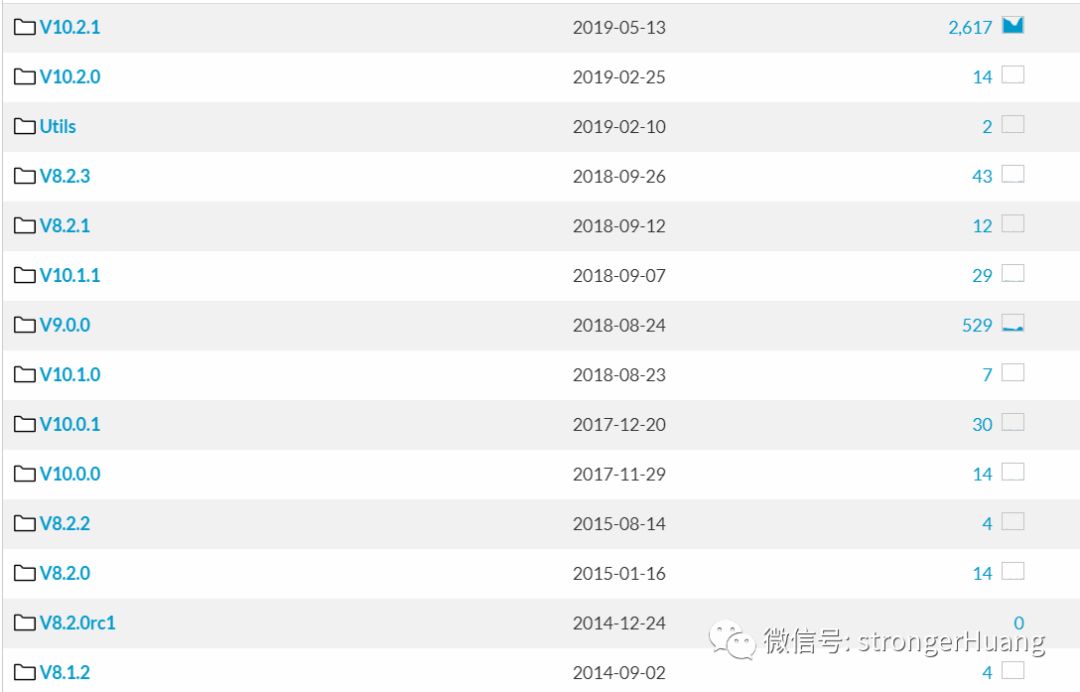
Tip:The software package includes FreeRTOS source code, but it is not the latest version.
2.3 FreeRTOS Source Code
The STM32Cube software package actually contains the FreeRTOS source code, but it is not the latest version.
FreeRTOS official website:
www.freertos.org
If you want to use the latest version or specify a certain version, you can download it from the following address:
https://sourceforge.net/projects/freertos/files/FreeRTOS
The above address contains historical versions of FreeRTOS. If you use a specified version, just replace the source code (they are generally compatible).
3Creating a Project with STM32CubeMX
With the STM32CubeMX tool, developing STM32 becomes much faster.
This article takes the STM32L412KB as an example; the principles are similar for other STM32 models.
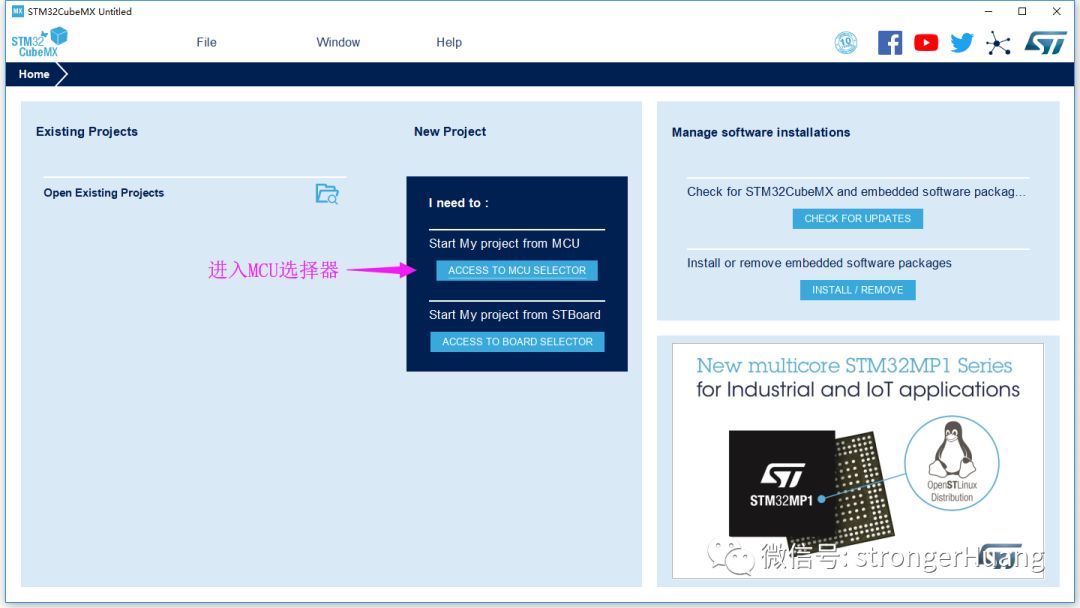
1. Open the software and enter the selector
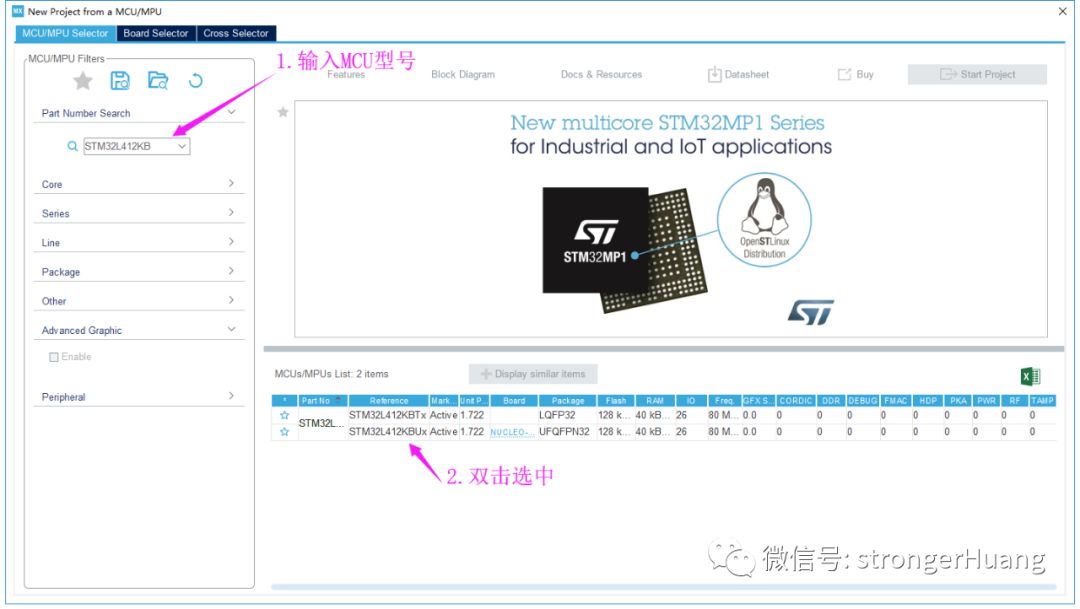
2. Select MCU
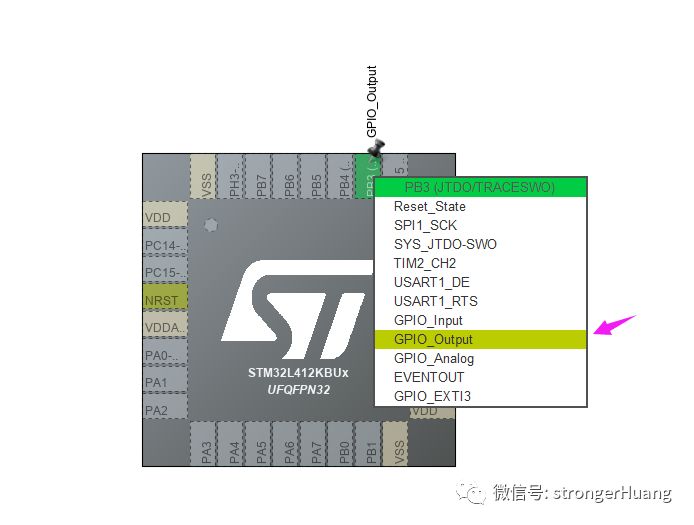
3. Configure LED pins
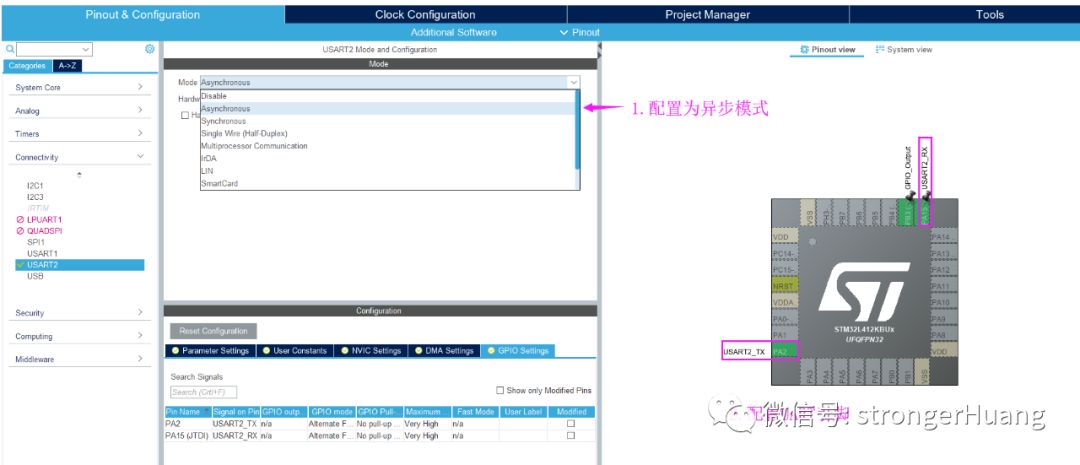
4. Configure UART output
After configuring it to asynchronous mode, the pins are automatically configured (if the RX pin of my development board is not default, it needs to be configured manually).
5. Enable FreeRTOS
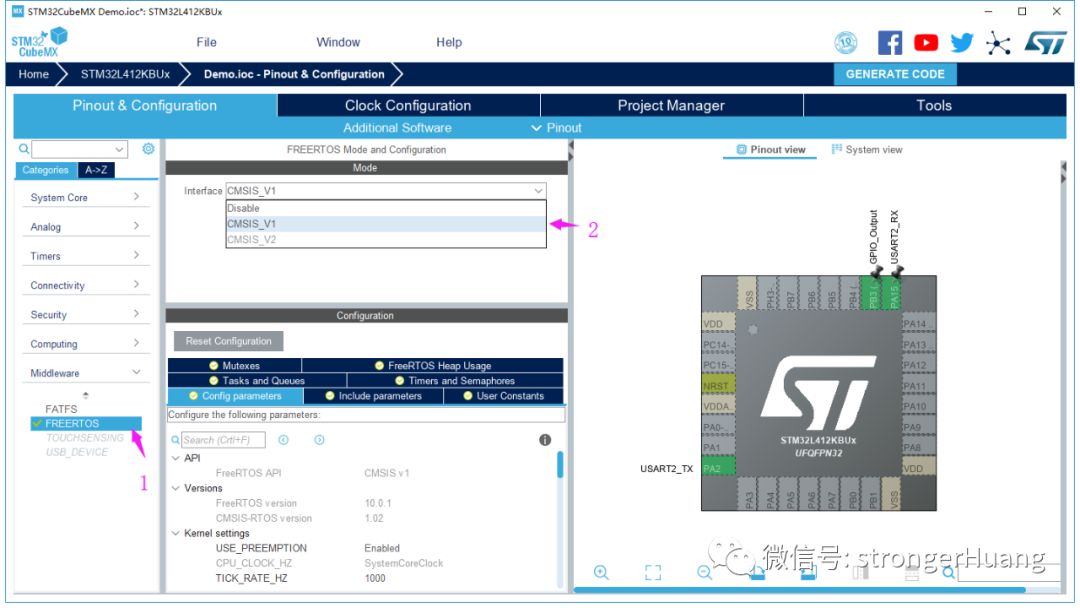
6. Configure FreeRTOS tasks
Here, two FreeRTOS tasks are created: Task1 and Task2.

Tip:For beginners, most parameters can be left at their default values when configuring FreeRTOS with STM32CubeMX.
Once you are familiar with it, you can further master each parameter.
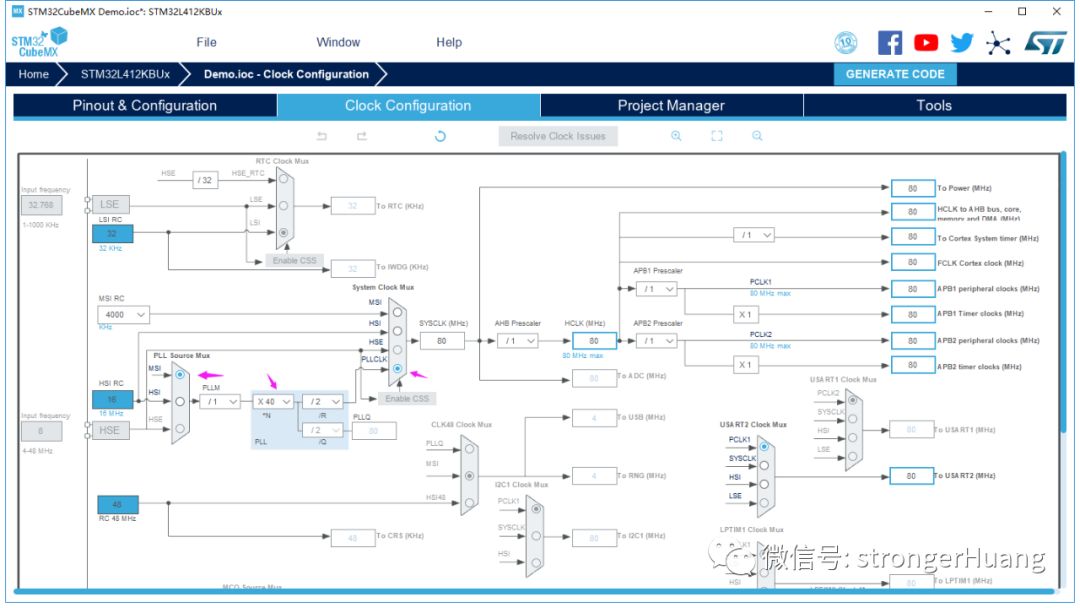
7. Configure the clock
Here, MSI is chosen as the clock source, and frequency multiplication is performed to reach a system clock of 80M.
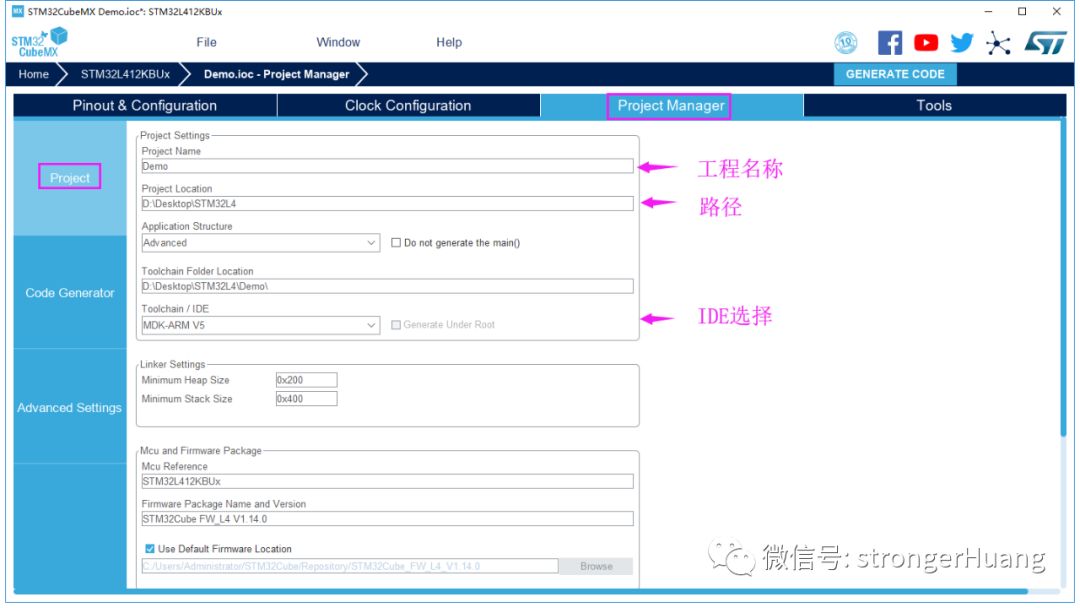
8. Project management configuration
This parameter is a general configuration; you can refer to my tutorial:【Column】STM32CubeMX Series Tutorials
9. Generate and open the project

4Source Code Analysis
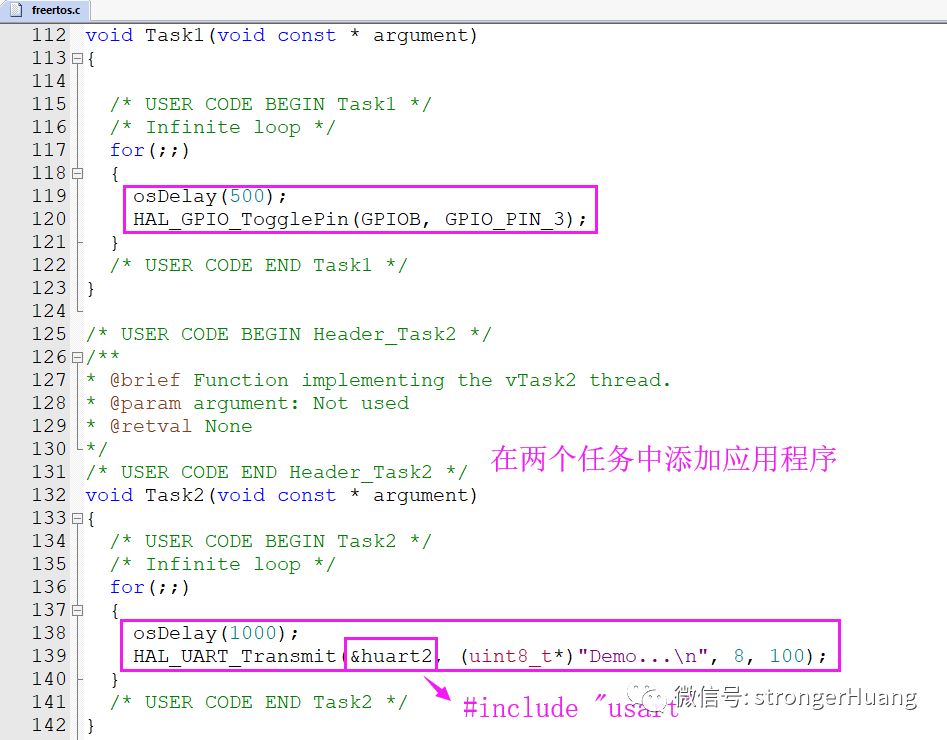
4.1 Adding Applications in Two Tasks
Tip: Here, huart2 is used, so you need to include: #include “usart.h”
4.2 Explanation
Task1: LED (PB3) blinks (changes) every 500ms.
Task2: Sends data “Demo…” via UART2 every 1000ms.
The osDelay function represents system delay, measured in ms.
Then, there are the LED blinking and UART sending functions.
4.3 Compile, Download, and Run
Once the above steps are completed, you can compile and then directly download and run it. You can see the output character “Demo…” through the serial debugging assistant.
5Project and Source Code Download
To make it easier for beginners, I provide the corresponding project and source code here for everyone to learn.
Baidu Cloud:
https://pan.baidu.com/s/1IdsuIlqqFhuJYxMI6EC7dQ
Extraction code: 7k5i
Tip: The public account does not support external links; please copy the link to open it in a browser.
The link may become invalid later; follow the public account “strongerHuang” to get timely updates.
Recommended Reading:
1. The Ministry of Industry and Information Technology announces that 5G commercial licenses will be issued soon!
2. Summary of IC Packaging Principles and Functional Characteristics
6Conclusion
My Zhihu: strongerHuang
My Website:www.strongerhuang.com
If you find the article helpful, a quick click on “Looking” or sharing it is my motivation to continue updating.
Scan the QR code below to follow the public account and find more exciting content in the bottom menu!

Long press to recognize the QR code in the image to follow