Today, I would like to introduce a project: running the LLama 2 model on the Jetson AGX Orin.
This project comes from:
Don’t worry, we have already replicated this project on the Jetson AGX Xavier 32G, so it is feasible.
Background
Large language models (LLM) like ChatGPT and Llama 2 have the potential to change the way data is processed and human-computer interaction works, and they are becoming increasingly popular as they approach the future of achieving artificial general intelligence (AGI). While these technologies undoubtedly bring excitement about a future closer to AGI, they are often designed to run on powerful servers with ample memory and computational resources.
Thanks to innovations in embedded GPU hardware, this level of computational capability can be achieved on embedded devices that are almost the size of a hamburger. This means that LLMs can produce local results on these devices, enabling scenarios that require real-time processing, privacy, and reduced latency.
In this article, we will demonstrate how to run a variant of Meta AI’s recently released Llama 2 LLM on NVIDIA Jetson hardware. Surprisingly, getting started and running is very simple. To reproduce this content, everything you need is almost as easy as starting a Docker container with all the necessary software prerequisites. Through this article, you will gain the knowledge necessary to explore running other models on your own devices, supporting custom LLM-based applications and services.
Getting Started Guide
For this project, it is recommended to use the Jetson Orin 32GB or 64GB development kit, as the memory requirements for the model used in this tutorial range from 18-64GB (depending on whether the 13B or 70B Llama 2 model variant is used). We assume that you are starting with an NVIDIA Jetson Orin device that has flashed the latest JetPack image (as of writing, r35.4.1).
To start, ensure that the Docker runtime on the Jetson device is set to default to “nvidia”. Open your preferred text editor and edit the contents of the /etc/docker/daemon.json file as follows:
{ "runtimes": { "nvidia": { "path": "/usr/bin/nvidia-container-runtime", "runtimeArgs": [] } }, "default-runtime": "nvidia" }After saving this modification, restart the Docker service using the following command:
sudo systemctl restart dockerWe need to create a directory to store the model files for Llama, which can be accomplished by running the following command in the terminal:
mkdir ~/modelsNext, execute the following command to start the text-generation-webui instance in Docker:
docker run --rm --it --name textgeneration-web-ui --net=host --gpus all -v ~/models:/app/models toolboc/text-generation-webui:v1.5_r35.4.1Note: In this example, the naming scheme refers to the Docker image for text-generation-webui v1.5 that is compatible with NVIDIA JetPack r35.4.1. The Dockerfile used to generate this image can be found in oobabooga/text-generation-web-ui repo @ text-generation-webui/docker/Dockerfile.jetson at main · oobabooga/text-generation-webui (github.com).
If you wish to build the image yourself or update to a different version of the text generation web user interface, modifying this file should be straightforward.
Once the Docker container is successfully started, you should be able to access the text generation web user interface application by visiting http://<IP of the Jetson device>:7860.
Running Your First Model
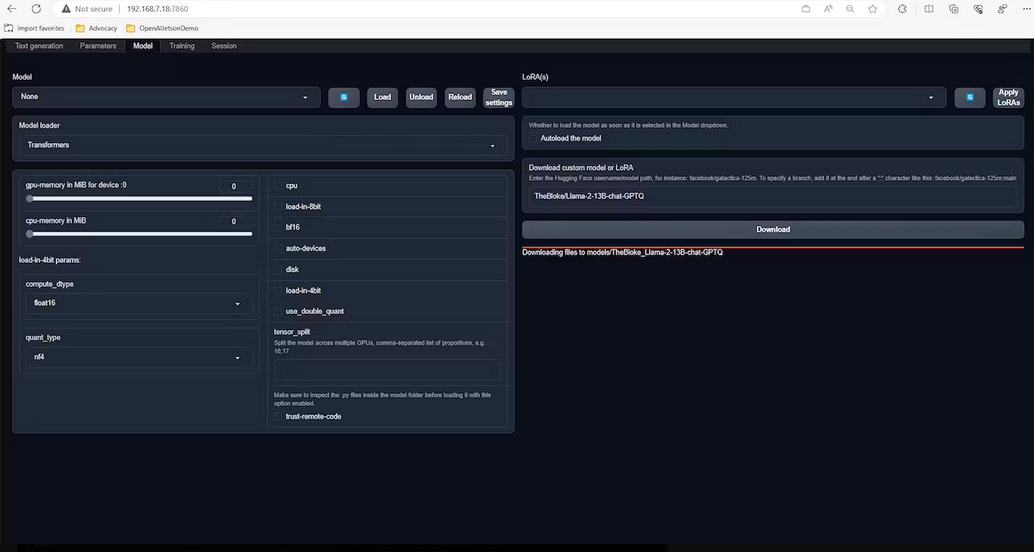
In a web browser connected to the same network as your Jetson device, navigate to http://<IP of the Jetson device>:7860, and you should see a user interface similar to the following:

Here, select the “Model” tab, then choose the “Download Custom Model or LoRA” field in the bottom right corner and paste “TheBloke/Llama-2-13B-chat-GPTQ”.
This will start downloading the Llama 2 chat GPTQ model variant from TheBloke/Llama-2-13B-chat-GPTQ · Hugging Face. (https://huggingface.co/TheBloke/Llama-2-13B-chat-GPTQ).
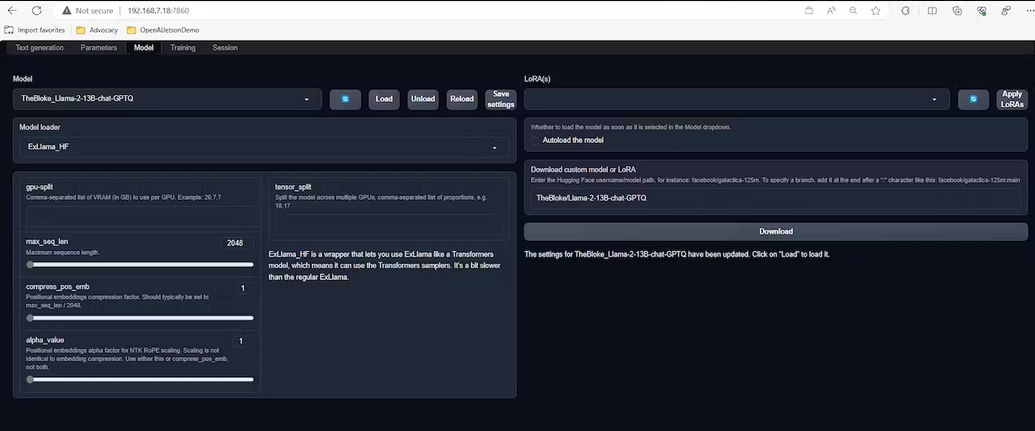
The following steps will apply to any technically based GPTQ Llama variant, so if you are interested in trying other models, now you know how to proceed. Once the model download is complete, select it from the “Model” dropdown menu in the upper left corner of the screen.
Using this method requires manually configuring wbits, groupsize, and model_type as shown in the image.
Note: These parameters can be inferred by checking TheBloke/Llama-2-13B-chat-GPTQ · Hugging Face’s model card information (https://huggingface.co/TheBloke/Llama-2-13B-chat-GPTQ).
While this model loader works fine, we can improve model performance by about 25% (approximately 5.2 tokens/second instead of 4.2 tokens/second) by choosing to use the ExLlama_HF model loader. So let’s select this option. With this model loader, you can keep the default options as shown in the image.
Note: By following the above instructions and choosing to use TheBloke/Llama-2-70B-chat-GPTQ variant from https://huggingface.co/TheBloke/Llama-2-70B-chat-GPTQ, you can get smarter responses, although performance will drop to about 0.9 tokens/second.
We are almost ready to start using the model.
To begin testing with real-time prompts, select the “Load” function in the “Model” tab, then choose the “Text Generation” tab. From here, select “Instruct-Llama-v2” from the prompt dropdown menu (if you are using a different model, you may need to select a different prompt option that fits better).
Next, you need to increase “max_new_tokens” to 2048, as this will generate longer responses (note that values above 2048 will cause errors that prevent output since the Llama 2 model is trained with a maximum of 2048).
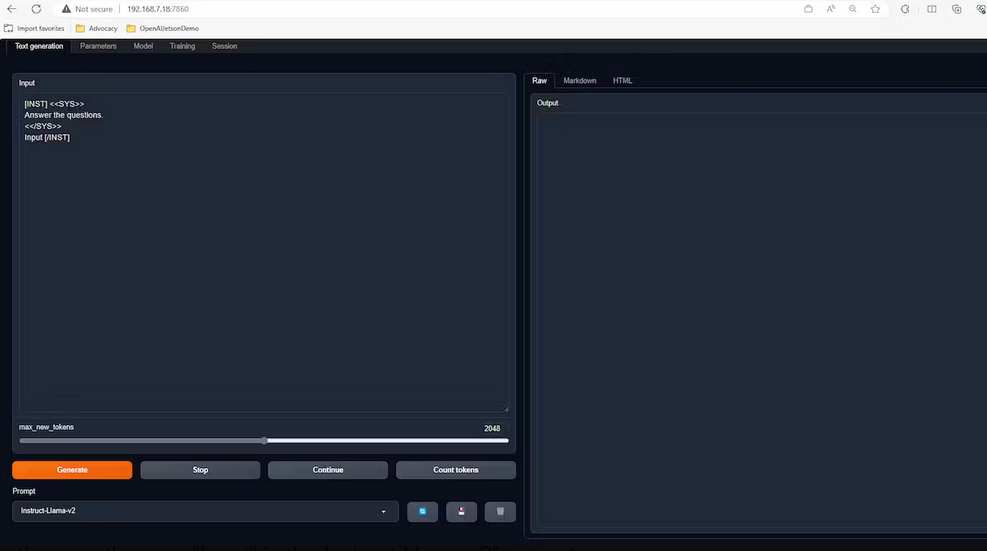
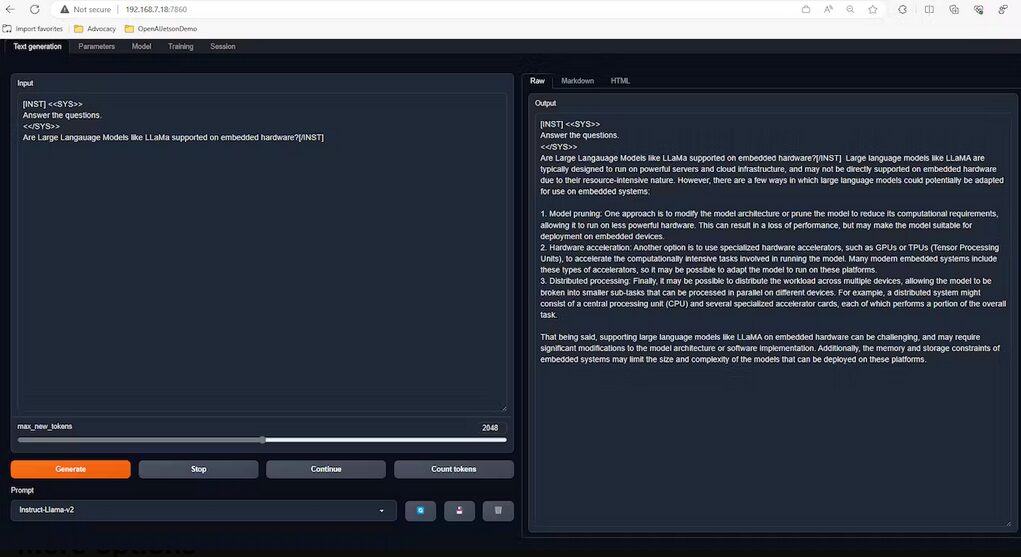
Now, we are ready to get results from our model. To do this, modify the area labeled “Input” in the “Instruct-Llama-v2” prompt template on the left side of the screen by replacing it with a new prompt. For example: “Does embedded hardware support large language models like LLaMa?” Then click the “Generate” button and watch the model start generating output on the right side of the screen.
More Options
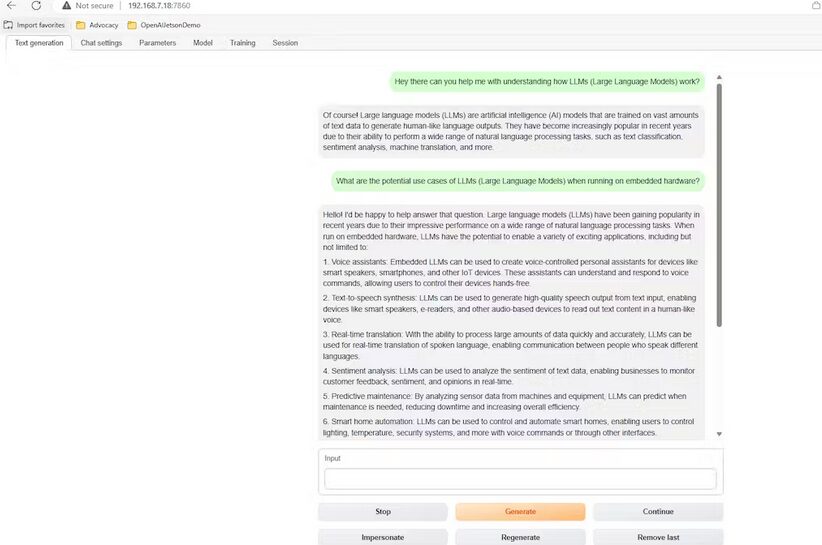
The text-generation-webui application has many options that allow you to modify its appearance, style, and behavior. These options include but are not limited to a friendlier chat interface, light/dark mode, and text-to-speech functionality. To see the available options, you can explore the “Session” tab to learn about these features and more. For in-depth and up-to-date information, check the official documentation at text-generation-webui/docs at main · oobabooga/text-generation-webui (github.com) (https://github.com/oobabooga/text-generation-webui/tree/main/docs).
Of particular interest is the API option, which allows you to generate programmatic prompts and responses that can be used in custom applications (https://github.com/oobabooga/text-generation-webui/tree/main/api-examples) (consider the use case of using a microphone/speaker to interact with your model using human voice in a HomeAssistant extension).
Here are some examples of these features (chat mode, bright mode, and use cases requesting the model to generate LLM on embedded hardware).
Advanced Options
If you are interested in building a more powerful textgeneration-web-ui container from scratch and want to try other loaders, check out jetson-containers/packages/llm/text-generation-webui at master · dusty-nv/jetson-containers (github.com). This approach supports additional loaders, including llama.cpp (which can achieve a performance of 13 tokens per second using the 4-bit quantized GGML Llama 2 13B model).
Conclusion
Large language models can run on embedded hardware, and while obtaining a powerful device may be somewhat expensive today, we can expect more innovations in the future to lower costs and enable smarter interactions. This will open doors for many different applications.