Why Choose boot-wrapper-aarch64?
If you are only focused on the Linux kernel, there is no need to run the complete software stack. Using boot-wrapper-aarch64 to boot Linux is quicker, and it is simple and easy to understand, which is sufficient for understanding the ARM boot process.
There will be a tutorial later that explains running the entire software stack on ads+fvp!
Download and Install ADS 2024.1
ADS 2024.1 has both Windows and Linux versions; choose the one you need for installation.
If you install the Windows version, you will still need a Linux environment to compile the Linux kernel later, but you can use WSL2 for this, which is the method I am currently using.
Follow the WeChat public account: Embedded Development Think Tank, and send “ADS” in the chat interface to get it.
You can scan the QR code to follow

If you need support, please add WeChat: leojiang1224
Compile the Kernel
If you are in a Windows environment, compiling the kernel requires a Linux environment. You can use a virtual machine or WSL2; I am using WSL2 here.
If you need help setting up the environment, please add WeChat: leojiang1224
Note that the subsequent downloading of the kernel and compiling code will all be done in the Linux environment.
Download the Kernel
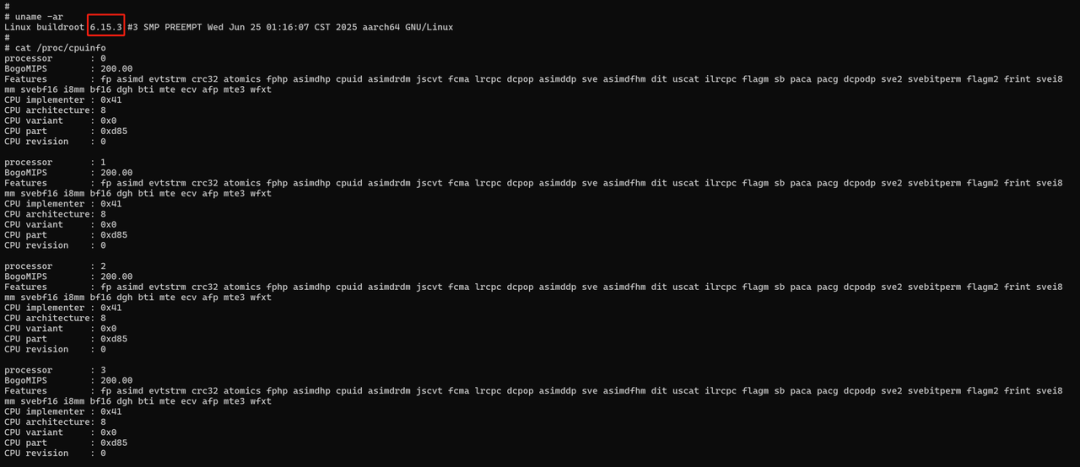
Use a domestic mirror to download linux-6.15.3:
wget https://mirrors.ustc.edu.cn/kernel.org/linux/kernel/v6.x/linux-6.15.3.tar.xz
Configure and Compile the Kernel
tar xf linux-6.15.3.tar.xz
cd linux-6.15.3
make ARCH=arm64 CROSS_COMPILE=aarch64-linux-gnu- defconfig
make ARCH=arm64 CROSS_COMPILE=aarch64-linux-gnu- menuconfig
Kernel hacking
[*] Kernel debugging
[*] Miscellaneous debug code
Compile-time checks and compiler options —>
Debug information (Rely on the toolchain’s implicit default DWARF version) —>
[ ] Reduce debugging information // Do not check this
make ARCH=arm64 CROSS_COMPILE=aarch64-linux-gnu- -j12
Compile boot-wrapper-aarch64
Clone the boot-wrapper-aarch64 Code:
git clone git://git.kernel.org/pub/scm/linux/kernel/git/mark/boot-wrapper-aarch64.git
cd boot-wrapper-aarch64
cat README
Linux boot wrapper with FDT support===================================
To get started:
$ autoreconf -i
$ ./configure --host=<toolchain-triplet> --with-kernel-dir=<kernel-dir> <other-options>
$ make
Where: - <toolchain-triplet>: this is something like aarch64-linux-gnu
 - <kernel-dir>: the directory containing a pre-built aarch64 kernel and its sources.
 - <other-options>: see ./configure -h for a list of other options.
Configuration and Compilation
Note the parameters of the configure command below, change the kernel and dtb paths to your own.
The rootfs can be downloaded here; it is a simple rootfs I made with buildroot, username root, no password, just place it in the boot-wrapper-aarch64 directory:
rootfs_arm64.cpio
https://www.alipan.com/s/z38QcD3GHyY
Extraction code: 5rkf
Click the link to save, or copy this content, open the “Aliyun Drive” APP, and view it online without downloading, video playback at original speed.
For more configure parameters, you can use the following command to view:
configure -h
The complete configuration and compilation command is as follows:
autoreconf -i
./configure --host=aarch64-linux-gnu --enable-psci --enable-gicv3 --with-kernel-dir=/home/leo/arm/linux-6.15.3 --with-dtb=/home/leo/arm/linux-6.15.3/arch/arm64/boot/dts/arm/foundation-v8-gicv3-psci.dtb --with-initrd=rootfs_arm64.cpio --with-cmdline="rdinit=/linuxrc console=ttyAMA0"
make -j12
Set Up ADS
Import Source Code
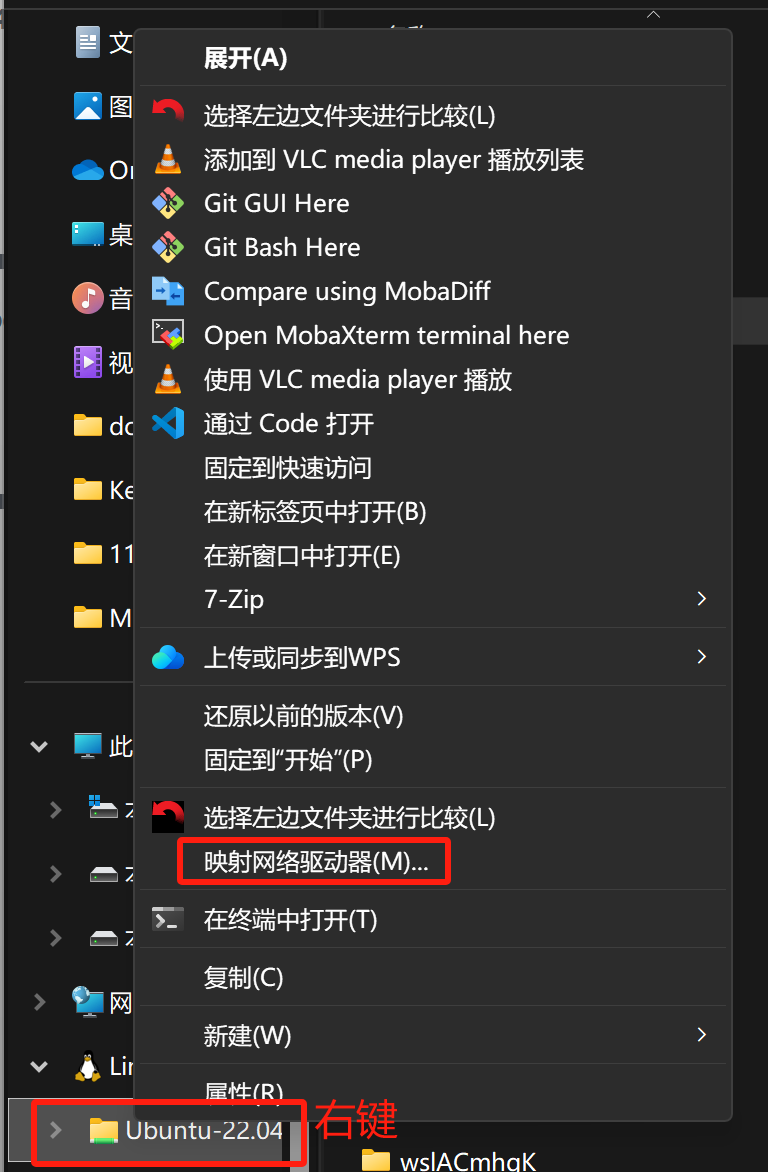
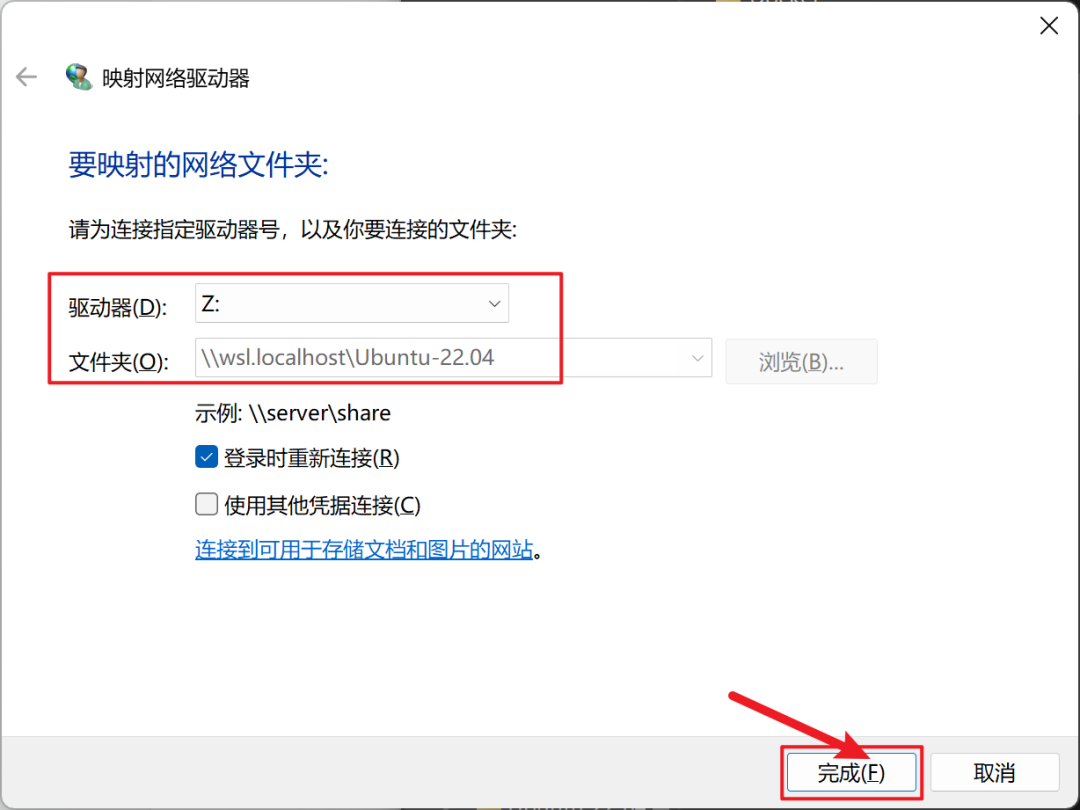
After opening ADS 2024.1, first import the source code. Since I am using WSL2, I will first map WSL2 to a local drive letter, as shown in the figure below. In the file explorer, right-click the WSL2 directory and select “Map Network Drive”:
Click finish to complete:
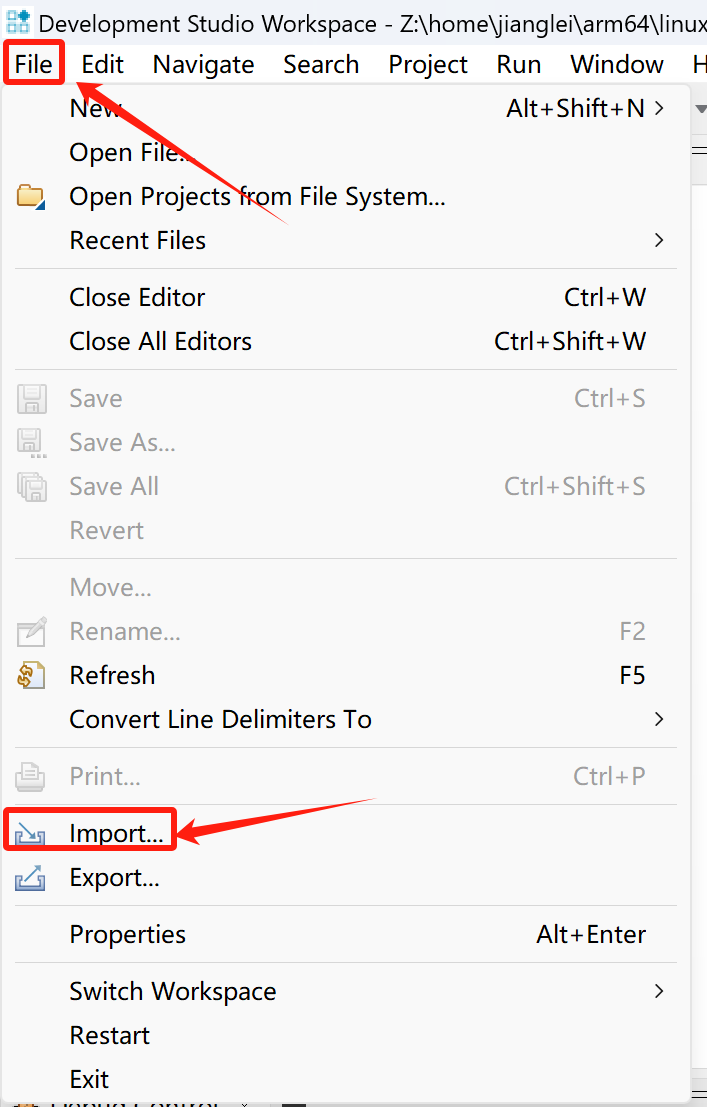
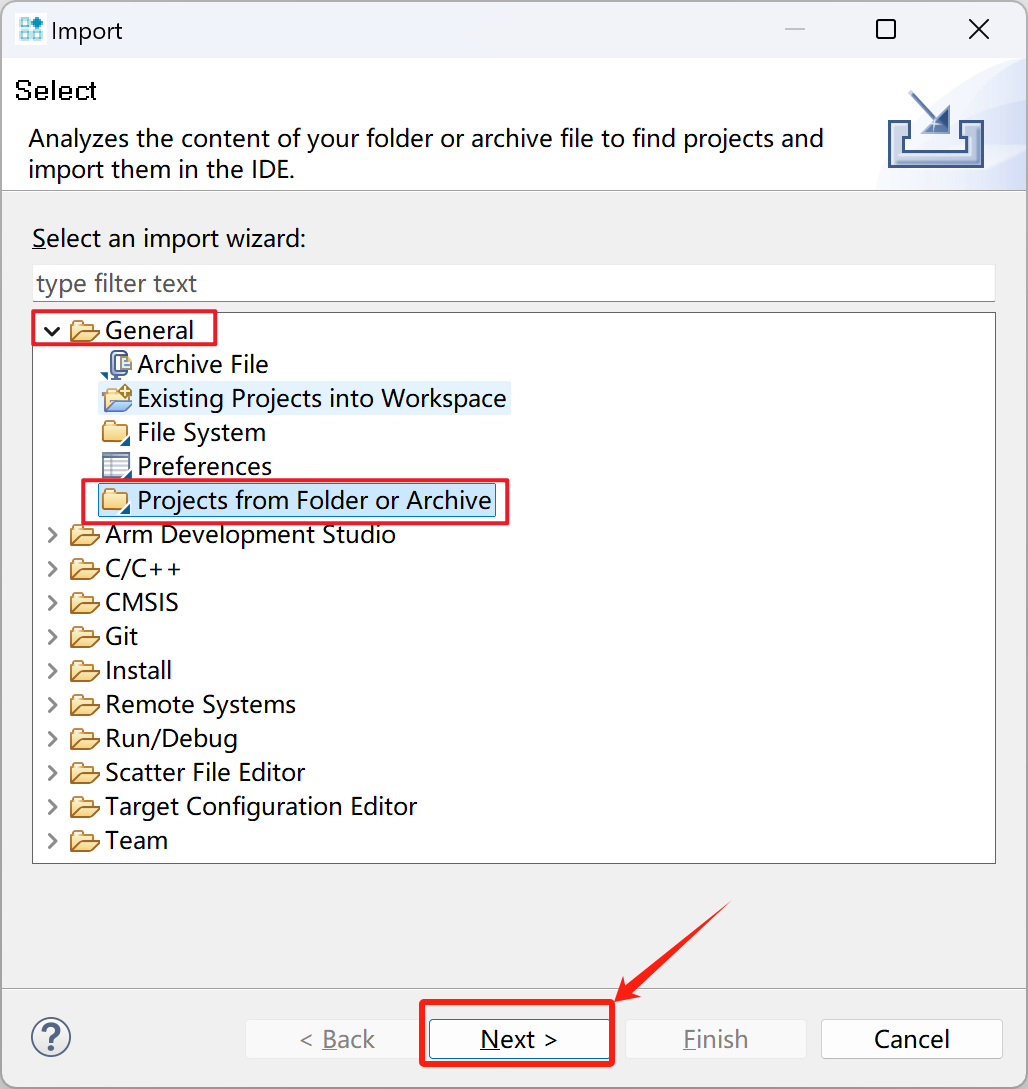
Now you can import the source code in ADS, click File->Import:
Select General->Projects from Folder or Archive, then next
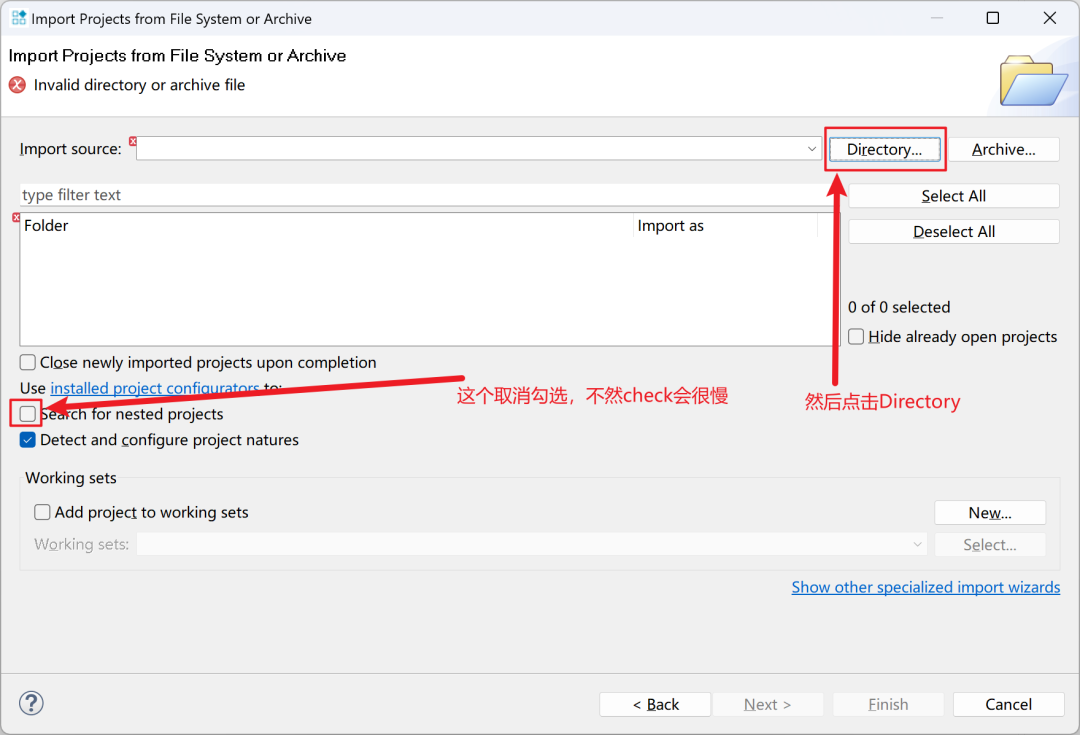
Then uncheck “Search for nested projects” because we are importing the Linux source code. If you do not uncheck this, the checking will be very slow, then click Directory:
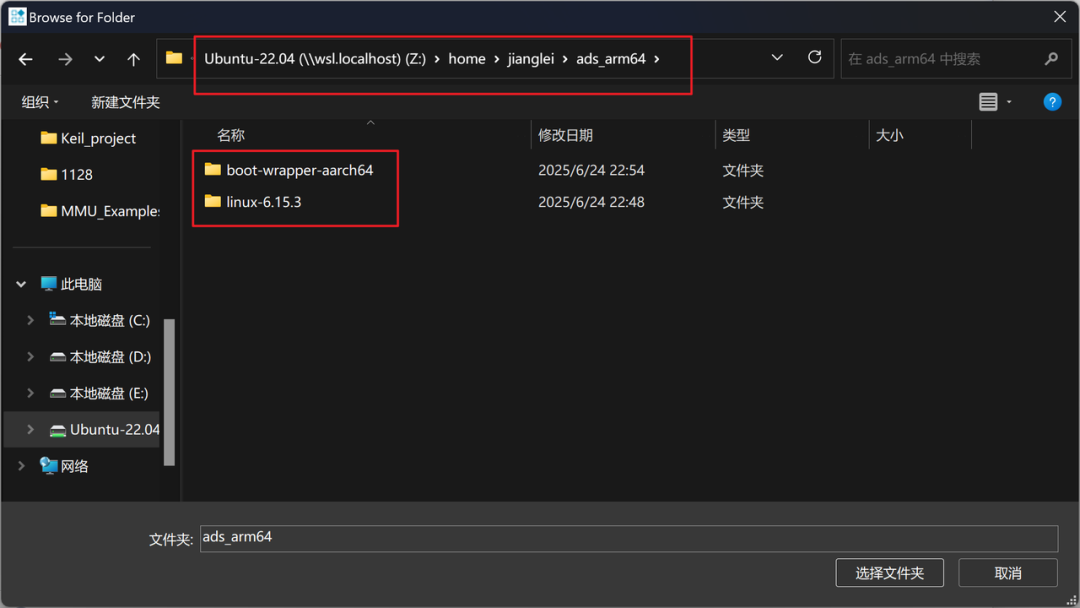
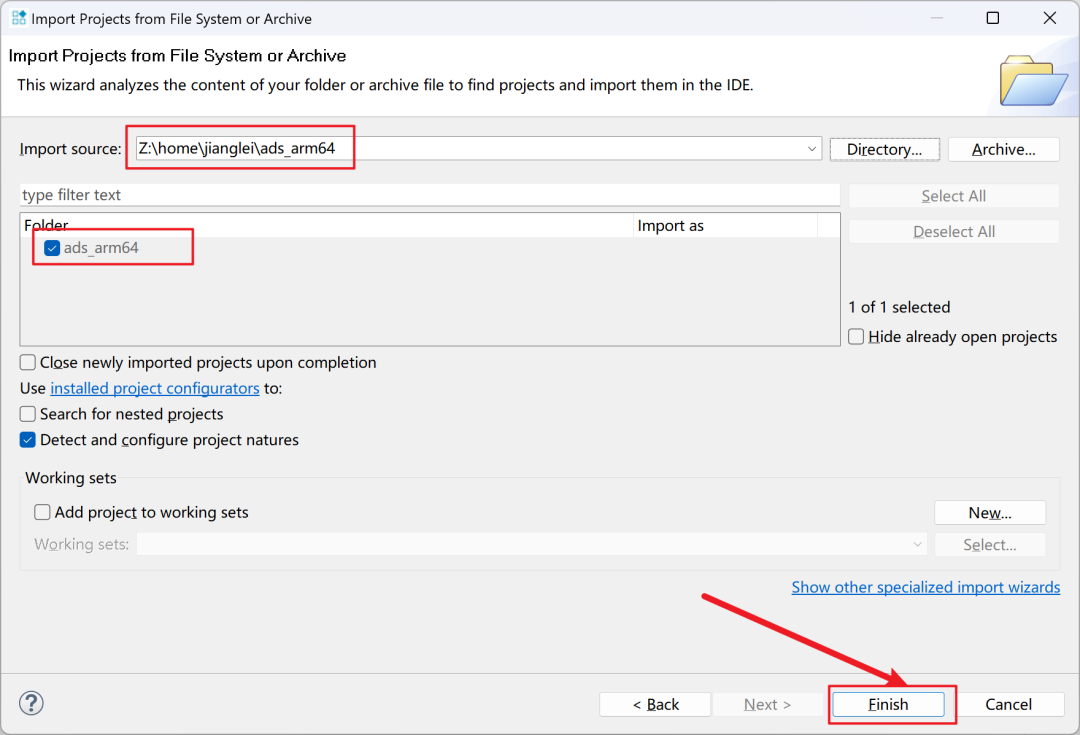
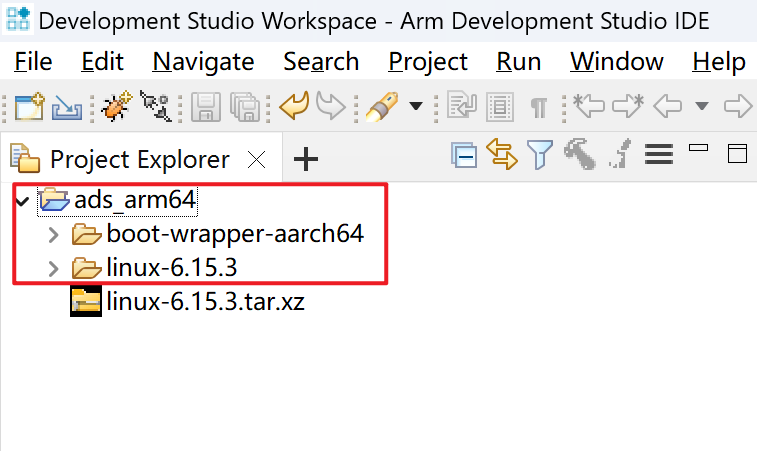
Select the directory where we store boot-wrapper-aarch64 and linux-6.15.3:
Click finish to complete:
Create Debug Launch
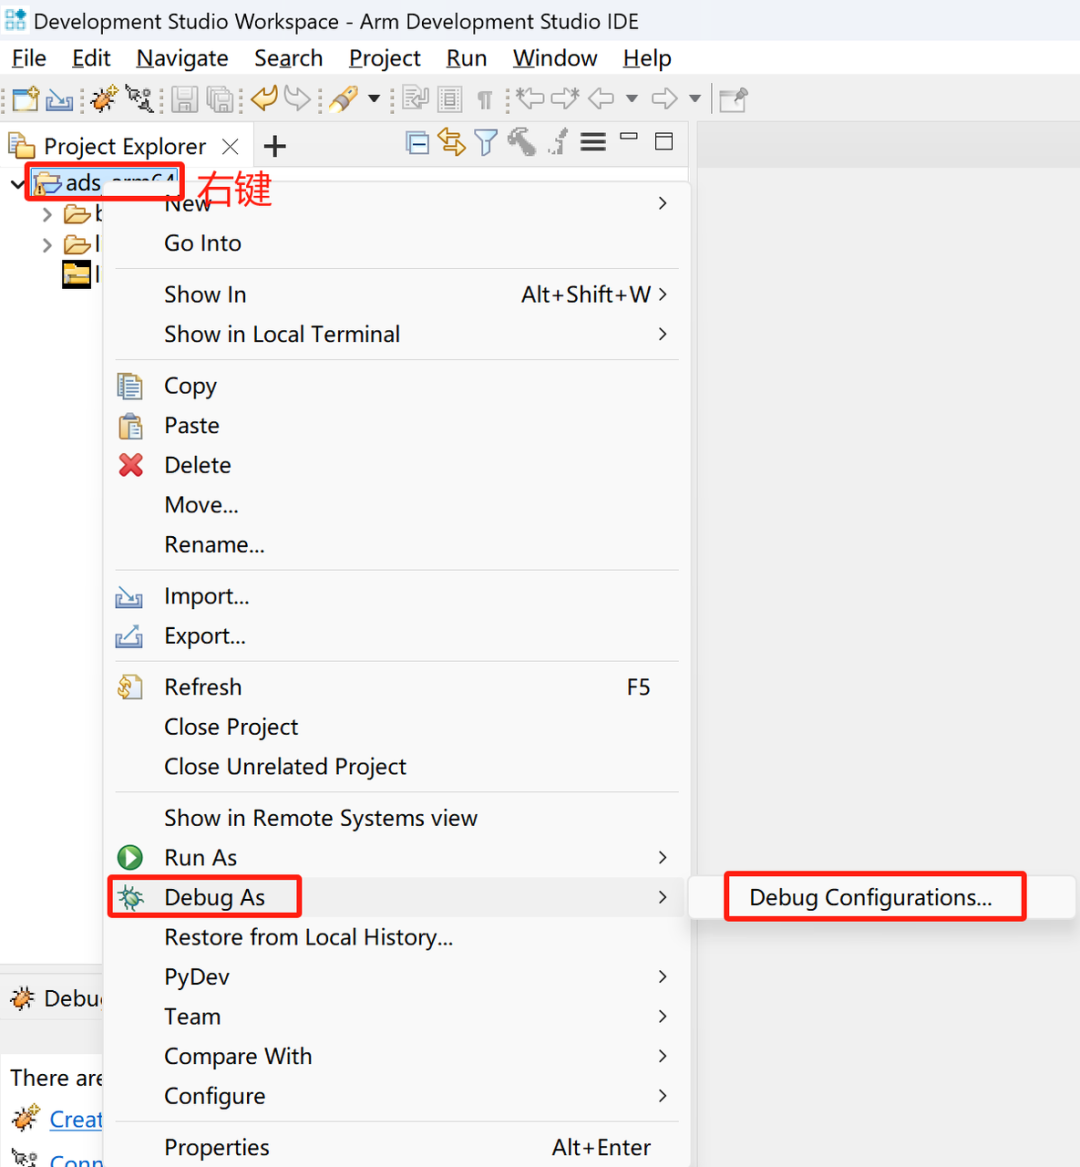
Right-click the imported project, select Debug As->Debug Configurations
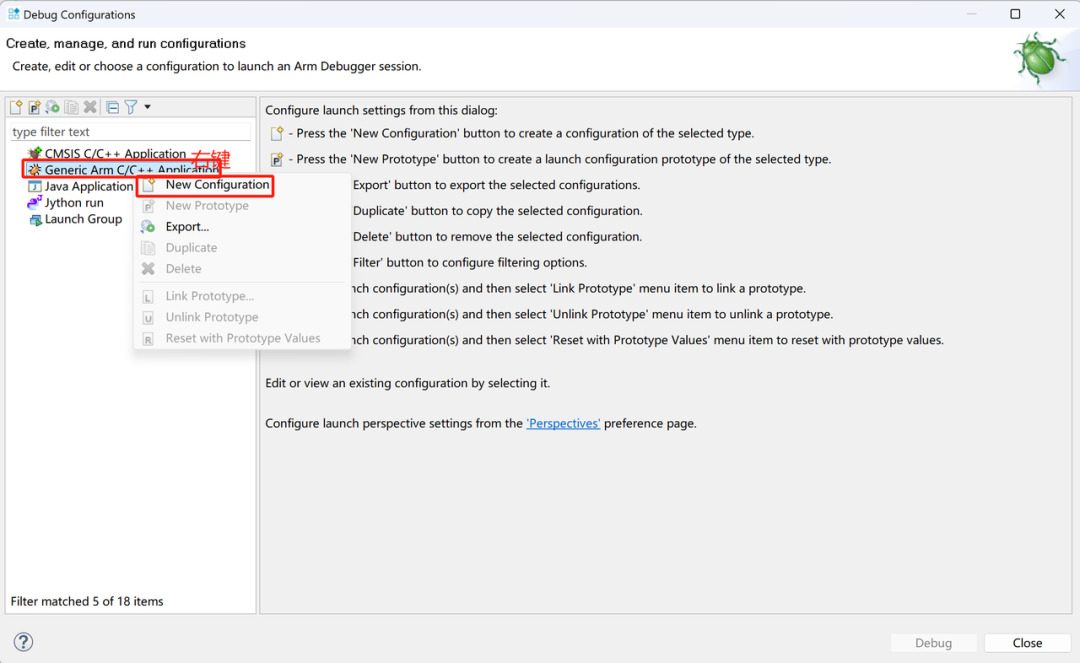
Generic Arm C/C++ Application, select New Configuration
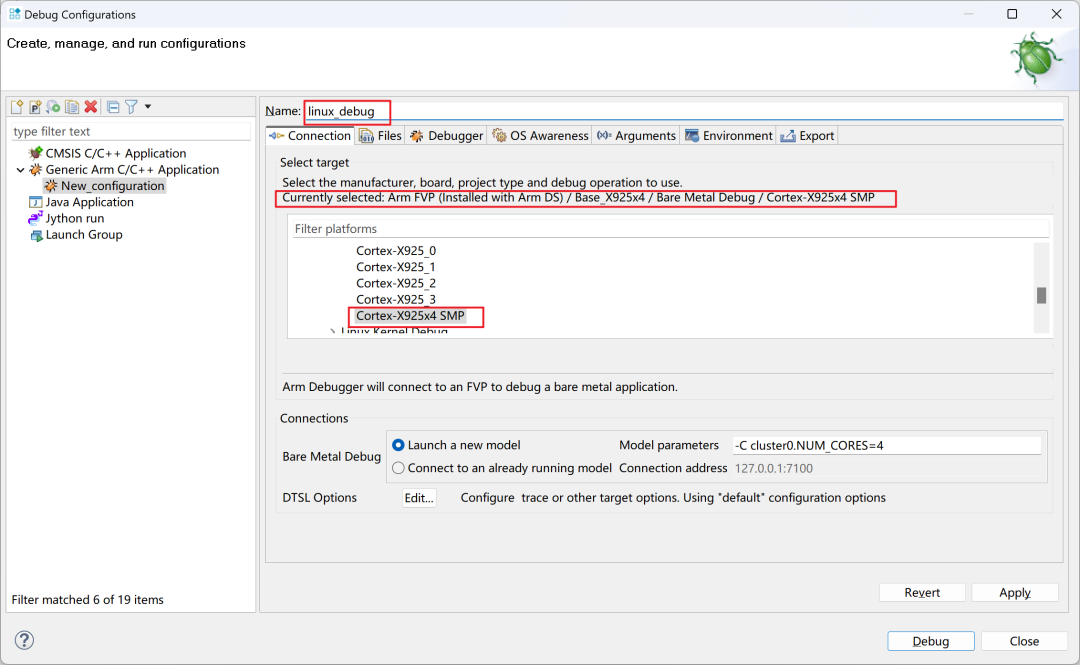
Select X925 x4 FVP, make sure to select it in Arm FVP (Installed with Arm DS), name it whatever you like:
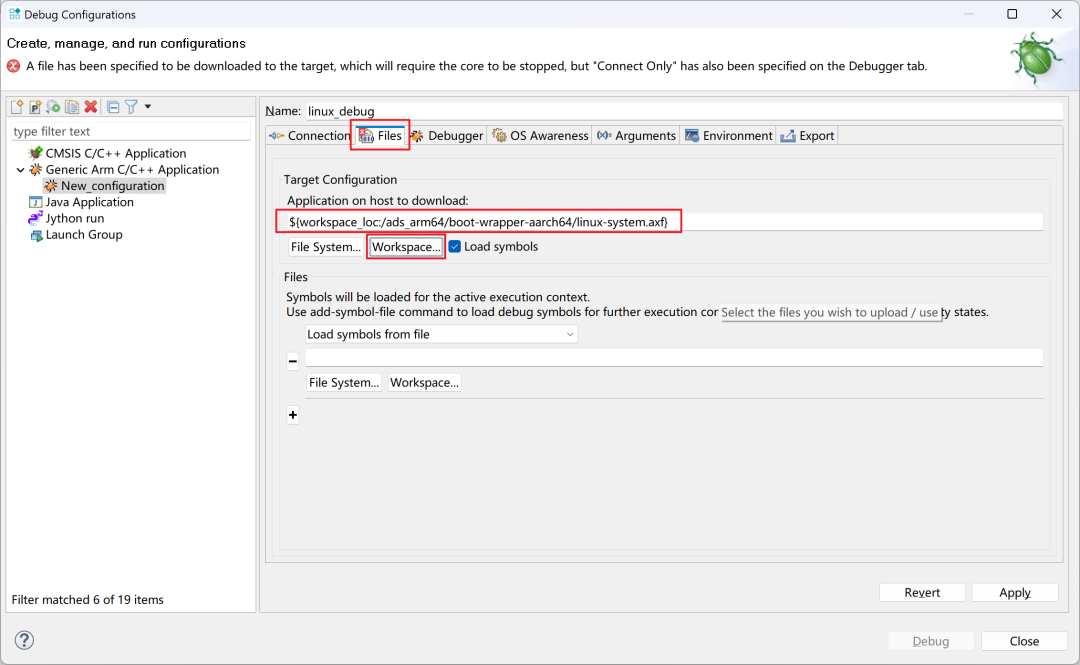
Then click Files, under Application on host to download, click Workspace, select ads_arm64/boot-wrapper-aarch64/linux-system.axf
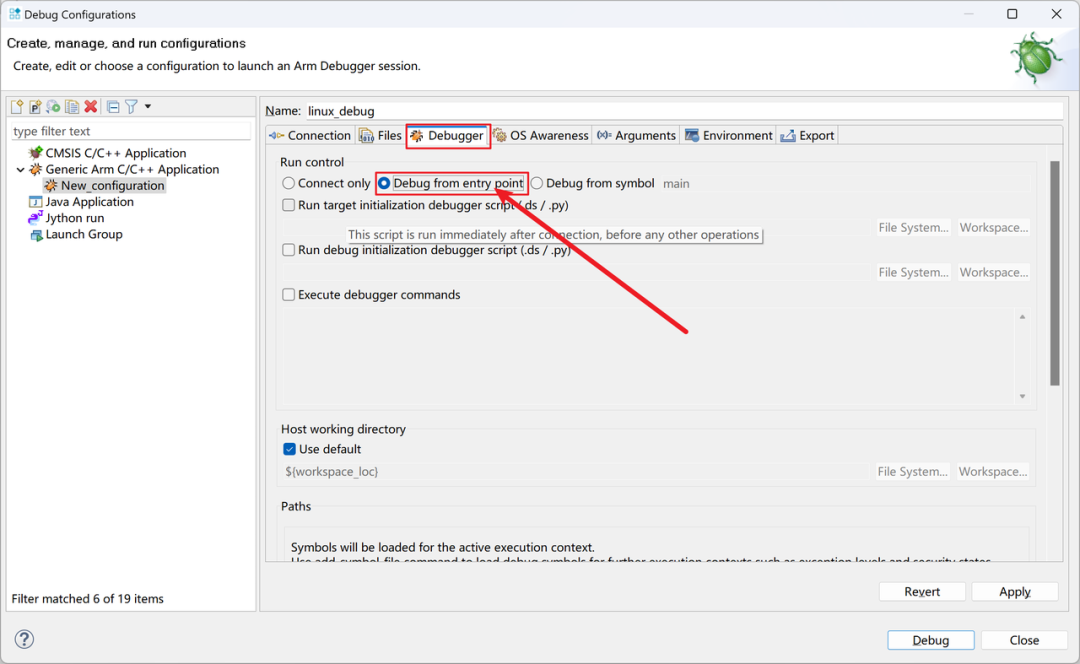
Click Debugger, select Debug from entry point
In the Source search directory, click Workspace, and add the paths for boot-wrapper-aarch64 and linux-6.15.3
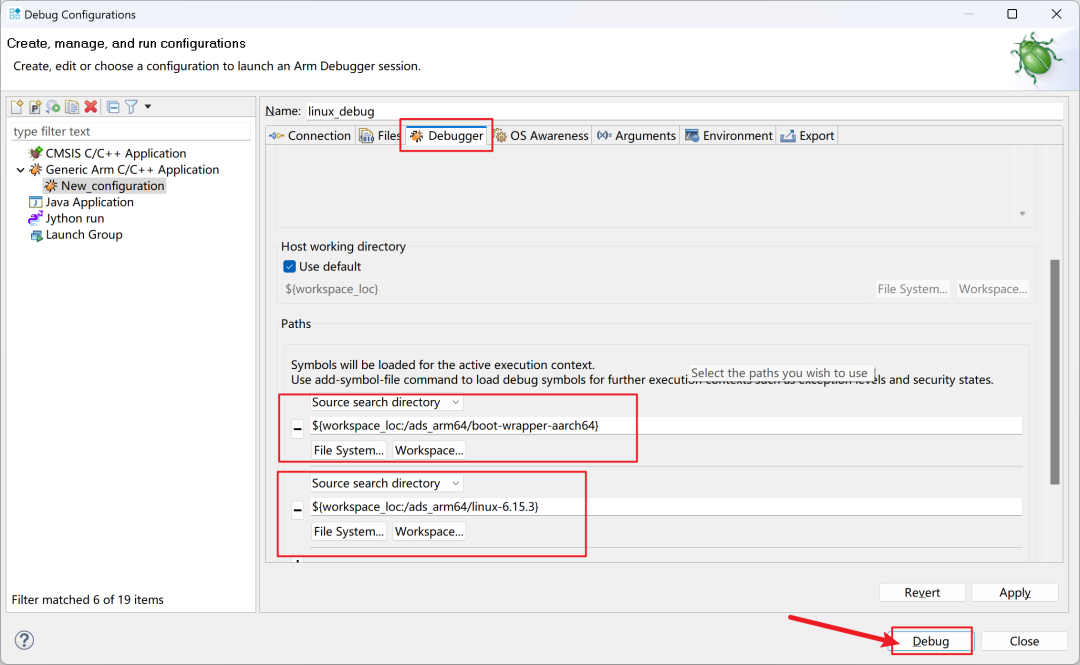
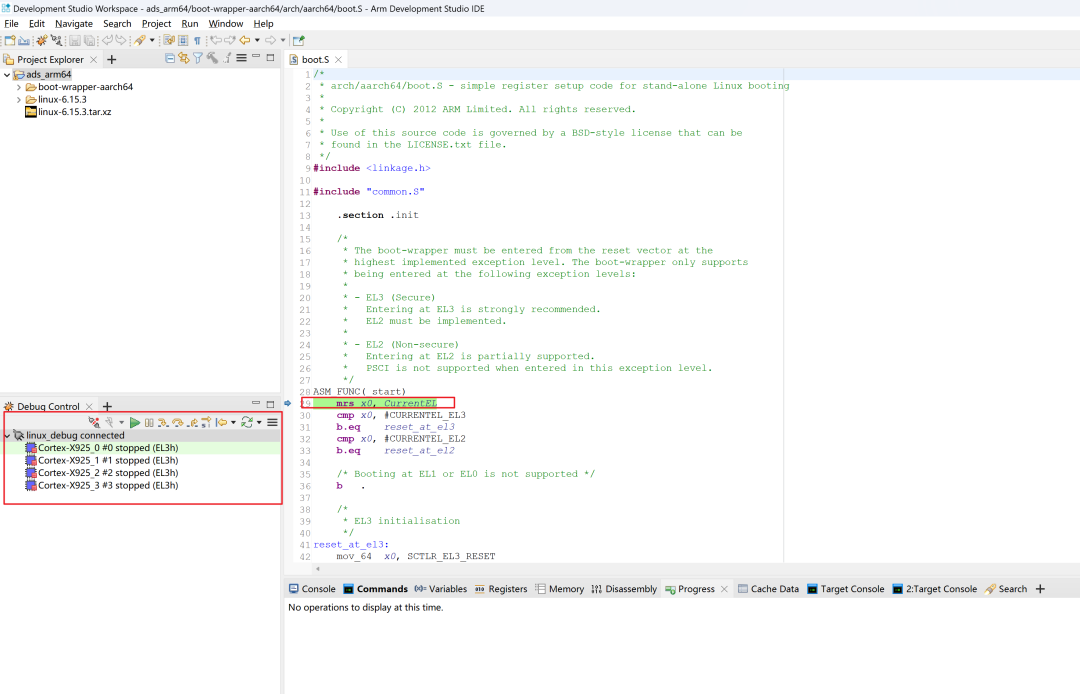
After setting up, click Debug, at this point the FVP will start, and the debugger will connect to the FVP, download the program, load the symbol table, etc., all in one go:
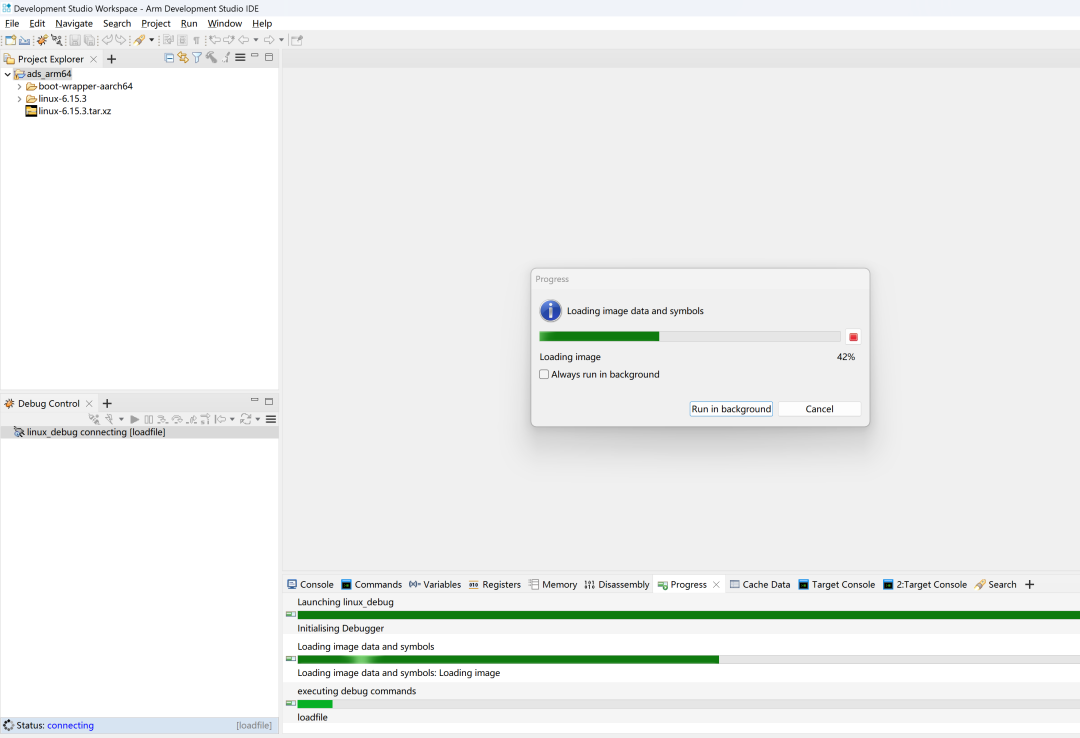
The completed interface looks like this:
Run boot-wrapper-aarch64 and Linux (Troubleshooting~)
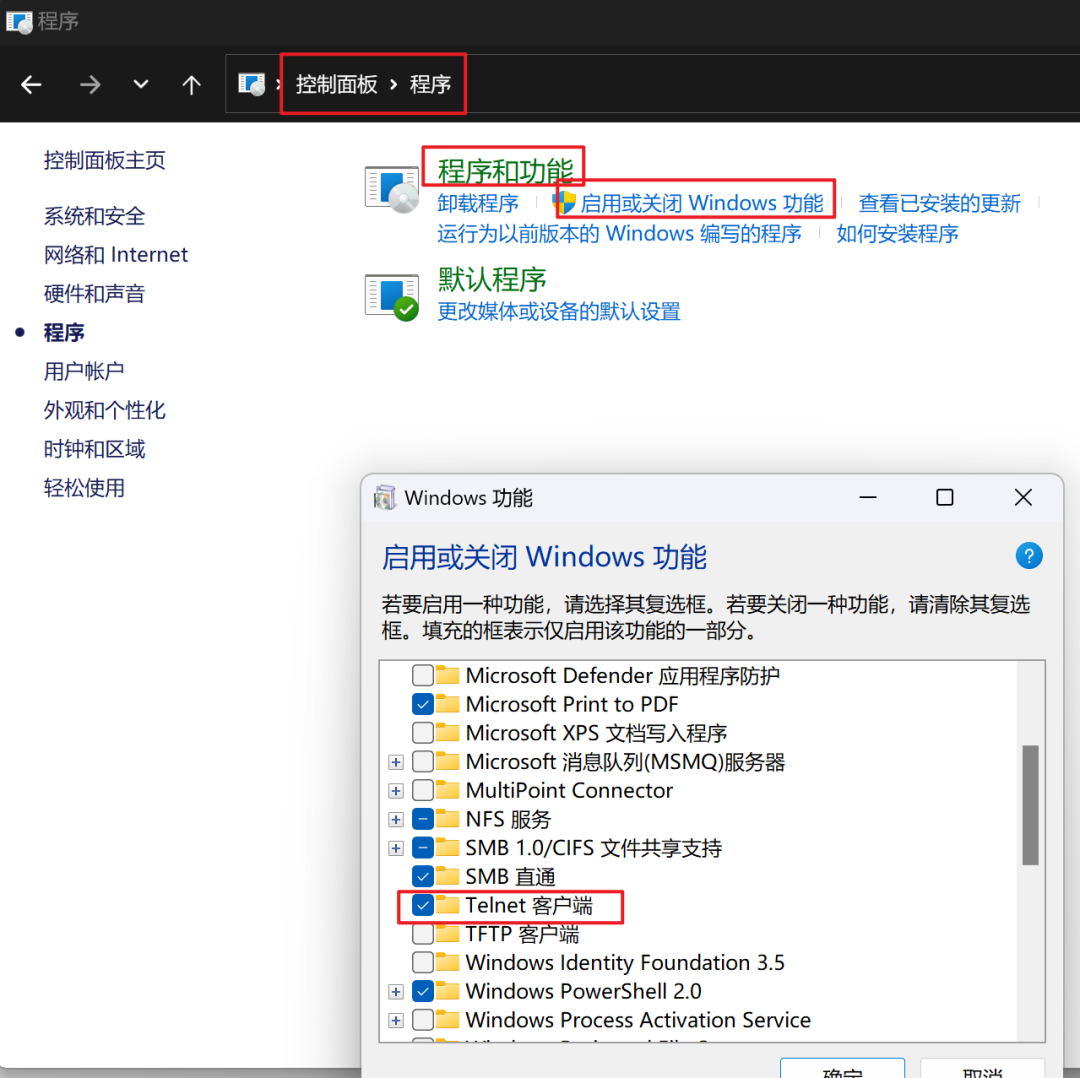
Before running, you need to enable Telnet:
After the above preparations, you can now run boot-wrapper-aarch64 and Linux
To give you a spoiler, running it is not as smooth as it seems, but I enjoy encountering problems ^_^
Issue One
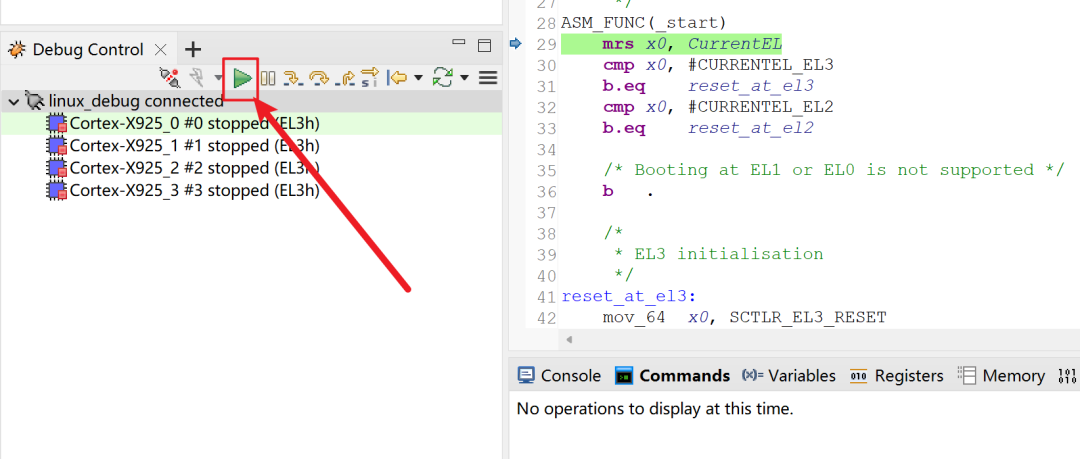
Click the run button to run the program:
Unfortunately, it did not run at the first step. Fortunately, a hint was given that we need to add the parameter bp.secure_memory=false to the FVP to resolve the TZC-400 control over DRAM. What this means, we will discuss later.
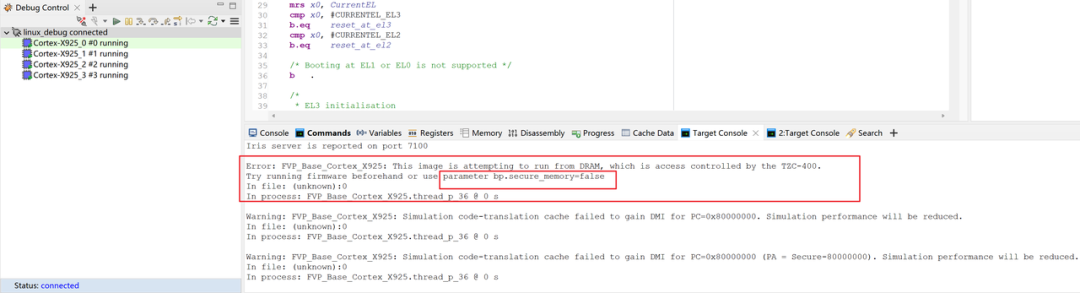
Now we will add the parameter bp.secure_memory=false to the FVP as prompted:
First disconnect:
Then right-click this launch, or right-click the project, select Debug As->Debug Configurations, just like when we created this launch:
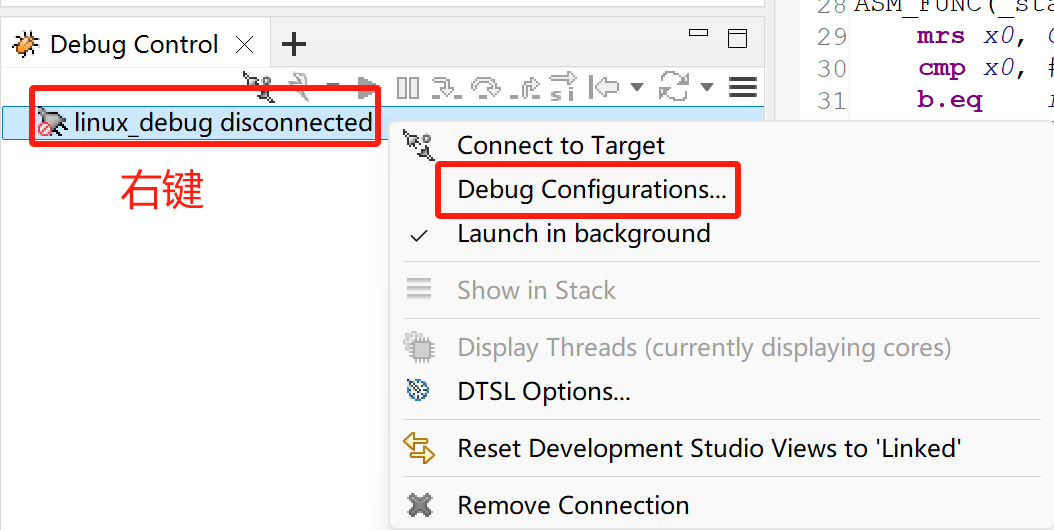
In Connection, fill in the Model parameters with -C bp.secure_memory=false, then click Debug
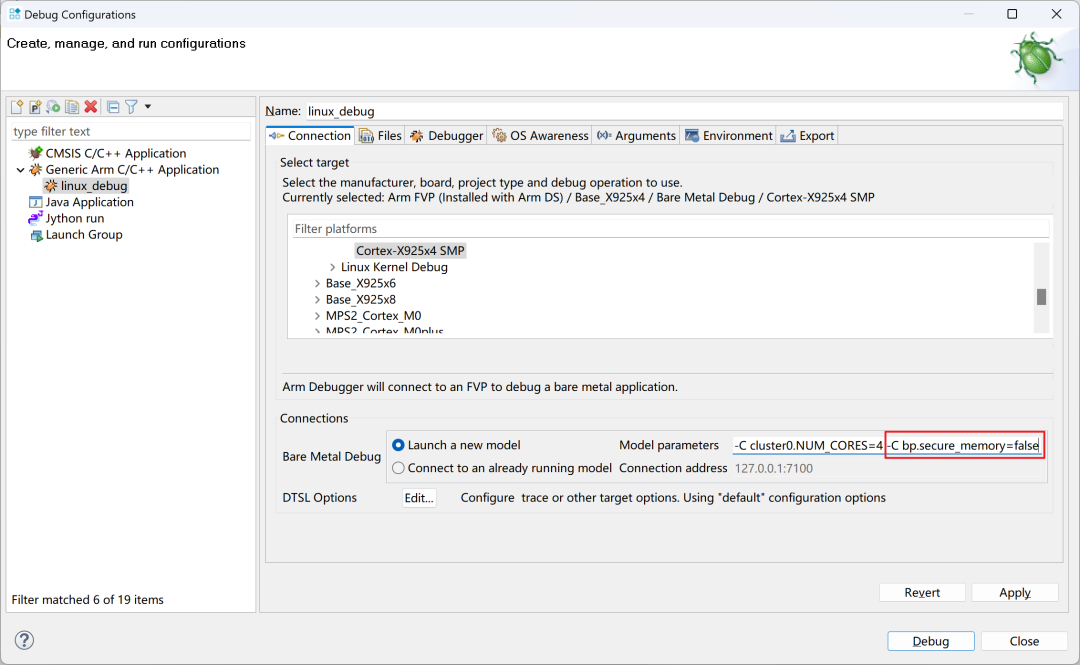
Now it has started again, click the run button, and finally, there are logs:

Issue Two
However, wait, why is it stuck here? We need to debug to see where it is stuck and why.
After my debugging, I needed to modify the boot-wrapper-aarch64 code. The debugging process will be demonstrated live later, or you can debug it yourself; practice makes perfect~
The modification is simple:
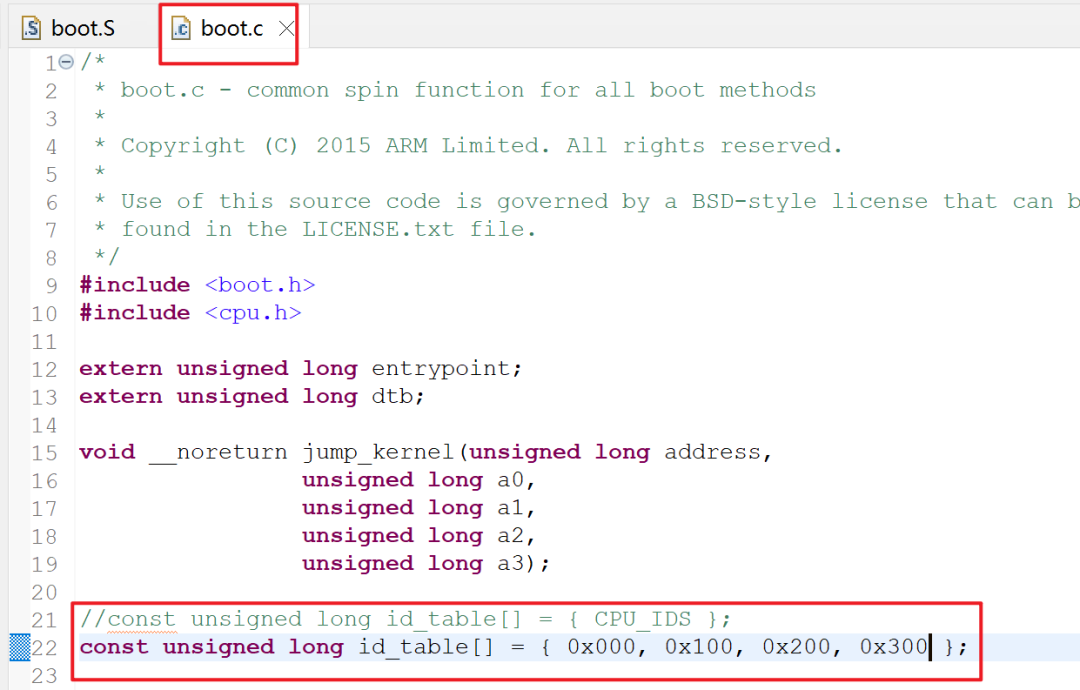
After modifying, recompile boot-wrapper-aarch64 and run again:
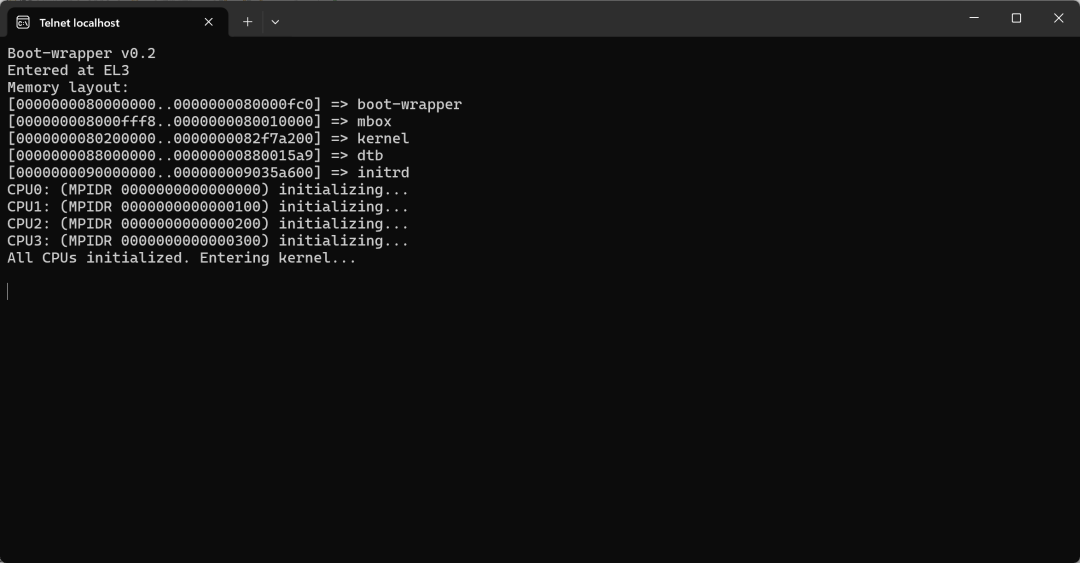
This time we can see that we have entered the kernel, but the kernel has not started running. It seems to be stuck in the kernel startup phase, at least boot-wrapper-aarch64 has finished running.
Issue Three
Next, we continue to debug the kernel to see where it is stuck and why.
After my debugging, I finally found the reason, and it was also quite simple. Just add a few lines of code in boot-wrapper-aarch64, and the debugging process will be live-streamed:
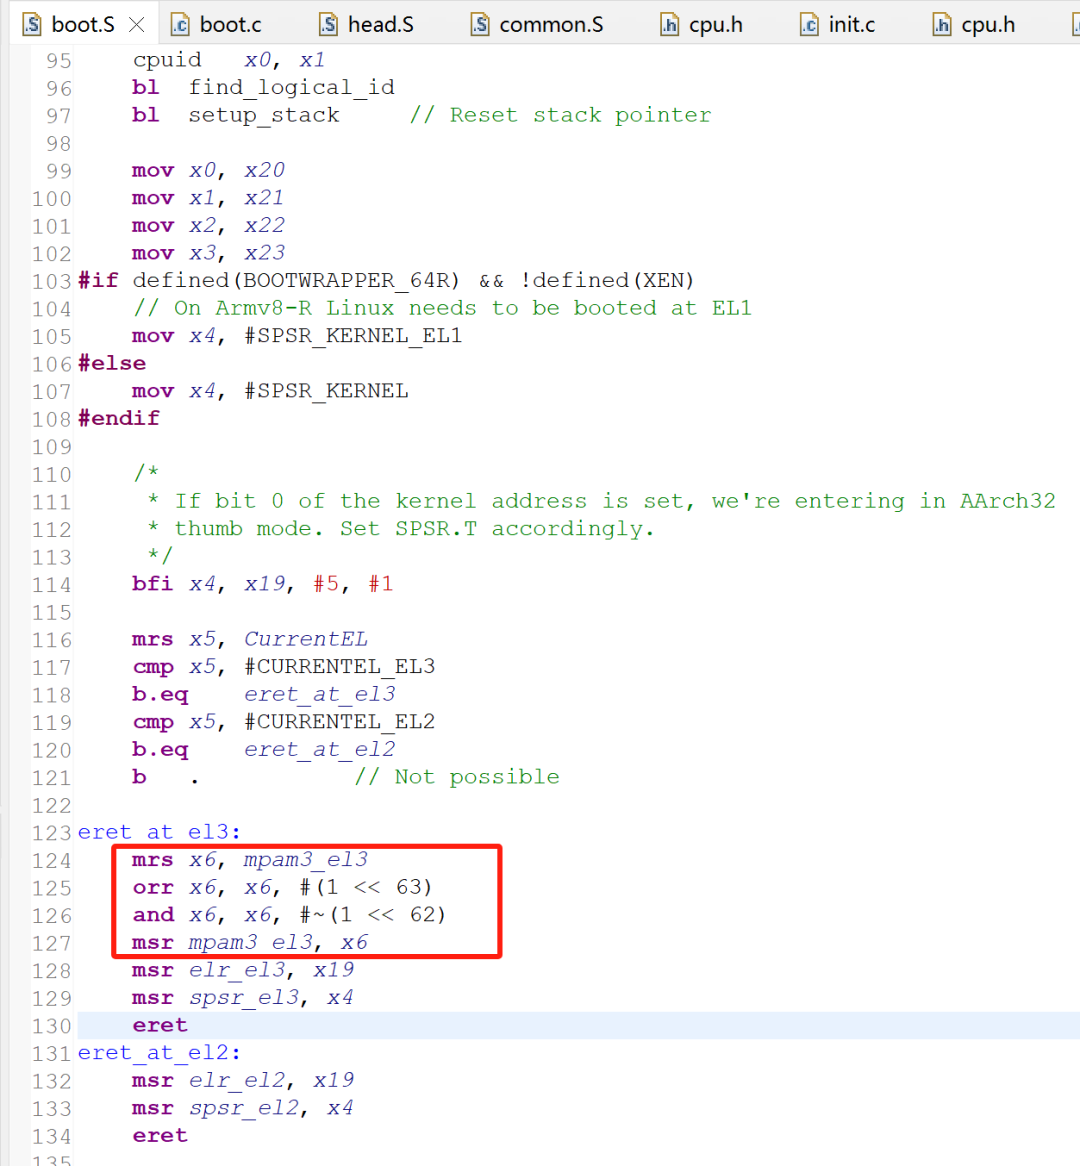
You can directly copy the code:
        mrs x6, mpam3_el3
        orr x6, x6, #(1 << 63)
        and x6, x6, #~(1 << 62)
        msr mpam3_el3, x6
Issue Four
Finally, we can see the kernel log
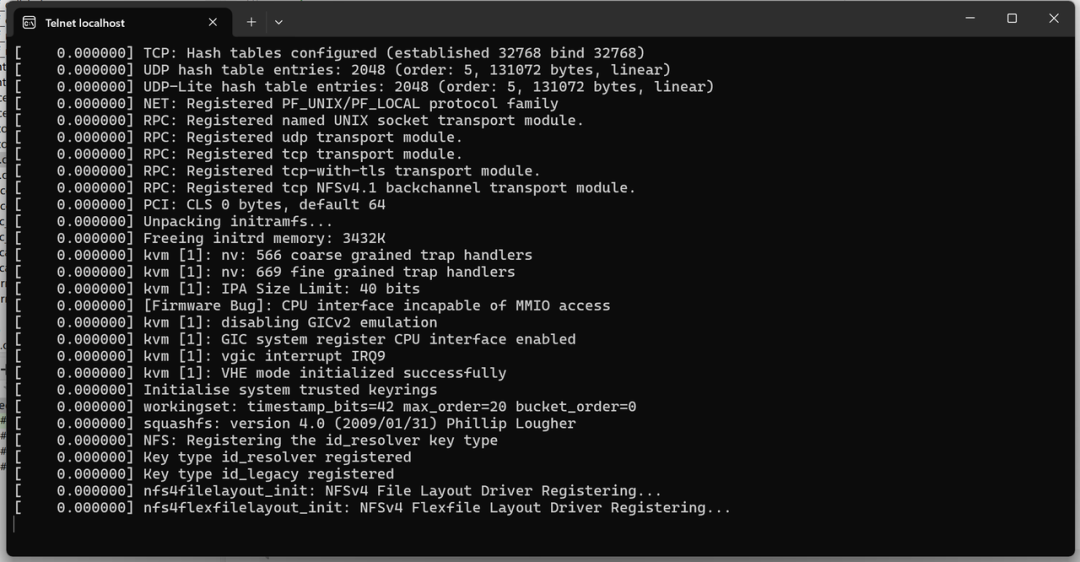
Unfortunately, it is stuck again. Analyzing it, I found that it failed to generate random numbers using time, and all the times in the log are zero, which made me realize.
Executing the command FVP_Base_Cortex-X925.exe –list-param shows the following content
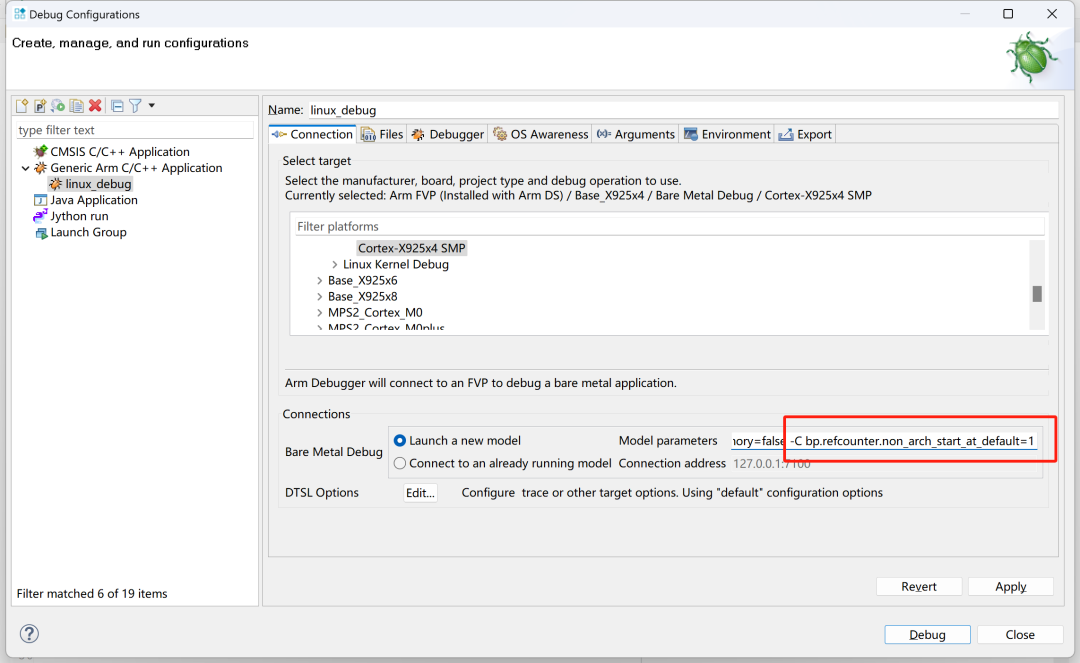
bp.refcounter.non_arch_start_at_default is default 0, which needs to be enabled by firmware, and can also be enabled in the FVP parameters. We will add -C bp.refcounter.non_arch_start_at_default=1 to the FVP parameters.

Run again, and finally, it runs!
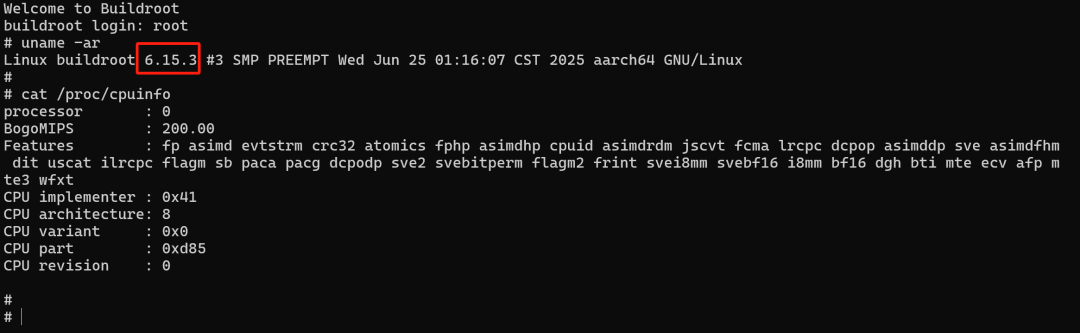
Wait a minute, why does it look a bit off?
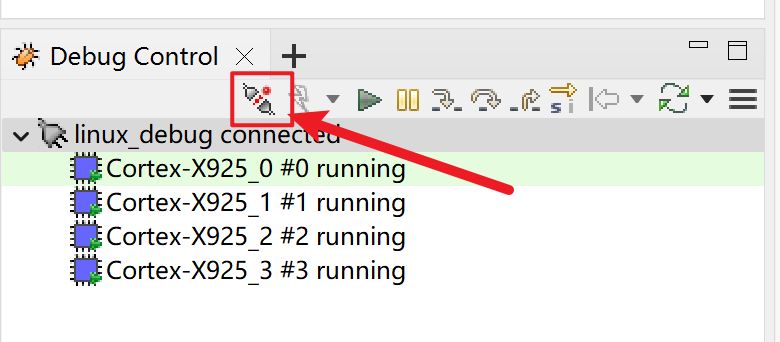
When I set up the FVP, I selected four X925 cores, but why is there only one in the Linux system? What happened to the other three? I need to analyze this and find those three back.
Issue Five
After some investigation, I found that when the kernel starts other cores through PSCI, the cpu_id does not match, which was caused by the previous modification of the id_table. Let’s change the id_table back, and then we modify the device tree in the kernel:
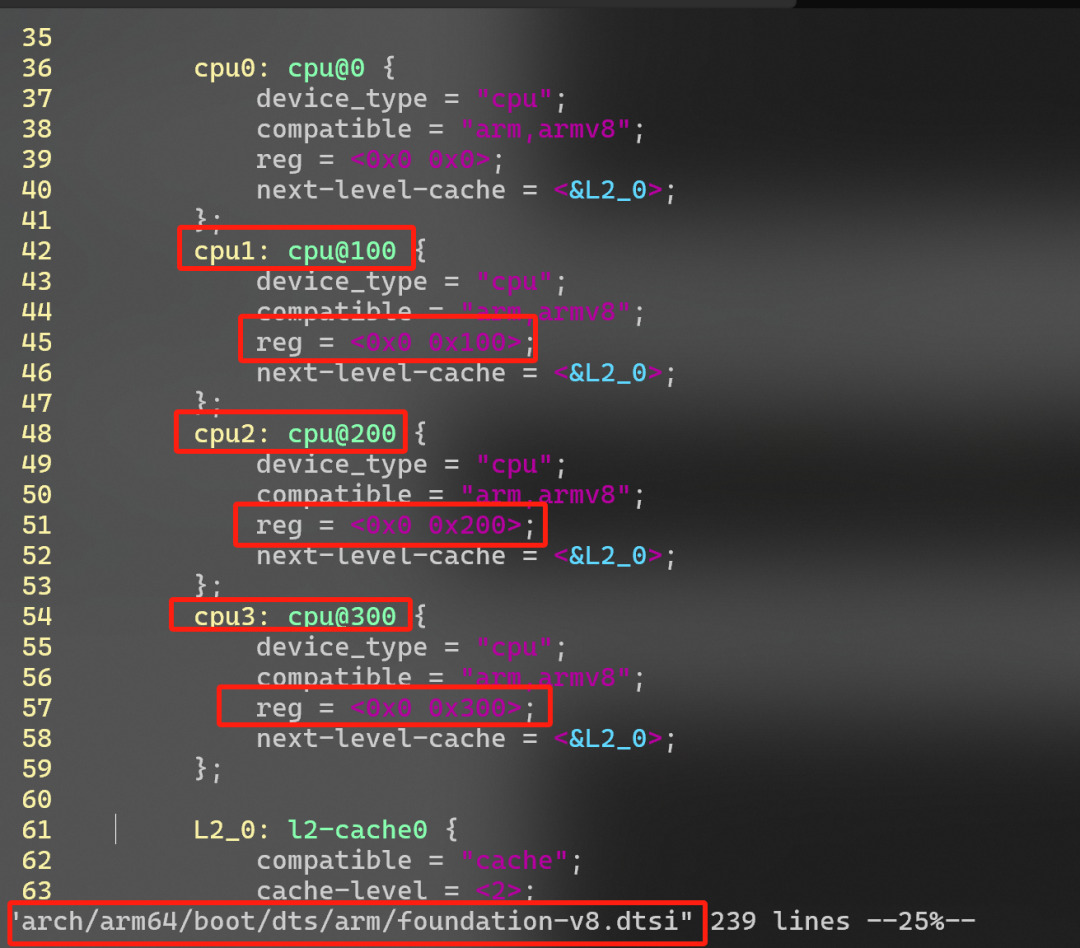
After modifying, recompile the device tree and boot-wrapper-aarch64
Finally, now all four cores are running, perfect~