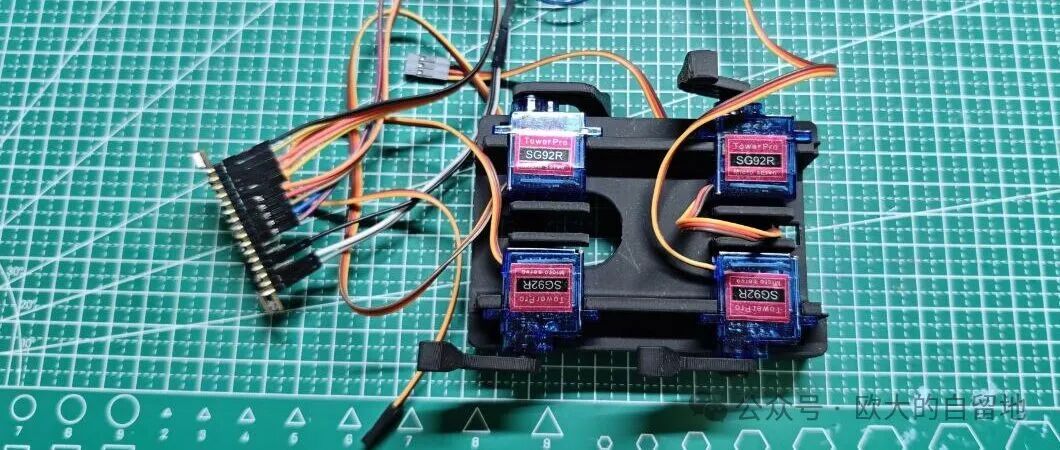
Recently, the Cyber Dog and Xiao Zhi AI have become quite popular on Bilibili. I also wanted to recreate one, preferably combining both, and after some research, I found that the authors’ open-source solutions did not quite match my preferences. I decided to modify them, which led me on a journey of troubleshooting.
Reason
The Cyber Dog open-source project uses ready-made voice recognition and text-to-speech modules. These two modules are quite expensive and not very flexible in use. Additionally, the main control unit uses STM32, which complicates the integration with Xiao Zhi AI for development.
Then I thought of the Espressif ESP32, which already has built-in voice wake-up, voice recognition, and text-to-speech capabilities. Why not use a single MCU to achieve the functionality of external modules? This would significantly reduce costs, and since Xiao Zhi AI is also based on ESP32, it would be more convenient to combine them.
After further research on the open-source hardware project of Xiao Zhi AI, I found it was developed based on ESP-IDF. This was a bit daunting; although the official ESP-IDF is more powerful and flexible than the Arduino framework, I still prefer using the Arduino framework for ease of development.
To modify everything to my liking, I embarked on a journey of troubleshooting.
Development Environment
Although I have always used the Arduino framework for ESP32, I did not use the Arduino IDE. Instead, I used Visual Studio Code with the PlatformIO plugin. The Arduino IDE’s editor is too outdated and lacks many useful features such as code suggestions, auto-completion, and symbol navigation.
Visual Studio Code is much more powerful in this regard, and thanks to the recent popularity of AI, tools like Codium or Cursor can help achieve more efficient coding. Additionally, PlatformIO supports SDK management and compilation for multiple MCU platforms, allowing one app to handle the development of various MCU firmware.
This time, I set up the ESP32 + ESP-SR + ESP-TTS development environment based on VSCode + PlatformIO, and I recommend this development environment to electronics DIY enthusiasts and Arduino fans.
ESP-SR Library Not Found?
First, I tried the official voice recognition example from ESP-SR, found the example in the arduino-esp32 repository for ESP_SR, copied the code as is, and upon compilation, it directly reported missing header files <span>ESP_I2S.h</span> and <span>ESP_SR.h</span>.
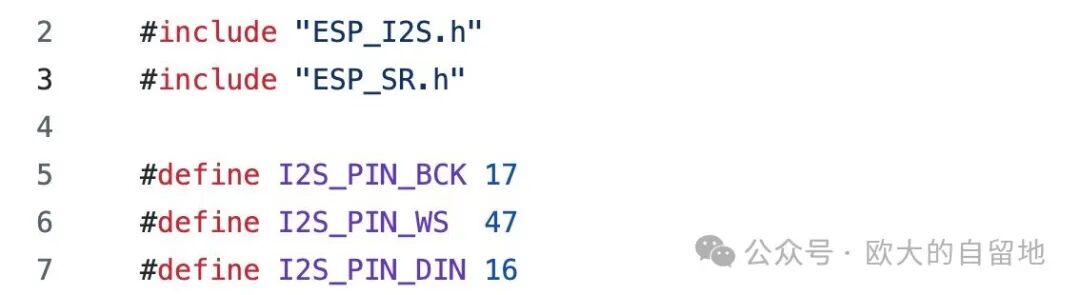
Then I checked the directory of framework-arduinoespressif32 in PlatformIO, and indeed, it was missing…
After a lot of searching, I discovered that the arduino-esp32 repository used by PlatformIO is packaged from another project, and during packaging, the ESP-SR related libraries were deleted.
I spent some more time finding a <span>pioarduino/platform-espressif32</span> repository, which closely follows the official upstream repository to generate the latest ESP-IDF packaged Arduino framework. I just needed to specify their repository in the <span>platformio.ini</span> file.

After saving, I waited for PlatformIO to download the dependencies, and finally, the code compiled successfully.
I2S Initialization Failed?
With the latest compilation and flashing, I opened the serial monitor, but it kept restarting. Pausing the log, I found it was stuck on the following error:

It seemed that I used the ESP32-S3-N16R8 version with PSRAM, which caused the interrupt function to be placed in PSRAM instead of SRAM during I2S initialization.
However, I didn’t change much in my test code; logically, allocating to PSRAM requires additional specification, which the example code did not do.
After some effort, I found an issue that someone had raised a few days ago during my troubleshooting: I2S failed to set up tx callback, which turned out to be a parameter error in the official SDK packaging. Well…
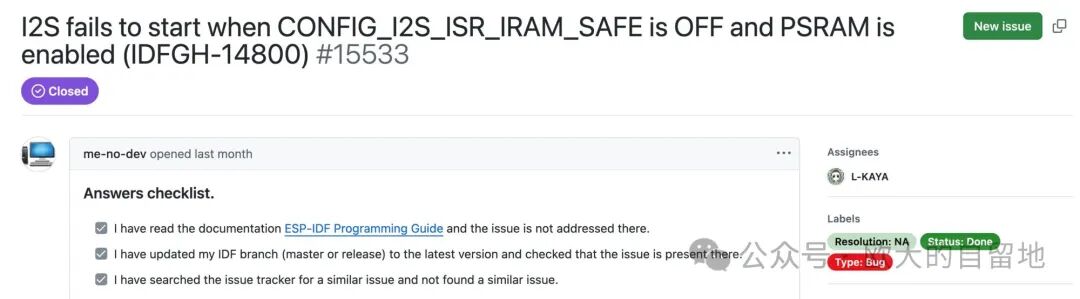
Comments mentioned that it would be fixed in 3.2.0-RC2, so I decided to wait for the fixed version of arduino-esp32.
Fortunately, I used 16M Flash, so the partition is sufficient
After a week, a new version of arduino-esp32 was finally available, and the firmware could run normally on the ESP32. However, during operation, it still reported an error saying the wake word was not found.
After searching, I found that the model needs to be uploaded separately, requiring a dedicated partition to be created on Flash. A tutorial suggested using the <span>esp_sr_16.csv</span> preset partition configuration.
# Name,   Type, SubType, Offset,  Size, Flags
nvs,      data, nvs,       0x9000,   0x5000,
otadata,  data, ota,       0xe000,   0x2000,
app0,     app,  ota_0,    0x10000, 0x300000,
app1,     app,  ota_1,   0x310000, 0x300000,
spiffs,   data, spiffs,  0x610000, 0x700000,
model,    data, spiffs,  0xD10000, 0x2E0000,
coredump, data, coredump,0xFF0000,  0x10000,
This partition configuration creates a label called <span>model</span>, with a size of <span>2944KB</span>, used to store the models required by ESP-SR, including models for voice wake-up and command recognition.
After using this partition table, the next step of configuring the wake model was successful, but the later TTS model required an additional partition, and the size of this partition was also insufficient. Therefore, I ultimately modified the partition table to use a custom configuration.
# Name,   Type, SubType, Offset,  Size, Flags
nvs,      data, nvs,       0x9000,   0x5000,
otadata,  data, ota,       0xe000,   0x2000,
app0,     app,  ota_0,    0x10000, 0x300000,
app1,     app,  ota_1,   0x310000, 0x300000,
spiffs,   data, spiffs,  0x610000, 0x100000,
model,    data, spiffs,  0x710000, 0x5E0000,
voice_data,data,fat,     0xCF0000, 0x300000,
coredump, data, coredump,0xFF0000,  0x10000,
Additional two partition configurations:
-
model: used to store the voice wake-up model, size 6016KB
-
voice_data: used to store the TTS model, size 3072KB
To use MultiNet6, which directly supports using Pinyin for Chinese commands, I adjusted the model partition size to over 6MB; otherwise, the WakeNet and MultiNet models wouldn’t fit.
How to Configure the Wake Model?
Great, it finally runs! However, upon running, it continued to prompt for missing wake words. I realized that while I had created the partition, I had not uploaded the model data.
I found the model data for WakeNet and MultiNet in the <span>esp-sr</span> project, and the current available wake words can also be seen on the project homepage.
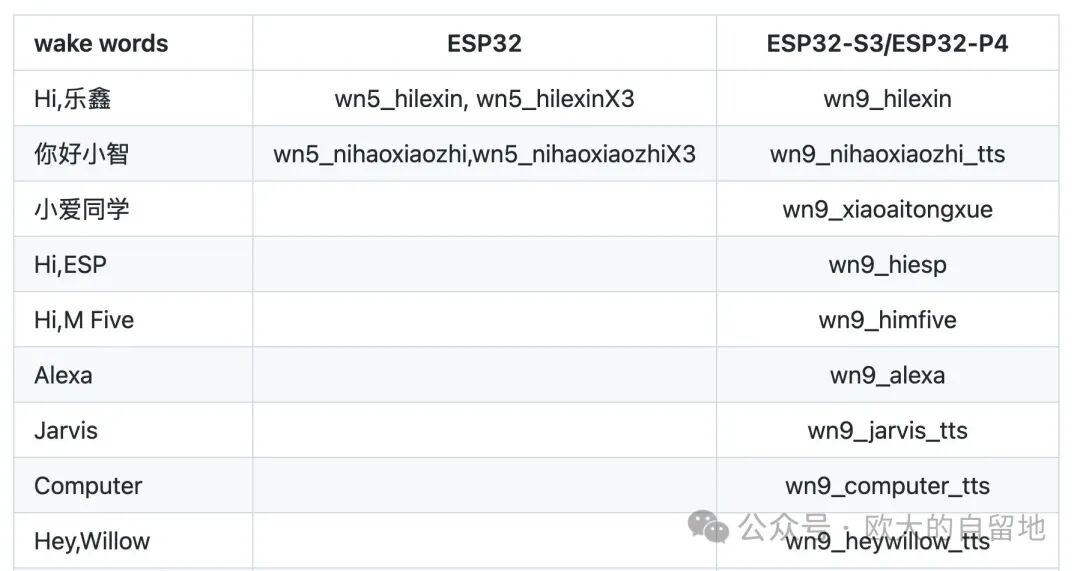
I chose <span>Little Duck</span> as the wake word.
Additionally, I needed the command recognition model for MultiNet. To use Chinese, I selected <span>mn6_cn</span>, which can also be found in the model directory of the <span>esp-sr</span> project.
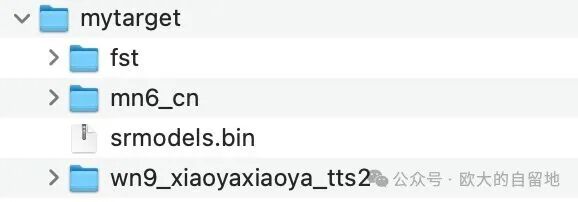
Then I placed them in a directory and used the built-in Python script to generate the target partition data:
python3 pack_model.py -m mytarget -o srmodels.binNext, I used <span>esp-tool</span> to upload it to the model partition:
esptool.py --baud2000000 --before default_reset --after hard_reset write_flash 0x710000 data/srmodels.binDone! I can finally wake the ESP32 with “Little Duck” and use “Turn on the air conditioner” to control it.
TTS Models Also Need to Be Uploaded
After finishing the ESP-SR voice wake-up and command recognition, I continued to work on TTS.
According to the example in <span>esp-skainet</span>, using TTS is also quite simple. Refer to the code in <span>https://github.com/espressif/esp-skainet/blob/master/examples/chinese_tts/main/main.c</span> for the example.
However, I must complain that the official examples, documentation, and model files are all scattered…
The TTS model is also in the <span>esp-sr</span> project, located in <span>esp-tts/esp_tts_chinese/esp_tts_voice_data_xiaole.dat</span> directory.
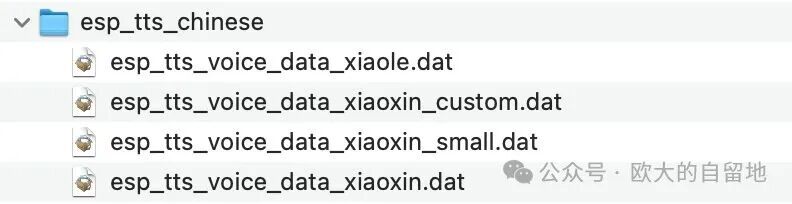
The differences in several voice tones can be found in the <span>samples</span> directory for a preview.
I used <span>xiaoxin_small</span> and used the following command to flash it into the ESP32’s Flash:
esptool.py --baud2000000 --before default_reset --after hard_reset write_flash 0xCF0000 ./data/esp_tts_voice_data_xiaoxin_small.datThen I tested it using the official example code.
Why Does the Voice Sound Wrong?
The hardware I used to set up the test environment was the MAX98357 I2S audio amplifier module. When initializing I2S and playing TTS audio according to the official example code, the sound was always monotone and incorrect. I adjusted the sample rate and bit width, but nothing worked. Eventually, I discovered that the ESP-TTS output data is mono, and changing the output mode from stereo to mono resolved the issue.

Here, I used the ESP_I2S library and changed the fourth parameter from <span>I2S_SLOT_MODE_STEREO</span> to <span>I2S_SLOT_MODE_MONO</span> during initialization, and it worked normally.
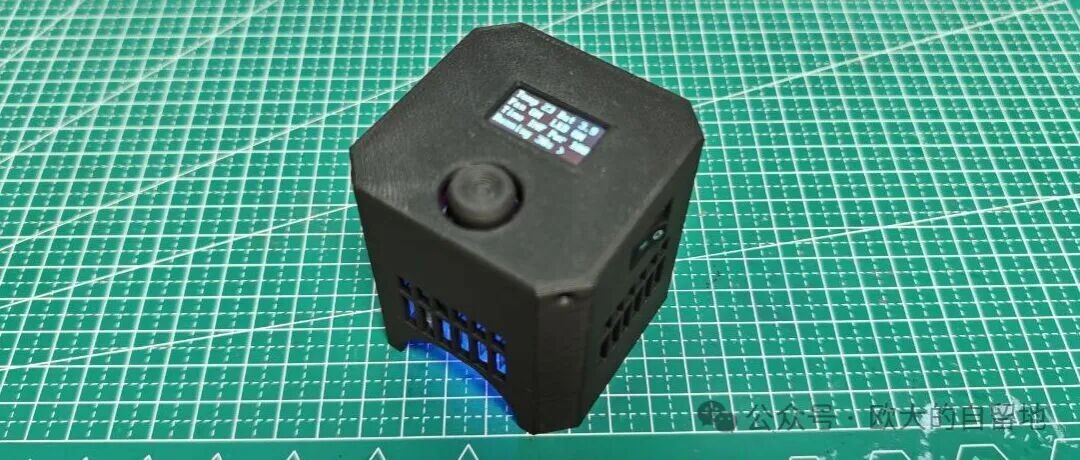
Finally, It Works!
After several weeks of intermittent work, I finally got the ESP32-S3 running ESP-SR voice recognition, voice commands, and text-to-speech functionalities under the Arduino development framework. With a bit more time, I can continue to tinker with the Cyber Dog and Xiao Zhi AI 😂.
I hope this article helps those who want to develop ESP-SR and ESP-TTS using the Arduino framework.
References
-
https://github.com/platformio/platform-espressif32
-
https://github.com/Jason2866/esp32-arduino-lib-builder/blob/v5.4_Arduino/tools/archive-build.sh
-
https://github.com/pioarduino/platform-espressif32
-
https://github.com/espressif/arduino-esp32/issues/11004
-
https://github.com/espressif/esp-idf/issues/15533
-
https://github.com/espressif/esp-sr
-
https://github.com/espressif/esp-skainet
-
https://github.com/espressif/esp-moonlight
-
https://docs.espressif.com/projects/esp-sr/zh_CN/latest/esp32/speech_synthesis/readme.html
-
https://docs.espressif.com/projects/espressif-esp-moonlight/zh-cn/latest/speech_recognition.html
Other DIY Projects
Open-sourced: Smart UV Glue UV Curing Lamp Reproduction Tutorial
How about a coin-sized game console? You can play Space Invaders and Pac-Man – fully open-source!

For just 60 yuan, make an open-source game console with ESP32-S3 that can play FC/NES, GameBoy, and comes with a custom colored PCB.
Don’t overlook idle fast chargers; DIY a USB-PD power deception device with a screen to display power.

Follow the public account for updates
If this article has helped you, please follow, like, share, or forward it. Thank you very much 😃.
Historical Articles
-
Automatic battery loading; this nickel-hydrogen battery charger is quite interesting
-
Electromagnet-driven 7-segment clock, a bit mechanical in flavor
-
Improving the split keyboard ErgoX a little bit~
-
Fidgeting small secondary screen, turning it into a small computer
-
How much does a 25 yuan price cost? Disassembling a 500-in-1 game console
-
Made a travel case for the Leifeng electric toothbrush; come try it if you have a 3D printer
-
A must-have for Arduino players, SimulIDE circuit simulator
-
Making a mechanical numeric keypad based on STM32+QMK with tea switches, encoders, and OLED screen~
-
An open-source pure PCB keyboard project, only the size of a credit card
-
Here it comes! Running a RISC-V emulator on the ESP32-S3 to boot Linux, this time it only takes 8 seconds
-
No-code DIY all-in-one air monitoring station AirCube, which can also connect to Home Assistant
-
How about a coin-sized game console? You can play Space Invaders and Pac-Man – fully open-source!
-
For just 60 yuan, make an open-source game console with ESP32-S3 that can play FC/NES, GameBoy, and comes with a custom colored PCB.
-
An open-source small steel mesh printing platform project experience
-
DIY a flexible filament ambient light for 30 yuan
-
Fully open-source! DIY USB ammeter tutorial using a microcontroller costing 0.7 yuan, diving into hardware design, firmware development, and appearance modeling