‖ System Learning
Life is like a marathon; sometimes you need to pause and take a break to go further.
| Recently, there have been many industrial control PLC projects, so the upcoming content will mostly focus on industrial control PLC topics. All programming knowledge is provided by project team member “Tang Lu Lu” and organized and explained by Xiao Yu. Please feel free to point out any shortcomings. |
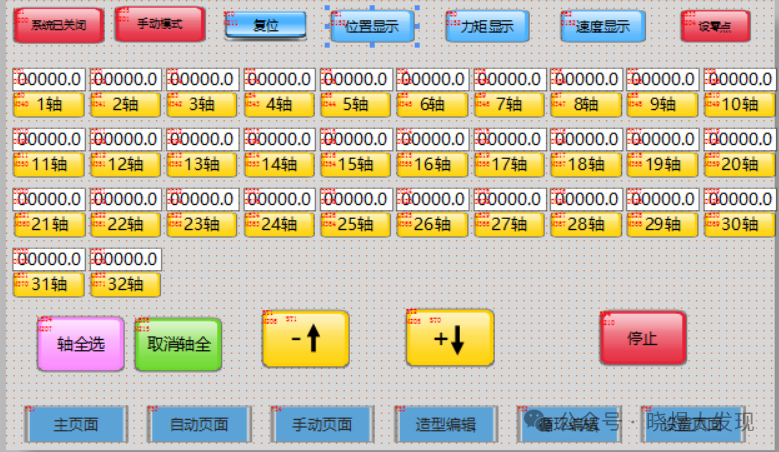
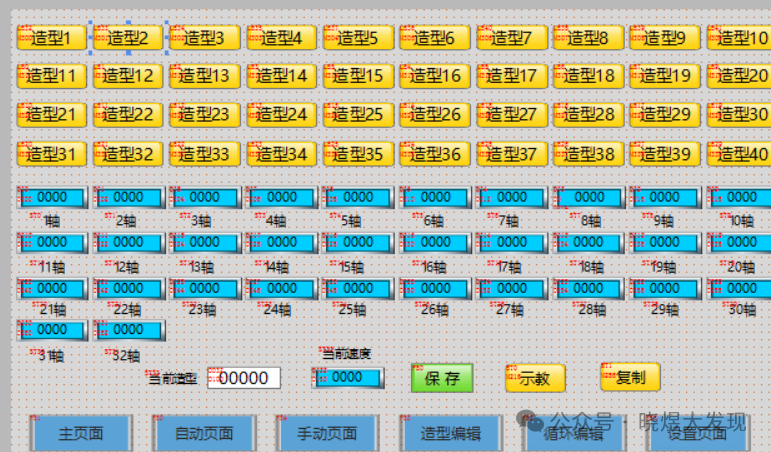
First, let’s look at the effect.
About Axis Control
For axis control, I still used FB blocks to write this program, but I drove it using C language.About Xinjie PLC version: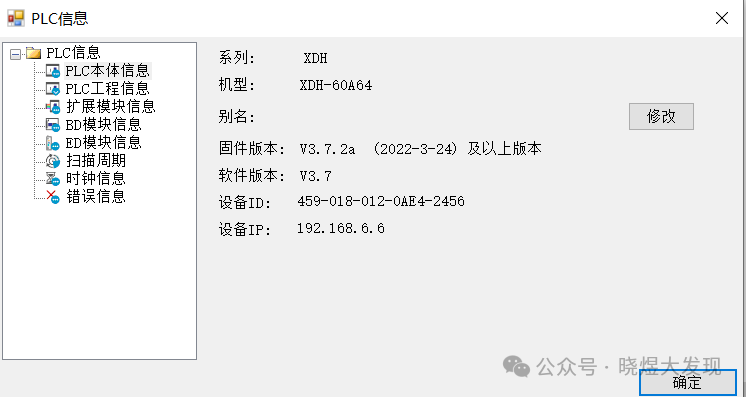
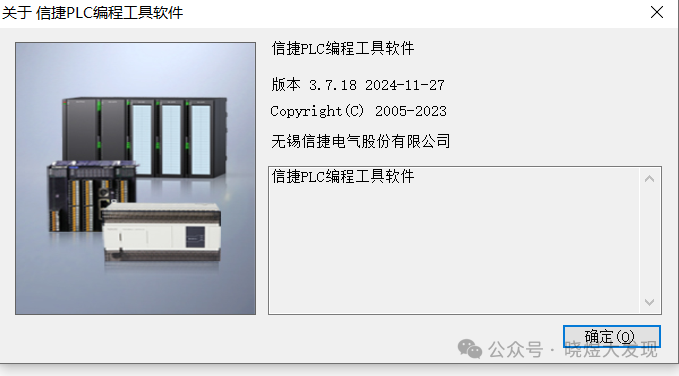
About the Software
Program Section
For the program section, you can refer to this article on how to write FB. The download link is in the article.Writing the 32-axis program for Xinjie PLC-EtherCAT communication
Click to jump to it.
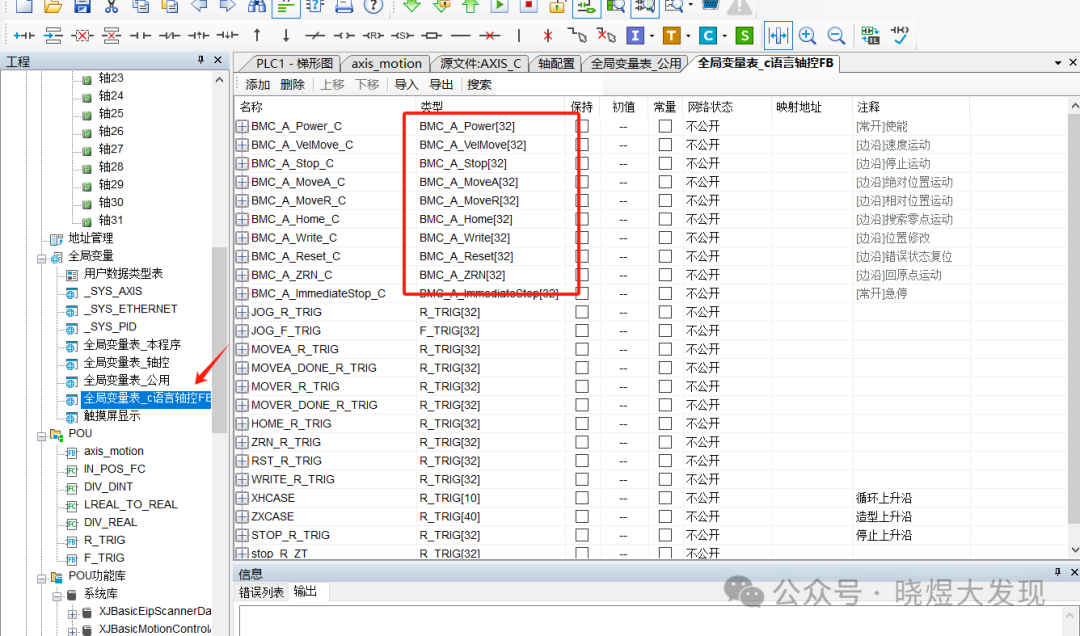
When driving with C language, we need to instantiate the FB.
A global variable table can be established.
Program Introduction
The programs needed first includeFB function blocks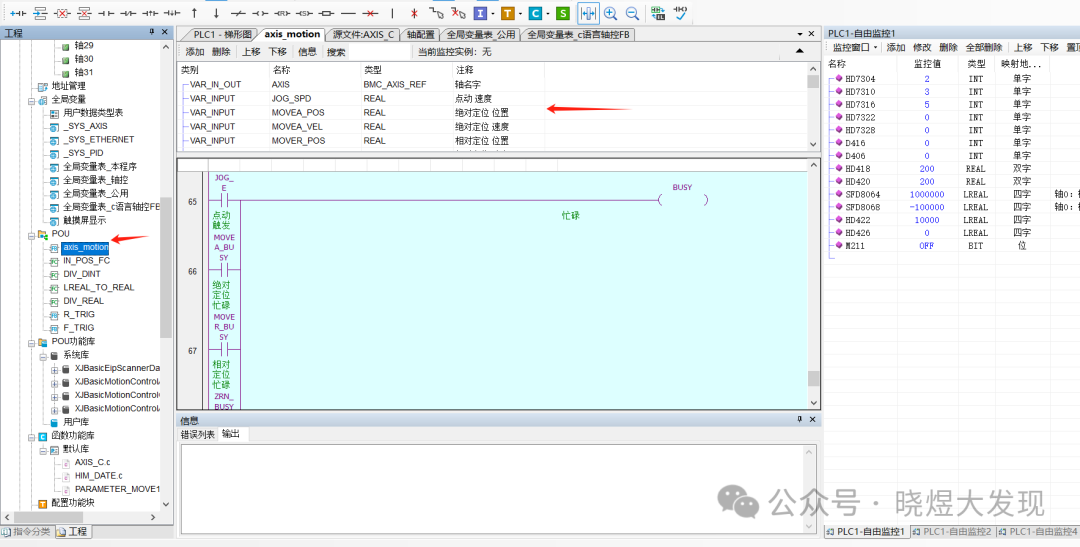 Position judgment FC for the axis
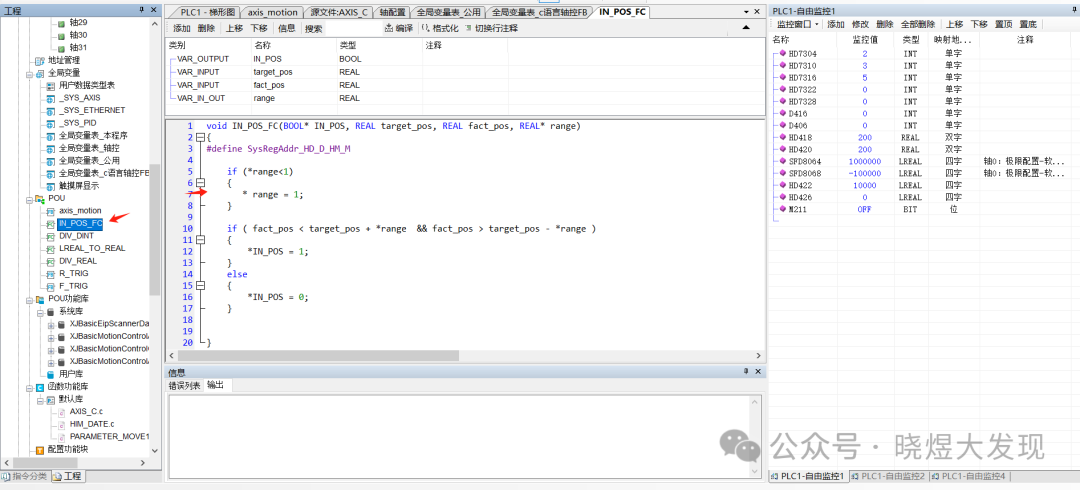 Simple version division operation (not used here) FC
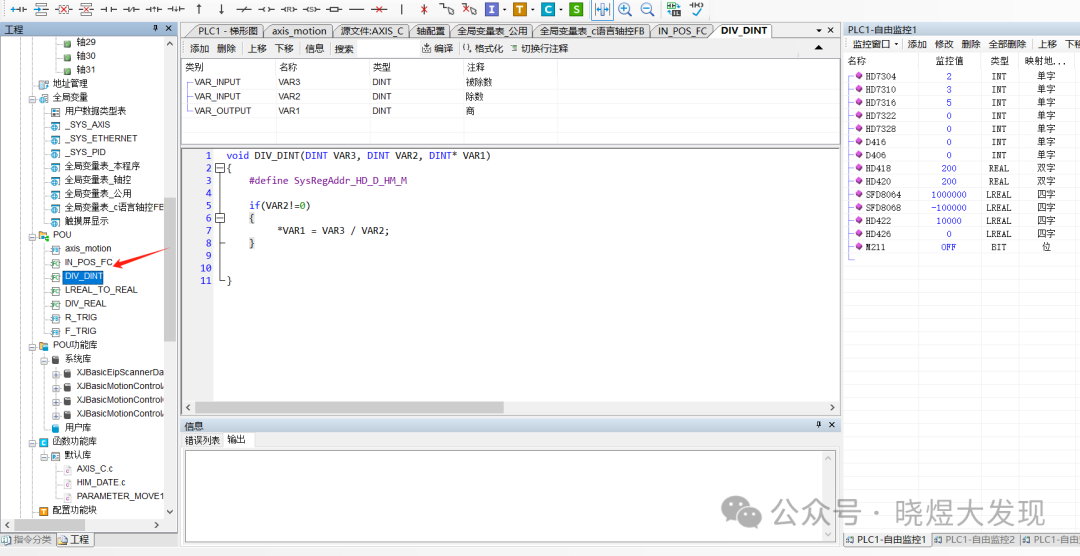 64-bit to 32-bit data type FC
 Multi-bit operation FC
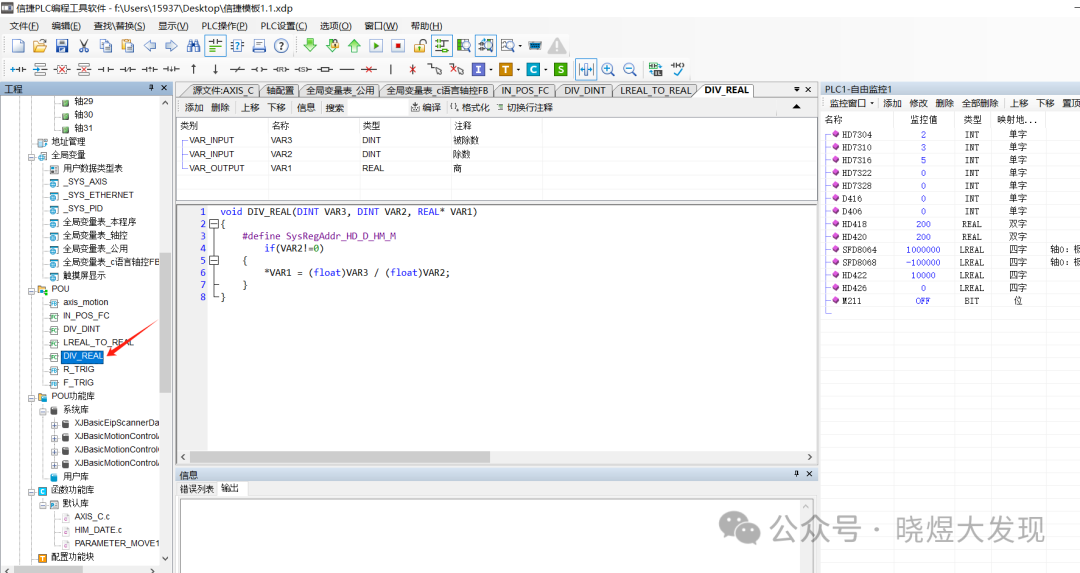 Rising edge FB block
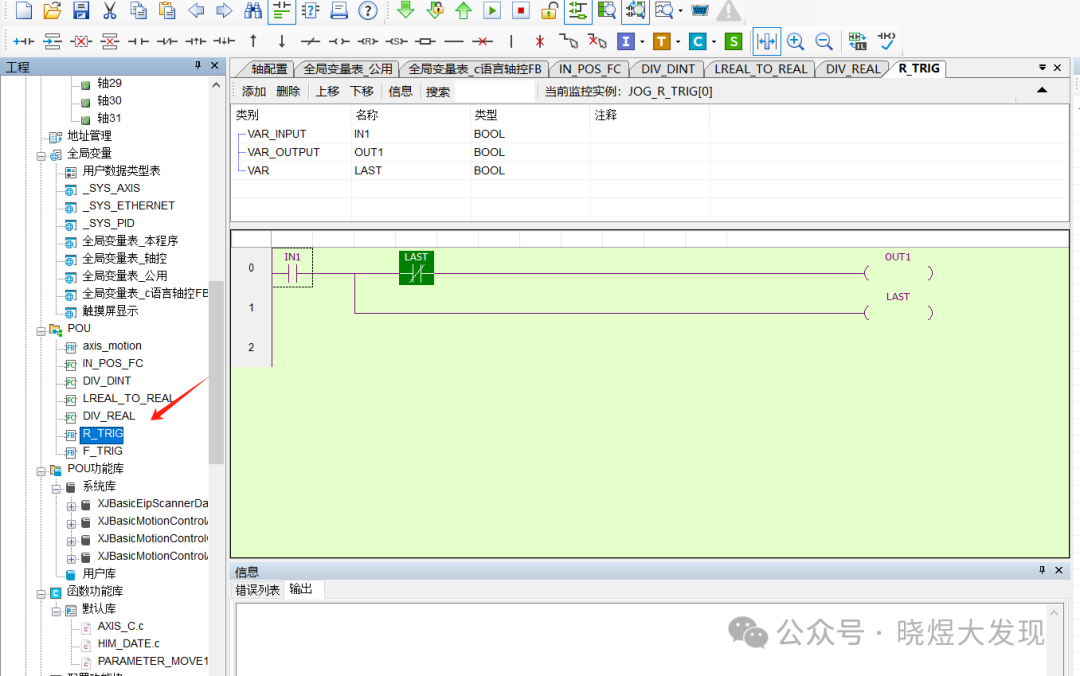 Falling edge FB block
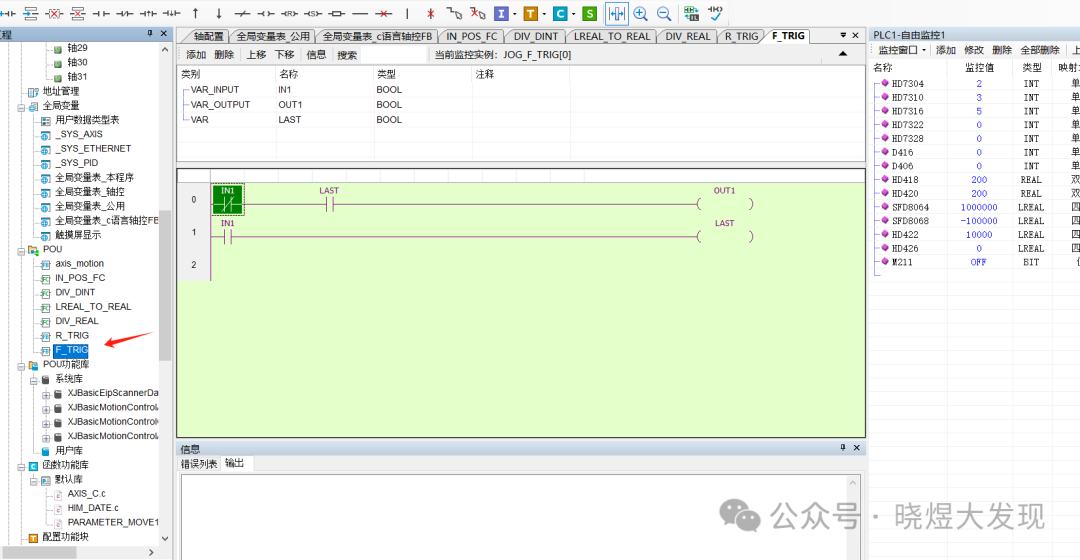
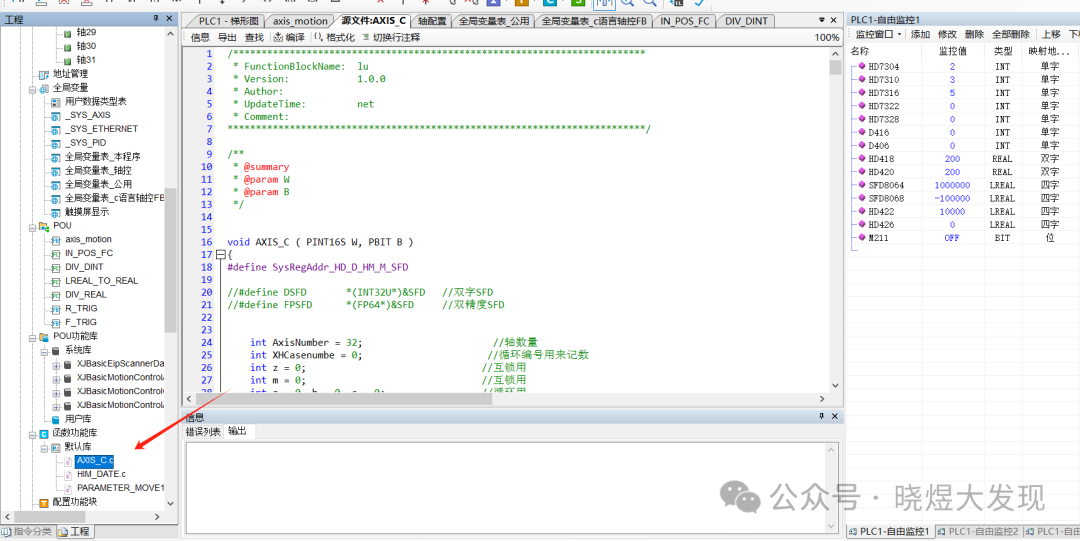
Axis control C language section
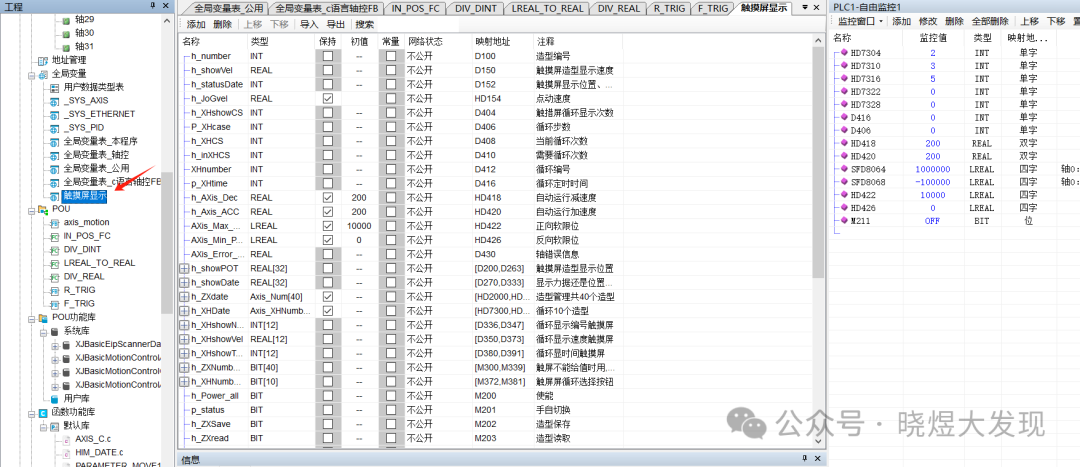
Various variable tables
C Language Program Introduction
Define pointers for 32 axes as a prerequisite; this step is to determine which axis I need to drive.When I input AXIS[0], I am driving axis 0 output. And so on.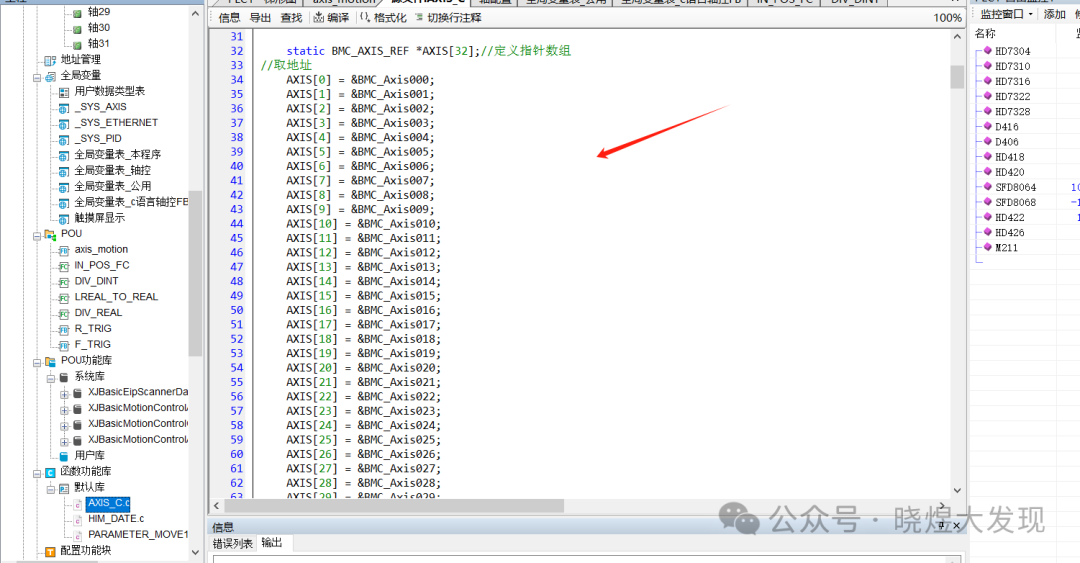
Enable Section
Here, I unified the enable conditions for all axes to the M200 register as a master switch.
The parameter BMC_A_Power_BODY indicates that I instantiated the enable FB block.
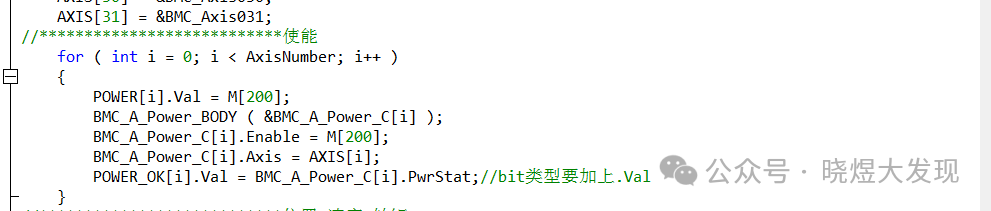
Specific parameters can be viewed here.

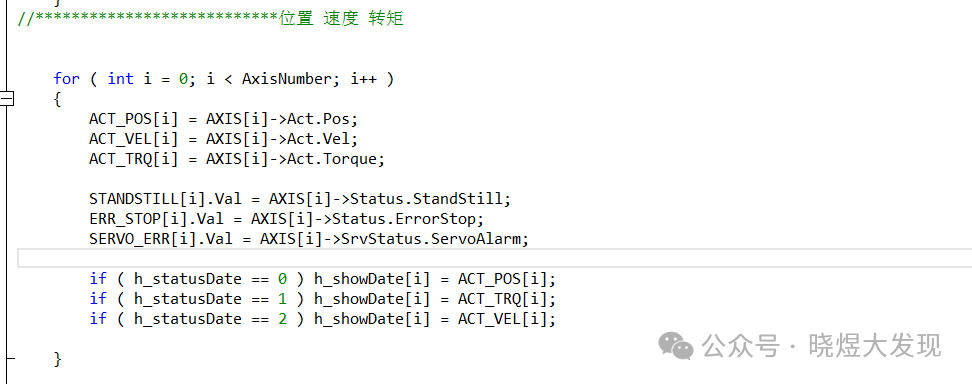
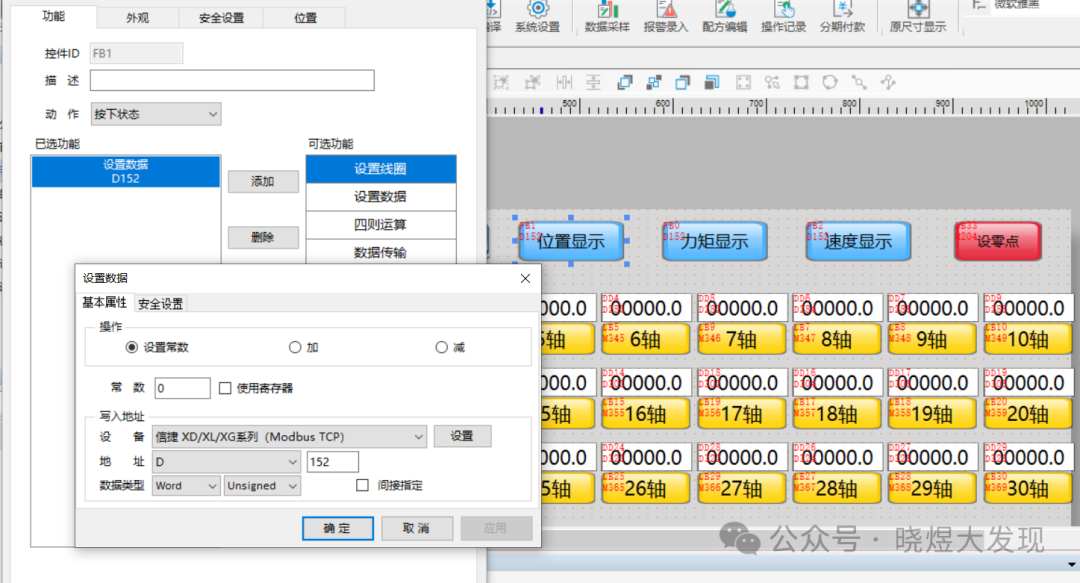
Display Position Speed Torque
I designed the touch screen to give the variable h_statusDat a value of 0, 1, 2 to display the data on the touch screen.
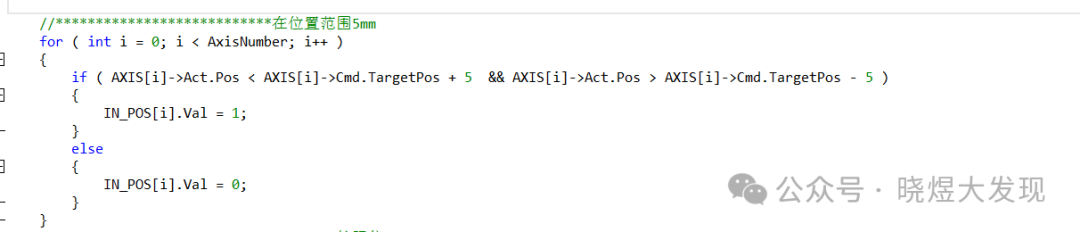
Position range judgment of 5mm
This directly adjusts the position judgment FC block and gives the corresponding axis output.
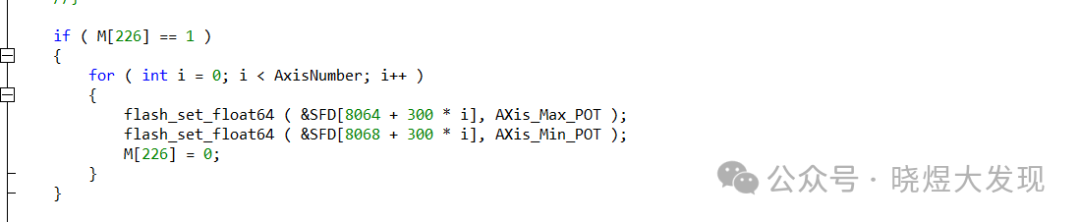
Soft Limit
The soft limit here directly uses Xinjie’s registers starting from SFD8084 and SFD8068, with each axis increasing by 300 addresses corresponding to the soft limit of that axis.
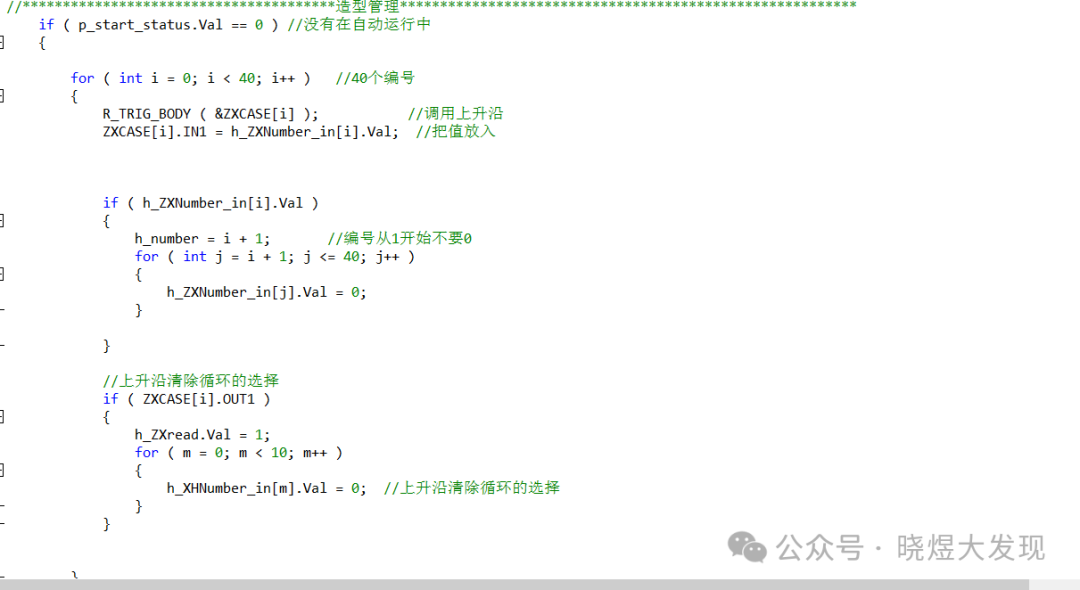
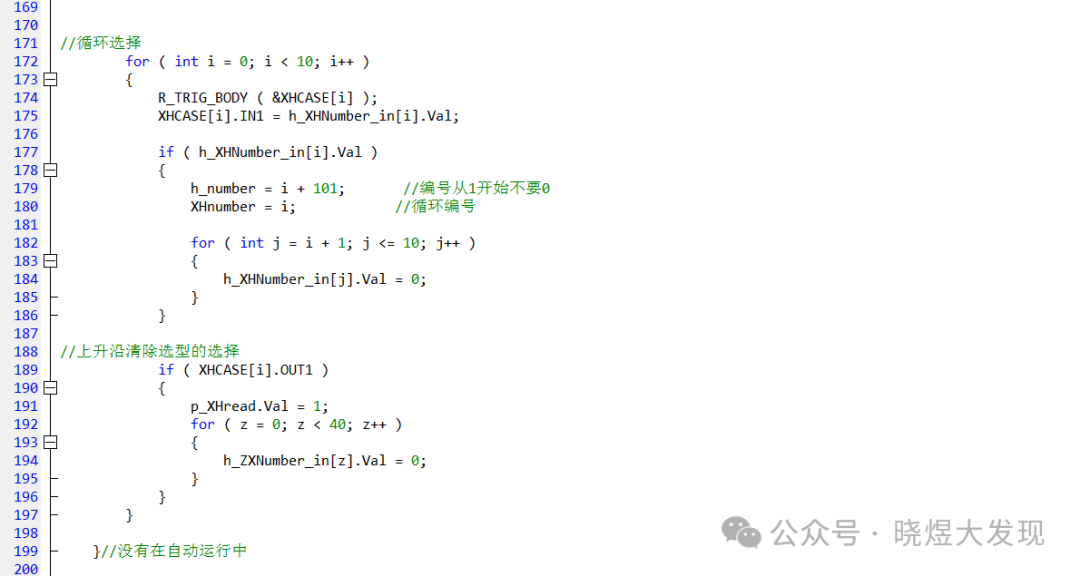
Model Number Management
I used h_number as the display number, with 1~40 for single model output and 101~110 for loop mode.
To avoid affecting the settings, I used a rising edge to clear the corresponding number during switching.
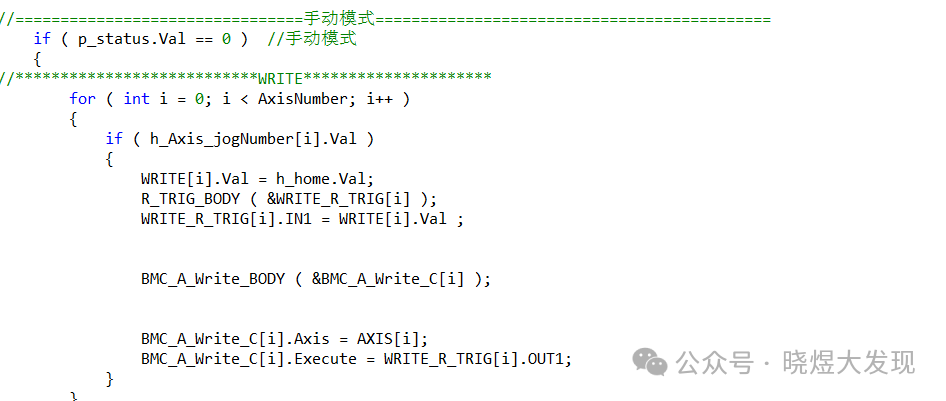
Manual Mode
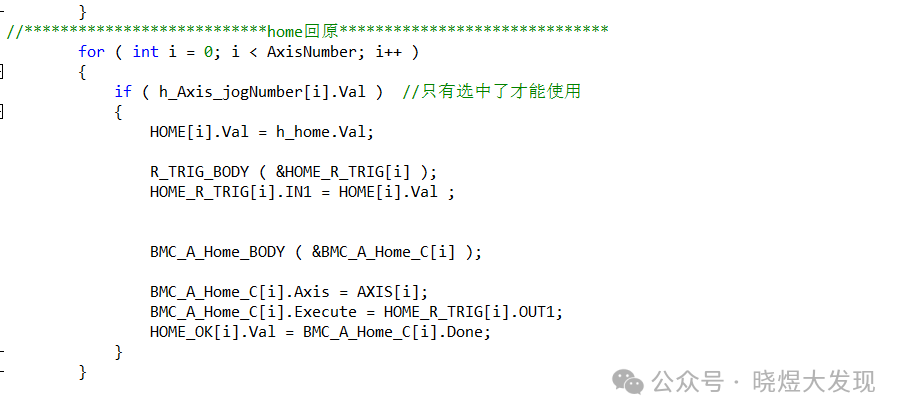
The manual mode can only perform jog control and model writing. Set the origin.
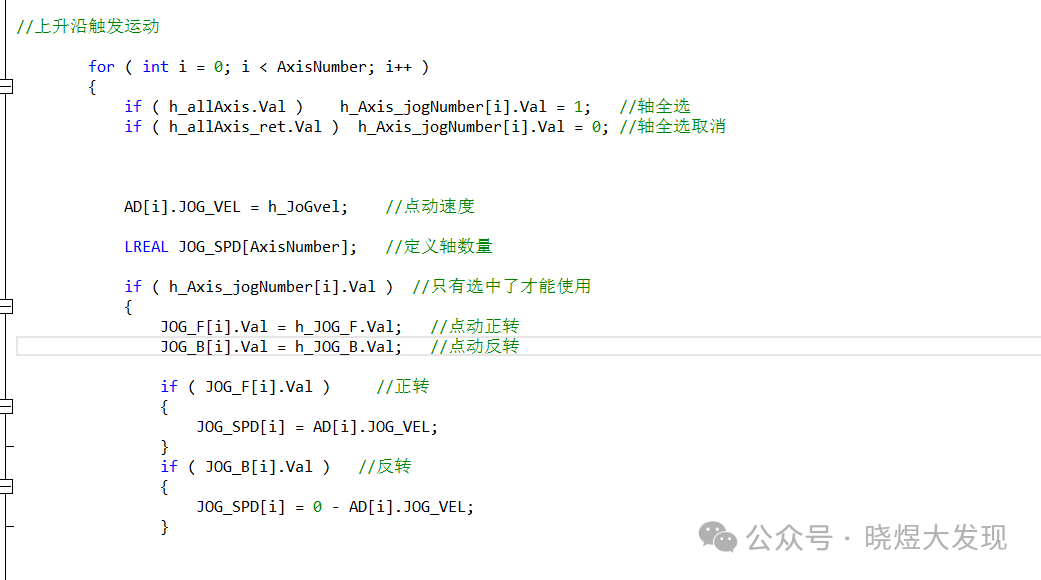
Jogging
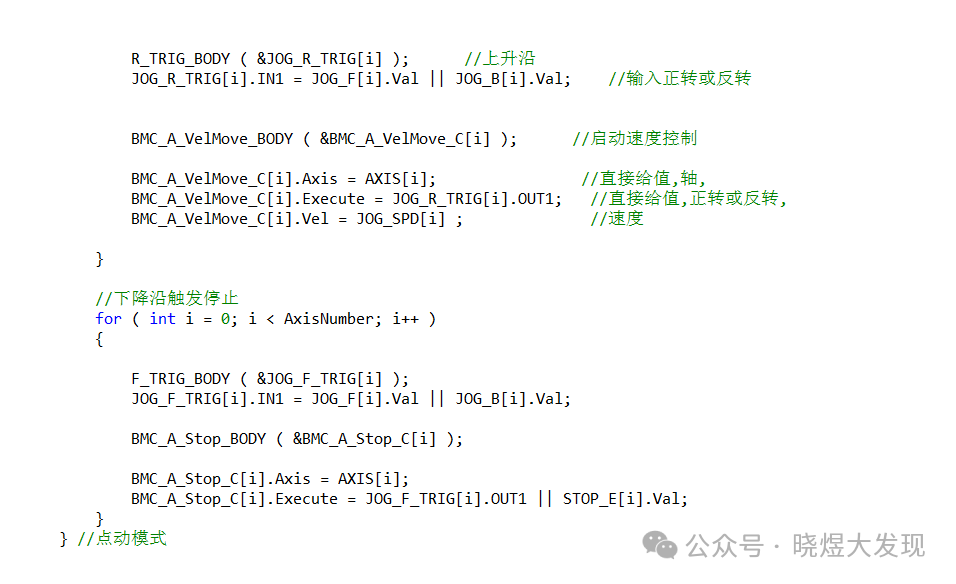
For jogging, I used a variable h_Axis_jogNumber, which can only be activated by the selected axis on the touch screen. Rising edge starts, falling edge stops, and both rising and falling edges are given to JOG_R_TRIG, and then output.
JOG_R_TRIG[i].IN1 = JOG_F[i].Val || JOG_B[i].Val; // Input for forward or reverse rotation
Stopping is simply done using the stop FB block.
Model Saving
For model saving, I used a structure for data storage,h_number is the selected number, and the data from the touch screen is cyclically saved to the PLC.
Here,h_showPOT[i] is the 32 data displayed on the touch screen, and clicking saveh_ZXSave.Val saves the data into the structure I set up.
Model Reading
It is the rising edge I just mentioned in the number setting, which generates a rising edge signal when switching numbers, and then reads the new data.

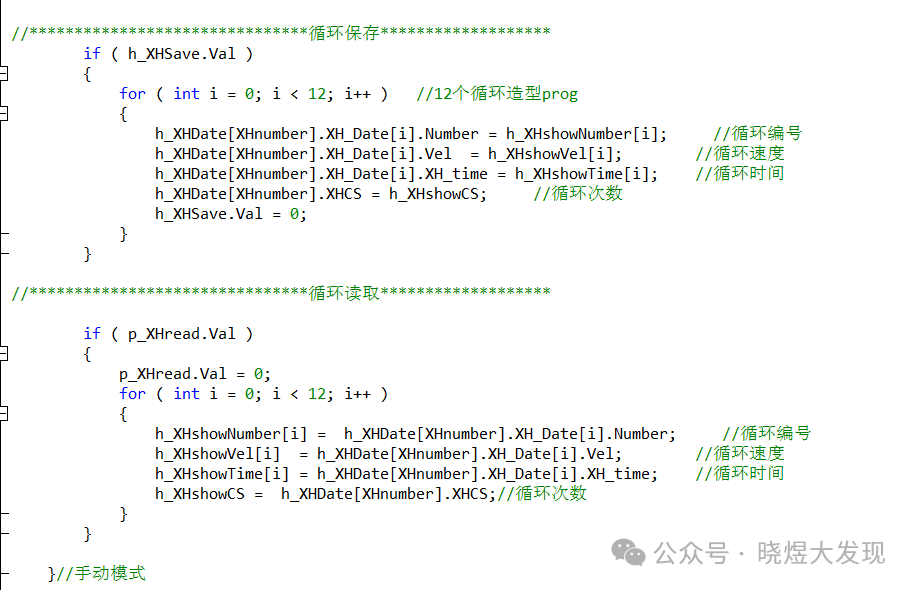
Loop Saving
Loop saving is similar to number saving, just that the structure has more data.
However, I only have 12 loops for 12 cycles.
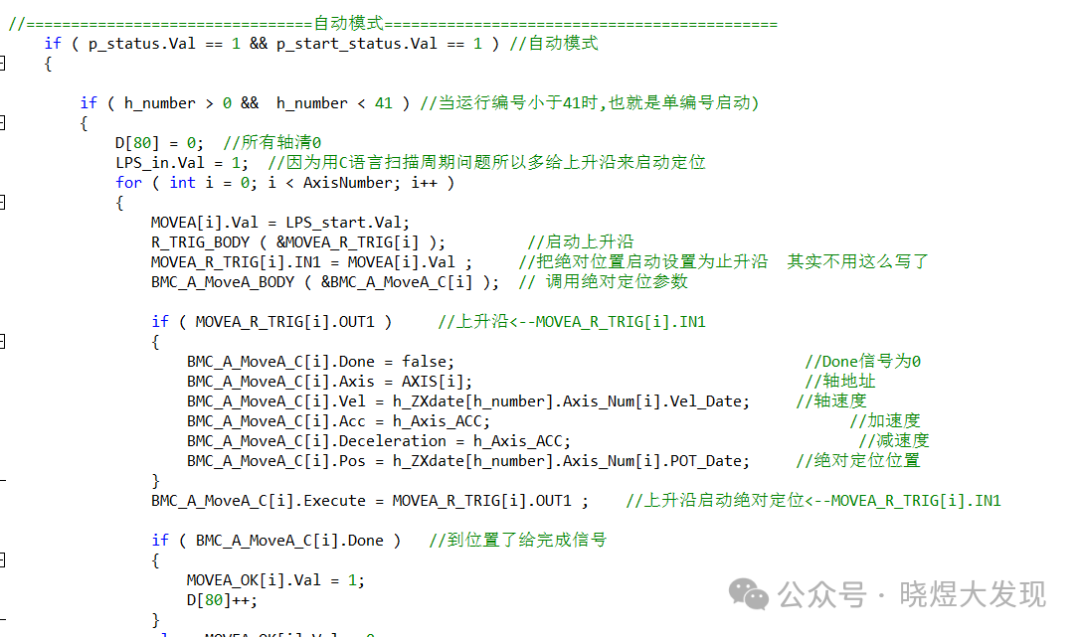
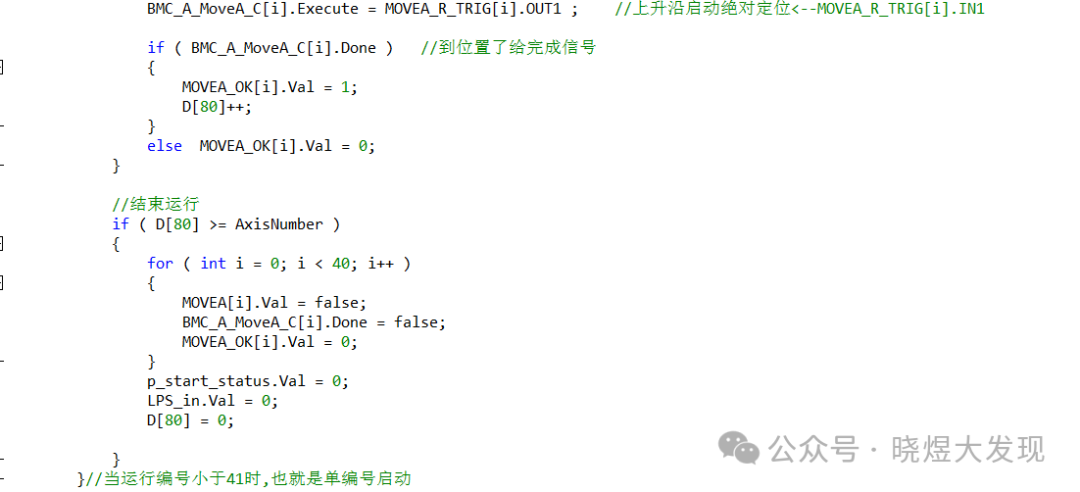
Automatic Running Mode
The automatic running mode is divided into two types: one is when I select the number from 1 to 41 for single number startup, and the other is when the number is from 101 to 110 for loop mode.
The program has annotations, so I won’t elaborate further.
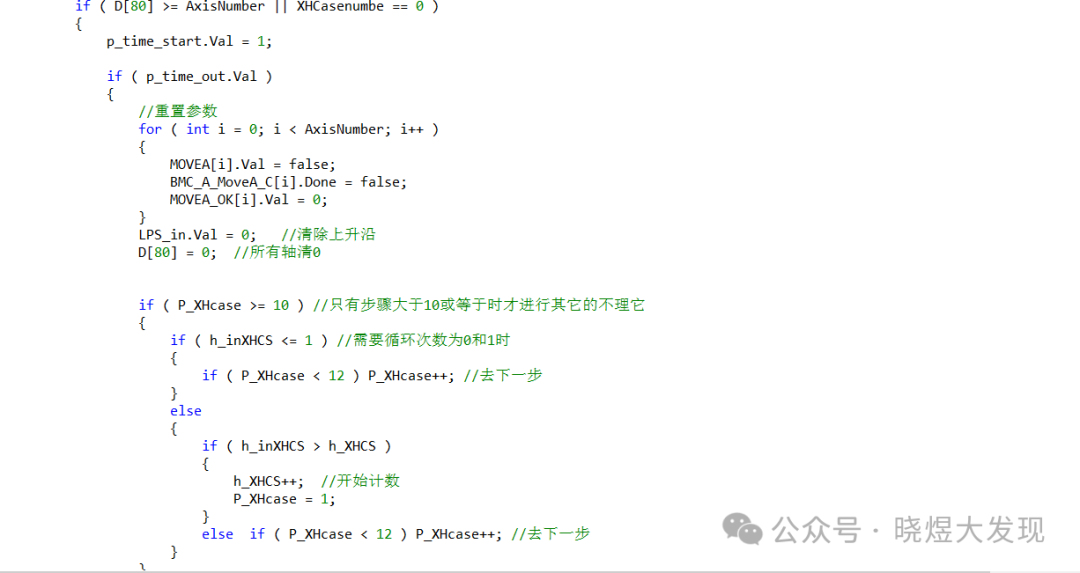
Loop Mode
Here, I used a while loop to read the required models sequentially. The loop number is saved directly as the single number startup number. Finally, I added a break in the while loop to ensure it only enters once.
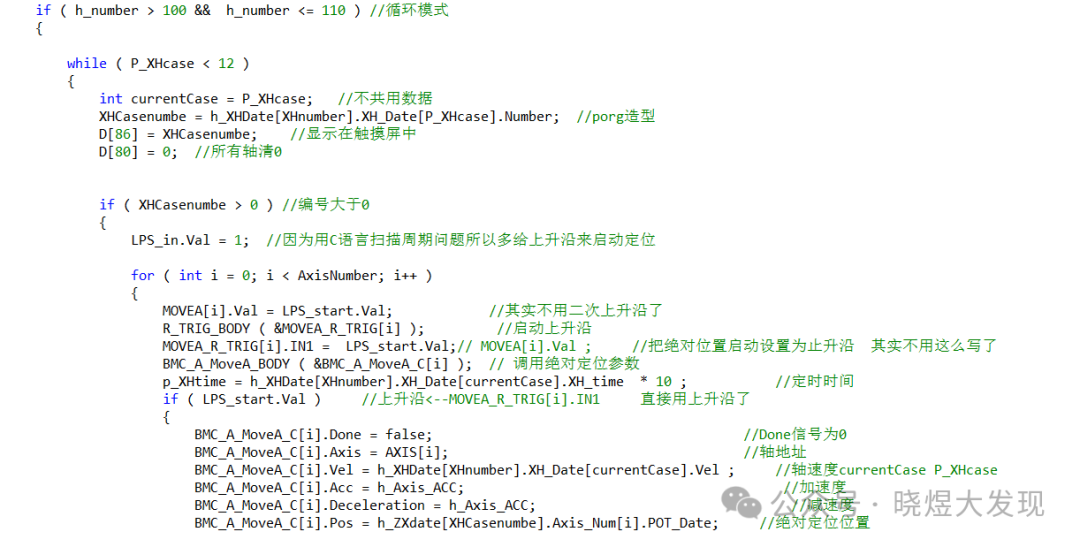
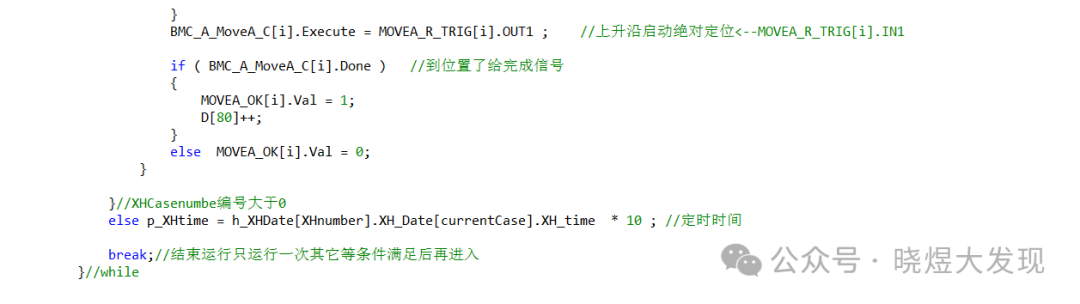
Then, I check whether the conditions are met; if they are, I enter the while loop again.
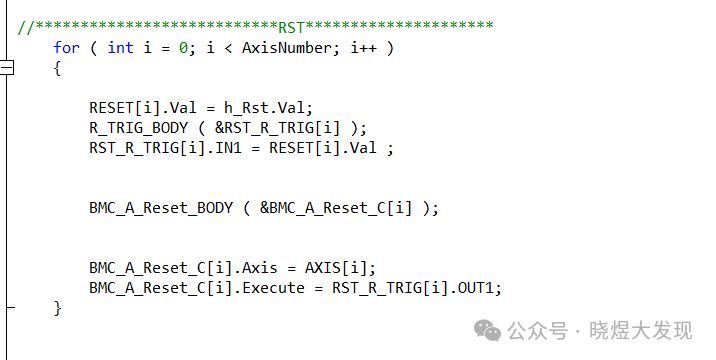
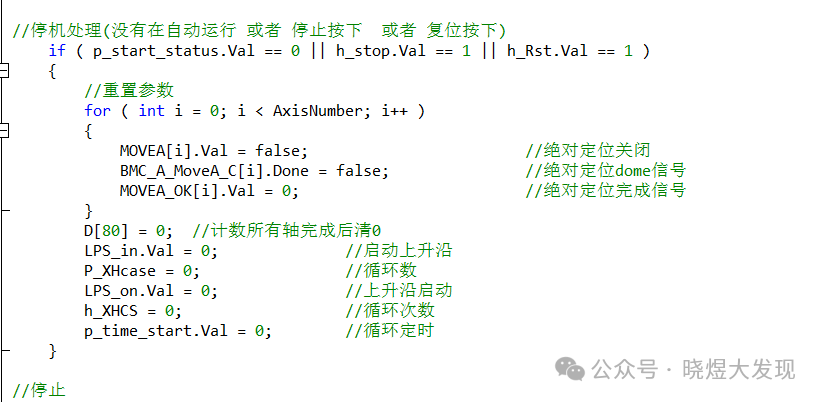
Reset and Stop
One is to clear various conditions in the program, and the other is to clear the servo alarms.
That’s all for this issue; I hope it helps you.
If you like it, please give a thumbs up and share to support more valuable content.
Teaching a man to fish is better than giving him a fish.
