🔥 Mitsubishi PLC Programming Tool GX Works2: A Step-by-Step Installation Guide for Industrial Automation 🔥

💡 Let’s Get to Know This “Industrial Brain”
GX Works2 is not just ordinary software; it is the programming hub for Mitsubishi PLCs! 🎯 It can precisely control various mechanical devices through logical operations, sequential control, and timing instructions. Even more impressive:
- Supports three major programming languages: Ladder Diagram, Structured Text, and Sequential Function Chart
- Exclusively compatible with Q series PLCs (⚠️ Note: Use GX Works3 for R series)
- This is not a version upgrade issue, but rather selecting the right software based on PLC model!
✨ For example: Just like different phones use different data cables, choosing the right software is essential to activate the PLC’s “superpowers”!
📦 Installation Prerequisites
To do a good job, one must first sharpen their tools! Please check this three-dimensional attribute card before installation:
| 🔑 Key Attributes | 💻 Configuration Requirements | ⬇️ Acquisition Method |
|---|---|---|
| Name | GX Works2 | Official Version |
| Language | Simplified Chinese | No localization needed |
| Size | 496.2M | About the size of a movie |
| System | Win7+64-bit | No 32-bit systems |
| Channel | GXWorks2 | Reply GXWorks2 on the official account |
💡 Friendly Reminder: Just like a car needs quality gasoline, a 64-bit system is a hard requirement for smooth operation!
🚀 15 Steps to Rapid Installation with Full Illustrations
(Strictly follow the official process; beginners can directly copy this)
1️⃣ ️ Extract the Startup Package Right-click on the 【GX Works2(64bit)】 compressed package → Select extraction software → Click 【Extract to GX Works2(64bit)】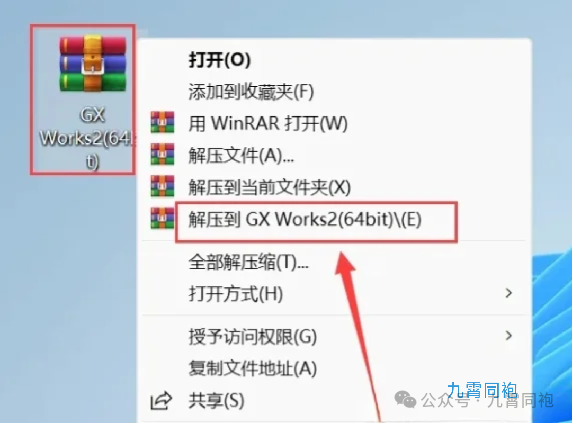 2️⃣ 📂 Enter the Core Area Open the extracted folder → Double-click the 【Setup】 folder
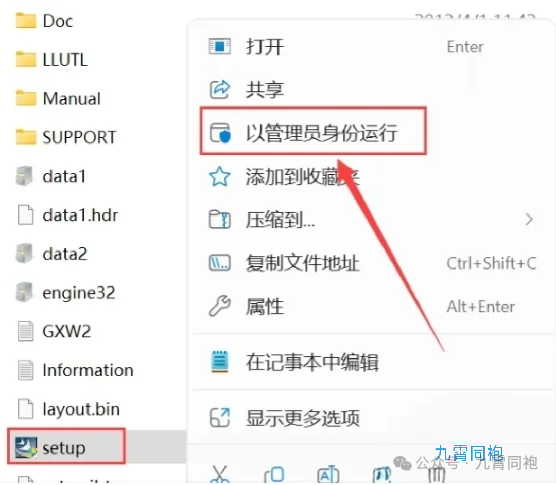
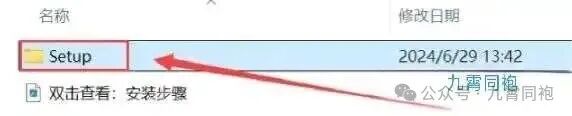 3️⃣ ⚡ Obtain Administrator Privileges Right-click on 【Setup】→ Select 【Run as Administrator】
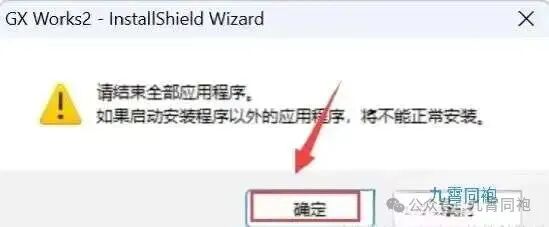
 4️⃣ ✅ Confirm the Popup Click 【OK】 (the system may ask for permission, grant it!)
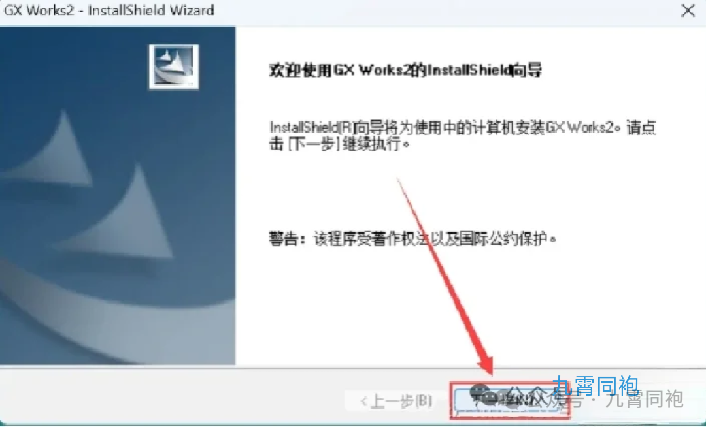
 5️⃣ ➡️ Start the Journey Click 【Next】 to begin
 6️⃣ Identity Verification Fill in your name/company name → Mysterious ID Enter 【570 986818410】→ Click 【Next】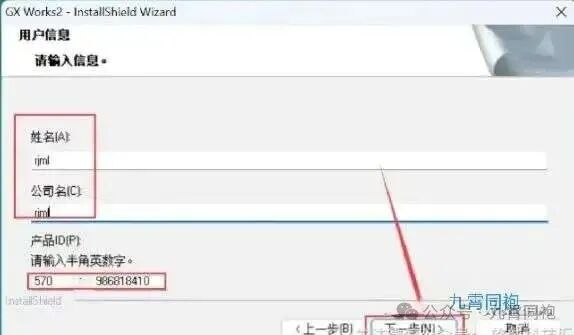
7️⃣ 🌍 Space Migration Technique (Key Point!)① Click 【Change】→ ② Modify the first letter of the path (e.g., change C to D)→ ③ Click 【OK】
💥 Pitfall Reminder: Don’t force it into the C drive if it’s full! Change to D/E drive to keep your computer running smoothly
8️⃣ 🔄 Second Confirmation Click 【Next】 (check if the path turns blue)
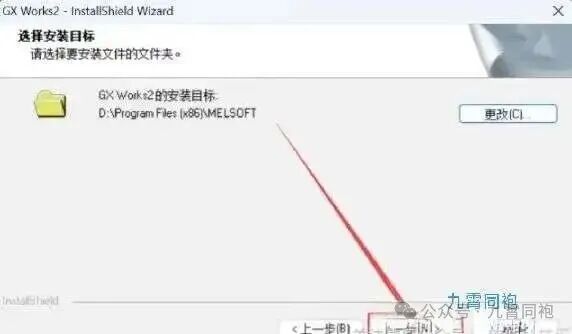
9️⃣ ▶️ Ultimate Confirmation Click 【Next】 (last chance to reconsider)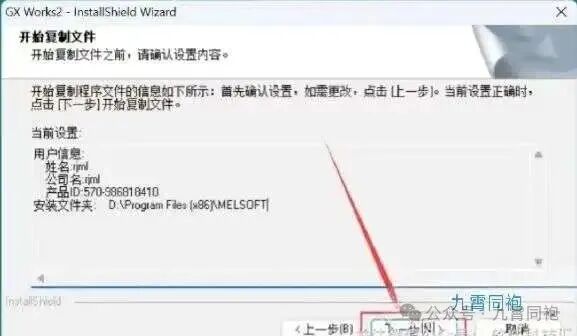 🔟 ☕ Break Time Installation in progress…(go grab a coffee ≈ 3 minutes)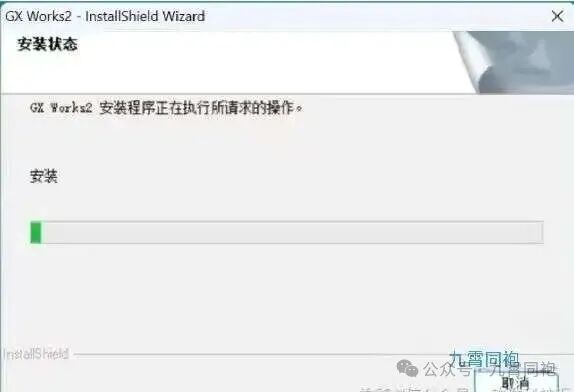
1️⃣1️⃣ ️ Final Push Click 【Install】 (progress bar appears)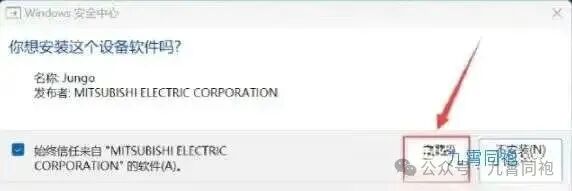 1️⃣2️⃣ ❌ Reject Temptation Click 【No】 (additional components? No way!)
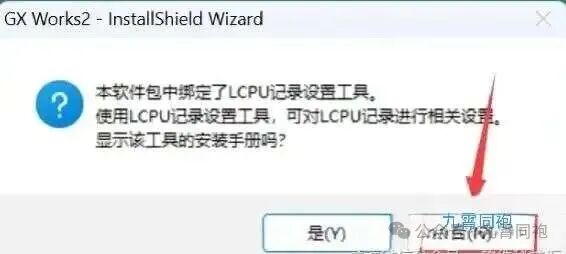 1️⃣3️⃣ Final Sprint Click 【Finish】 (victory is in sight!)
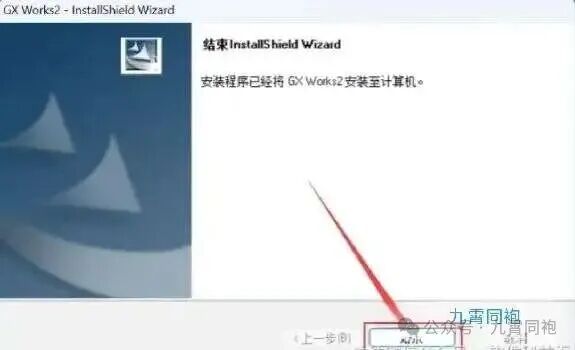 1️⃣4️⃣ ️ Invoke the Tool Double-click the blue 【GX Works2】 icon on the desktop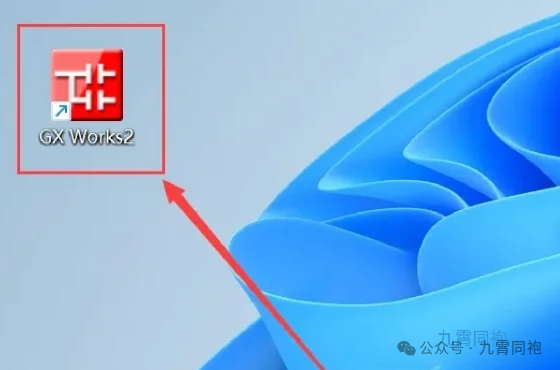
1️⃣5️⃣ 🎉 Mission Accomplished The startup interface flashes → Industrial Brain Activated!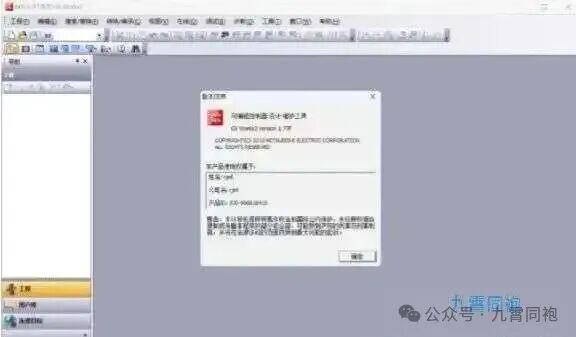
🌟 Mid-Installation Reminder
For those who have reached step 7! 💡 Changing the installation path is like giving the software a “home”; choosing a spacious disk partition will make it run more smoothly!✨ Tip: D drive > E drive > C drive, leave the system drive for Windows to play around!
🌟 End of Article Surprise
Those who have read this far are tech enthusiasts! 💖 If this tutorial saved you 3 hours of exploration:
- ✅ Feel free to give a thumbs up 👍 so more peers can see it
- 💬 Share your installation stories in the comments ✍️
- 🔍 By the way: The homepage has a PLC troubleshooting kit~🔗 Next update preview: “Top 10 Operation Tips for GX Works2” awaits your unlocking!
⚠️ ️ Disclaimer: This tutorial is for learning and communication purposes only; the software copyright belongs to Mitsubishi Electric.
Encountering issues during installation? ⬇️ The comment section is waiting for you to join the battle! 😉
💌 Every interaction from you is our motivation to write late into the night ⛽️