1. Introduction
Previously, we completed the design and source code implementation of the storage layout and loader. Now we will practice and test loading the image from SPIFLASH into SDRAM for execution. Of course, during debugging, we can also directly transfer the image to SDRAM using xmodem for direct execution.
See the code at:https://github.com/qinyunti/stm32f429-boot.git
Please open in the WeChat client
2. Block Diagram and Image Preparation
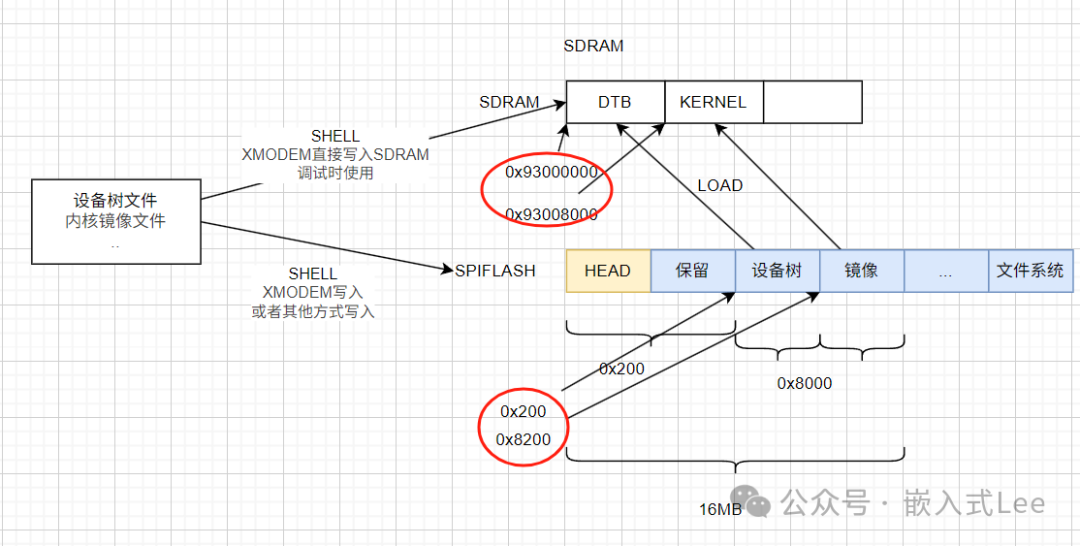
The entire process is illustrated as follows
During debugging, we can directly transfer the device tree and kernel image to SDRAM using SHELL with XMODEM, and then use the SHELL BOOT command to jump directly to the kernel for execution, which is suitable for debugging. This method manually loads to SDRAM for execution, and does not retain data upon power loss.
After release, we can transfer the SHELL HEAD information, device tree, and kernel image to SPIFLASH, and then during startup, the LOAD program loads the content from SPIFLASH into SDRAM for execution.

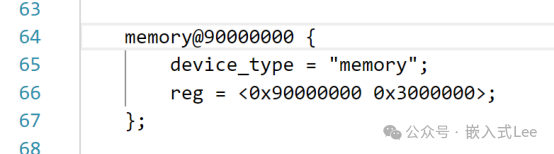
Since loading the DTB and KERNEL into SDRAM requires some space, the actual usable RAM is less than 64MB. The usable SDRAM starts from 0x90000000, but only 48MB is allocated. Here, we allocate the last 16MB for the DTB and kernel, with the DTB starting from 0x93000000 occupying 32KB, i.e., 0x8000, and the kernel image starting from 0x93008000 occupying 16MB-32KB.
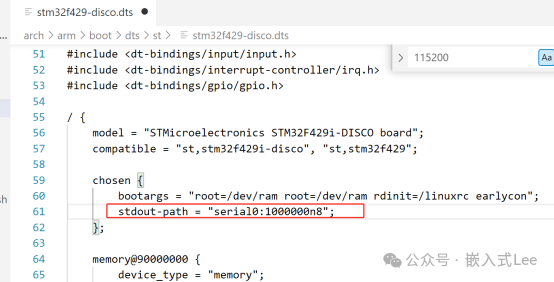
Therefore, we need to modify the device tree’s memory starting from 0x90000000 with a size of 0x3000000.
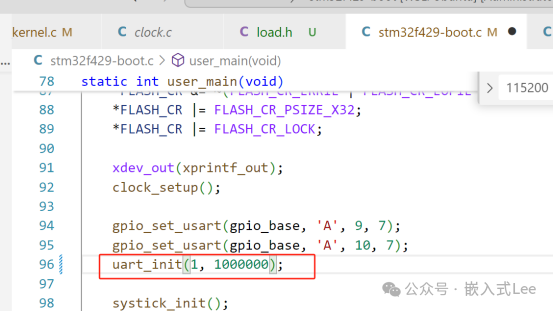
To speed up xmodem, the serial port baud rate is also modified to 1000000. The device tree is modified as follows
Modify the Boot code as follows
The previous kernel image ran atin address 0x0800C000, now changed to 0x93008000
Boot options —>
(0x93008000) XIP Kernel Physical Location

Rebuild
make ARCH=arm CROSS_COMPILE=arm-none-eabi-
Export to windows
cp arch/arm/boot/dts/st/stm32f429-disco.dtb /mnt/d/stm32f429-disco-sdram.dtb
cp arch/arm/boot/xipImage /mnt/d/xipImage-sdram.bin
Add the boot command in the Boot shell for direct manual jump to the specified location for execution.
Declare in shell_func.c as follows
static void bootfunc(uint8_t* param);Add in g_shell_cmd_list_ast
{ (uint8_t*)"boot", bootfunc, (uint8_t*)"boot dtbaddr[hex] kernel[hex]"}, Implement as follows
static void bootfunc(uint8_t* param){ uint32_t dtbaddr; uint32_t kerneladdr; #if 0 if(2 == sscanf((const char*)param, "%*s %lx %lx", &dtbaddr, &kerneladdr)) #else char* p =(char*)param; while(1){ /* Skip %*s part */ if((*p > 'z') || (*p < 'a')){ break; }else{ p++; } } long tmp; xatoi(&p, &tmp); dtbaddr = tmp; xatoi(&p, &tmp); kerneladdr = tmp; #endif { start_kernel(dtbaddr, kerneladdr); }}3. Manually Load to SDRAM During Debugging
First import stm32f429-disco-sdram.dtb to 0x93000000
rxmem 0x93000000 19604
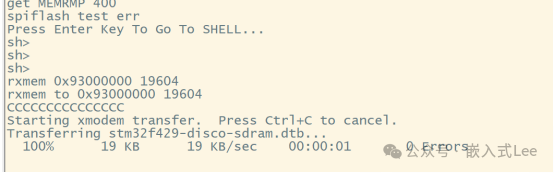
Then import xipImage-sdram.bin to 0x93008000
rxmem 0x93008000 1935164

Then enter
boot 0x93000000 0x93008000
Run
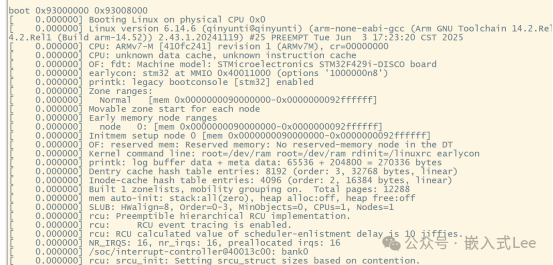
4. Burn to SPIFLASH for Execution
First manually prepare the HEAD file content as follows
The device tree is loaded from SPIFLASH at 0x200 to SDRAM at 0x93000000
The kernel is loaded from SPIFLASH at 0x8200 to SDRAM at 0x93008000
Import the HEAD
rxspiflash 0 54

Then import the dtb
First rxmem to sdram and then restore to write to spiflash
rxmem 0x90000000 19604
restorespiflash 0x90000000 0x200 19604
Alternatively, you can directly
rxspiflash 0x200 19604
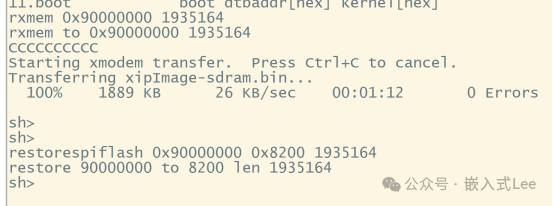
Then import the kernel image
First rxmem to sdram and then restore to write to spiflash
rxmem 0x90000000 1935164
restorespiflash 0x90000000 0x8200 1935164
Alternatively, you can directly
rxspiflash 0x8200 1935164
Then restart to run
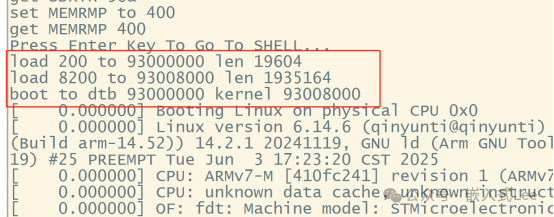
5. Conclusion
The above has improved the functionality of BOOT, achieving LOAD. You can download the image to SPIFLASH through the boot shell, and then load and start from SPIFLASH, thus the image is no longer limited to the internal 2MB FLASH space, allowing for a larger kernel and more drivers to be added.
At the same time, the BOOT shell has also added more practical commands, such as import/export of mem, import/export of spi flash, and manually transferring images to SDRAM for booting, covering basic common needs, and more can be added for debugging and maintenance.