@
-
Configuring QT5 in Microchip Buildroot -
Select Graphic Configuration File -
Add QT5 Configuration -
Modify Root Filesystem to Support QT5 -
Modify output/target/etc/profile Configuration File -
Add output/target/usr/share/X11 Configuration File -
Flash the Generated Linux Image -
Download Etcher Tool -
Generate Final Flashing Image -
Use Etcher Tool to Flash SD Card -
Introduction to the Partition of the Flashed SD Card -
Next Episode Preview
This series will create my first runnable embedded Linux system based on the Buildroot repository provided by Microchip.
Configuring QT5 in Microchip Buildroot
Select Graphic Configuration File
<span>We now need to configure the Graphic system for embedded Linux by selecting the sama5d2_xplained_graphics_defconfig configuration file:</span>
Since we need to use the Graphic system in this configuration, use the following configuration command:
cd buildroot-mchp-linux4microchip-2024.10/
BR2_EXTERNAL=../buildroot-external-microchip-linux4microchip-2024.10/ make sama5d2_xplained_graphics_defconfig
<span>It is important to note that in the Microchip Buildroot configuration file, the graphic configuration we selected enables the Cairo-based graphic development kit EGT provided by Microchip. If QT5 is needed, further manual configuration is required as per this tutorial:</span>
Introduction to Microchip Graphic Development Kit EGT
Add QT5 Configuration
Modification of Toolchain
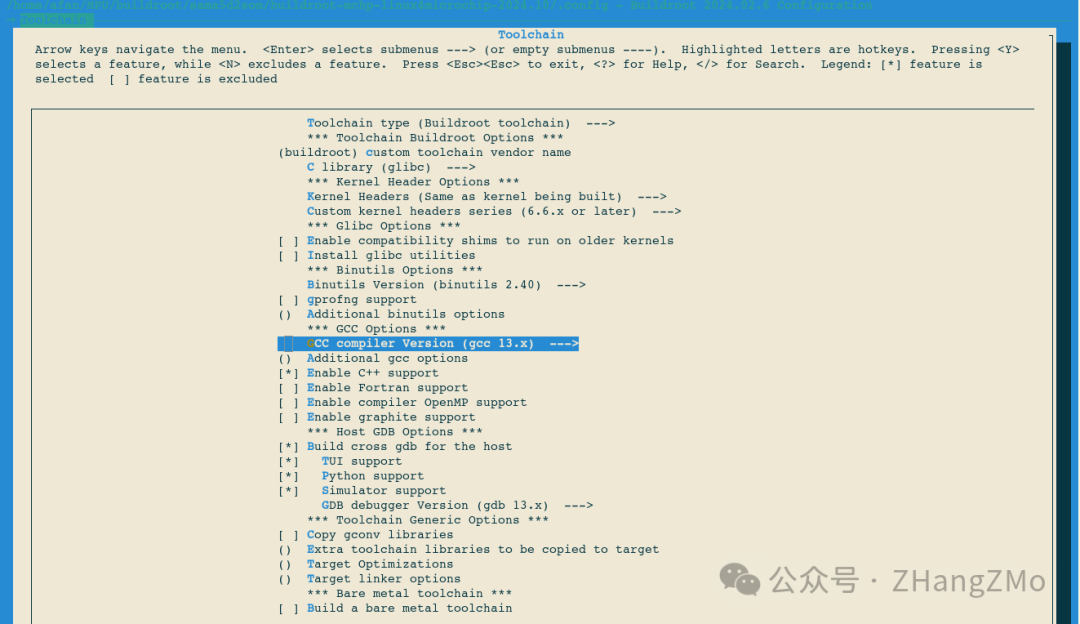
<span>Manually change the default Toolchain's GCC version to gcc13.x; otherwise, many inexplicable issues will occur during compilation, for example:</span>
undefined reference to ‘__atomic_load_8’
QT5 Configuration
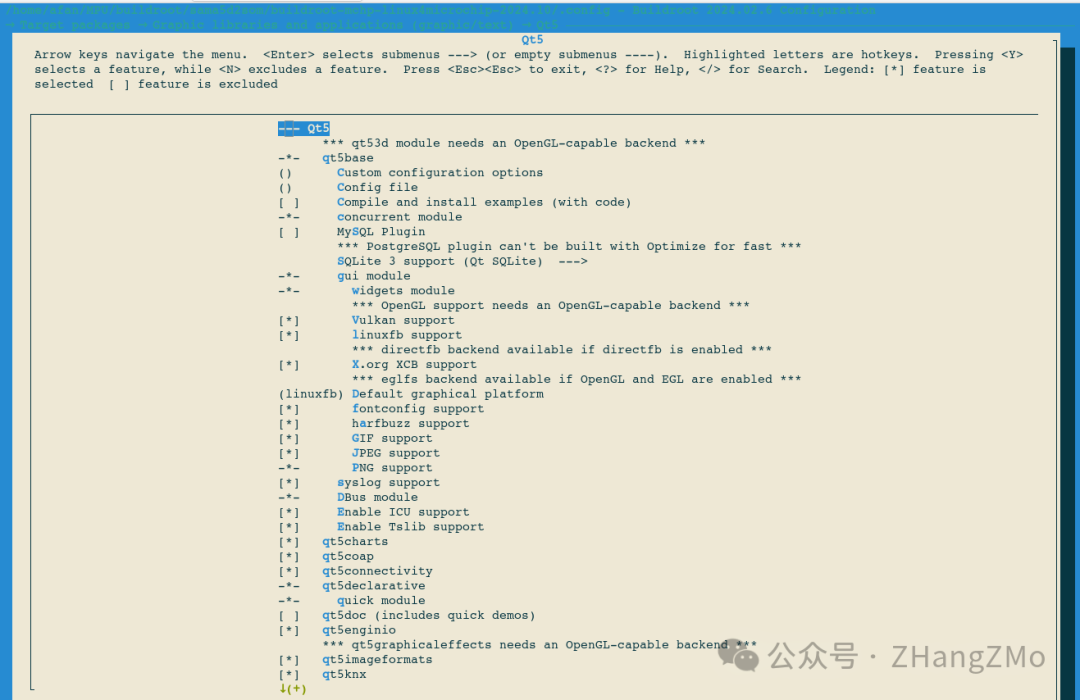
<span>The complete configuration for QT5 is shown in the following screenshot: Target packages → Libraries → Graphics</span>

Configuration of Other Libraries
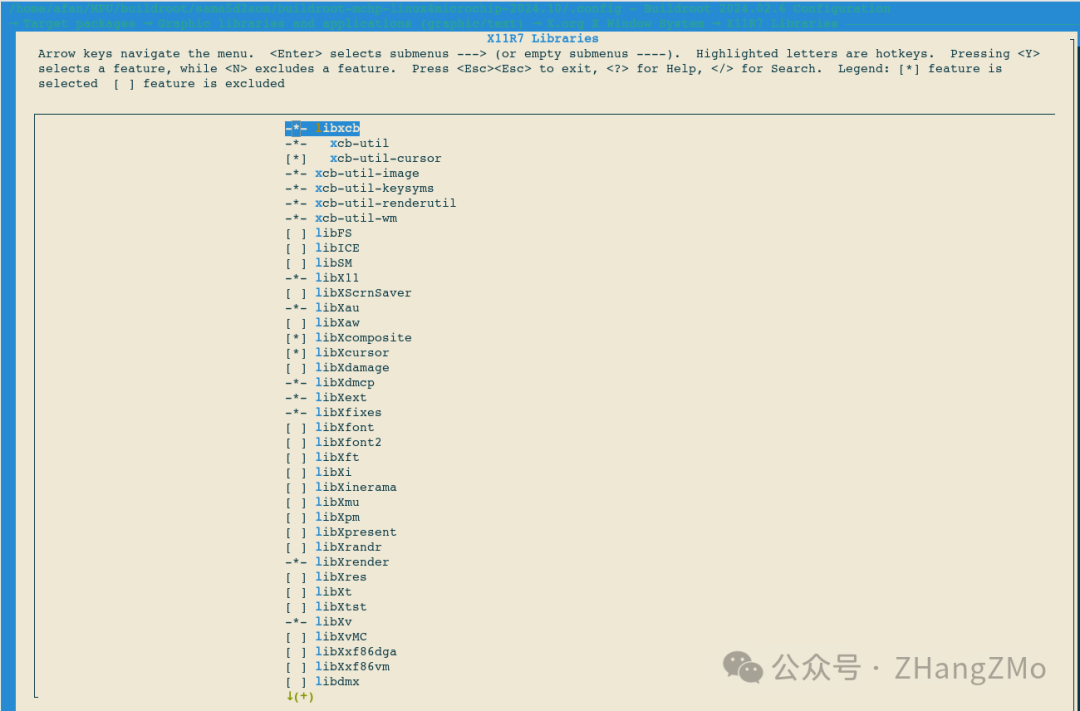
<span>Select libxcb: Target packages → Graphic libraries and applications (graphic/text):</span>
<span>Select libxkbcommon: Target packages → Libraries → Hardware handling:</span>

Common Compilation Errors Solutions
fatal error: stdlib.h: No such file or directory
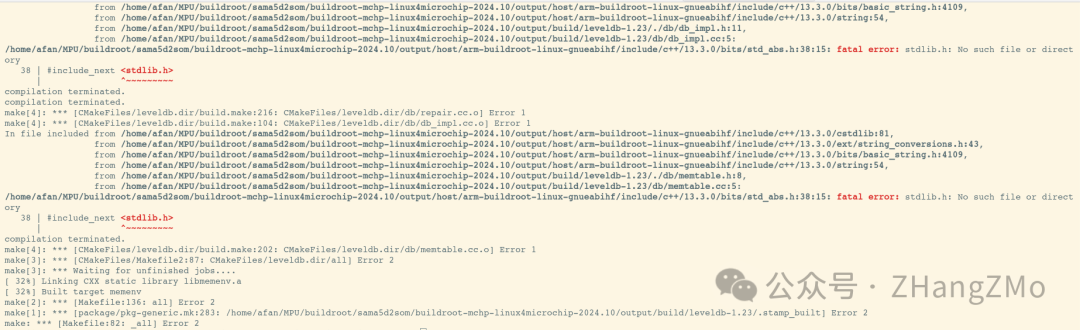
<span>Source file before modification:</span>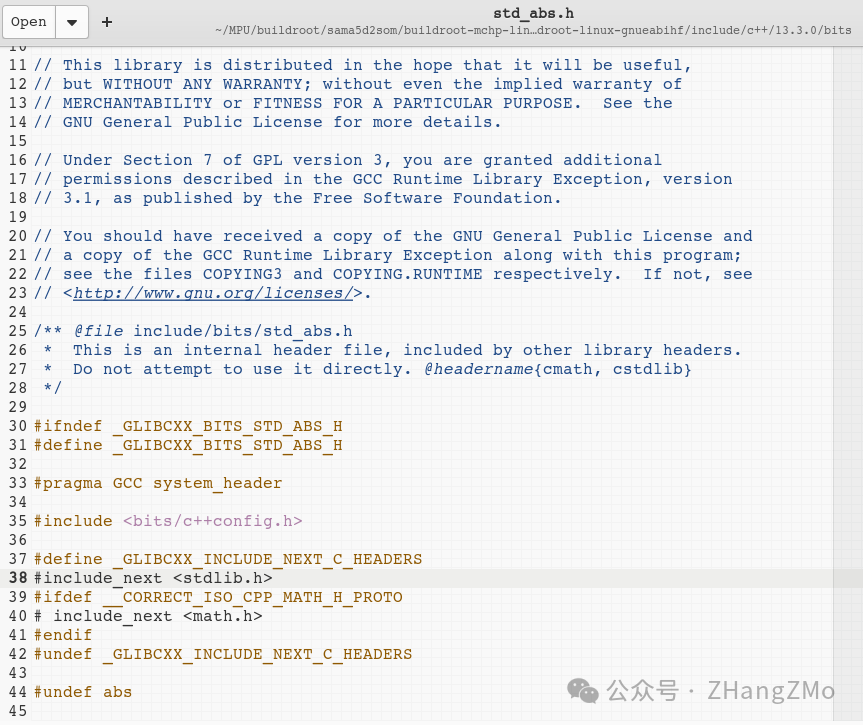
<span>Source file after modification: #include_next changed to #include</span>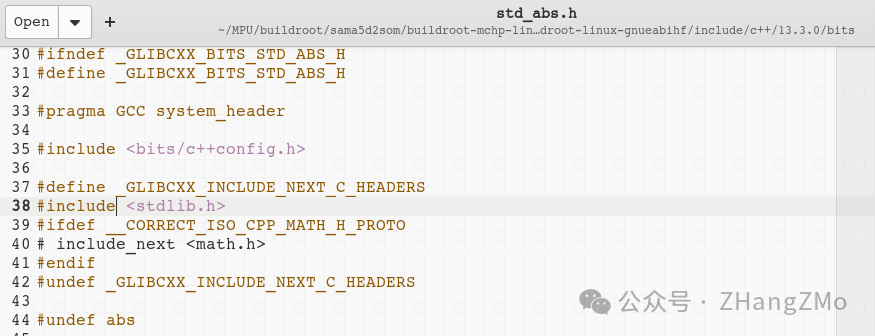
Common Errors When Running QT5 Solutions

qt.qpa.input: xkbcommon not available, not performing key mapping
<span>Solution: Select libxkbcommon. If you encounter the xkbcommon not available error when running QT5 programs, but find that libxkbcommon is also checked, the only solution is to delete all files generated in the root filesystem and the Build directory, then re-make and it will be OK:</span>

QStandardPaths: XDG_RUNTIME_DIR not set, defaulting to ‘/tmp/runtime-root’
<span>Solution: Set the value of the XDG_RUNTIME_DIR variable, for example: export XDG_RUNTIME_DIR=/run/qt</span>
Modify Root Filesystem to Support QT5
Modify output/target/etc/profile Configuration File
<span>You can add the following content to the output/target/etc/profile system configuration file:</span>
export TSLIB_TSDEVICE=/dev/input/event0
export QT_QPA_FB_TSLIB=1
export QT_QPA_PLATFORM=linuxfb
export QT_QPA_FONTDIR=/usr/share/fonts
export QT_QPA_FB_DRM=1
export XDG_RUNTIME_DIR=/run/qt
export XKB_CONFIG_ROOT=/usr/share/X11/xkb
Add output/target/usr/share/X11 Configuration File
<span>My personal solution is to directly copy the /usr/share/X11 folder from the Ubuntu system to the output/target/usr/share/ directory</span>
Flash the Generated Linux Image
Download Etcher Tool
Etcher tool download address
<span>Etcher is a cross-platform tool that can be used directly on Linux hosts</span>
Generate Final Flashing Image
<span>After completing the QT5 related configuration, it is also necessary to modify the root files according to the suggestions above, and finally execute the make command again. Check the newly generated sdcard.img file in the output/images/ directory.</span>
Use Etcher Tool to Flash SD Card
Official flashing tutorial provided by Microchip
<span>It is recommended to use an SD card reader to connect the SD card to the system via USB reader</span>
Step 1: Select the image to be flashed and the SD card to be used for flashing 
Step 2: Execute the image flashing command 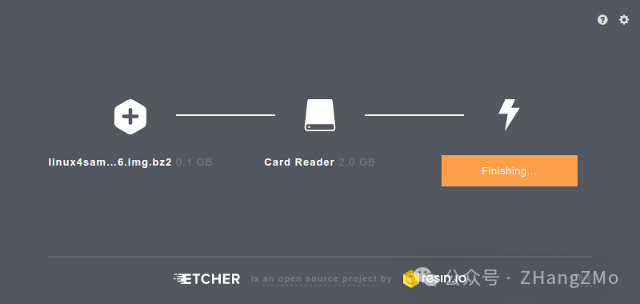
Step 3: Remove the SD card after flashing is complete 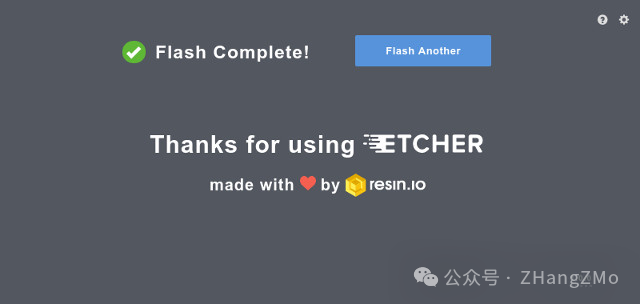
Introduction to the Partition of the Flashed SD Card
<span>The flashed SD card will be divided into 2 partitions, one is the BOOT partition, and the other is the ROOTFS partition</span>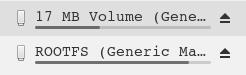
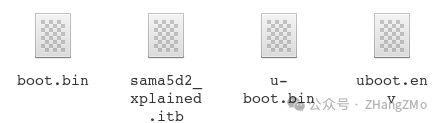
<span>The BOOT partition contains boot.bin (at91bootstrap), itb files (containing linux image, linux dtb, and other dtb files), u-boot files, and their configuration files. The BOOT partition is relatively small, and the size of the files placed is limited</span>
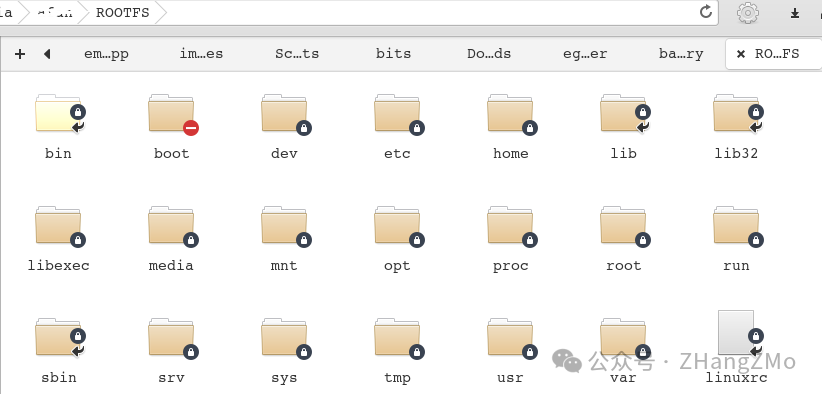
<span>The ROOTFS partition contains all contents of the root file. During normal development and debugging, user code, newly added library files, and modified system configuration files can all be operated in this directory</span>
<span>After inserting the flashed SD card into the SAMA5D2-XULT development board, you can see the Linux system boot information from the printed serial port</span>
Next Episode Preview
-
Configuring QT5 under Embedded Linux in QT Creator -
Simple QT5 Code Demo