Click on the top “Reverse Newbie“, select “Follow Public Account“
Learn Python web scraping and reverse engineering with me!

1. Introduction
Good reverse engineering starts with a good environment, so let’s set up our phones together. The purpose of this article: to install LineageOS (LOS) 15.1, Root, and install Frida and Objection tools.
Why choose LOS 15.1? Because as experts say, it has more features than the stock system, such as network debugging and htop tool. Its 15.1 version is developed based on Android 8.1, which is what most experts are currently using. Therefore, we choose this system for our setup, and the following steps may require a VPN.
It’s best to understand the relevant terminology before flashing, and I recommend reading this article “Step-by-Step Guide to Setting Up a Perfect Android Reverse Engineering Environment”[1].
2. Device Information
I am using a Google Pixel Sailfish, which is the first generation Pixel. Below is its device information:
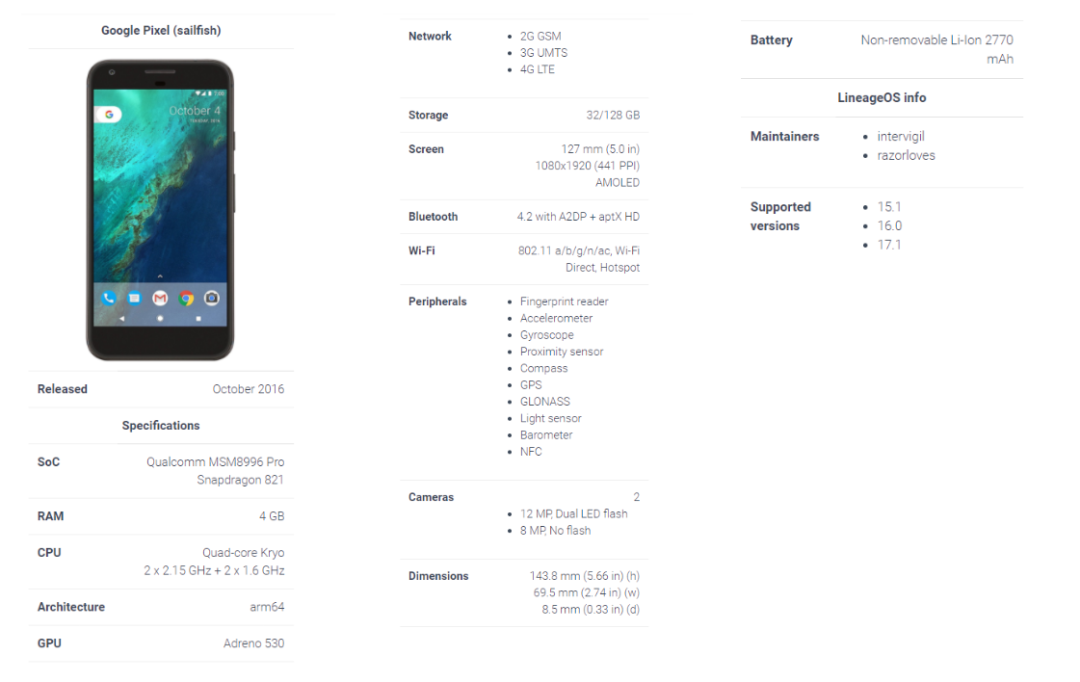
We mainly look at the phone’s Architecture, Sailfish is arm64 architecture. Later, we need to download different tools based on different architectures, which can be checked on LOS Wiki[2].
3. Install adb-fastboot
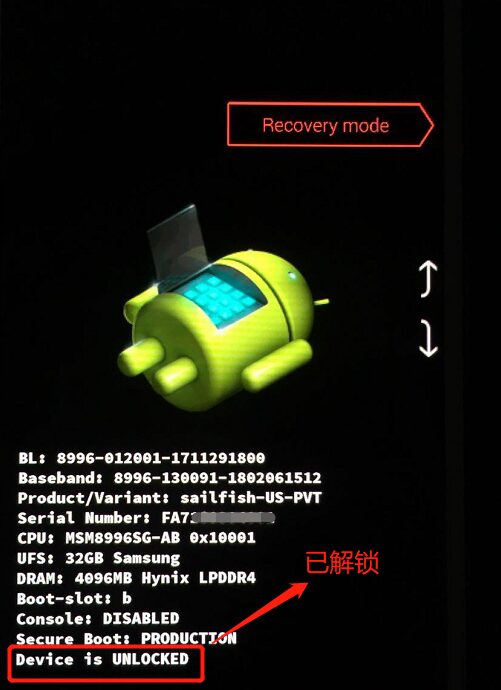
First, ensure that the phone has unlocked the BL lock, please search online for the unlocking steps, and keep the phone charged. After unlocking, enter fastboot mode (to enter, see title 4) as shown in the figure:
Download link: https://developer.android.com/studio/releases/platform-tools
LOS tutorial: https://wiki.lineageos.org/adb_fastboot_guide.html
1. Unzip the downloaded zip to a path, such as E:\adb-fastboot
2. Add the path E:\adb-fastboot\platform-tools to the system environment variable ‘Path’
3. Open cmd and type adb version to test if the tool is available, as shown in the figure:

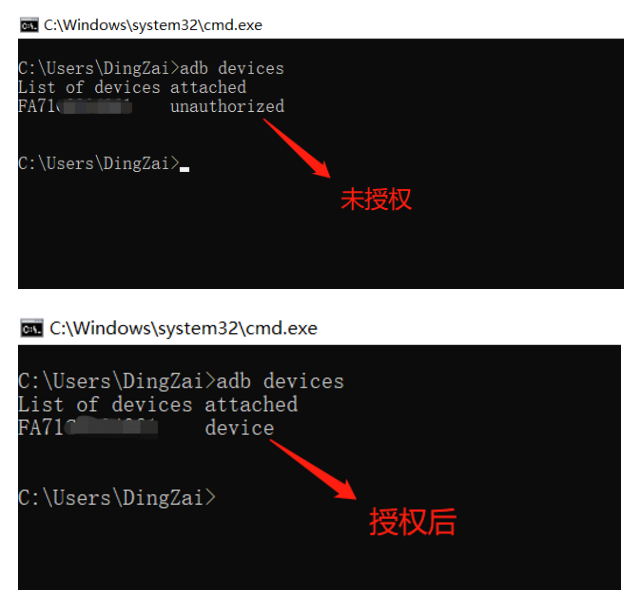
4. Open phone settings – system – about phone – continuously click ‘build number’ until prompted ‘Developer options have been enabled’
5. Go back to the previous page, enter ‘Developer options’, and enable Android debugging
6. Connect the phone to the computer, and the phone will pop up a prompt ‘Allow USB debugging?’, check ‘Always allow’ and click OK
7. Open cmd and type adb devices to display the phone’s serial number, indicating a successful connection
4. Temporarily Flash TWRP
Temporarily flash the third-party Recovery TWRP, which will become invalid after rebooting; later we will discuss how to flash it permanently.
US version Sailfish download link: https://dl.twrp.me/sailfish
Official tutorial: https://twrp.me/google/googlepixel.html
1. Download the latest image file img corresponding to the phone
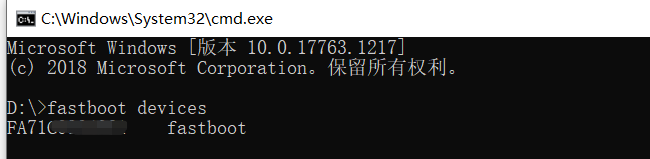
2. Enter Fastboot mode on the phone
-
In shutdown state, press and hold the volume down key and the power key simultaneously -
In boot state, connect to the computer, open cmd and type adb reboot bootloader
3. Unplug and re-plug the data cable, then type fastboot devices in cmd to test if fastboot is connected successfully; if the phone’s serial number is displayed, it is successful
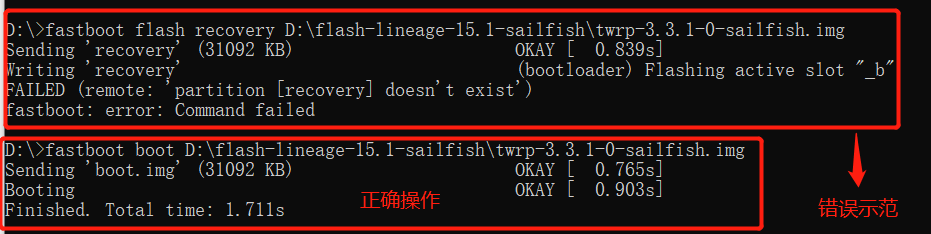
4. Type fastboot boot <recovery_filename>.img in cmd to temporarily flash TWRP
-
<recovery_filename>.img is the path of the downloaded image file, you can drag the file directly into cmd -
Or use fastboot flash boot <recovery_filename>.imgto temporarily flash (from LOS tutorial)
5. Normally, after flashing TWRP, it will automatically enter; if it does not enter TWRP, refer to the following
-
Shut down, enter Fastboot mode, press the volume down key, select ‘Recovery Mode’, and press the power key to enter TWRP
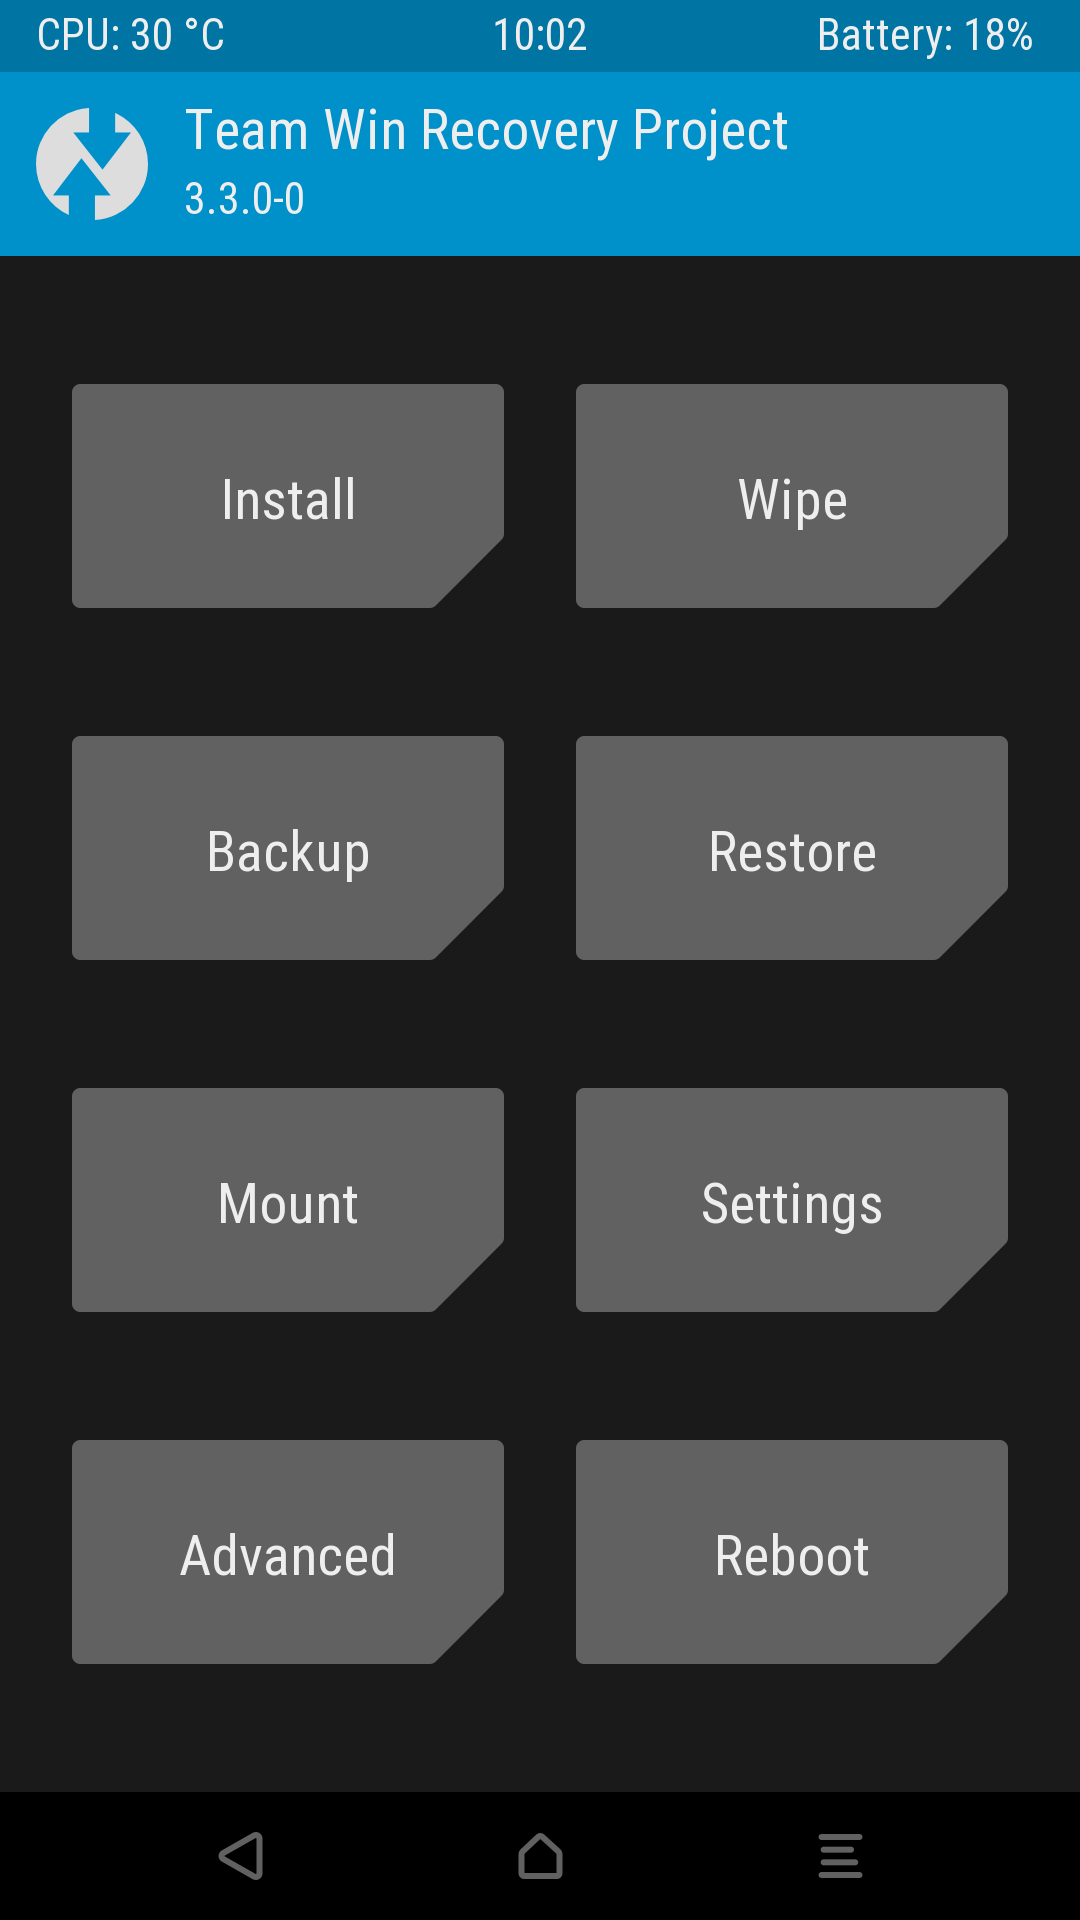
6. Before entering TWRP, there may be two interfaces
-
One is an interface with a slider that asks whether to allow modification of the system partition, slide to allow -
If a lock screen password is set, you need to enter the lock screen password to decrypt the entire disk
5. Flash the System and Google Services
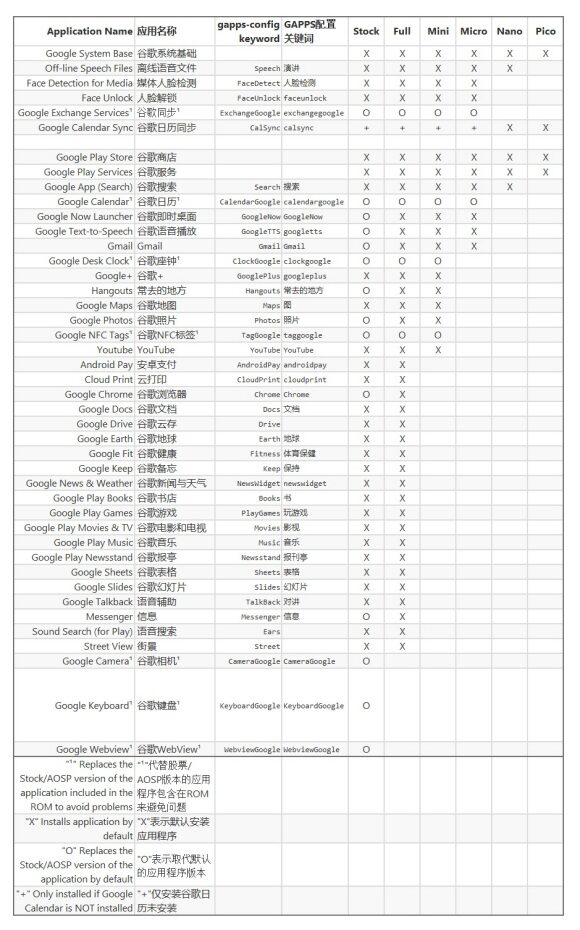
Since the LOS official website no longer provides the Sailfish 15.1 version, I searched for a long time and found a snapshot saved by the Time Machine, which can download the 20190221 version. LOS does not come with Google services, such as Google Play, which need to be installed separately; I choose OpenGapps, version ARM64-8.1-nano.
Sailfish is ARM64 architecture, and LOS 15.1 is developed based on Android 8.1, so the first two must be selected this way; the last nano can be modified as needed. For specific differences between each version, see the image below or check its Github introduction[3].
System download link: https://web.archive.org/web/20190224153128/https://download.lineageos.org/sailfish
Google services (OpenGapps) download link: https://opengapps.org/
Official tutorial: https://web.archive.org/web/20190224175720/https://wiki.lineageos.org/devices/sailfish/install
1. After downloading the flashing package, it’s best to verify the package integrity by typing certutil -hashfile <filename>.zip SHA256 in cmd and checking with the official website
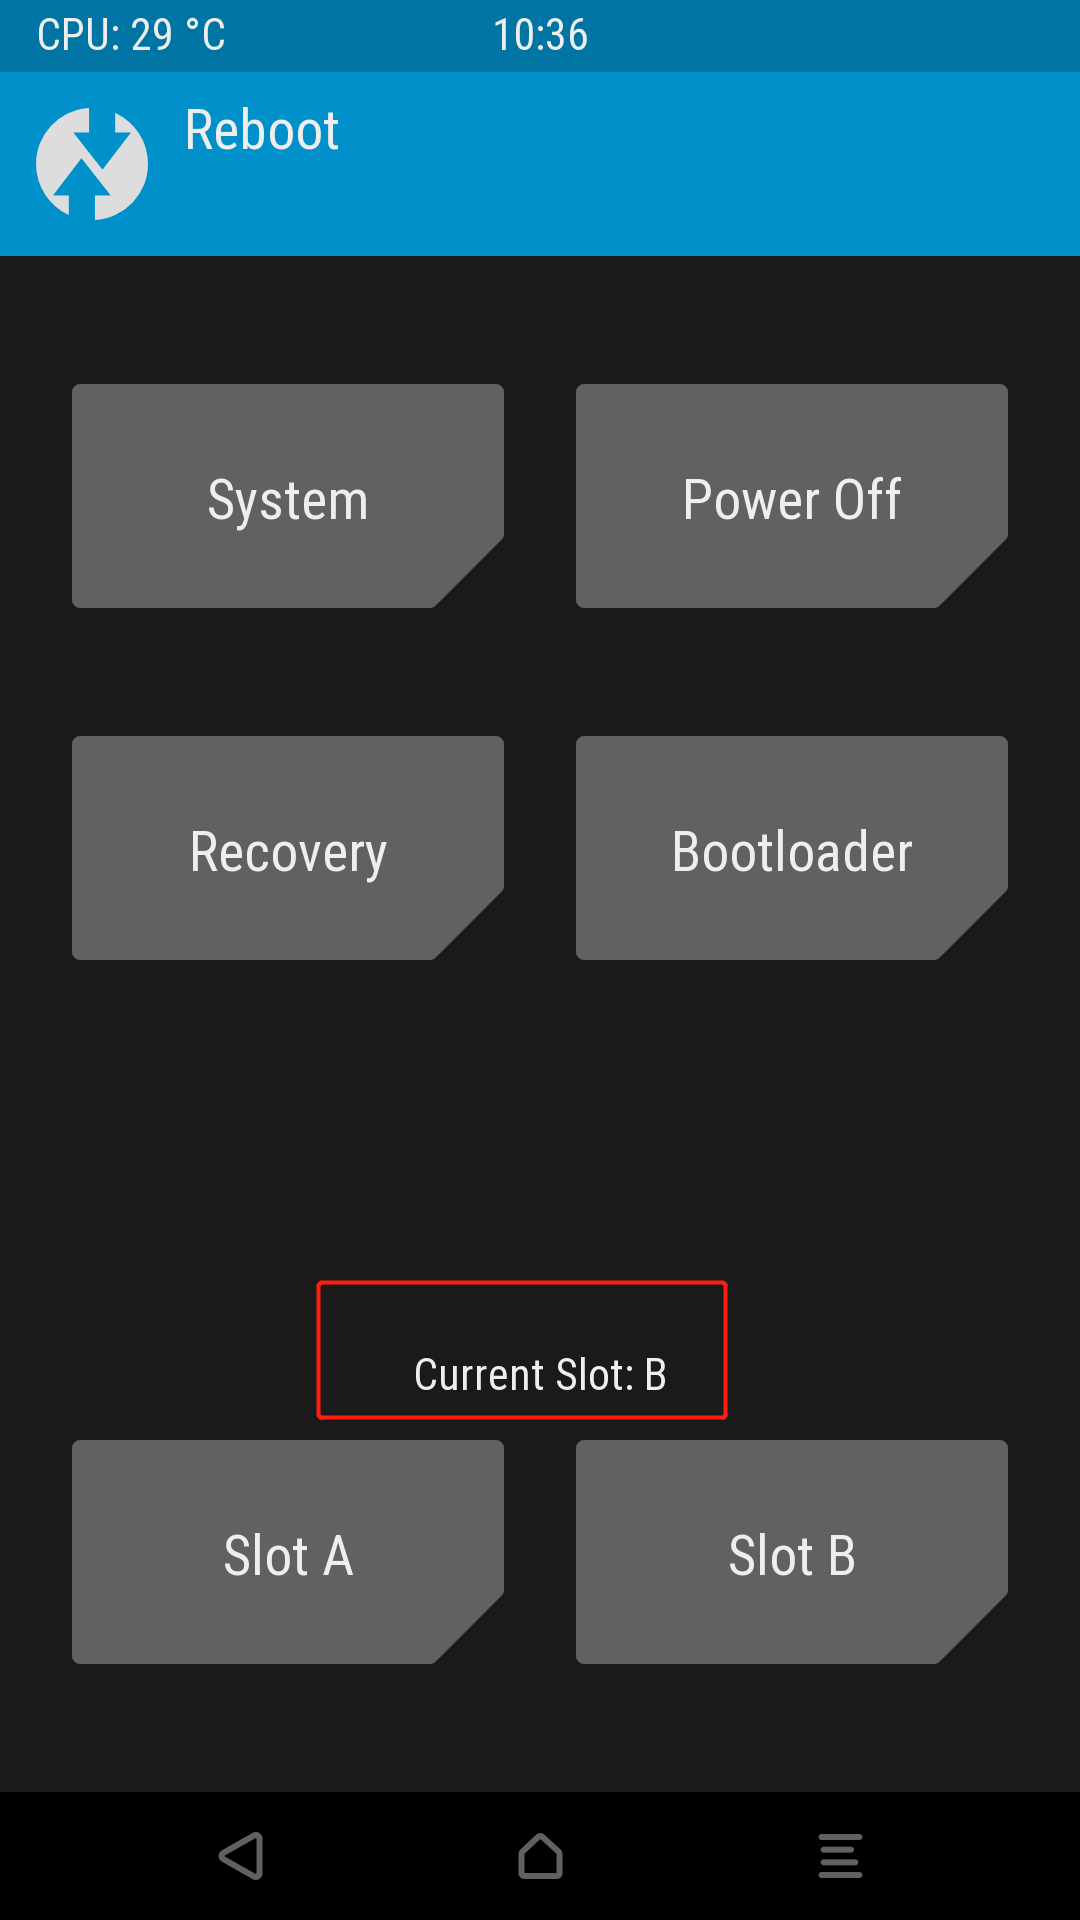
2. Enter Recovery Mode, i.e., TWRP, click Reboot, and check the current partition current slot
-
Pitfall: Sometimes it will automatically switch to another partition, causing flashing errors, so check the current partition every time you enter TWRP; if it’s incorrect, switch it
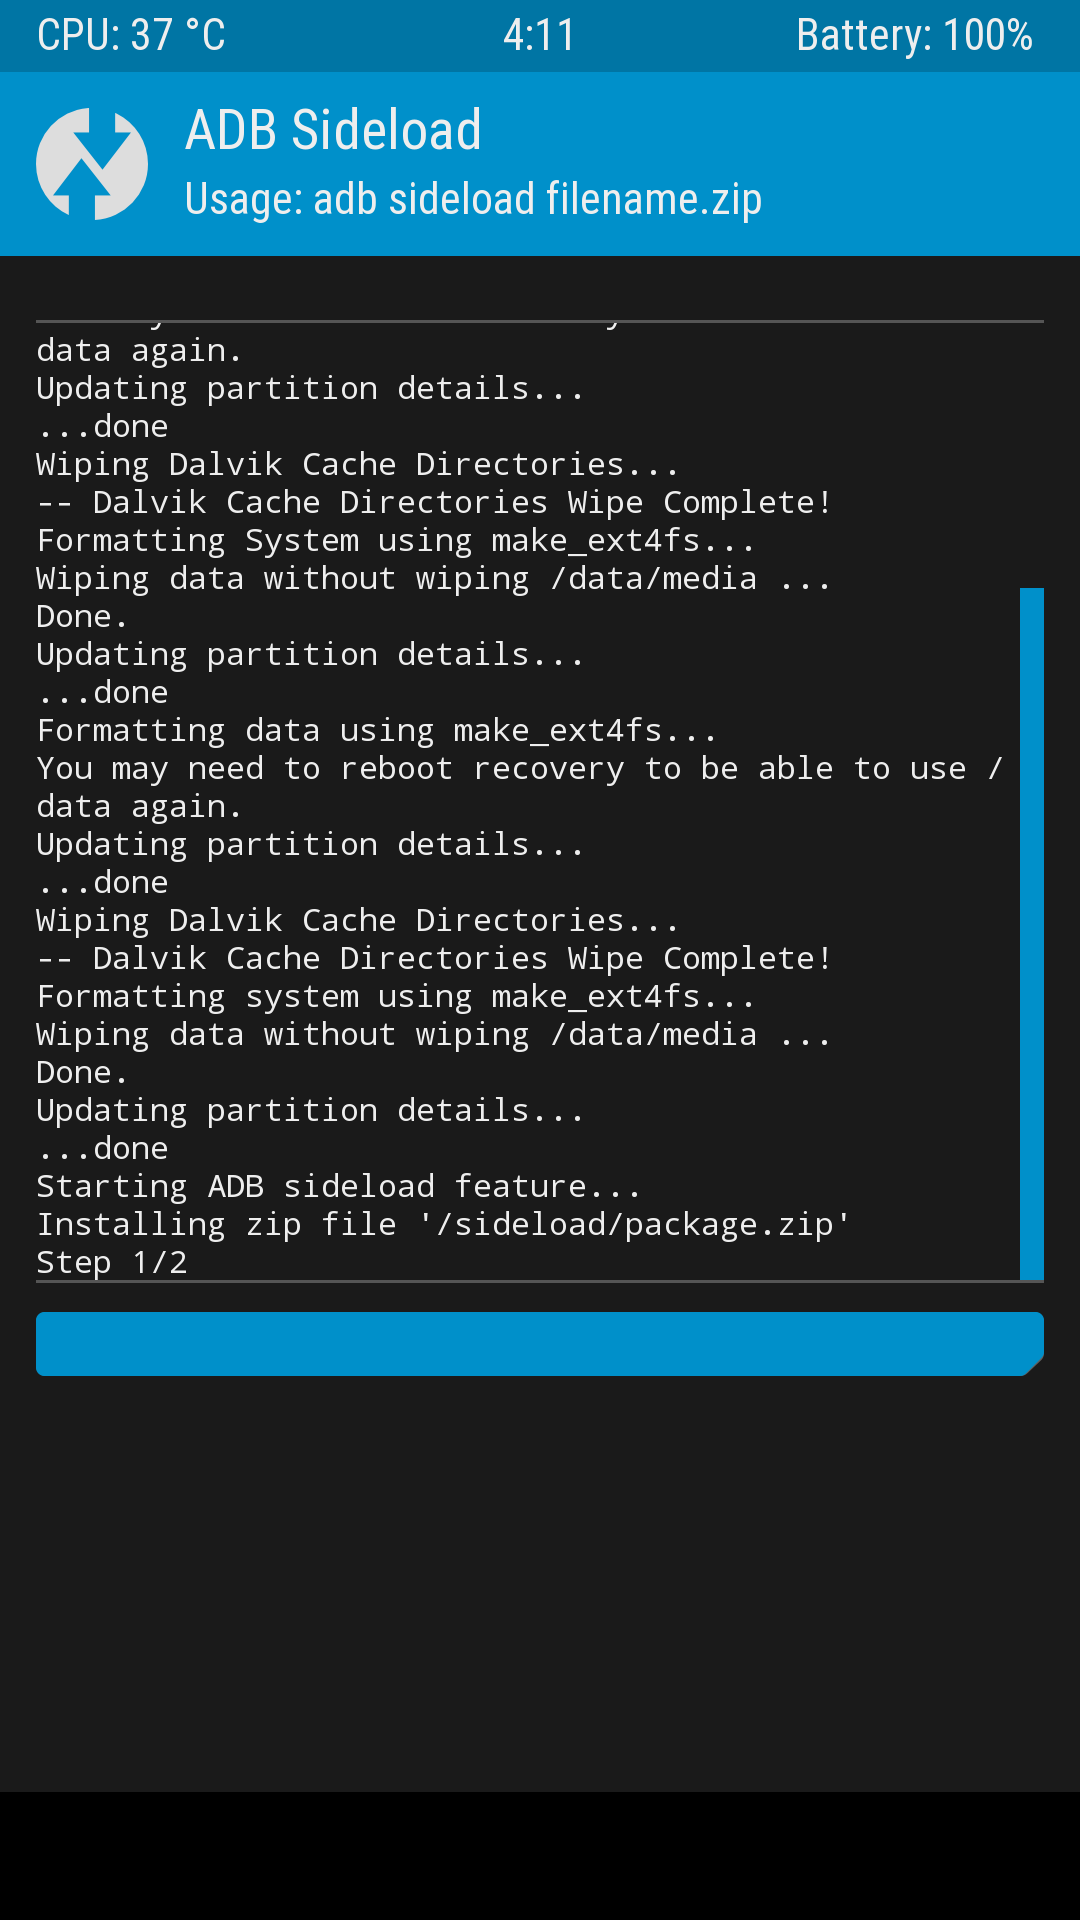
3. Go back to the homepage to perform a factory reset: click Wipe→Advanced Wipe, check data, cache, Dalvik Cache, and slide Swipe to Wipe to start the factory reset
-
Or click Wipe→Format Data, enter yes, which will format all files and remove the password
4. Continue to return to the homepage (do not reboot), click Advanced→ADB Sideload, and the phone will wait for the computer to flash the package
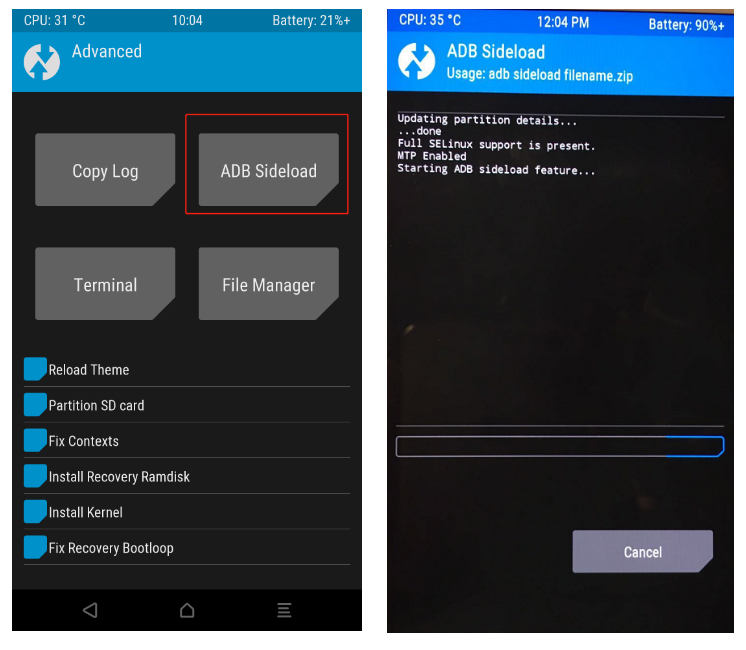
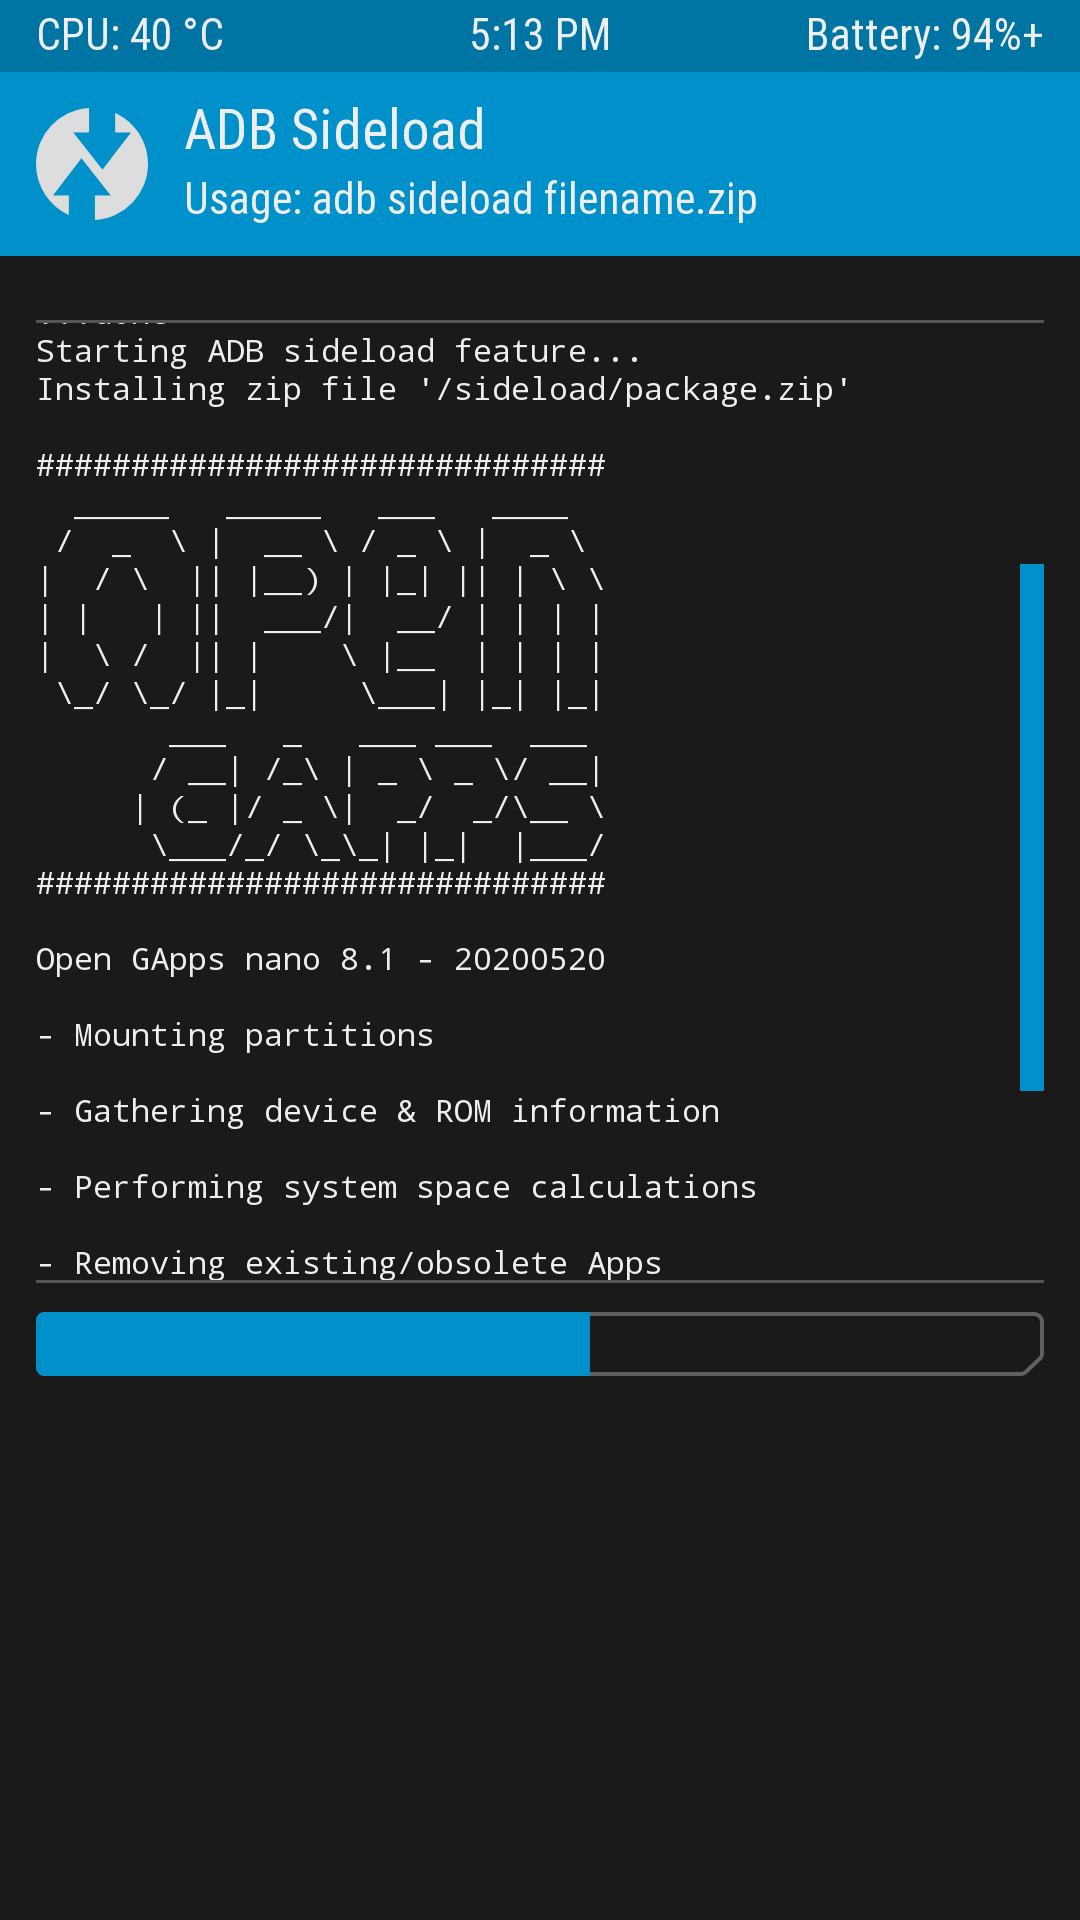
5. In cmd type adb sideload <filename>.zip to flash the system package

6. Return to the TWRP homepage (do not reboot), click Reboot→Power off to shut down
-
Important: After flashing the system, you cannot boot; you must repeat the previous steps to flash Google services before booting, otherwise Google services may crash
7. Repeat the previous two major steps, temporarily flash TWRP again. Then repeat the above steps to flash Google services
6. Permanently Flash TWRP and Root
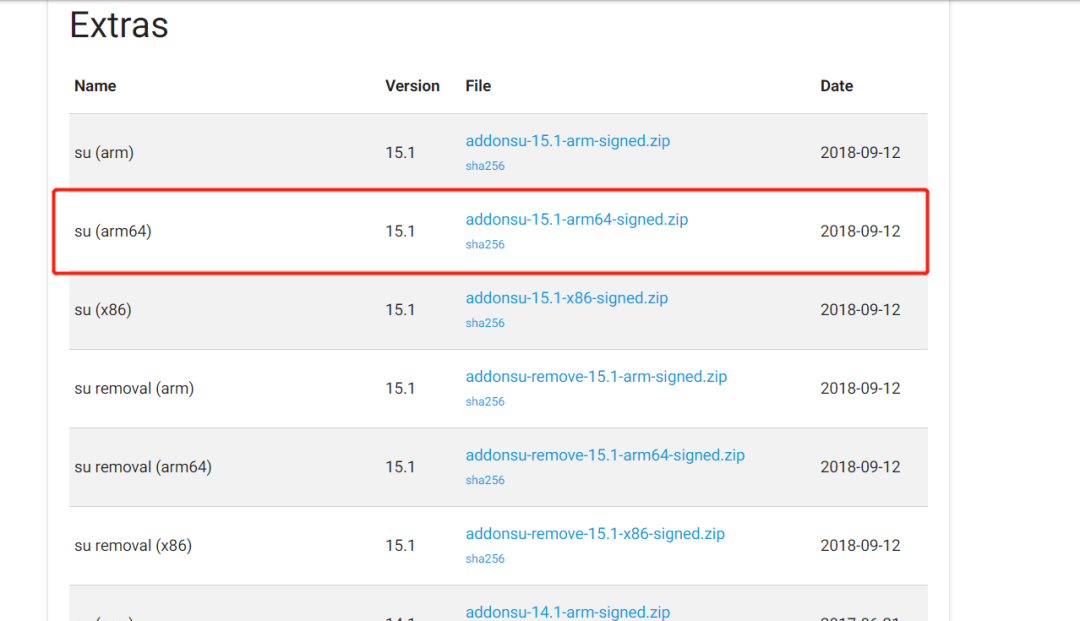
LOS official Root download link: https://web.archive.org/web/20190223223558/https://download.lineageos.org/extras
Magisk (Root) download link: https://github.com/topjohnwu/Magisk/releases
1. Download the TWRP installation file zip corresponding to the phone, temporarily flash TWRP according to the previous steps, and use ADB Sideload to flash TWRP permanently
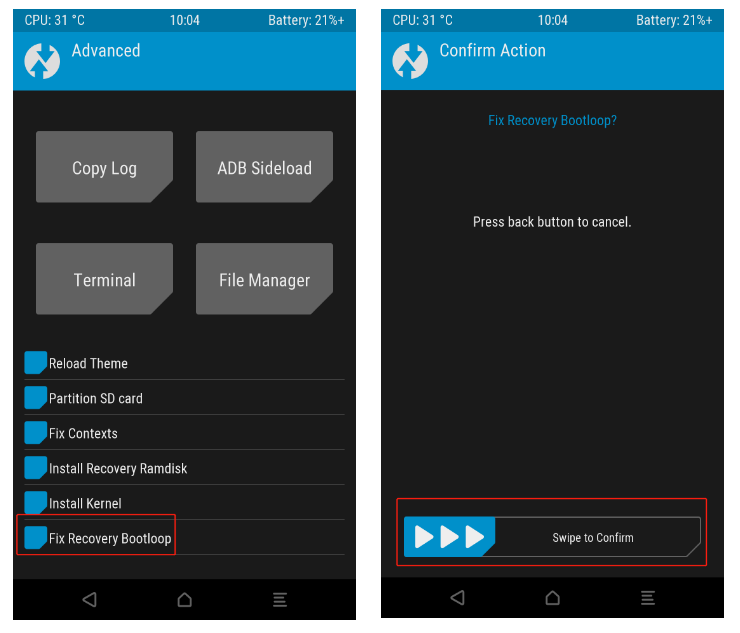
2. Click Reboot System to see if you can reboot the system. If it enters a bootloop into TWRP, refer to the following
-
Click Advanced→Fix Recovery Bootloop, swipe Swipe to Confirm to fix the TWRP bootloop, and reboot
3. Enter TWRP, repeat step 1 above, and flash the downloaded Root tool zip via adb sideload
-
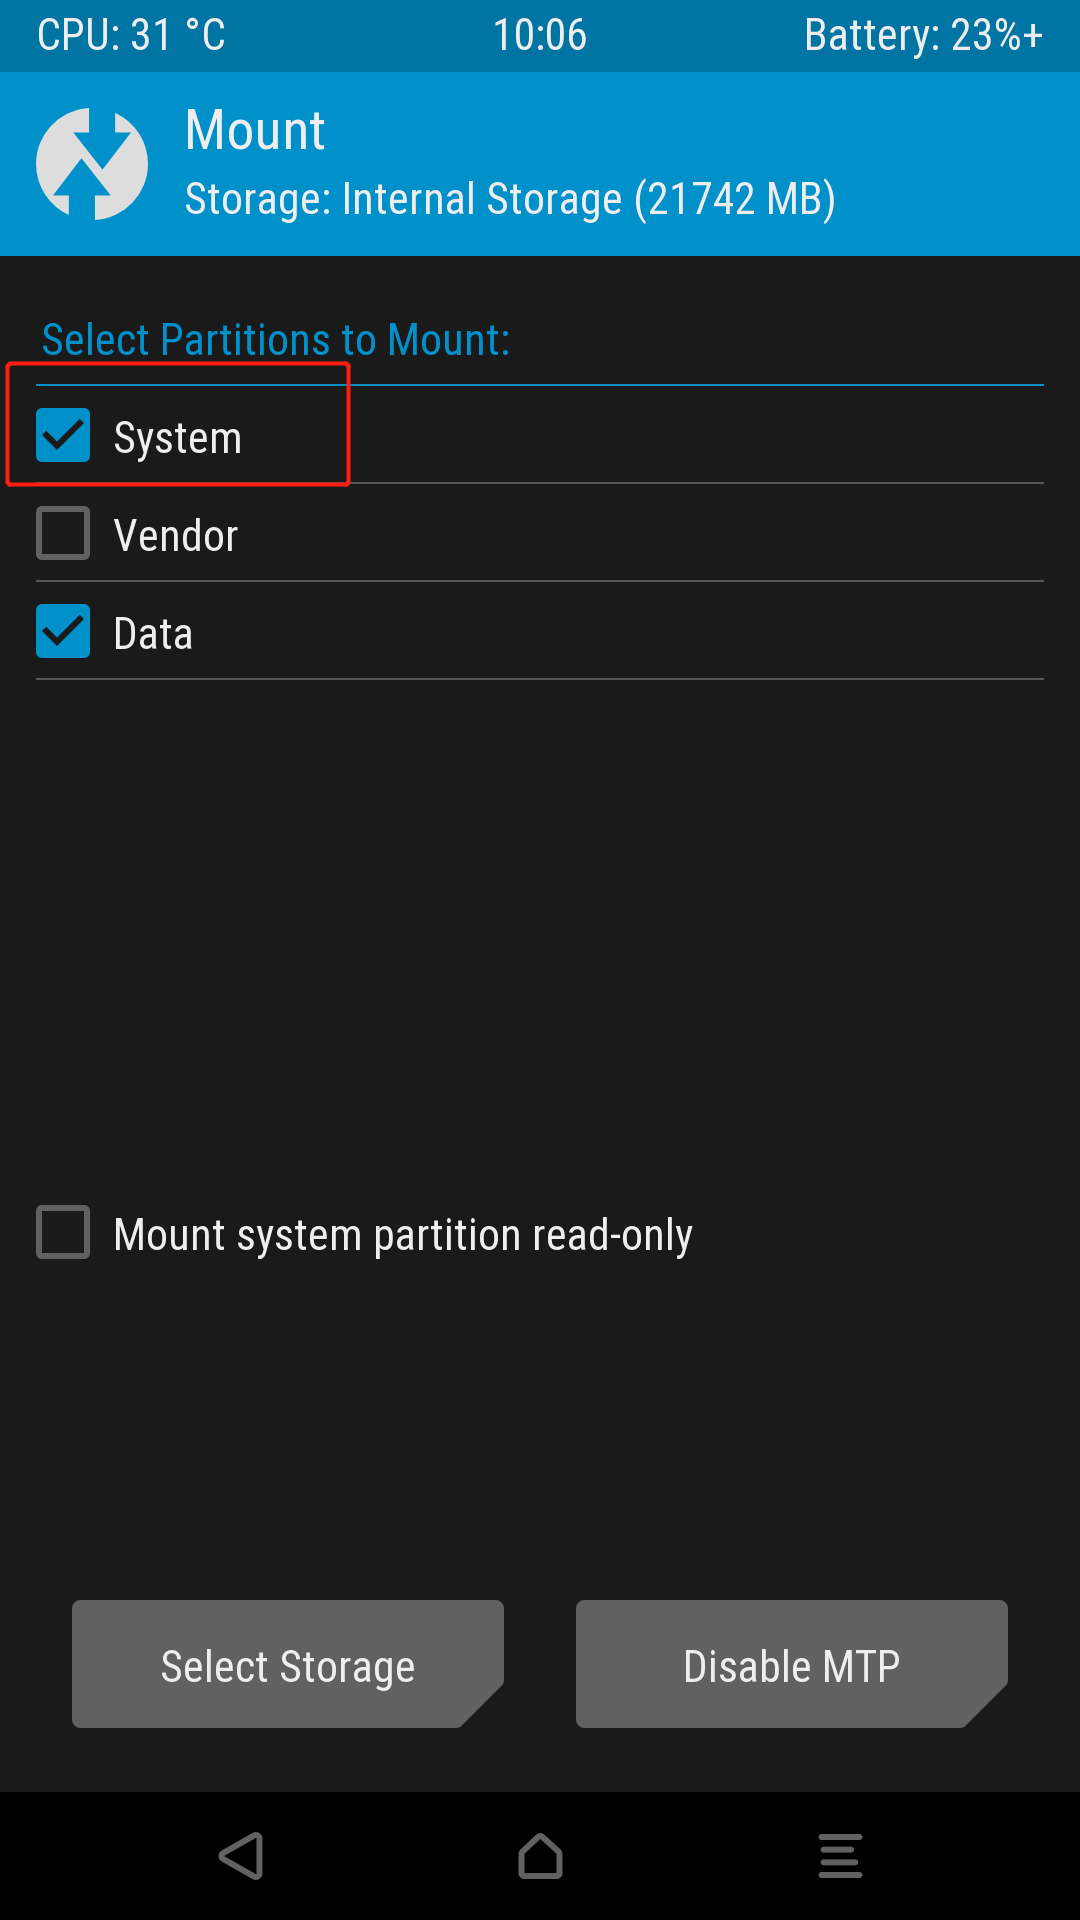
Note: If prompted cannot mount /system, it means the system partition cannot be mounted; click Mount→check system, and then flash again
Note: The LOS official Root tool and Magisk can only choose one; the other will be overwritten. According to experts, Magisk is a fake root. However, it has more features, and there are no official Root tools in subsequent LOS versions, so I ultimately chose Magisk. You can choose for yourselves and try both.
4. If using LOS official root: enter developer options, turn on root switch, and select ‘Apps and ADB’
-
If the official root is not flashed, there may also be a root switch, but there are only two options: Disable and Only ADB -
After flashing the official root, there are 4 options: Disable, Only Apps, Only ADB, Apps and ADB
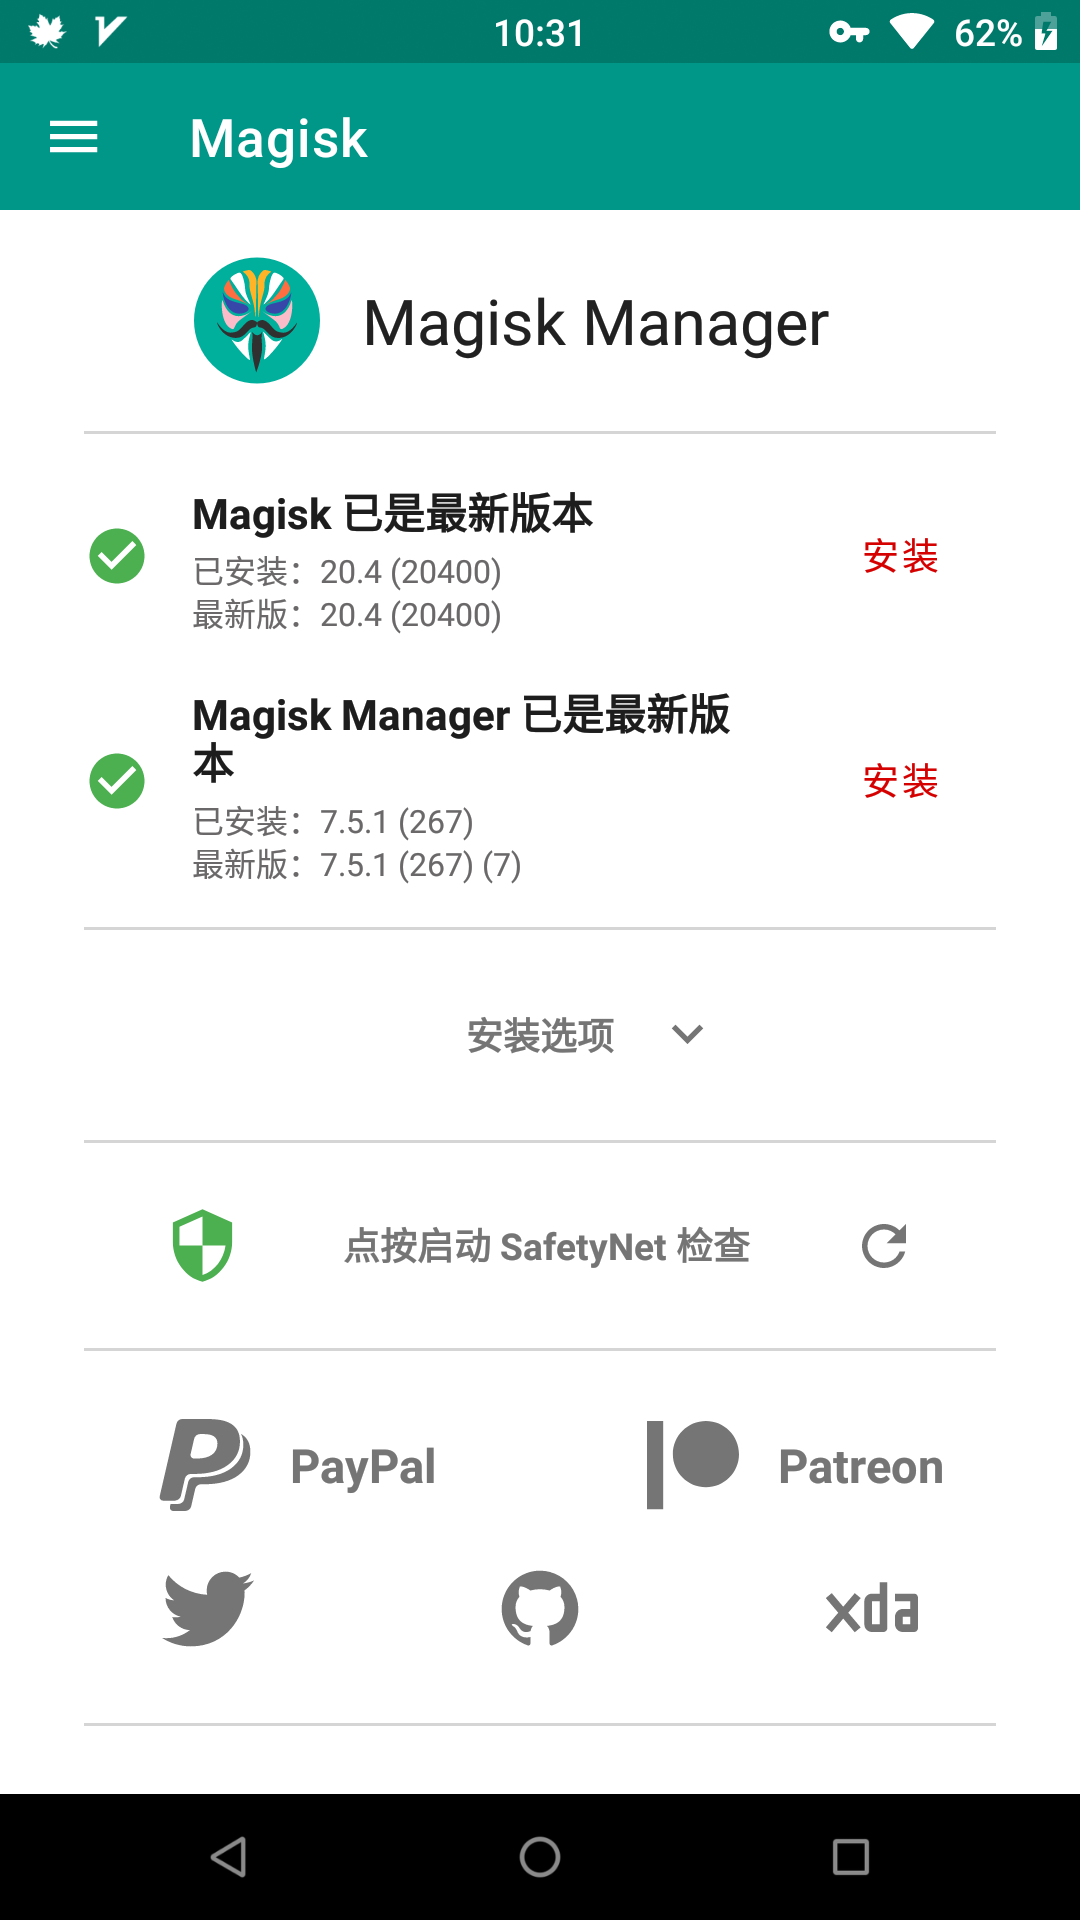
5. If using Magisk: after rebooting, there will be the Magisk Manager software, and if it shows ‘XXX Installed’, it indicates success
7. Others
I won’t go into detail about installing Frida and Objection tools; just refer to r0ysue’s GitHub[4]. I installed the Ubuntu subsystem on WIN10 for easier operation; you can search for how to install it.
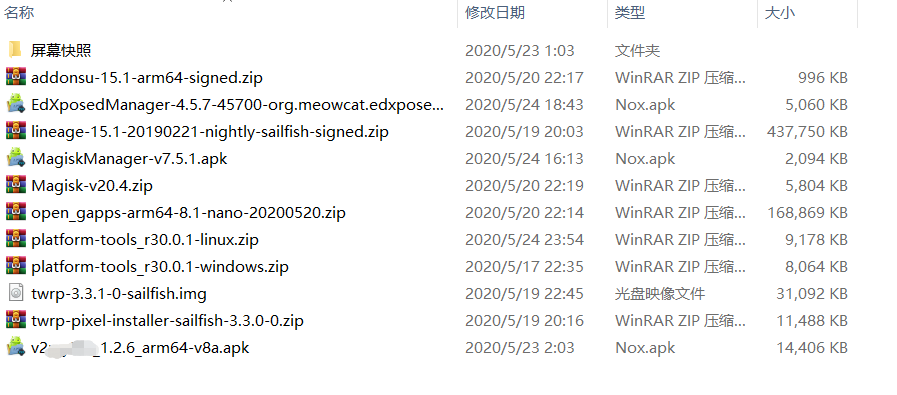
Below are all the packages used for this flashing; it is recommended to download them all first before proceeding, done!
References
Terminology Explanation: https://mp.weixin.qq.com/s/31-w6Hjl1ZvBc2htQfujoQ
[2]Device Information: https://wiki.lineageos.org/devices/
[3]OpenGapps Version Differences: https://github.com/opengapps/opengapps/wiki
[4]r0ysue GitHub: https://github.com/r0ysue/AndroidSecurityStudy
— END —
Click here to leave a message 📝
or
Click “Join Group Chat” in the background to communicate together