Note:
1. This guide is written for S3C2440. Other configurations are basically the same, just change the model. I will explain in the article, as the issues encountered are quite similar.
2. This summarizes and resolves some issues regarding the connection and configuration of the J-Link with the development board for bare board development and laptops. The software used for bare-metal development is ARM Developer Suite v1.2 (ADS).
3. The focus is on the configuration issues of J-Link, explaining the problems I encountered, and contributions are welcome!
Recently, I spent several days debugging with J-Link, and even the technical support for the development board could not solve the issues. I found many experiences online. I resolved my issues step by step. Actually, I was stuck on the last step, and I couldn’t find such issues online, probably due to randomness. In the end, it was resolved by luck. I am extremely pleased. I would like to summarize some points to note when using ADS for development and J-Link for debugging on S3C2440, and I hope this helps those who see it. Feel free to share!
1. Compile Source Code and Generate BIN
Software: ADS1.2 is very simple, nothing much to pay attention to. Just crack it at the end. After installation, there is a directory called ARM Developer Suite v1.2 in the start menu. Open it, and we use the first AXD Debugger (AXD) and the second CodeWarrior for ARM Developer Suite (IDE). The IDE is used for compiling source code to generate BIN.
1. IDE Related Configuration
a. Create a new project and select executable image. Then create or directly add code. Code management is also very simple.
*b. In the created project, there is a ***.mcp (mcp is the project name, you can directly open it later or drag it) window, click on DebugRel Setting (we default to DebugRel, the generated BIN file is also in there).
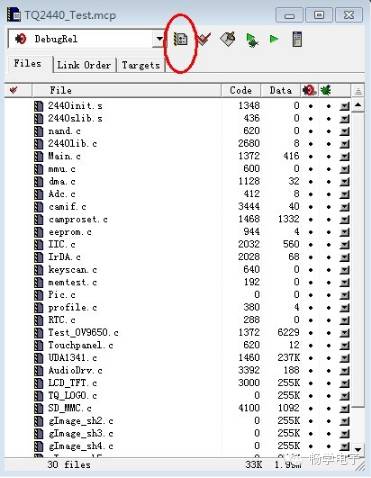
In the pop-up settings dialog box, make the following settings:
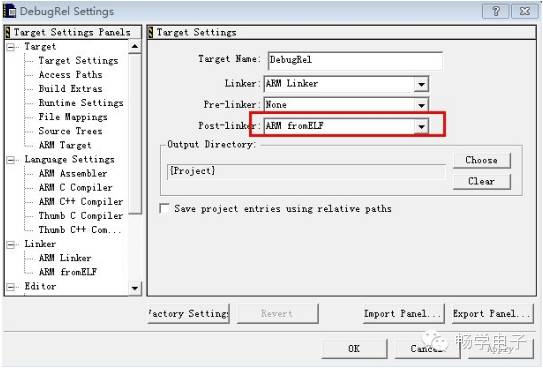
1. Target->Target Setting should change Post-Linker (ARM from ELF).
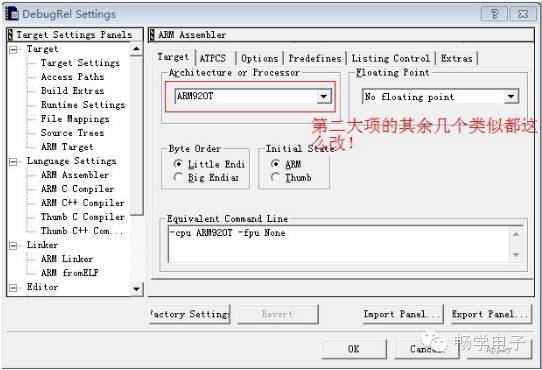
2. Change all in Language Setting to ARM920T, and make corresponding changes for other core models. The default is ARM7 core.
*3. Linker->ARM Linker in the output tab change RO base to 0x30000000, in the Option tab change Image entry point to 0x30000000, in the Layout tab Object/Symbol(2440init.0), Section(Init), Listing(List.txt).
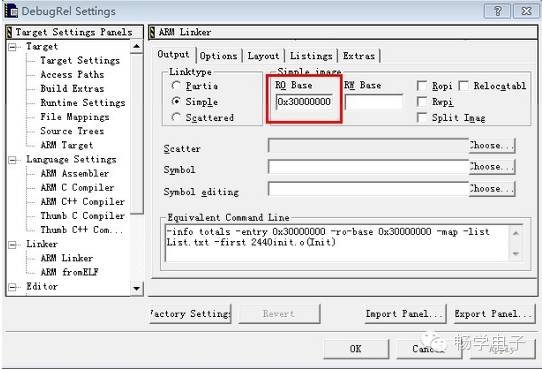
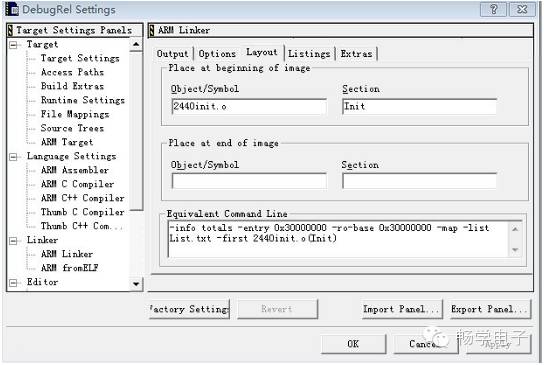
Click OK, the configuration is done!
c. Next, click the button next to the icon that represents compiling the file. If there are no errors, the compilation will pass, and the BIN file will be generated.
Note: *For .mcp files with Chinese paths, they cannot be opened directly.
*If there is a path error, try clicking project->remove object code, and then recompile.
*To recompile and generate BIN, you can directly delete the .axf and .bin in the project directory.
2. Use J-Link to Directly Download BIN
a. Install SEGGER, open J-FLASHARM, and configure (refer to “S3C2440 Bare Metal Program Development Steps” in the TQ2440 Development Board User Manual V3.2).
b. Connect the J-Link and power on the development board, in JFlash software click Target->Connect, then click Open to open the BIN file, and click Target->Program.
c. Turn off the power of the development board, disconnect the J-Link from the development board, and power on the development board.
Note: It can be downloaded to both NAND and NOR, but it is recommended to use NOR, as NAND has bit inversion issues.
(Some also say NOR is slow, etc. I am not quite clear on the specifics of downloading to NAND vs. NOR, there are issues with code copying, and SDRAM, I will check next time when I have time.)
*3. Use J-Link with AXD for Step Debugging and Running (full text see original)