Background
Due to frequent crashes of the production server running under Docker, we decided to abandon Docker and directly install the necessary software. Today, we will implement the installation of MongoDB.
System Version
The command is as follows:
lsb_release -a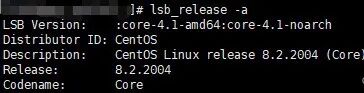
Download MongoDB
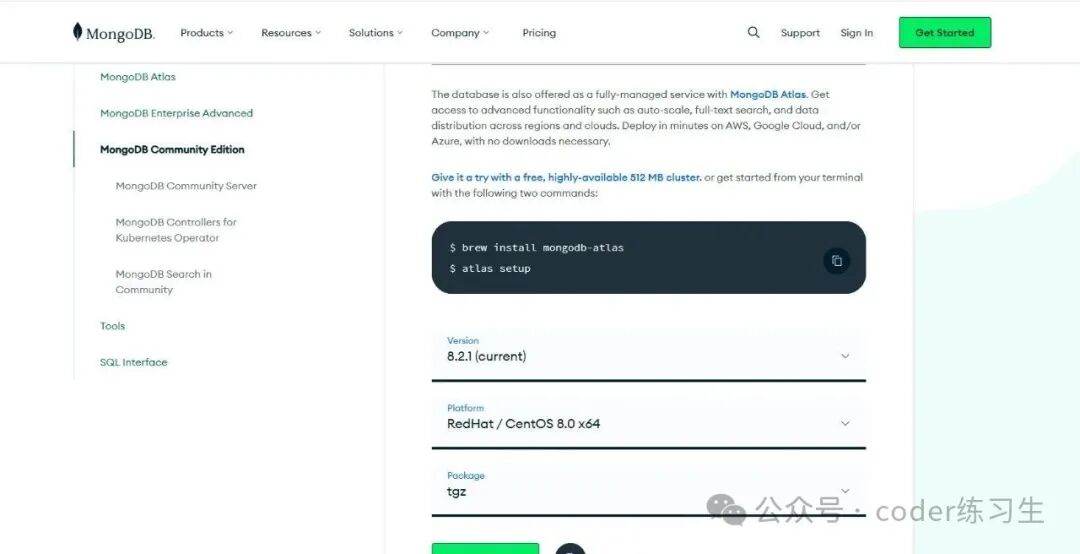
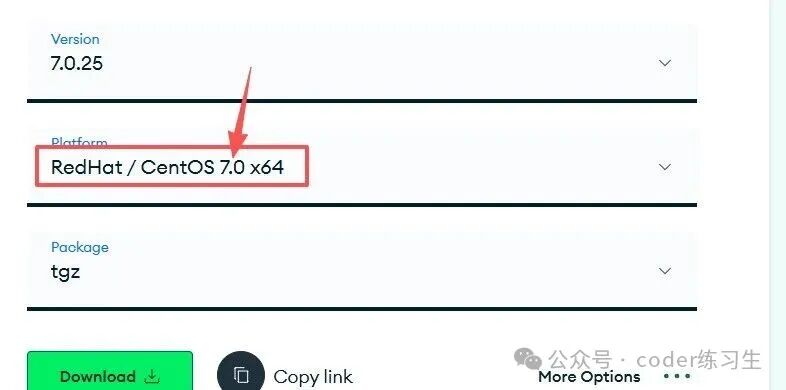
You can click here to download. I chose the version shown in the image below, but you can adjust it according to your own needs. Note that it is best not to choose a version with ARM, as it may cause issues.
Install MongoDB
Upload Installation Package
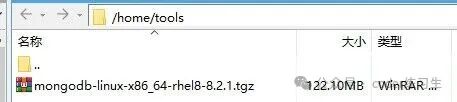
First, upload the downloaded compressed package to the server. I created a directory directly on the mounted drive to avoid running out of disk space. The above /home/tools can be used directly, and upload it to the corresponding /mnt/data/mongodb directory.
Extract Files
Execute the command
tar -zxvf mongodb-linux-x86_64-rhel8-8.2.1.tgz
Rename
As shown in the image, since the name is too long, we can rename this file. Execute the command
mv mongodb-linux-x86_64-rhel88-8.2.1 mongodb8
Create Storage Directory
I created a directory directly on the mounted drive to avoid running out of disk space. The above /home/tools can be used directly, and upload it to the corresponding /mnt/data/mongodb directory.
Command Knowledge
mkdir -p command is used to create multi-level directories in Linux. The specific meaning is as follows:

mkdir: command to create a directory.
-p: recursively create directories; if a level in the path does not exist, it will automatically create all missing parent directories.
Enter the root directory and create the data storage directory. The command is as follows:
mkdir -p /mnt/data/mongodb/mongodb8/data/dbNext, create the log file directory. The command is as follows:
mkdir -p /mnt/data/mongodb/mongodb8/data/logPermissions
Grant read and write permissions to the directory. The command is as follows:
cd /mnt/data/mongodb/mongodb8/
chmod -R 666 data
Create Configuration File
In the MongoDB directory (at the same level as bin), execute the following command
vim mongodb.confAfter executing the edit command, copy the following content into the file
# mongod.conf

# for documentation of all options, see:
#   http://docs.mongodb.org/manual/reference/configuration-options/

# Where and how to store data.
storage:
  # The directory where the mongod instance stores its data. The storage.dbPath setting only applies to mongod
  dbPath: /mnt/data/mongodb/mongodb8/data/db
  #journal:
    # Enable or disable persistent logging to ensure data files remain valid and recoverable.
    #enabled: true

# where to write logging data.
systemLog:
  # Specifies the target for all log output from MongoDB as a file
  destination: file
  # When the mongos or mongod instance restarts, it appends new entries to the end of the existing log file
  logAppend: true
  # The path to the log file where mongod or mongos should send all diagnostic log information
  path: /mnt/data/mongodb/mongodb8/data/log/mongod.log

# network interfaces
net:
  port: 27017
  # To allow remote connections, specify the IP; 0.0.0.0 means no IP access restrictions
  bindIp: 0.0.0.0

processManagement:
  # Enable daemon mode to run mongos or mongod processes in the background.
  fork: true

#sharding:

## Enterprise-Only Options:

#auditLog:
Ensure the above data is correct, then exit and save the file
After confirming, press the esc key and type ":wq" to save and exit.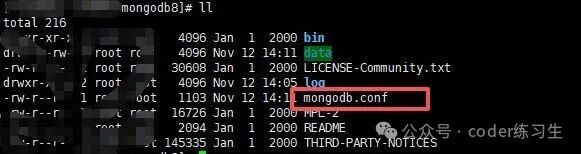
Modify Configuration File
After completing the above content, modify the configuration file
Execute the command
vim /etc/profile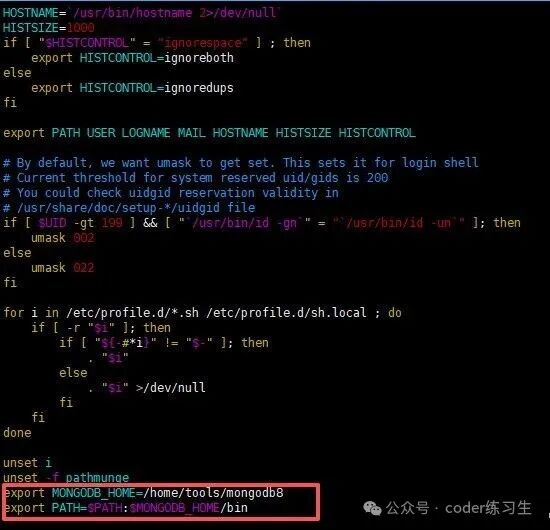
In the screenshot above, I just wrote according to the directory I uploaded and the extracted data. Fill in according to your actual directory.If there are other environment variables in front, you can separate them with “:”. The content is as follows:Add the following commands:
export MONGODB_HOME=/mnt/data/mongodb/mongodb8
export PATH=$PATH:$MONGODB_HOME/bin
Enable New Configuration File
source /etc/profileStart Service
Execute the following command. Replace the configuration file with your own directory structure.
mongod --config /home/tools/mongodb8/mongodb.conf Errors
If your version does not match the version provided on the official website, you may encounter the following error. Replace the corresponding version of the compressed package on the official website.Pay attention to the corresponding version.
Error Message
mongod: error while loading shared libraries: libssl.so.1.1: cannot open shared object file: No such file or directoryAnother error:

Connect to Database
If you are using the Navicat tool, you do not need to install mongo shell; otherwise, you can install the client to view the data.
At this point, the installation of MongoDB is complete.Feel free to leave comments and engage in discussions in the comment section below.