Skip to content
The Raspberry Pi has won the love of users with its compact size and various playability. If you are not familiar with the Raspberry Pi, I recommend you check out previous articles.
Open Source Hardware Raspberry Pi (1) Getting to Know Raspberry Pi and Its Applications
The Raspberry Pi can also be used as a portable windows computer, allowing you to edit documents, create ppts, spreadsheets, etc., making it a blessing for those with light office needs. It can also be used to learn programming, configure environments, install IDEs, and connect a wireless keyboard and mouse to learn algorithms. You can also install media software, connect to a projector or TV, and watch TV or listen to music.
1). Only the arm version of Win10 can be installed.
2). During installation, exit 360 and other security software, otherwise it will affect the image writing.
1). Raspberry Pi arm version Win10
If you do not have the Raspberry Pi win10 image, you can reply “Raspberry Pi win10 image” to the public account.
2). Raspberry Pi dedicated image flashing tool
If you do not have the win10 flashing tool, you can reply “Raspberry Pi win10 tool” to the public account.
4. Unzip the Win10 flashing tool (hereafter referred to as WoR)
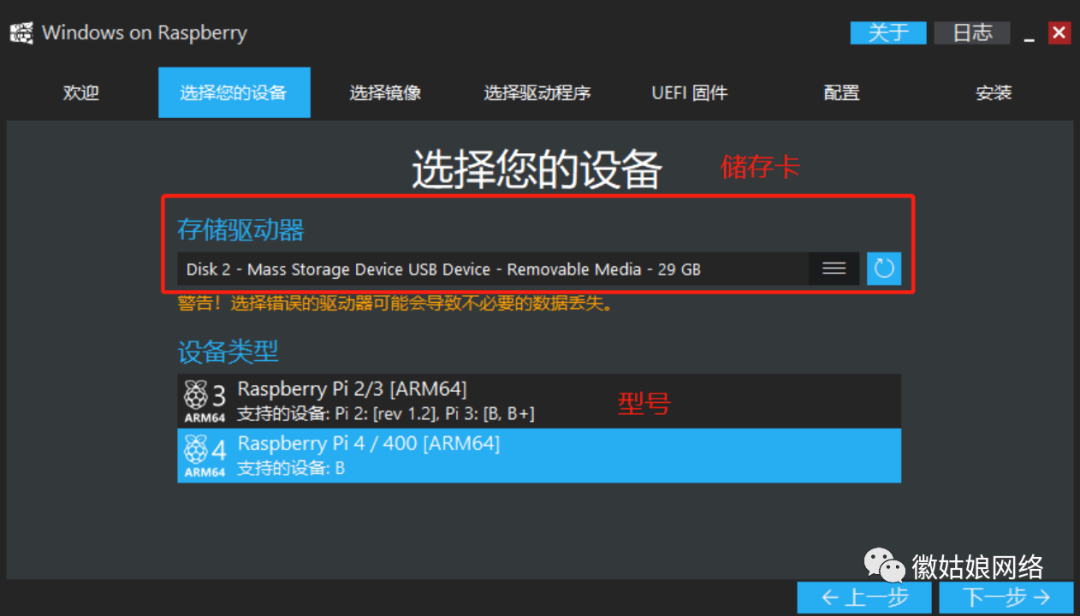
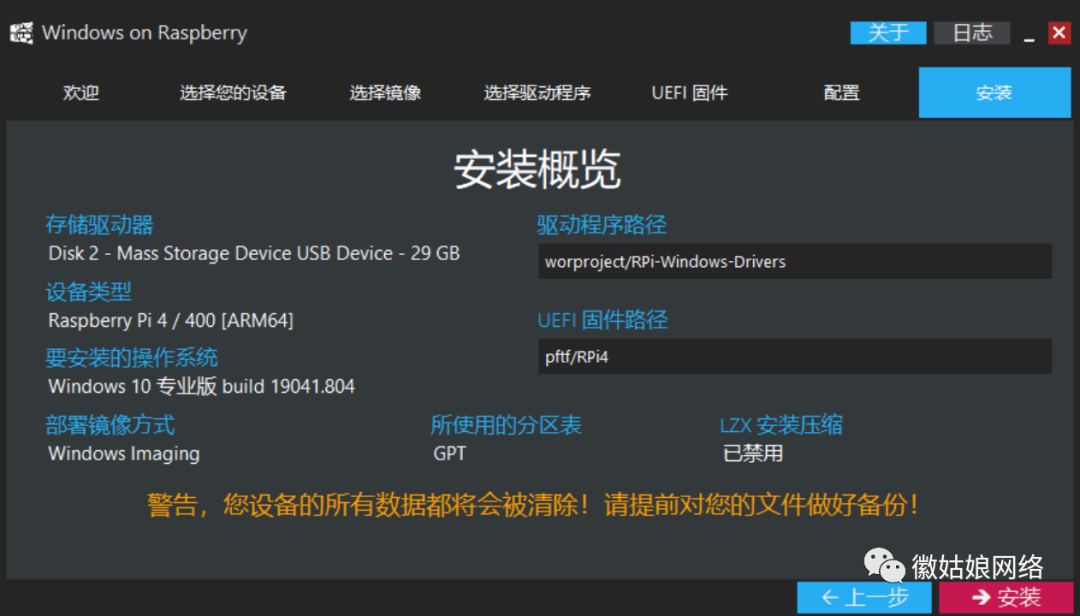
Note: Be sure to pay attention to the choice of storage card, otherwise it may format your mistakenly operated disk or storage device.
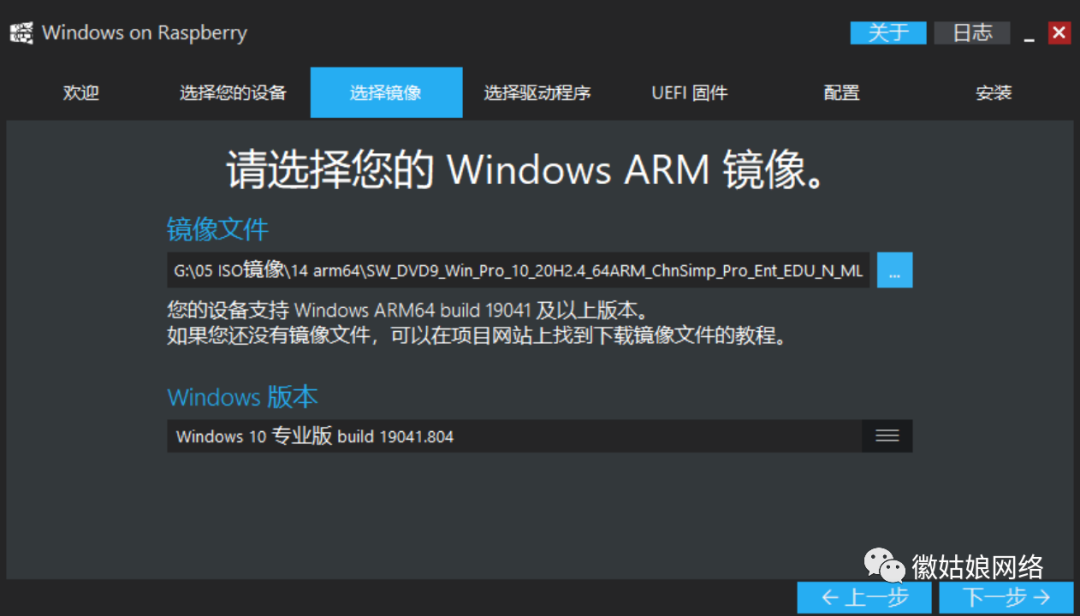
Select the downloaded image, the professional version is recommended.
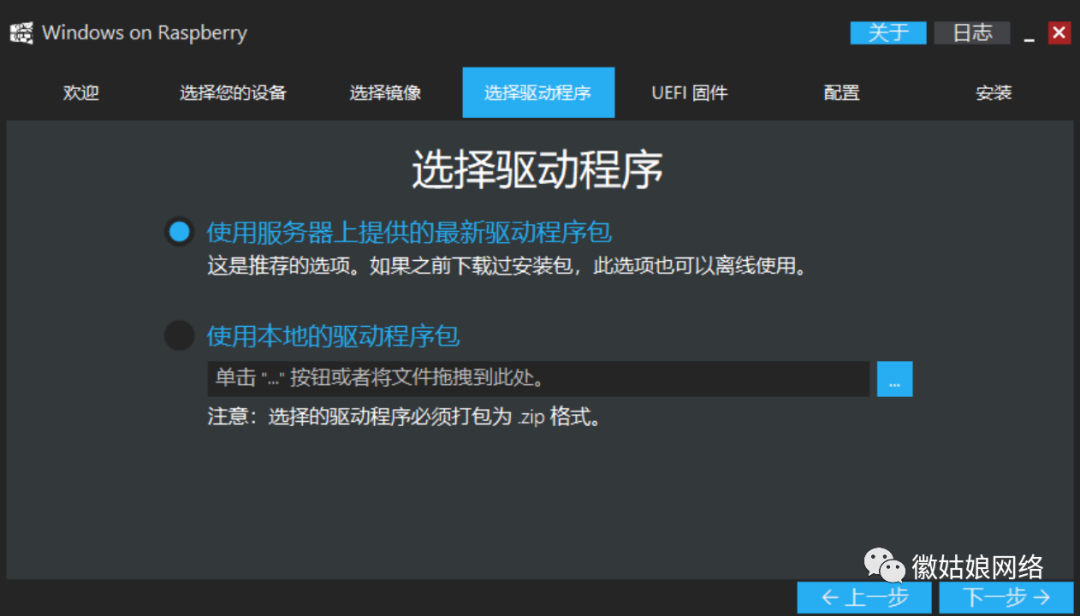
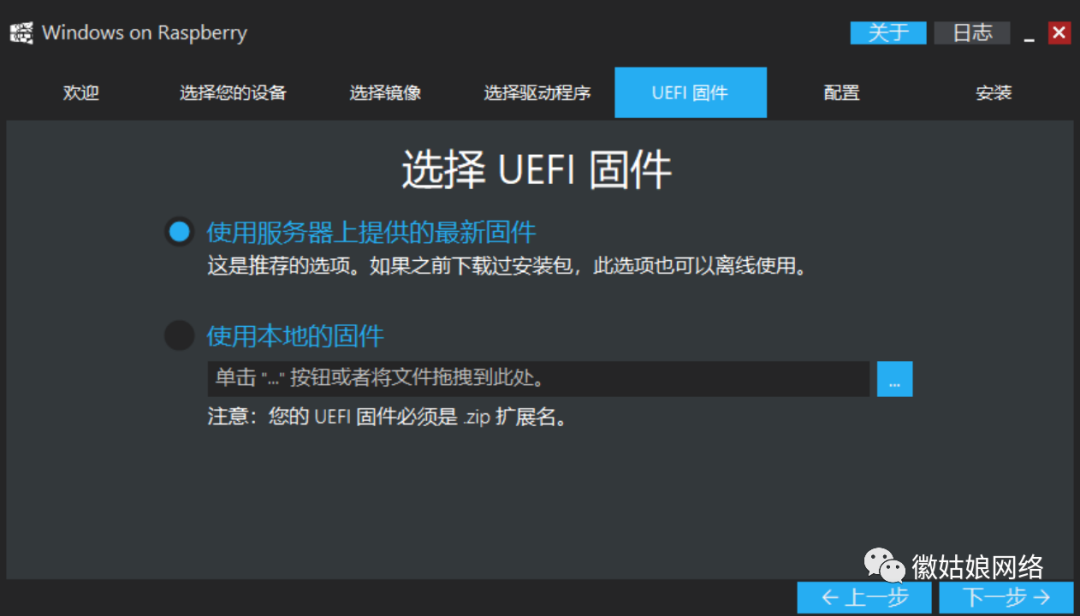
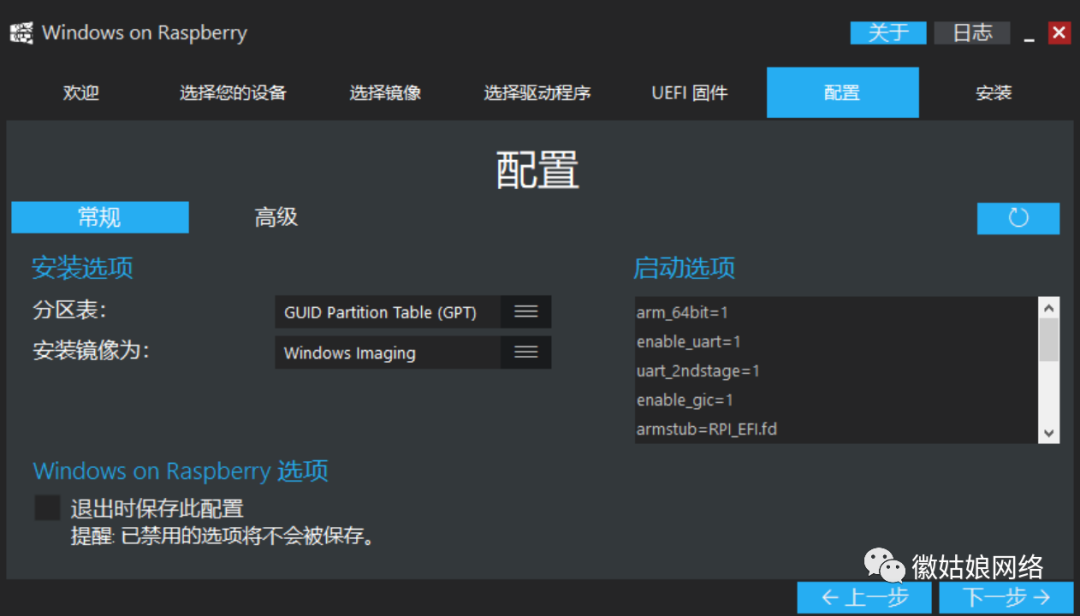
Keep the default configuration, do not change it randomly.
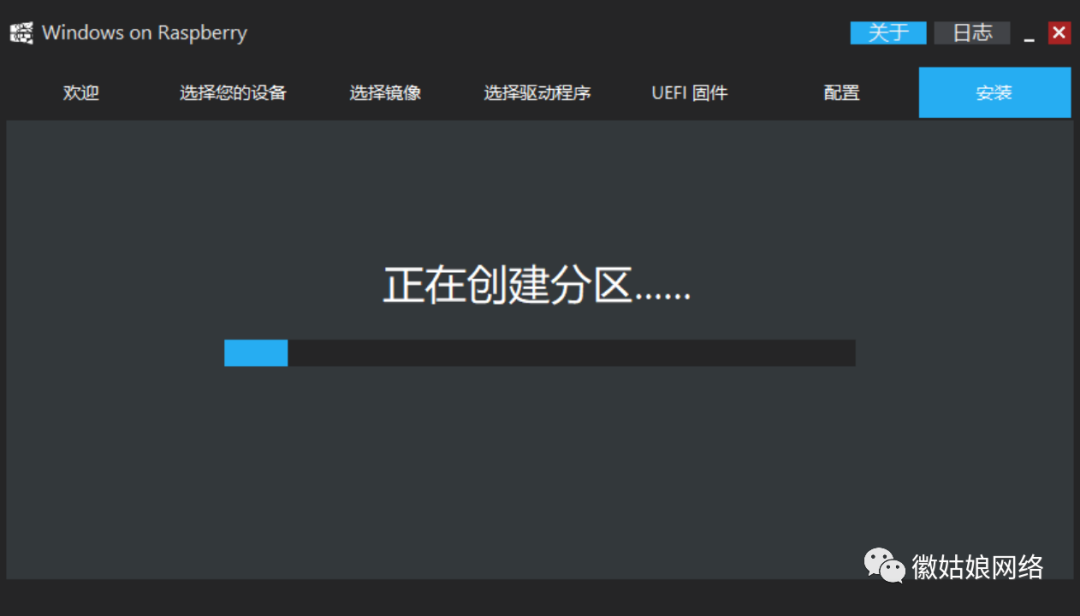
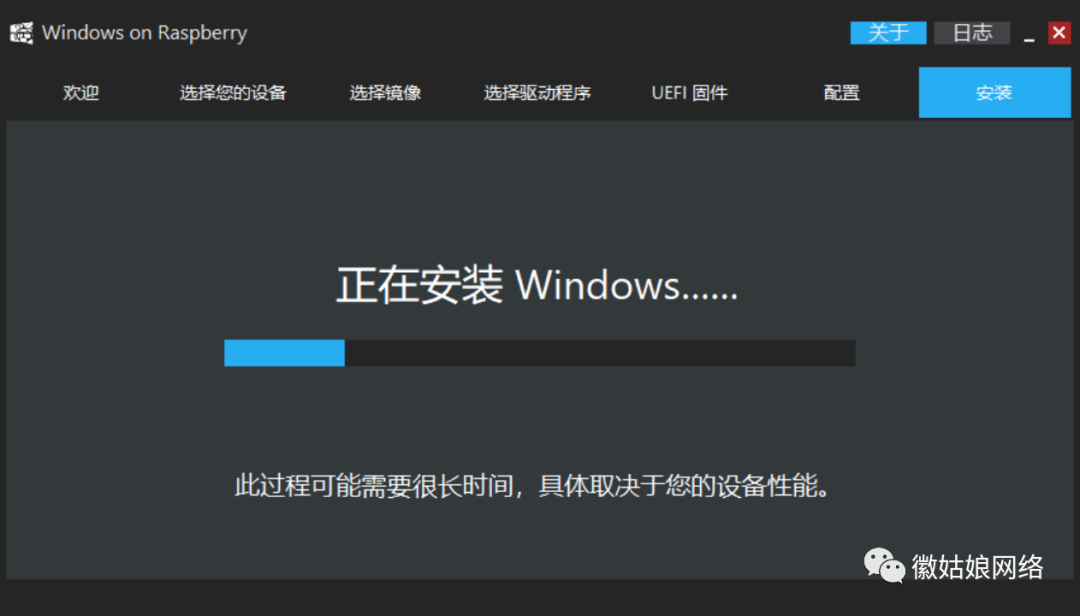
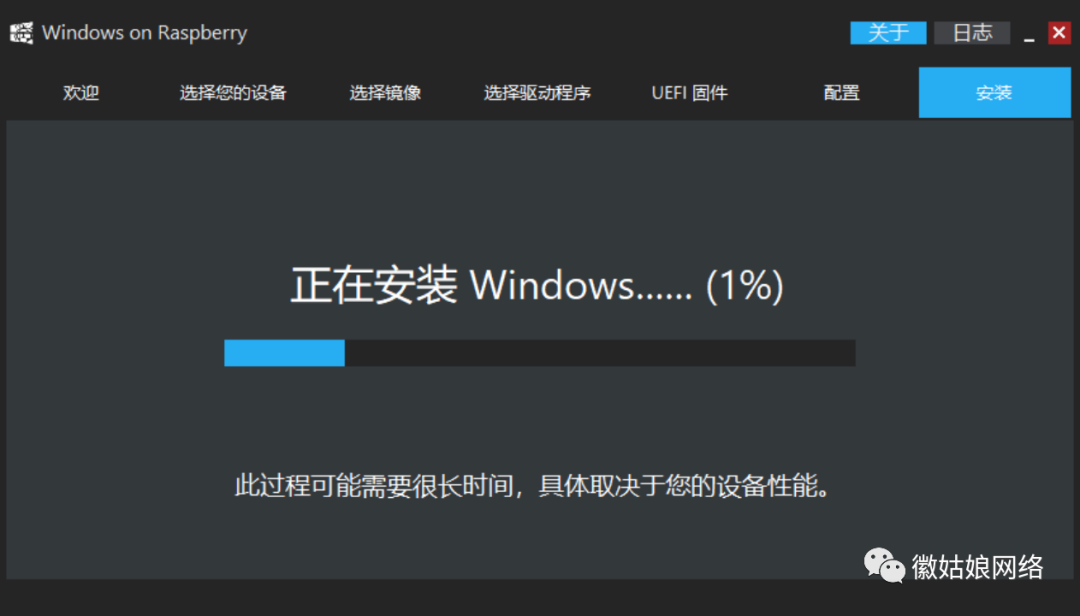
Wait for windows installation to complete
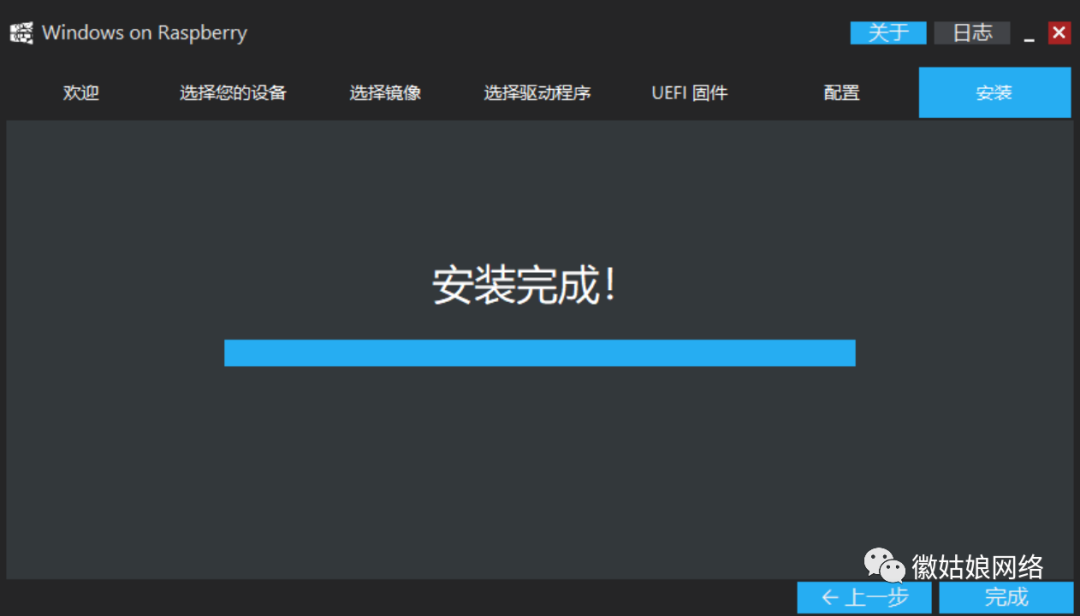
Installation complete, insert the storage card into the Raspberry Pi.
Note: Up to this point, it does not mean that you can use it by turning it on; you still need to configure the Raspberry Pi to enter the system.
5. Configure the Raspberry Pi
When the Raspberry Pi Logo appears, press ESC to enter the boot BIOS, and you need to modify the following items
5.1 If you are using a 1080 monitor, enable 1080 in the BIOS.
5.2 Set the storage card as the first boot item
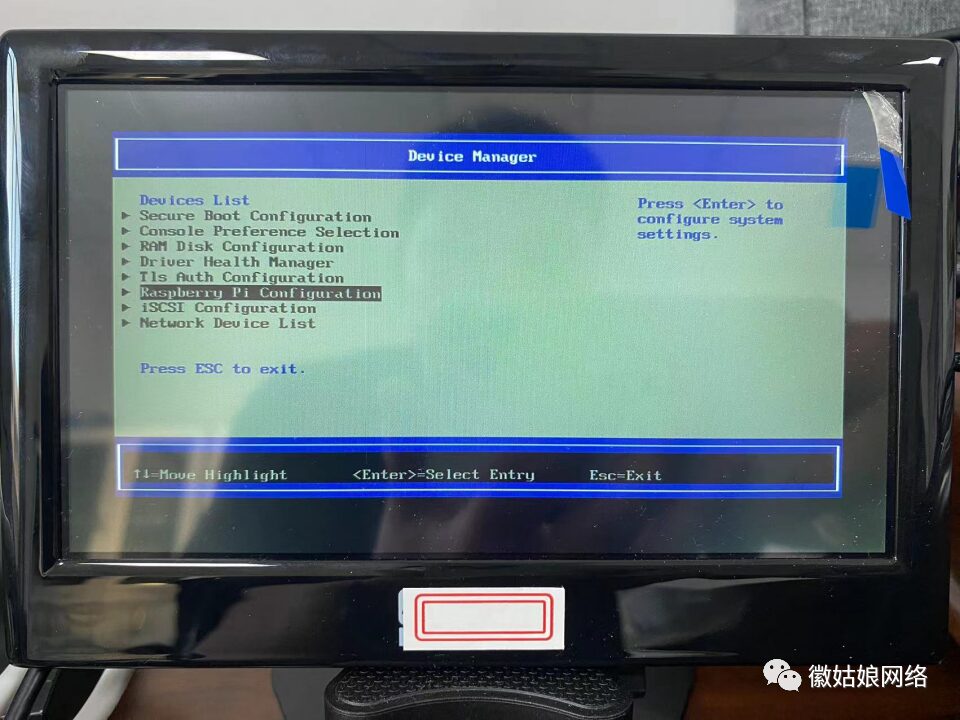

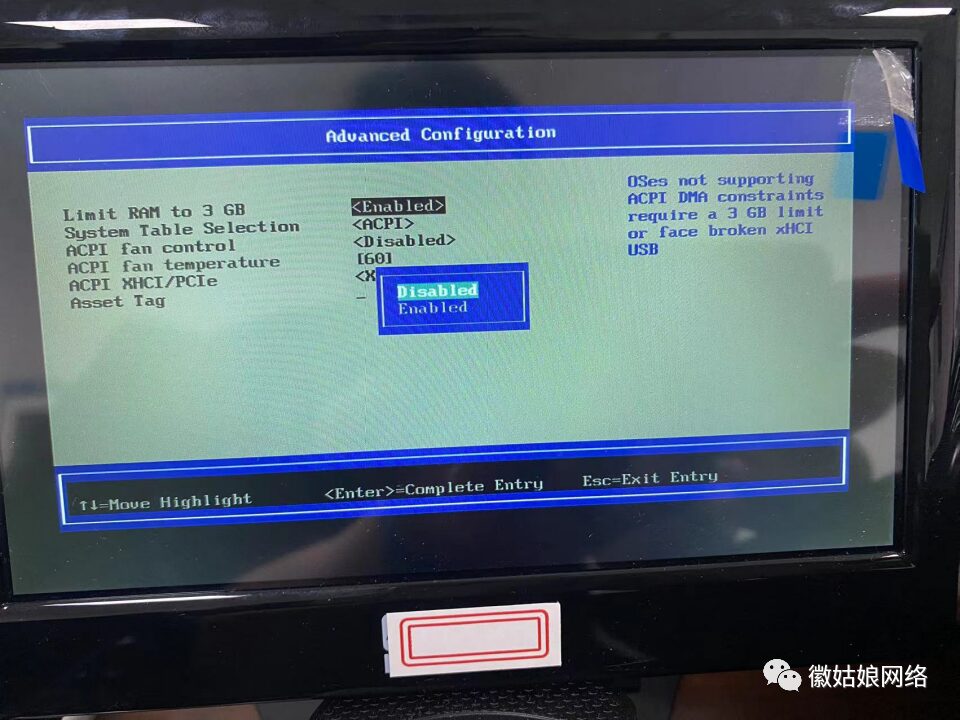
5.3 Disable the Raspberry Pi 3GB memory limit
6. Restart the Raspberry Pi
Press ESC to exit, wait for the prompt, and press Y to confirm; the Raspberry Pi will restart.
At this point, you can normally start and wait for those words
“Though we are thousands of miles apart, we are still close at heart”
Wish you a pleasant experience!