
The printer is a common office device. When it shows an offline status, it cannot connect to the computer for printing. The offline status usually occurs when it was previously functioning normally.
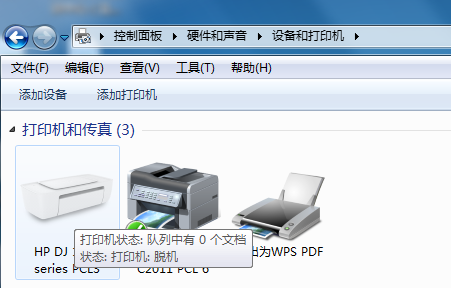
1. Common Reasons for Printer Offline Status
1. The printer data connection cable is poorly connected or loose, causing a failure to connect.
2. The printer is turned off and not connected.
3. The printer is set to ‘Use Printer Offline’ status, preventing connection for printing.
4. The network printer has changed networks, resulting in different network segments, making the network printer unable to connect.
2. Solutions for Offline Status
1. Replace the printer connection cable and retest, ensuring the connection interface is properly connected.
2. Check if the printer is turned off, and restart it to test the connection.
3. Check if the connected printer is set to ‘Use Printer Offline’:
(1) Open the Control Panel and find the sub-option ‘View Devices and Printers’ under ‘Hardware and Sound’
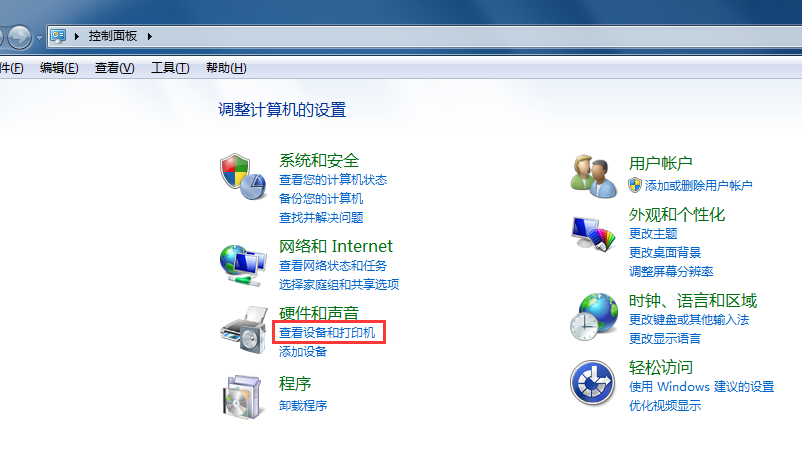
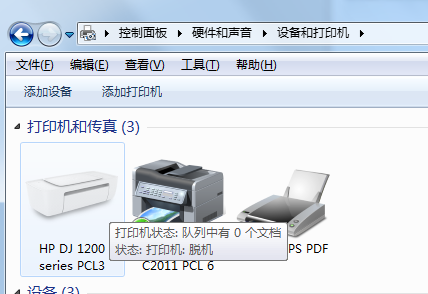
(2) In the Devices and Printers list, find the corresponding offline printer, right-click on it, and select ‘See What’s Printing’
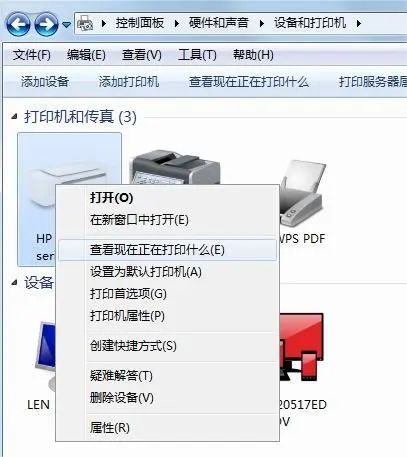
(3) After opening, click ‘Printer’ and uncheck ‘Use Printer Offline’
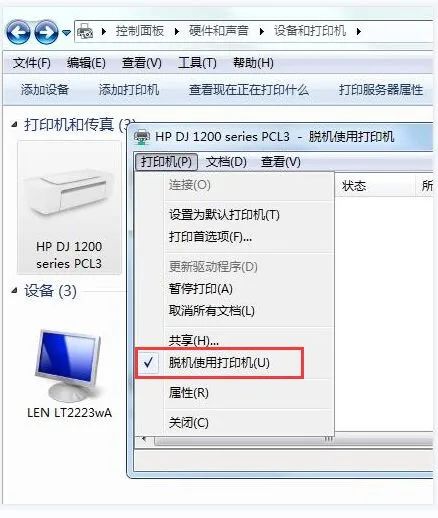
4. Check whether the network printer’s network segment and the computer’s network segment can communicate, and change the printer’s network IP accordingly.
(1) Open the Control Panel and find the sub-option ‘View Devices and Printers’ under ‘Hardware and Sound’
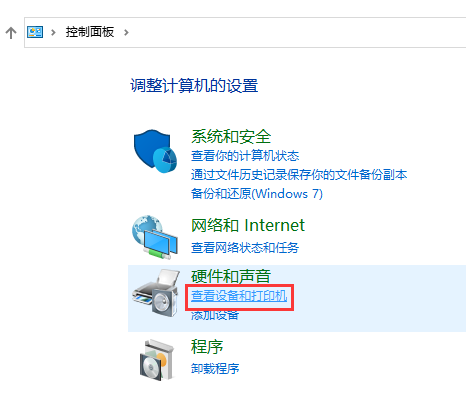
(2) Find the corresponding offline printer, right-click, and select ‘Printer Properties’
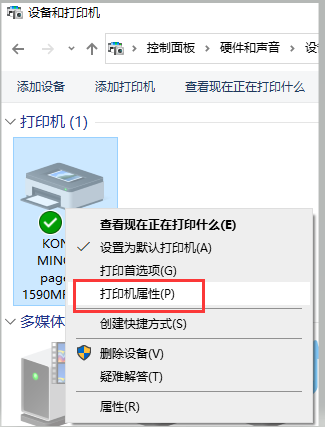
(3) After entering the printer properties, select ‘Ports’, check the current printer IP, and then go into the printer settings to change the printer IP
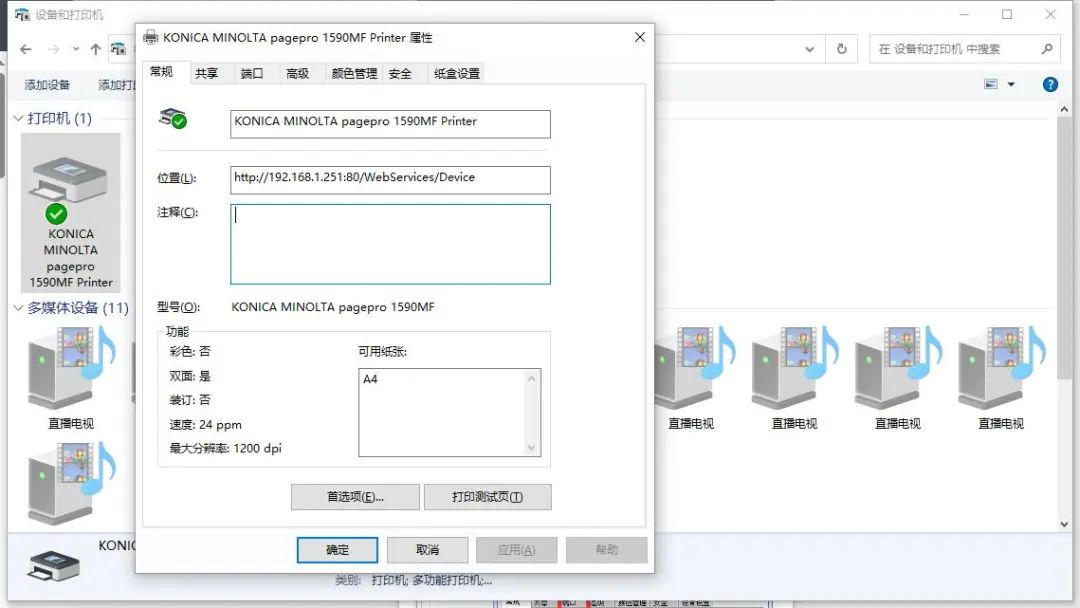
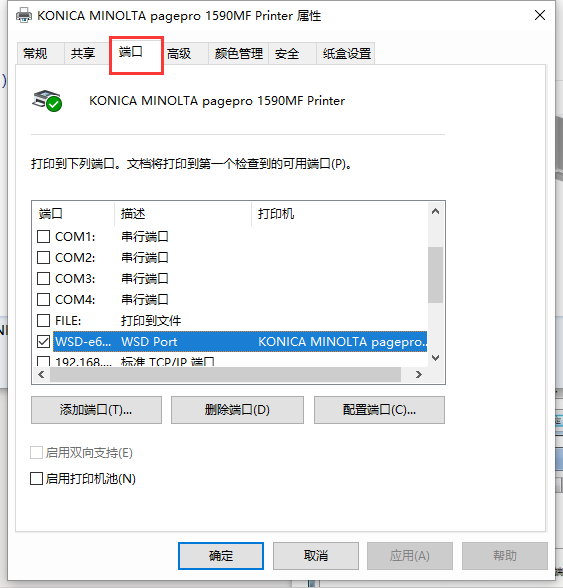
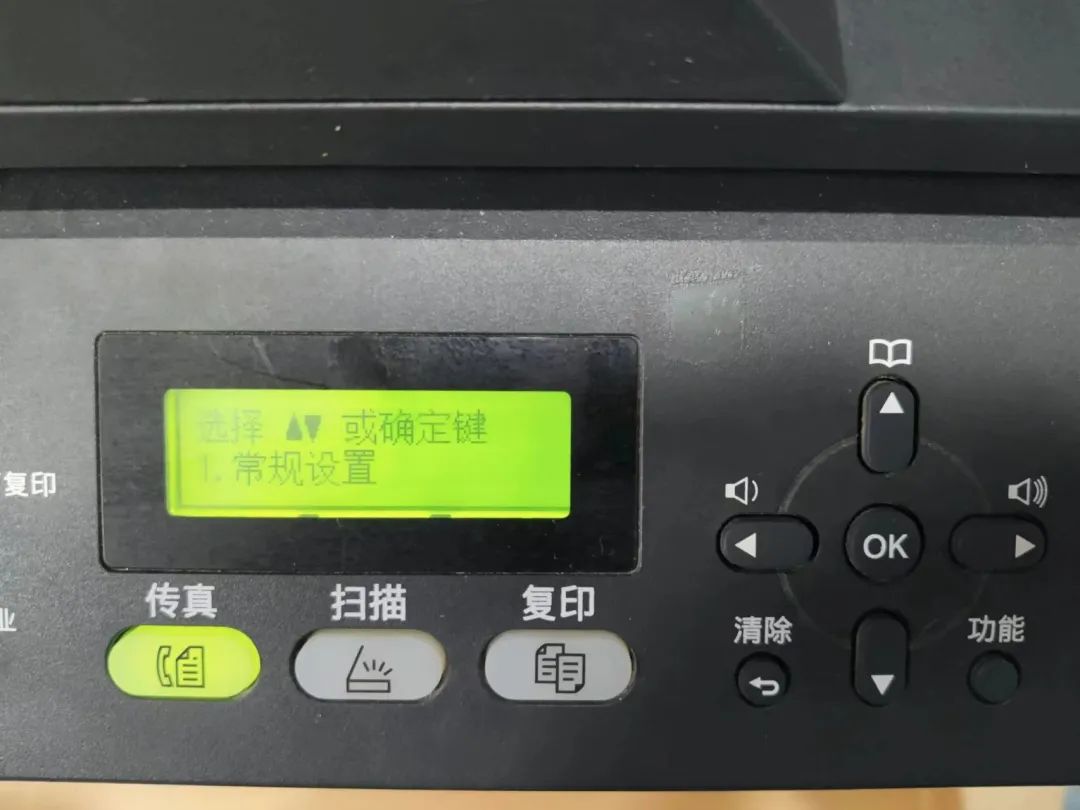
(4) Enter the printer settings interface and change the printer’s IP to a communicable network segment. The method to change the IP varies by printer, but the settings are generally similar. Below is an example using the Konica Minolta 1590MF.
First, press the ‘Function’ key to display the settings menu, then select ‘General Settings’
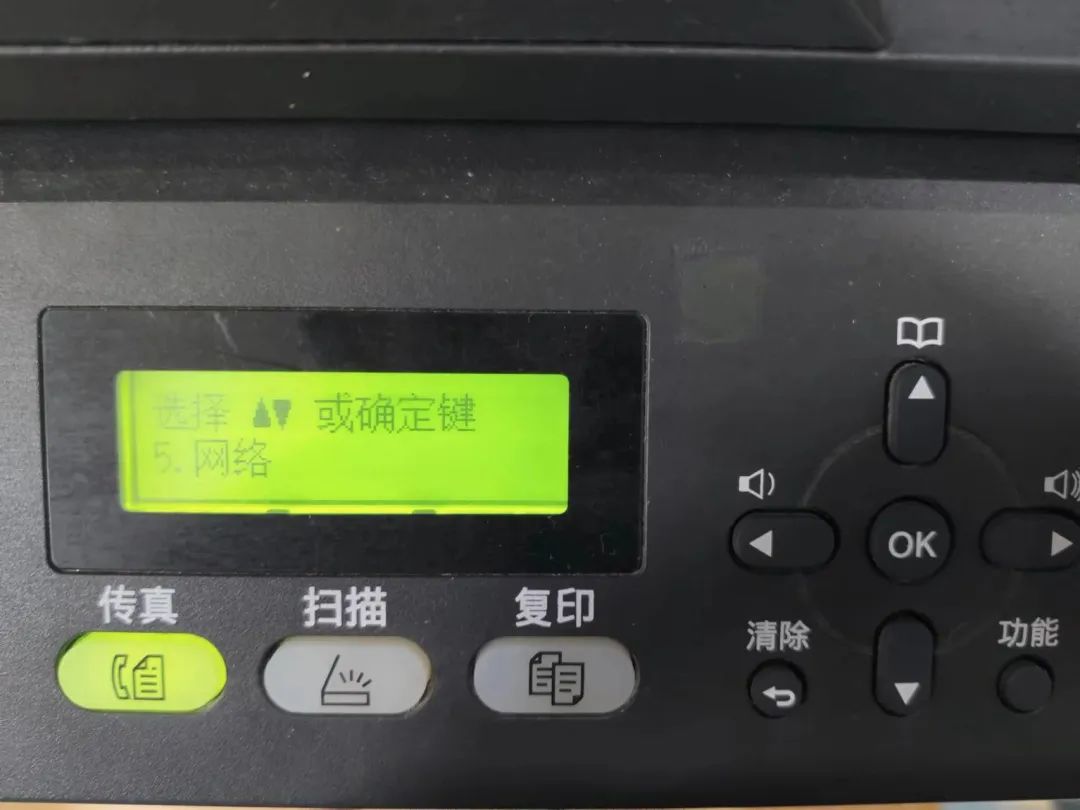
(5) In ‘General Settings’, find ‘Network’ and press ‘OK’ to enter the options inside
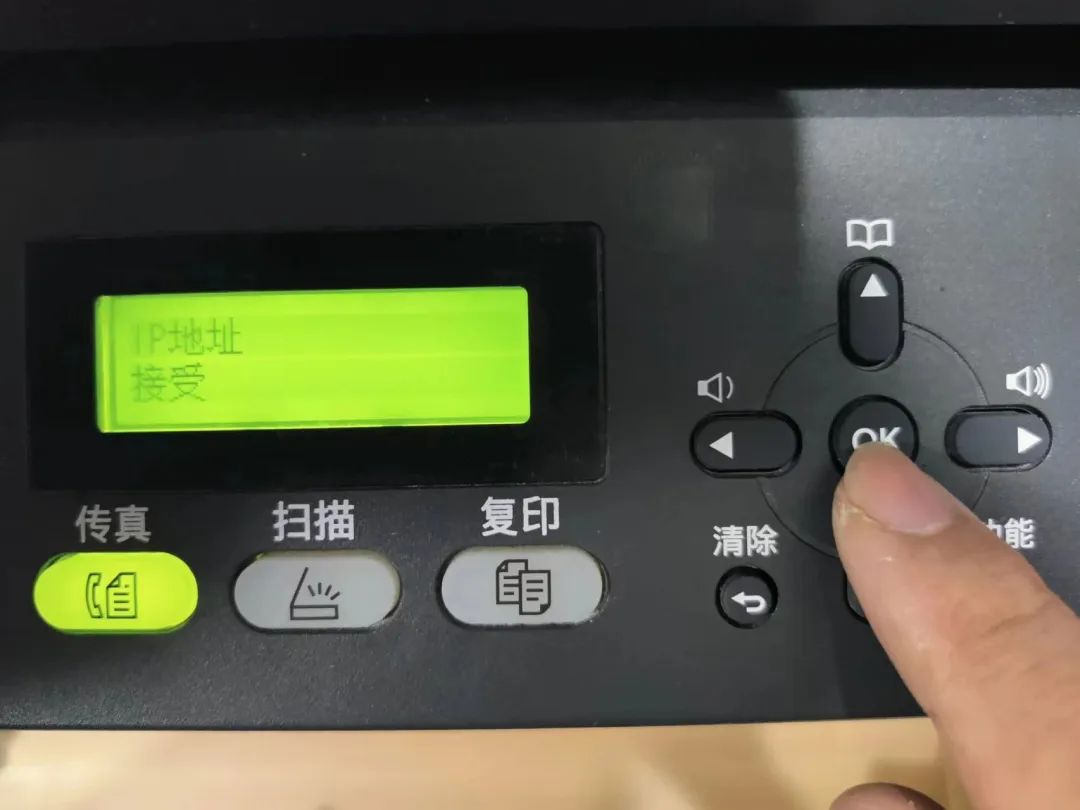
(6) In the ‘Network’ menu, find ‘IP Address’ and press ‘OK’ to enter the ‘IP Address’ to change it
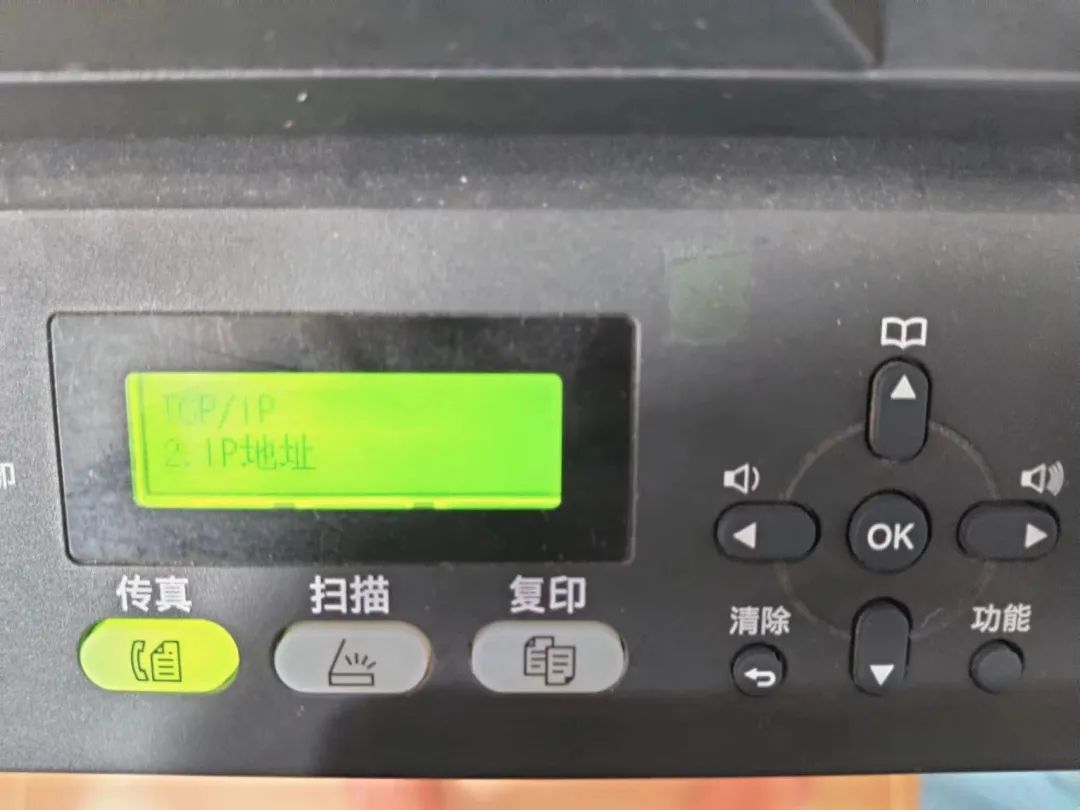
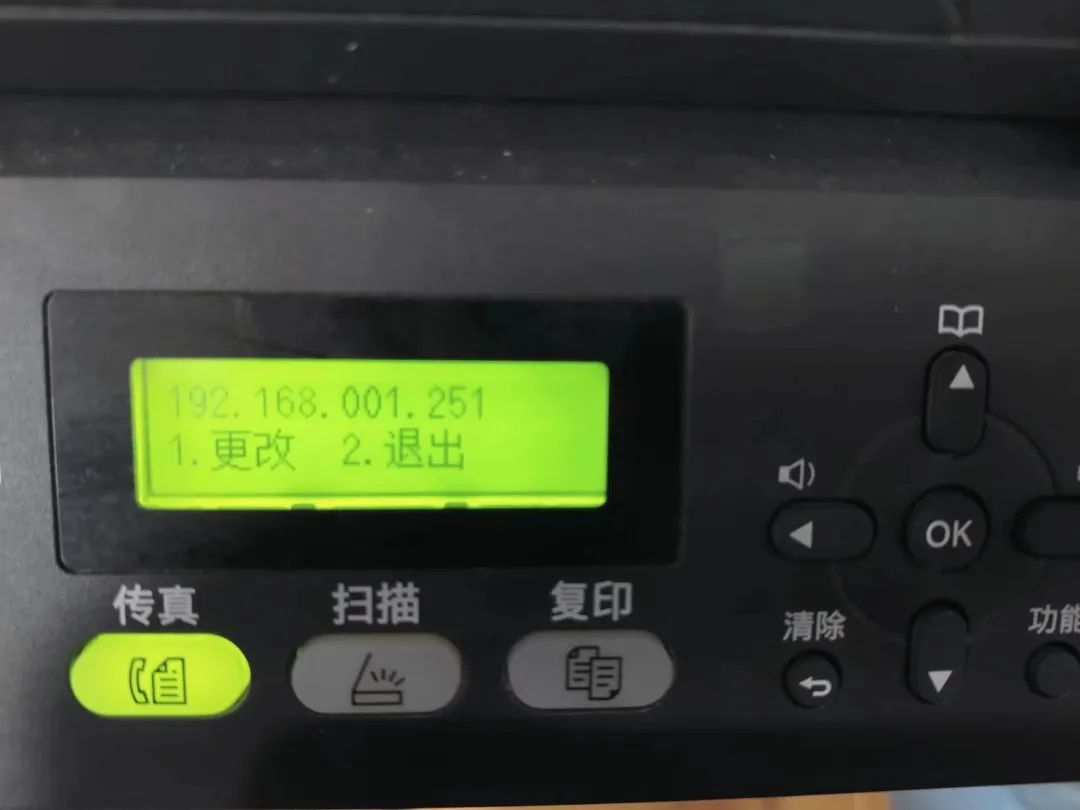
(7) After completing the changes, it will display ‘Accepted’, indicating that the IP settings have been saved. This completes the printer IP change process.
Finally, if the test page responds, it indicates that the printer has returned to normal operation.
END