How to measure leakage current with a multimeter, methods for measuring leakage current with a multimeter.
Using the continuity setting of the multimeter, measure between the ground and the circuit being tested. If the meter shows a resistance value, it indicates that there is no insulation.
However, in practice, to measure leakage current, a megohmmeter should be used, which is also known as a shake meter. This is because the voltage across the probes of a multimeter during measurement is very low, generally not exceeding 9V, which cannot break down the gap for leakage current. A megohmmeter can reach over 1000V. Connect the multimeter leads to the corresponding terminals for measuring AC voltage, then use one probe to measure the neutral wire or ground wire, and the other probe to measure the suspected leakage point. If the reading is 0, it indicates no leakage and no voltage! If the reading is 220V or any voltage exceeding 36V, it indicates leakage, meaning this point is unsafe!
Use the resistance setting of the multimeter at 200M to measure insulation resistance, first determining which wire is leaking or which two wires are shorted.
Methods are as follows:
Measure the insulation resistance between the live wire and the neutral wire, measure the insulation resistance of the live wire to the ground wire, and measure the insulation resistance of the neutral wire to the ground wire. If there is a short circuit, the insulation resistance will be close to zero.
Once you know which wire is leaking, use a segmented search method to gradually narrow down the fault range.
Alternatively, use the elimination method by separating the circuit and testing it segment by segment.
How to distinguish between neutral wire and live wire using a multimeter.
Generally speaking, to identify the neutral wire and live wire in the mains, it is not advisable to use a low-voltage test pen. Can a multimeter distinguish between live wire and neutral wire?
The answer is yes, the method is as follows:
Set the multimeter range switch to the AC voltage setting of 250V or 500V. Connect the black probe to a wet ground such as a water pipe or damp floor, and touch the red probe to the power line or power socket. The higher voltage reading on the multimeter indicates the live wire, while the lower or zero voltage reading indicates the neutral wire.
Using a digital multimeter to measure the neutral and live wires.
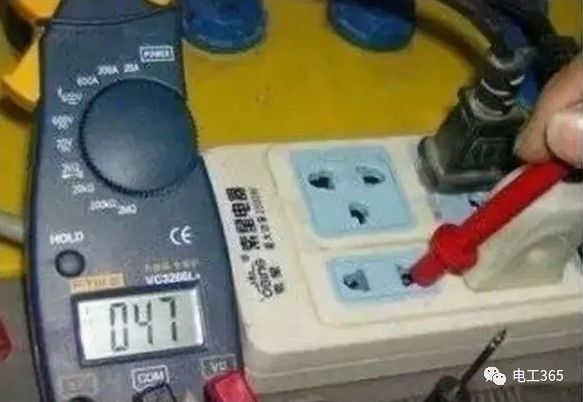
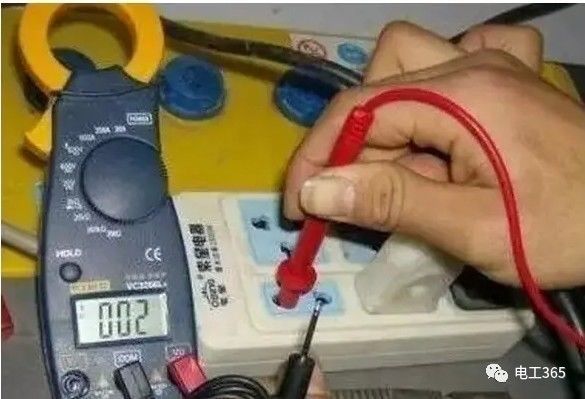
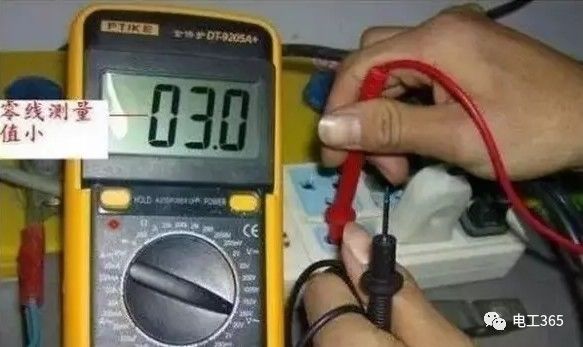
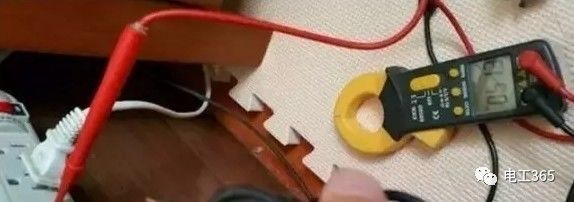
It is very convenient to measure the neutral and live wires in your home with a multimeter, as long as you use a digital multimeter, clamp meter, or analog multimeter in the AC voltage range. Set the multimeter range switch to the AC voltage range (most multimeters have this function, with ranges from 200mV to 750V; generally, select the 200V range, and if the clamp meter does not have a 200V range, select a larger range).
For an analog multimeter, select a smaller range, such as 10V or 100V. Then insert the red and black probes into the V/COM ports (usually used for measuring 220V voltage in household appliances). Wrap the black probe wire around your left hand 2-3 times (as shown in the picture), and of course, the more wraps, the better. Note: At this time, do not let the metal tip of the black probe touch your hand to prevent electric shock. Then you can start testing. Use the red probe to measure the socket or the neutral and live wires, and record the results of the two measurements. There will definitely be one high and one low voltage reading; the higher voltage reading is the live wire, and the lower voltage reading is the neutral wire. If you measure the ground wire, it should show an even lower voltage or no voltage at all (depending on whether your ground wire is connected!). The difference in voltage readings between the neutral and live wires is clear at a glance.
Hydraulic Ring

Communicate with Hydraulic Brother(QQ/WeChat: 26489494)