
MAKER:diyperspective/ Translated by: Fun Endless
Scrolling text displays are widely used in various occasions such as billboards, train stations, bank counters, toys, and even wearable electronic badges…
Have you considered DIYing this feature? It is quite simple for Arduino, as you can use the existing Arduino libraries to display letters from A-Z, which is quite nice for scrolling some English messages~
First, let’s watch a video to get a feel for it:
The retro wooden case paired with the LED dot matrix module looks more like a sentimental piece of art!


Materials List
Arduino Nano x1, 18×8 LED Display x2, Lithium Battery (18650) x1, Battery Holder (18650) x1, Boost Power Module x1, Switch Button x1, Breadboard x1, Wires x several, 6mm Wooden Board x1, Small Wood Screws x several, Clips x several, Multi-functional Ruler x1, Hot Glue Gun x1, Electronic Caliper x1, Soldering Kit x1, Wire Cutter x1, Wire Stripper x1, Silicone Pads x4, Wood Glue, Wood Oil, Epoxy, Tape, Sandpaper, Silicone Feet, Drill Bits, Scroll Saw, Hacksaw, Tape Measure, Knife
Making the Wooden Case
1. Cut the wooden board.
 Create a simple case by cutting out the sides, top, and bottom of the case. Use tape to secure the edges.
2. Cut with a scroll saw

The scroll saw makes it easy to cut identical wooden pieces, which is very practical.
3. Glue the wooden frame


Use tape and glue to stick all the edges together.
4. Further process the front and back wooden pieces

Continue cutting small wooden pieces for the front and back. Drill holes in the front wooden piece to reserve installation space for the LED display. To make the cutting lines prettier, I used a scroll saw.
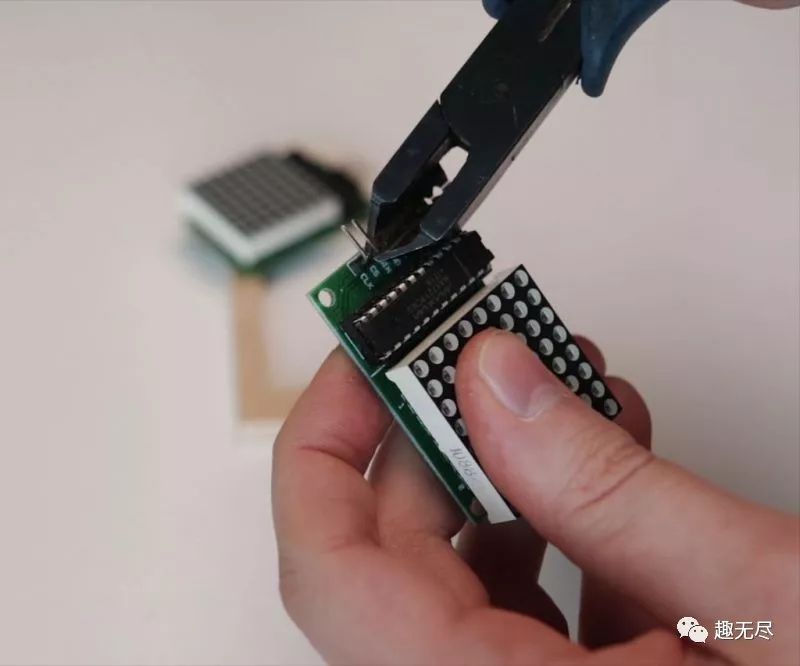
5. Create a slot for the chip


Wire the chip of the LED display, ensuring that the display is flush with the front panel.
Debugging Voltage


Before soldering the voltage booster to the circuit, ensure that the output voltage from the potentiometer on the chip is adjusted to 5V.
Software Section
1. Download and install the Arduino software.

https://www.arduino.cc/en/Main/Software. If you receive the prompt in the image, please agree and install. (Code and library http://bit.ly/arduinocodelibrary)
2. Download other files.

The code uses other Arduino libraries.
The link is:
https://github.com/riyas-org/max7219. Unzip and copy the “MaxMatrix” folder to the “libraries” folder of Arduino.
3. Arduino software setup


a. Launch the Arduino software, and select the type of Arduino. In this project, we are using Arduino Nano. b. Open the Serial Monitor window. If there is a red error as shown in the image, you need to select the correct USB port connected to the Arduino. c. Try different ports until you can accurately open the Serial Monitor window without errors.
4. Upload the code


Copy the entire code into a new empty sketch file. Press the upload button and save the project file. The program will start compiling/generating code and begin to upload.
5. Error handling during upload
 If your upload takes a long time (15 seconds+) and you receive a red error message as shown in the image, you need to change the processor from “ATmega328P” to “ATmega328P (Old bootloader)”.
Then the upload will be successful.
6. Configure display


As shown in the image, adjust the custom display text, scrolling speed, and display brightness.
Hardware Section
1. Battery usage time.

Using a 3000 mAh battery, the display can run for more than 20 hours at brightness level 5, 14 hours at level 10, and 12 hours at level 15. You can also power it using a wall charger.
2. Display cutting lines.


The display cutting pins and soldering wires are as follows:
From the top of the first display – VCC to VCC – bottom of the second display. From the top of the first display – GND to GND – bottom of the second display. From the top of the first display – DOUT to DIN – bottom of the second display. From the top of the first display – CS to CS – bottom of the second display. From the top of the first display – CLK to CLK – bottom of the second display. Then use hot glue to stick the display to the wooden board.
3. Drilling holes.


Drill a hole for the USB mini cable, and another hole for the power button.
4. Battery holder.


I glued two squares together to prevent the back part of the glued wooden block from loosening the top of the case inward. And fixed the battery holder. Let the glue cure for 30 minutes.
5. Soldering wires.

Solder five wires to the bottom of the first display.
6. Connect the display to Arduino.

The wires of the LED display connect to Arduino:
+ expand source
The wires of the booster (VOUT+ and VOUT-) will connect to (VIN+ and GND-).
7. The front small wooden piece.

Glue small pieces inside the case for fixing, making it easier to paste the front part of the LED display.
8. Final soldering.

Previously, I had already soldered the wires of Arduino’s VIN and GND to the VOUT+ and VOUT- of the booster. Now, I must solder two additional wires to the power switch.
Connect one wire of the power switch to the positive terminal of the battery, and the other to the VIN+ of the booster. Connect the negative terminal of the battery to the VIN- of the booster.
Testing

First, test the working condition of the panel. If all is well, you can wrap the booster with tape. I additionally glued a small wooden block, which will help secure the Arduino and fix it with screws.
Completion

Drill holes, secure with screws, and glue the front panel of the case. Finally, polish with wood oil and stick silicone feet on the bottom.
Manufacturing completed! Come and try it!
via instructables.com/id/Scrolling-Text-Display-With-Arduino-A-to-Z-Guide
Links in the text can be clicked to view the original text at the end

More exciting content
Drawing Robot Made with Raspberry Pi
Making a “Pocket TV” with Raspberry Pi
Creating a Decent NAS with Raspberry Pi
DIY WI-FI Remote Control Boat with ESP32 Development Board
Raspberry Pi (Raspberry Pi) 3rd Generation A+ Version Released
Petoi Nybble: A Blessing for Raspberry Pi Cat Slave Players
Raspberry Pi UPS: Uninterruptible Power Supply Modified with a Power Bank
