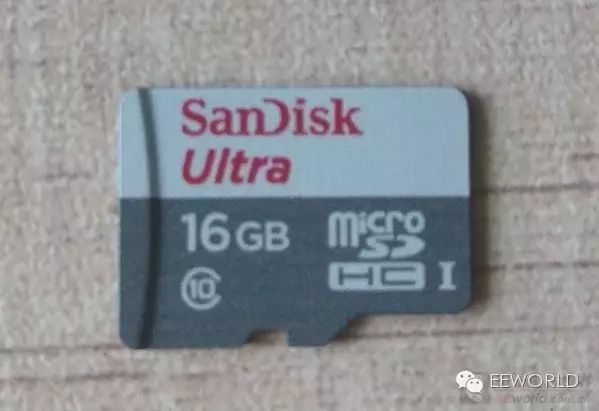
In the unboxing review, I got an initial understanding of the Raspberry Pi, and now I am going to put it to the test and start my “practical training”. The first time I powered on the Raspberry Pi, I opened its inner world to catch a glimpse of its true form. In the unboxing review, we learned that the brand new Raspberry Pi does not come with a pre-installed operating system, so we need to download an operating system and write it to an SD card to complete the startup. To use the Raspberry Pi, some additional external devices are required: a monitor (optional), a keyboard, and a mouse for input operations. The peripherals to start the Raspberry Pi 3 include: • An SD card, maximum 64GB, recommended configuration is at least 8GB. • Power supply. • Micro USB cable • SD card reader • A TV or computer monitor with an HDMI interface. • HDMI cable Type A. The optional peripherals for starting the Raspberry Pi 3 include: • Ethernet cable • USB keyboard. • USB mouse. Considering the size of the operating system, the capacity of the SD card should be at least 8GB to store the necessary files. Some models of SD cards will perform better, while others may not work at all on the Raspberry Pi. For information on supported SD card models for Raspberry Pi, you can visit http://www.elinux.org/RPi_SD_cards. I used a 16GB MicroSD HC UHS-I card from SanDisk that I removed from an old phone, class 10. The card reader is used to format the SD card and burn the system.

Using the SD card formatting tool SDFormatter recommended by the Raspberry Pi official website, download link https://www.sdcard.org/downloads/formatter_4/index.html, and then use it to format the SD card in preparation for installation.

The recommended power supply for the Raspberry Pi 3 is 5V-2A. My phone charger happens to be 5V-2A, but I have also tried a 5V-1A phone charger, which can meet basic usage.

The monitor used is a Dell UltraSharp U2415, which supports HDMI, DP, and USB expansion.

Everything is ready, and we just need the soul of the system – the operating system. Visit the Raspberry Pi official website https://www.raspberrypi.org/, but in my network environment, I often cannot find DNS and need to refresh again to succeed. On the system download page https://www.raspberrypi.org/downloads/, I found that the Raspberry Pi supports various systems, and of course, we will start our exploration journey with the officially recommended system.

The Raspbian system is the officially recommended first-choice operating system. Its name cleverly combines Raspberry and Debian into one word. Raspbian is developed based on Debian and comes with over 35,000 software packages and integrates a lightweight graphical interface LXDE. Friends who want a convenient and quick start can choose this system. I chose NOOBS, downloaded the offline version, selected the Torrent download, and completed the download with a download tool.

So what is NOOBS? NOOBS stands for New Out-Of-Box Software. It is a tool developed by the Raspberry Pi Foundation called the new out-of-box software to make the first-time use of the Raspberry Pi as simple as possible. NOOBS has two versions: offline/online version and online-only version. The offline version is about 1.08GB and contains both the NOOBS installation program and all available system image files. After downloading the offline version, you can complete the installation without being online. The online installation is only 20MB and only contains the NOOBS installation program. The NOOBS downloaded is a Zip compressed package. Use a decompression tool to extract all the files inside and save them to the root directory of the SD card. The extracted files are shown in the image below.

Then insert the SD card into the slot of the Raspberry Pi. Note that the gold fingers of the SD card should face the PCB board, and push it in all the way until it clicks.

After the system is installed, the next step is to connect the Raspberry Pi and power it on. Connect all peripheral devices, including USB power, monitor, Ethernet cable, USB mouse, and keyboard.

Then turn on the power, turn on the monitor, and start the Raspberry Pi. The NOOBS install interface will appear, indicating that the first startup was successful.


Since this is the first time running NOOBS on the SD card, it may take a long time as the first partition of the SD card needs to be resized to allocate enough space to install the operating system. Since the downloaded offline version of NOOBS defaults to the Raspbian operating system, click the “Install” button in the upper left corner of the menu. A dialog box will pop up asking if you confirm overwriting the contents of the SD card. After confirming, the installation can begin.

The installation process also includes installing NOOBS itself, and the entire installation process may take a long time. During this time, patience is required, and you can only watch the progress bar and the slides above to pass the time. During this time, you can play music on the computer while waiting for the installation to complete. It takes about 15 minutes to complete the installation (but during the first installation, I encountered a problem where it got stuck at 20%, so I waited for an hour, then power cycled and restarted, and continued the installation, which was fine). During this time, do not unplug the power supply or SD card from the Raspberry Pi, as this may damage the SD card.


After the system installation is complete, click the “OK” button to restart, and the Raspbian operating system will load.

Once you enter the desktop of the Raspbian operating system, those who have used Debian or Ubuntu should find it easy to get started.


Use the shortcut Ctrl+Alt+T to bring up the terminal and use scrot to take screenshots.

Access EEworld using the browser on the Raspberry Pi.

Summary: Installing the Raspberry Pi operating system using NOOBS is not very complicated, and the steps are as follows: (1) Download the NOOBS offline version from the official download site “http://www.raspberrypi.org/downloads/”. (2) Use SDFormatter to format the SD card, then extract the NOOBS compressed package and copy all the extracted files to the root directory of the SD card. (3) Insert the SD card into the Raspberry Pi, connect the monitor and keyboard/mouse. Power on the Raspberry Pi and start the installation program. First, NOOBS will automatically partition the SD card, then you just need to select the Raspbian operating system in the “System Selection” menu and click “Install” to start the installation automatically. Then… then just patiently wait for the installation success prompt! (4) After the installation is complete, restart and start the magical journey of the Raspberry Pi.
Welcome to click to read the original text and communicate with the author.
Follow EEWORLD (Electronic Engineering World) WeChat public account: reply “submission”, your original work will have a chance to appear in our WeChat push.
To communicate with more industry peers, please click to read the original text to log in to the EEWORLD forum.

WeChat ID: EEWORLD Forum Activities E 掌握

Follow EEWORLD service number EE benefits at your fingertips


WeChat ID: EEXINRUI Chip Information Sharp Interpretation

