@Getting Started with Embedded Linux Using Buildroot – Part 7 (Final)
- Setting Up Embedded C/C++ Development Environment in Eclipse
- Preparation
- Create a New C/C++ Project in Eclipse
- Configure Cross-Compilation Environment for C/C++ Project
- Setting Up Embedded C/C++ Debugging Environment in Eclipse
- Configure Remote Debugging Environment for C/C++ Project
- Summary
This series will create my first runnable embedded Linux system based on the Buildroot repository provided by Microchip.
This time, I will introduce how to use the cross-compilation tools generated by Buildroot in Eclipse to set up an embedded C/C++ development environment, supporting graphical development with Microchip EGT, and finally explain the configuration for remote debugging.
Setting Up Embedded C/C++ Development Environment in Eclipse
Preparation
<span>Download the Eclipse IDE for Embedded C/C++ Developers. Choose the Linux platform zip package that does not require installation:</span> Download Link Eclipse IDE for Embedded C/C++ Developers
Create a New C/C++ Project in Eclipse
<span>Open the downloaded Eclipse zip package, extract it, and then open it:</span>
Create a New C/C++ Project
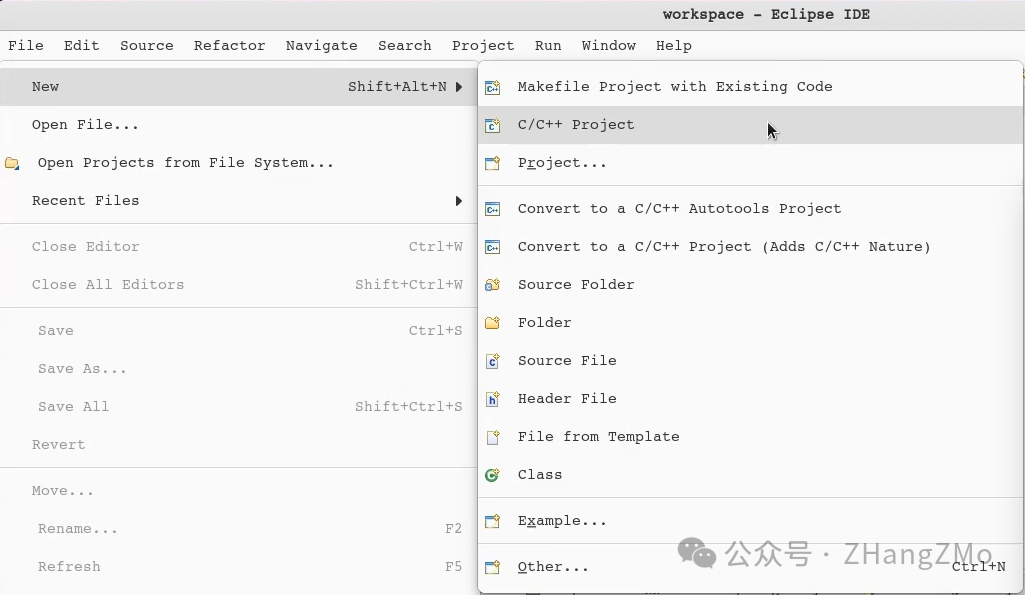
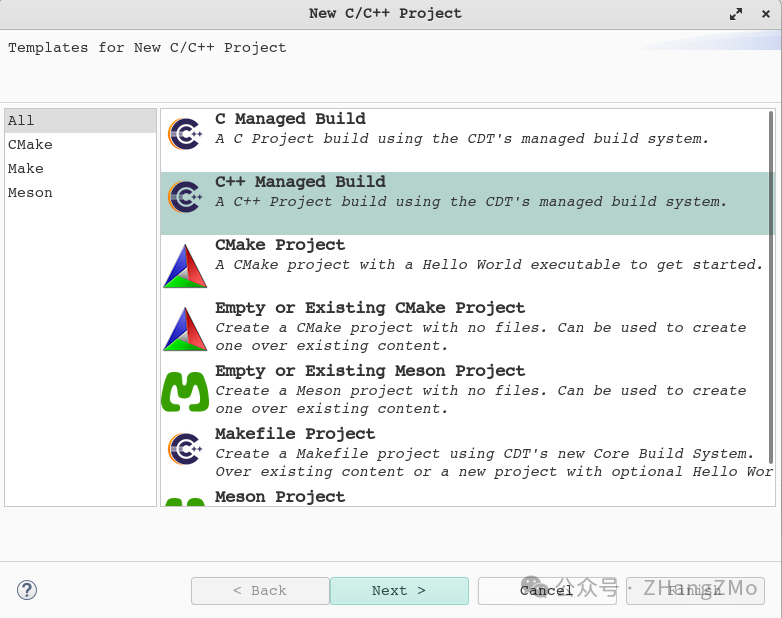
C++ Managed Build, then select Next
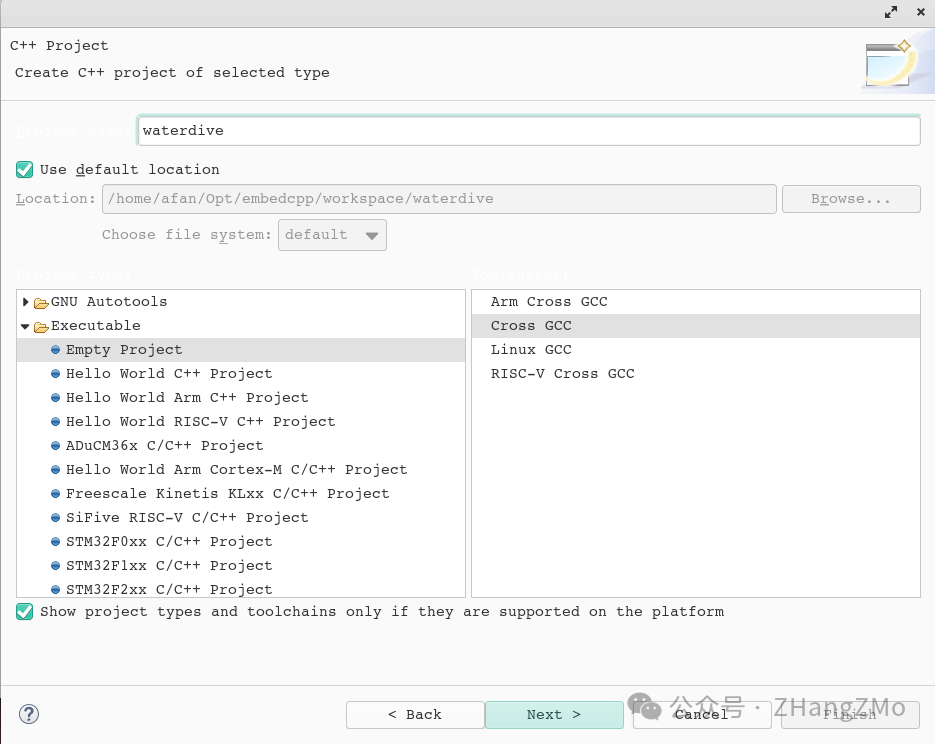
Empty Project & Cross GCC, then select Next
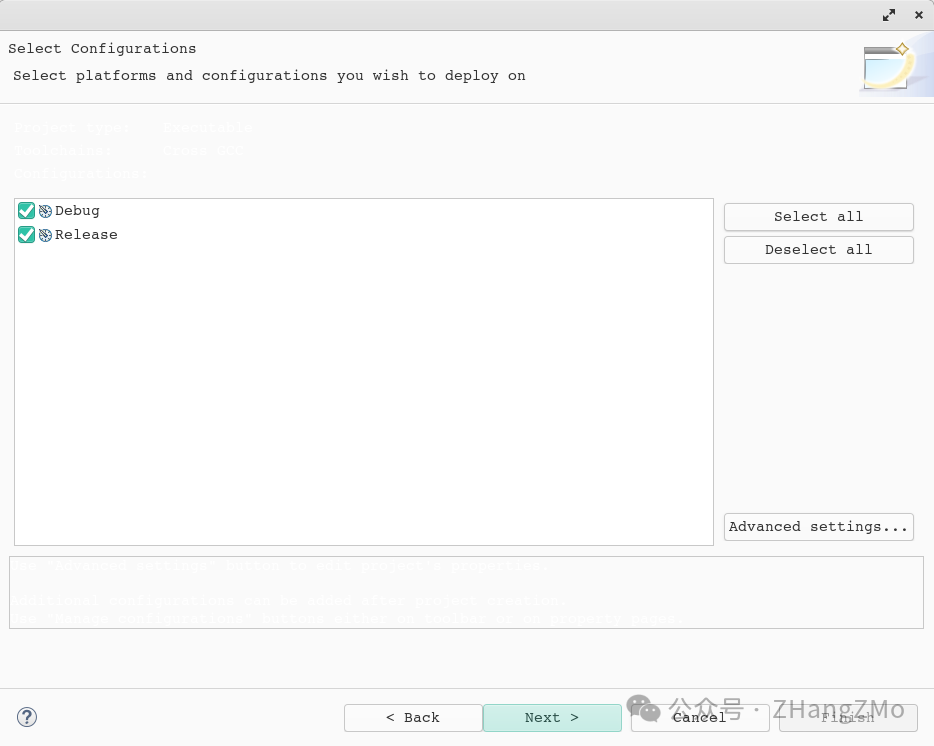
Debug & Release, then select Next
Cross compiler prefix & path, finally select Finish, at this point the C++ project is successfully created
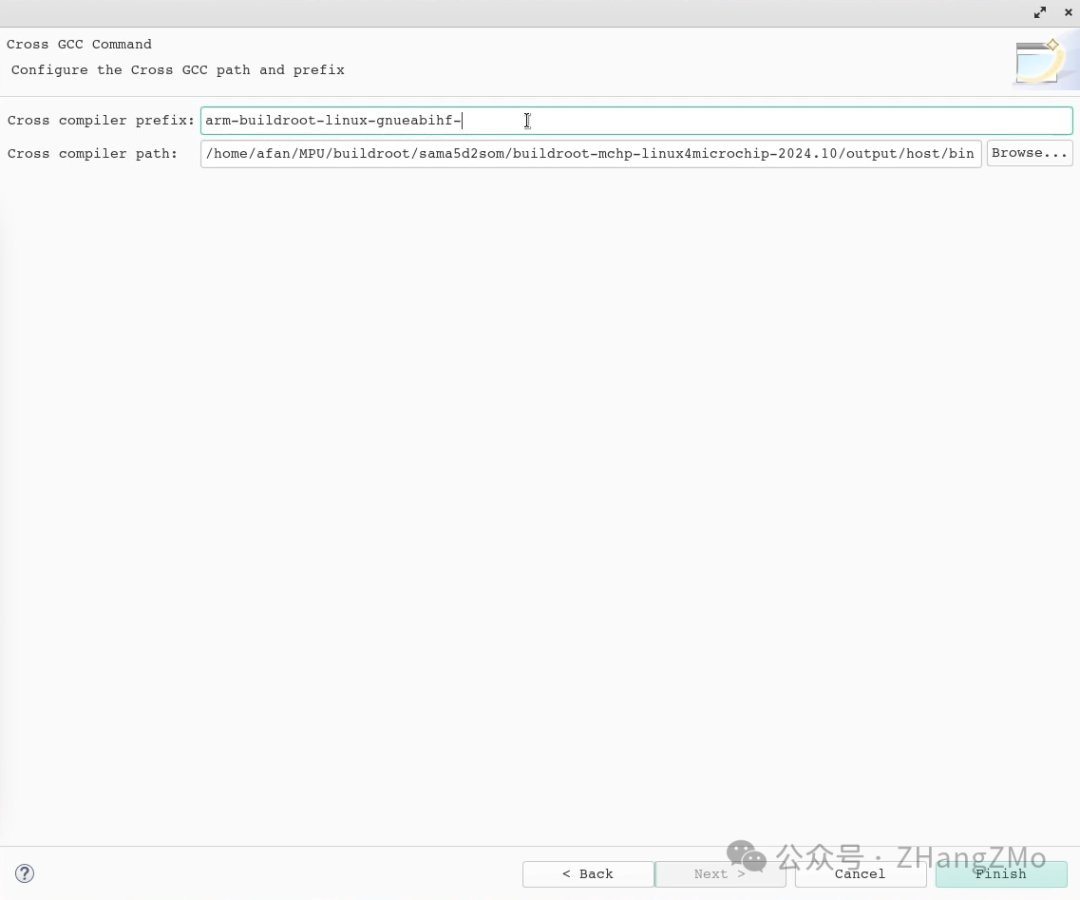
<span>At this point, the cross-compilation configuration for the C/C++ project is complete. Right-click on the project and select Build Project to start compiling:</span>
Configure Cross-Compilation Environment for C/C++ Project
Add the processor platform Package Config generated by Buildroot to the system environment variables
<span>You need to add the following content to ~/.bashrc</span>
export PKG_CONFIG_PATH=/home/xxxx/buildroot/sama5d2som/buildroot-mchp-linux4microchip-2024.10/output/host/arm-buildroot-linux-gnueabihf/sysroot/usr/lib/pkgconfig/

<span>You can add the content to the end of the .bashrc file</span>
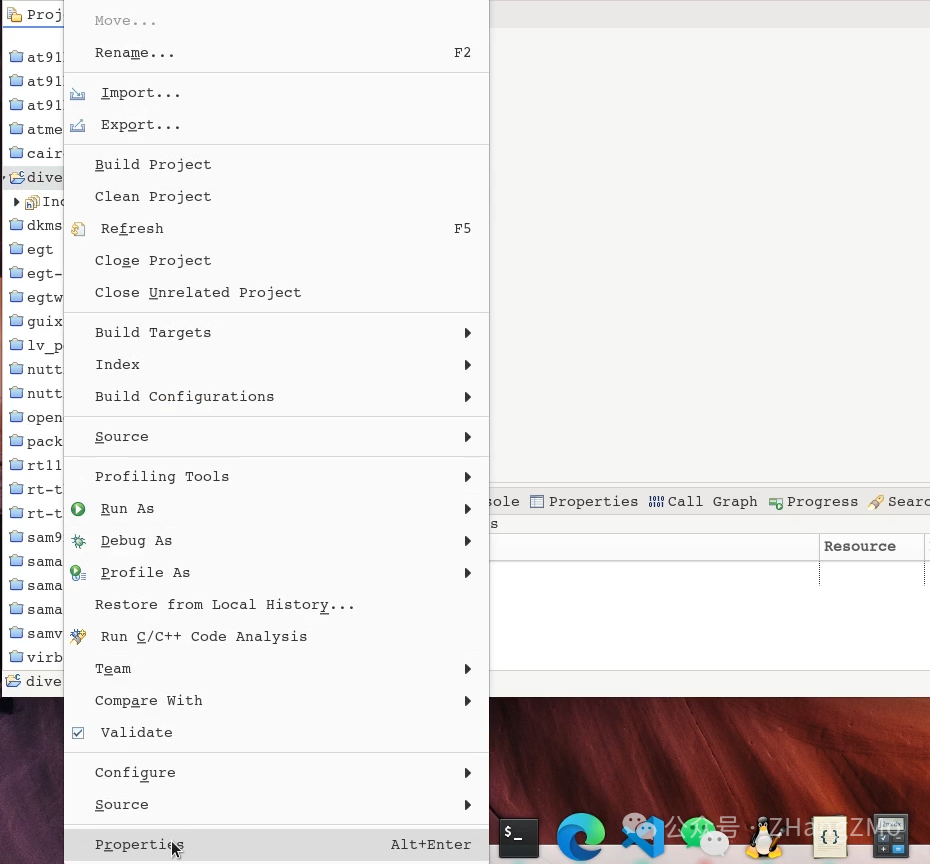
Right-click on the newly created C++ project, select Properties
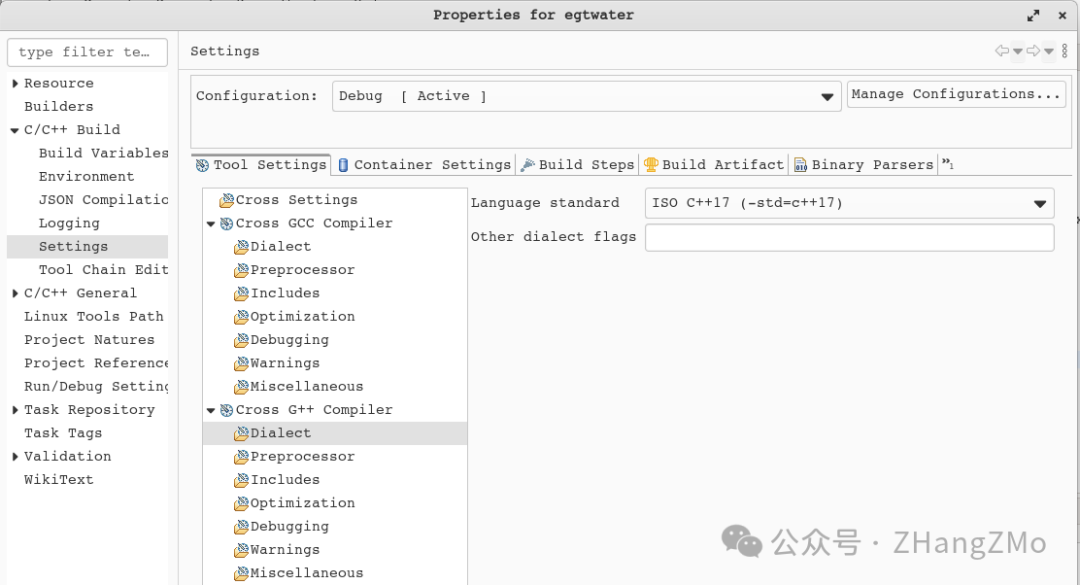
In C/C++ Build -> Settings -> Tools Settings -> Cross G++ Compiler -> Dialect -> Language standard change to ISO C++17 (-std=c++17)
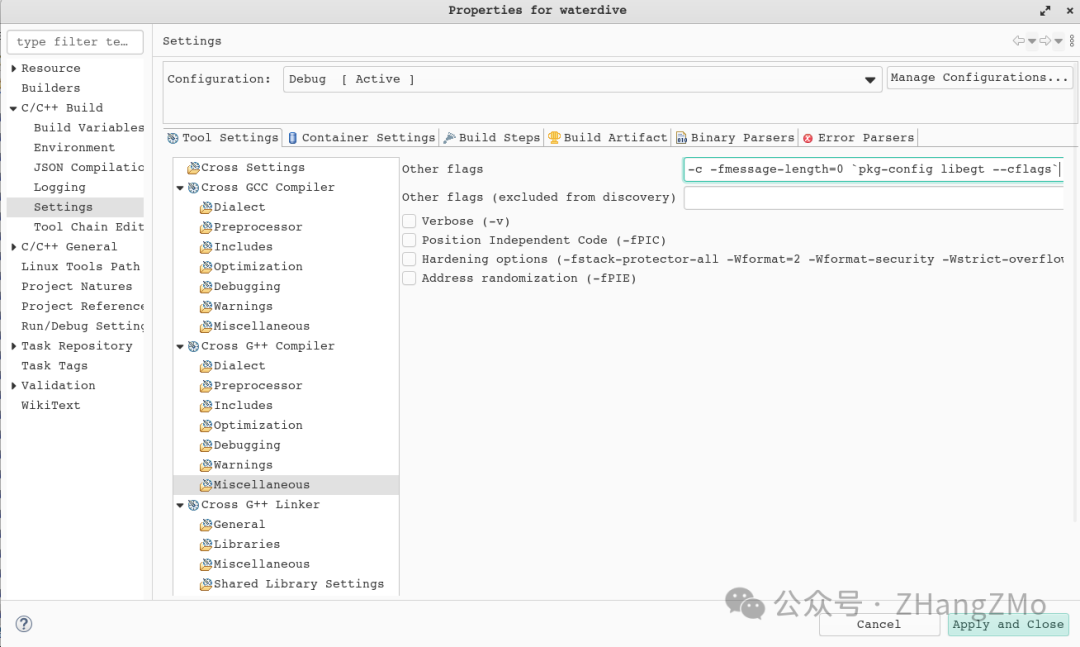
In C/C++ Build -> Settings -> Tools Settings -> Cross G++ Compiler -> Miscellaneous -> Other flags change to -c -fmessage-length=0
<span>pkg-config libegt --cflags</span>
In C/C++ Build -> Settings -> Tools Settings -> Cross G++ Linker -> Miscellaneous -> Linker flags change to
<span>pkg-config libegt --libs</span>
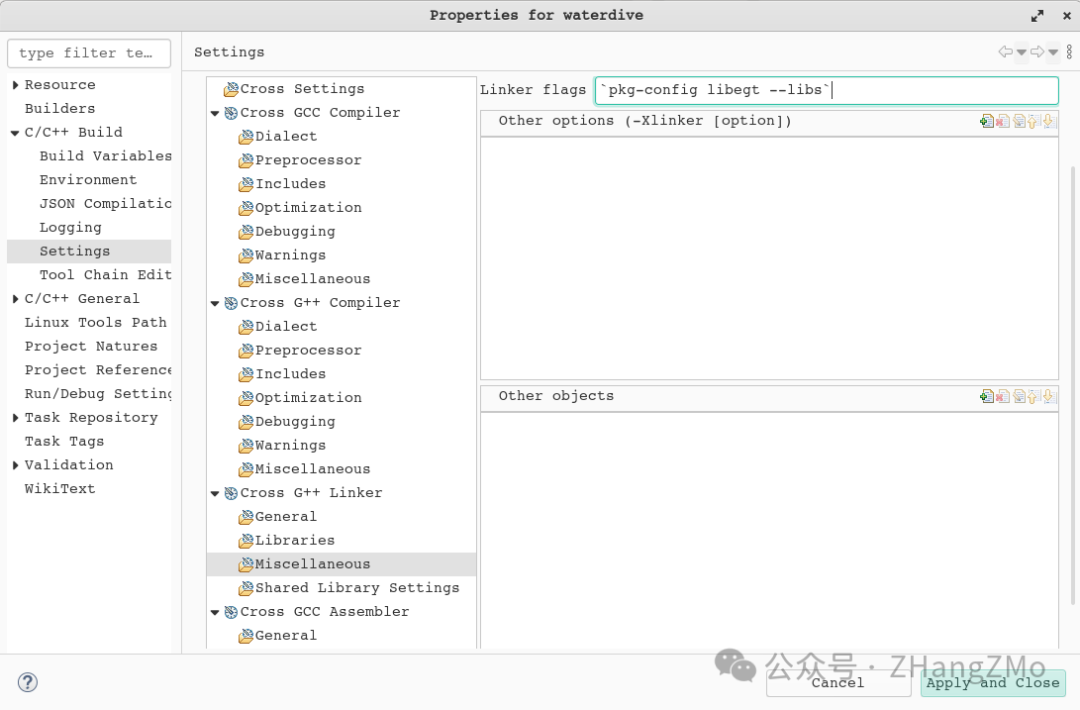
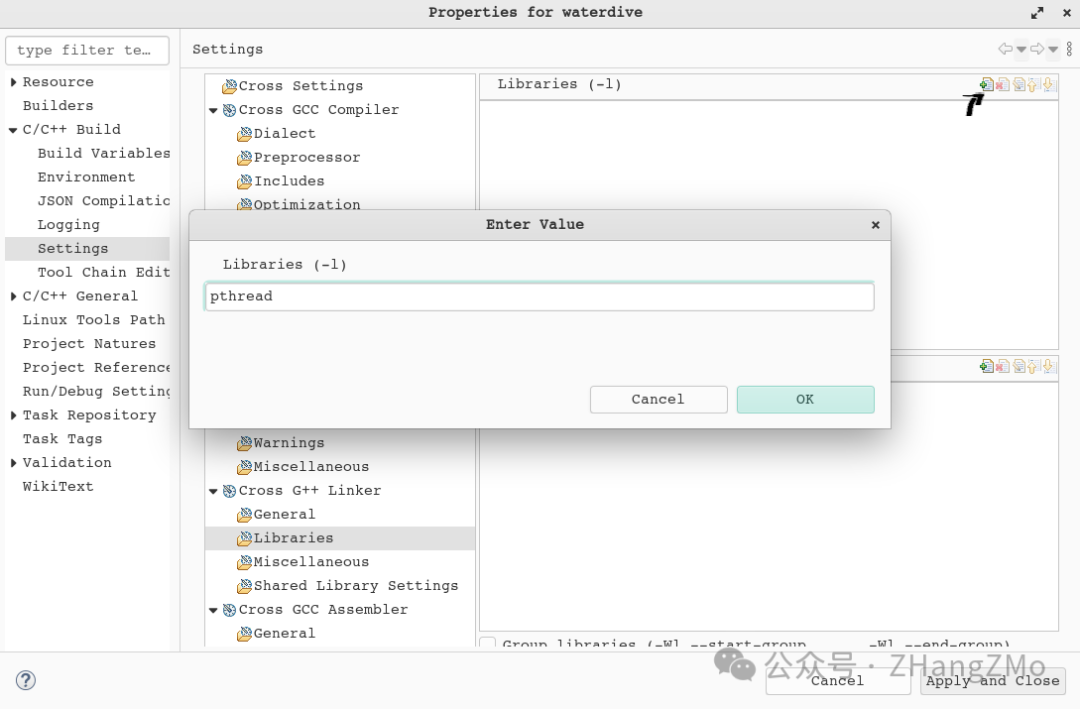
In C/C++ Build -> Settings -> Tools Settings -> Cross G++ Linker -> Libraries -> add pthread under Libraries and click OK to save
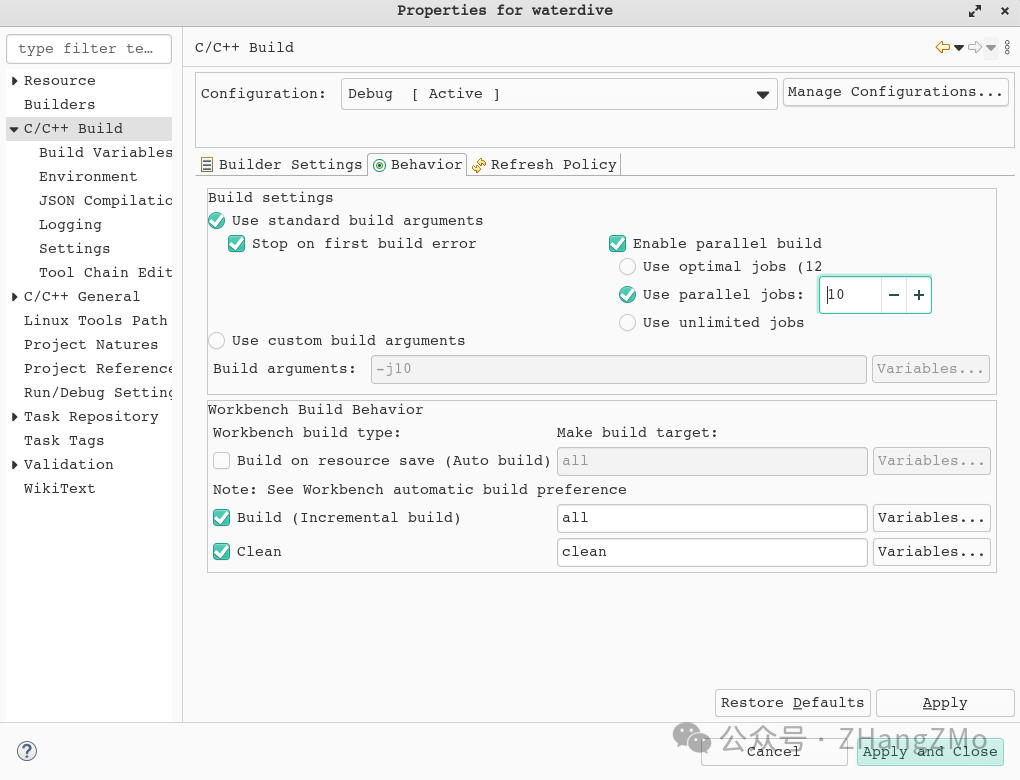
In C/C++ Build -> Behavior -> Building settings select enable multi-threaded parallel compilation and click OK to save
Setting Up Embedded C/C++ Debugging Environment in Eclipse
Configure Remote Debugging Environment for C/C++ Project
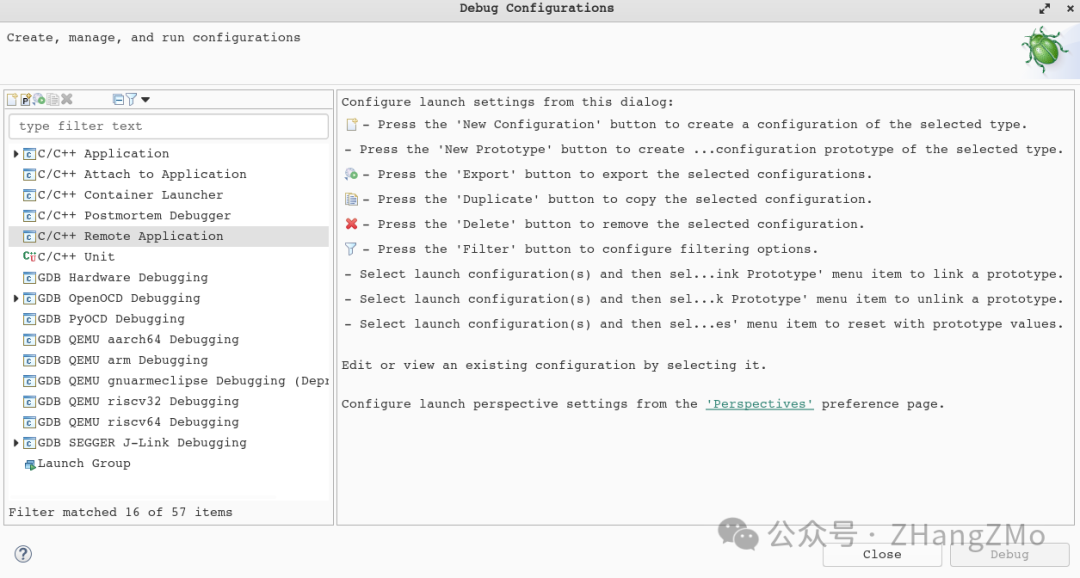
Right-click on the newly created C++ project, select Debug As -> Debug Configurations
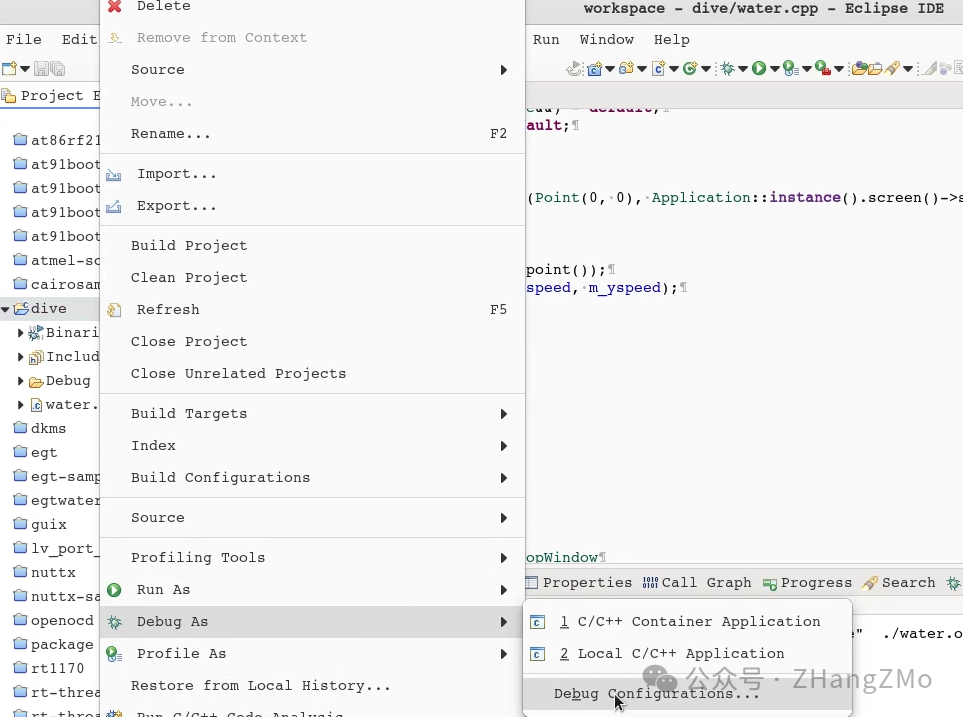
Double-click on C/C++ Remote Application to create a new remote debugging configuration
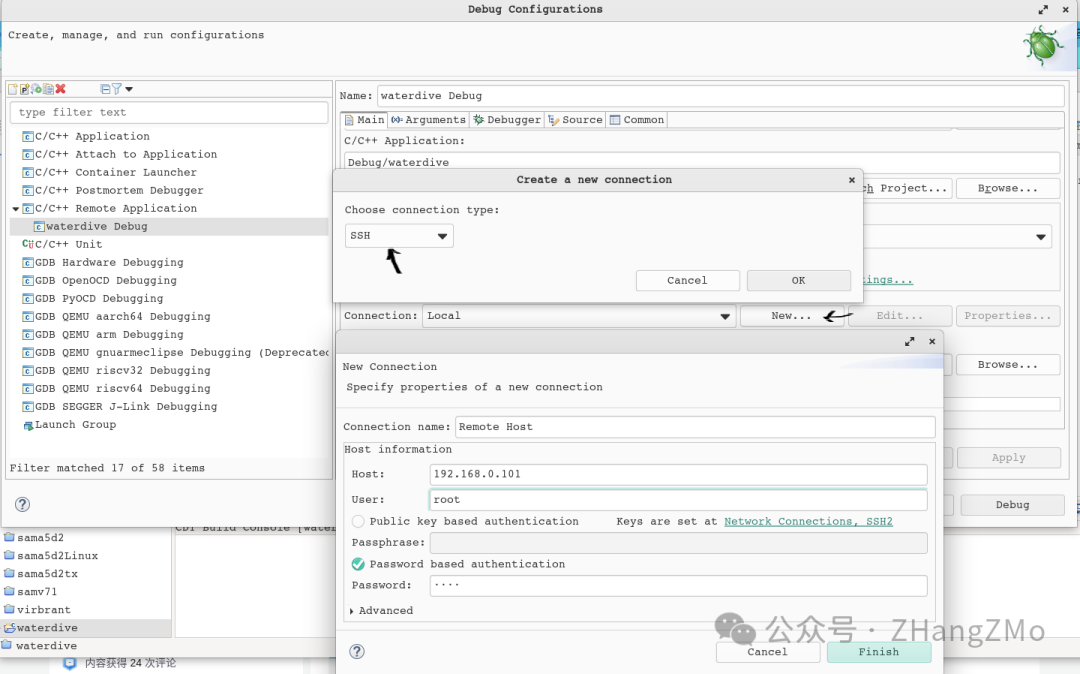
In Main -> Connections, create a new SSH remote debugging configuration, enter the configuration name, the IP address of the development board (which needs to match the development board), login user root and password, and finally click Finish to complete the configuration
Summary
Spent some time writing a bunch of verbose words, hoping to inspire those in need.
Video tutorial link