
14.4.2 Flashing the File System
In the previous chapter, we updated the Bootloader image. Now, we need to insert the flashed SD card image into the development board and press the Reset button to restart the system.
Note:
Since the main control chip has only two sets of SDIO buses, and the board uses SD card, Wi-Fi, and eMMC, a total of three sets (i.e., Wi-Fi and SD card can only use one set at the same time, so two sets of device tree files are divided), namely mys-rzg2l-wifi.dtb and mys-rzg2l-sdcard.dtb. For convenience in production testing, the default startup is set to load the mys-rzg2l-wifi.dtb file. If the user is using the SD card for the first time to flash the system, they need to modify the default loaded device tree file to the SD card in the U-Boot environment variables (once set and saved, no need to repeat the settings). The specific method is as follows:
During the system startup, you need to continuously press the Enter key in the serial terminal to enter the U-Boot command line. Then, set the following env environment variable parameters.
As shown in the red box in the figure below, copy and paste it into the serial terminal and press Enter:
Swipe left and right to view the full content
setenv fdt_file mys-rzg2l-sdcard.dtb
setenv sdhi_sw "if test $board_name = MYS-RZG2L ; then switch_sdhi1 sdcard;fi"
saveenv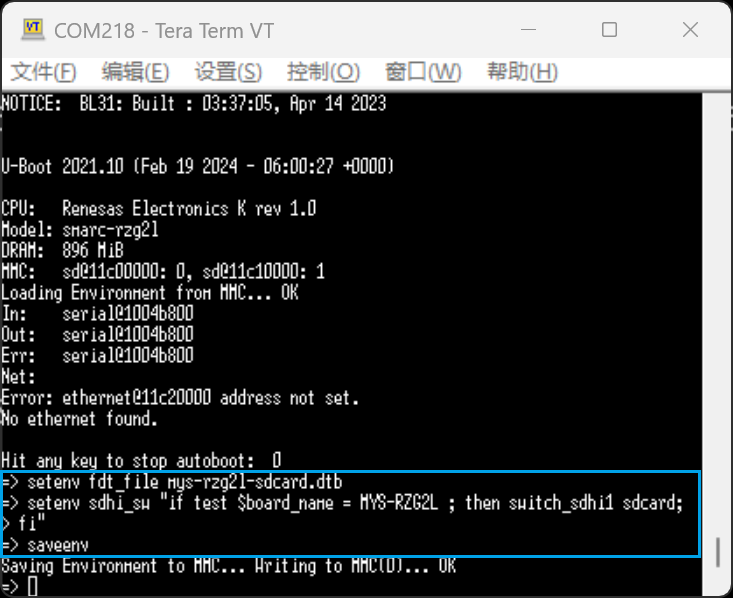
After setting, the U-Boot will read the configuration information from the SD card by default, and it will start from the SD card. Press the RESET button to restart the development board.
After the board starts, it will enter the system and automatically execute the /home/root/flash_renesas.sh update script, then update the corresponding files (kernel, device tree, etc.) to eMMC. The update process is shown in the figure below:
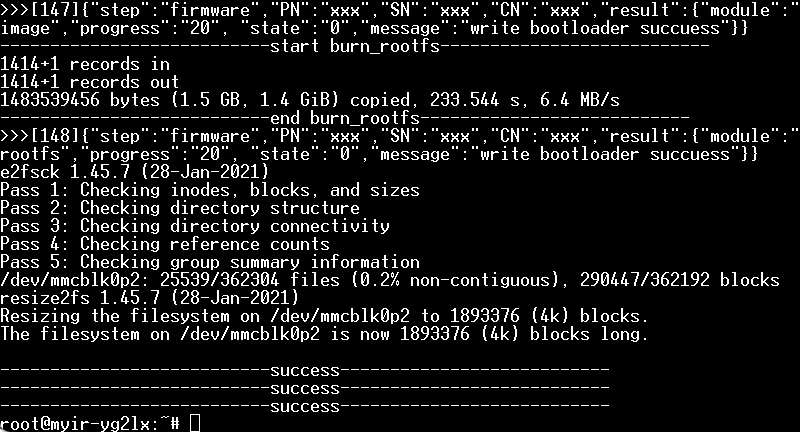
After the update is successful, power off, remove the SD card, and restart to automatically enter the latest system.
14.5 Using Toolchain to Develop Applications
There are two types of SDK in Yocto:
-
Only Toolchain, or Toolchain + some GUI features
-
SDK for a specific Distribution, which includes both Toolchain and special files for this Distribution, explained below.
These software packages include the following:
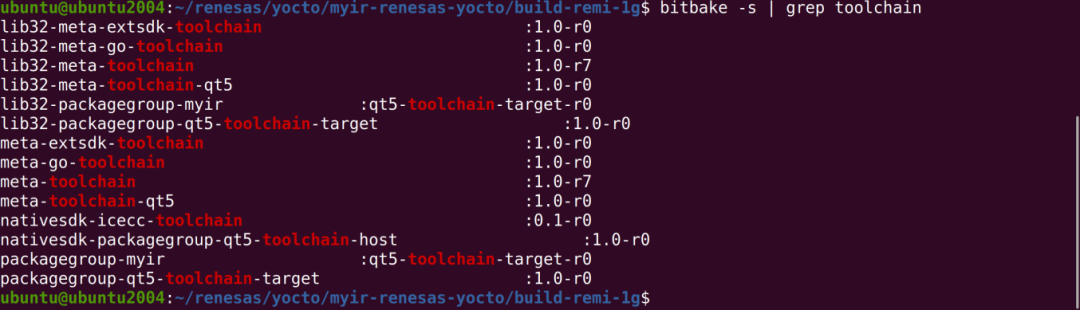
Actually, there are two types:
First Type
meta-toolchain
meta-toolchain-qt/qte/qt5
The latter includes QT-related components, where QTE is aimed at embedded systems. If you need to develop QT-related applications, then the one that includes QT is the appropriate choice; otherwise, if you are only developing regular applications, then using meta-toolchain is sufficient.
Second Type
This type of SDK is recommended for use. There is a special task in the distribution’s task to create this SDK, called populate_sdk. For example, to create a myir-image-full target Distribution (also known as image), you can do this:
bitbake myir-image-full -c populate_sdk
After completing these two types, you can see them in the deploy:

The XML file contains the list of files included in the SDK.
Since the SDK file consists of a shell script + compressed file contents, it can be run directly.
14.5.1 Generating External Toolchain
1. How to Compile
The previous section introduced the function of generating an external toolchain. The generation method is very simple; just execute the command bitbake -c populate_sdk myir-image-full in the environment where we compiled the system image. Note that it cannot be executed in a new terminal; if you create a new terminal, you need to reconfigure the compilation environment.
The entire compilation process lasts about 2-6 hours, and try not to operate Ubuntu during the build process.
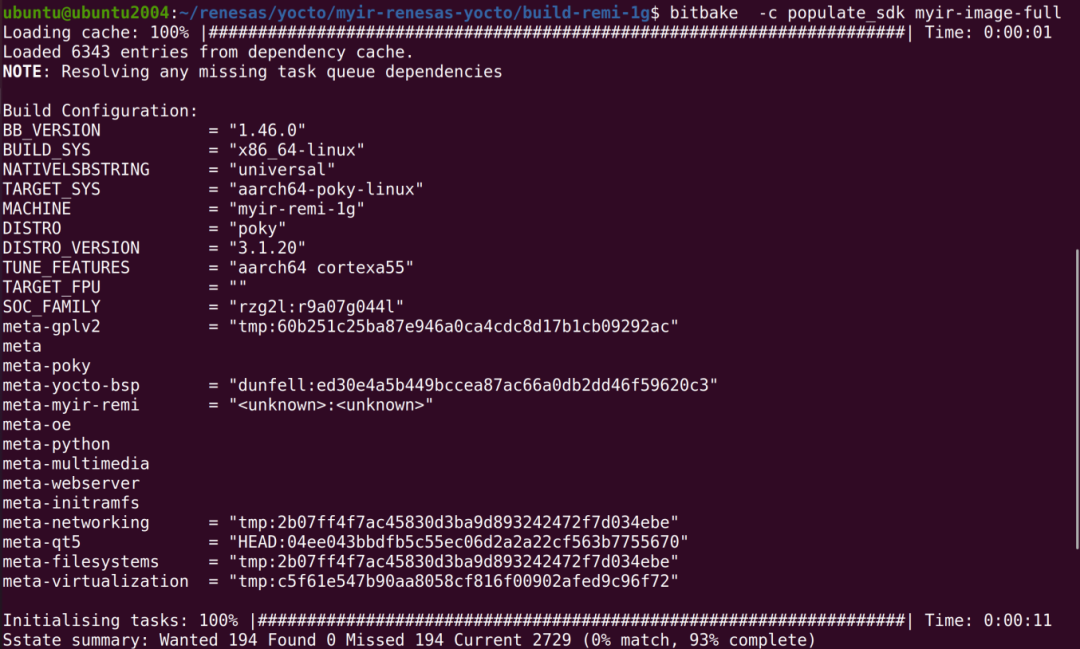
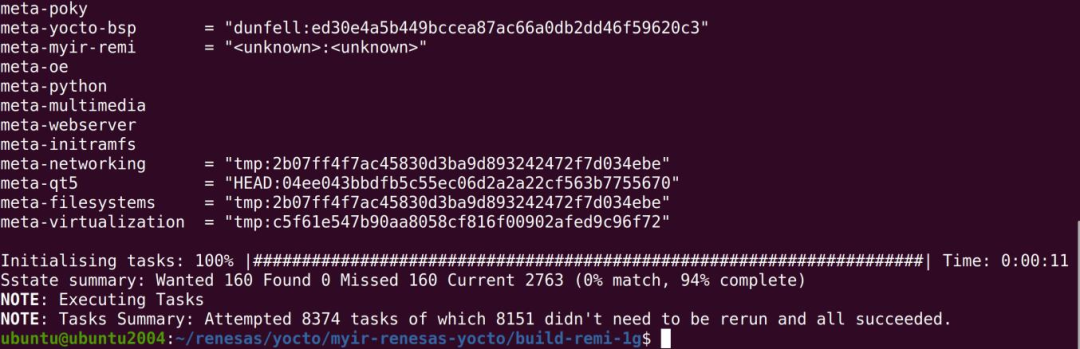
After the compilation is complete, a dialog box similar to the following will pop up: NOTE: Tasks Summary: Attempted 8374 tasks of which 8151 didn’t need to be rerun and all succeeded.
You can see that a total of 8374 tasks have been executed, and the final message of all succeeded indicates that the compilation is complete.
2. SDK File Location
Enter the directory ~/renesas/yocto/myir-renesas-yocto/build-remi-1g/tmp/deploy/sdk to see the final output SDK file. We only need poky-glibc-x86_64-myir-image-full-aarch64-myir-remi-1g-toolchain-3.1.20.sh.
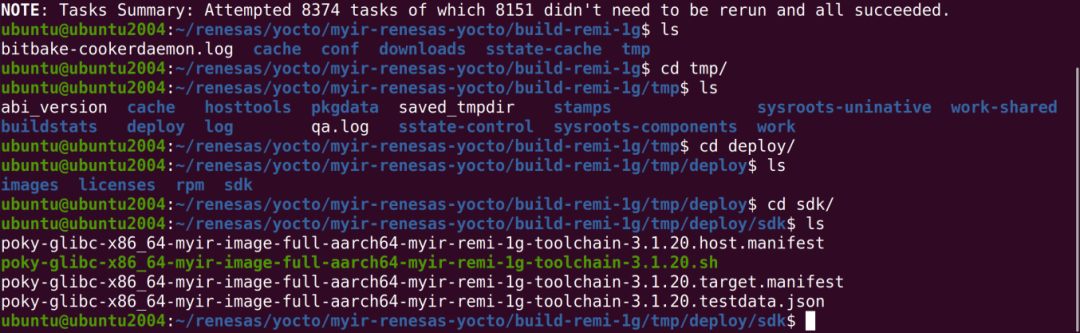
The entire SDK file is about 1.9G, which is a self-extracting script that can be distributed to application developers working on the current system image version for development and compilation.
For convenience in subsequent experiments, I will store poky-glibc-x86_64-myir-image-full-aarch64-myir-remi-1g-toolchain-3.1.20.sh separately in the 100ASK data CD/06_Yocto system development.


Need Product and Solution Support
Please Scan to Register

Need Technical Support?
If you have any questions while using Renesas MCU/MPU products, you can scan the QR code below or copy the URL into your browser to open the Renesas Technical Forum to find answers or get online technical support.
https://community-ja.renesas.com/zh/forums-groups/mcu-mpu/
To Be Continued
Recommended Reading

LVGL Frontend Program Development Related Operations – RZ MPU Industrial Control Tutorial Series (53)

MQTT Test Program On-Site Experiment and Program Development – RZ MPU Industrial Control Tutorial Series (55)

Modbus TCP Server Program Development and Yocto System Build – RZ MPU Industrial Control Tutorial Series (56)
For more exciting content, please follow us.



Need Product and Solution Support
Please Scan to Register