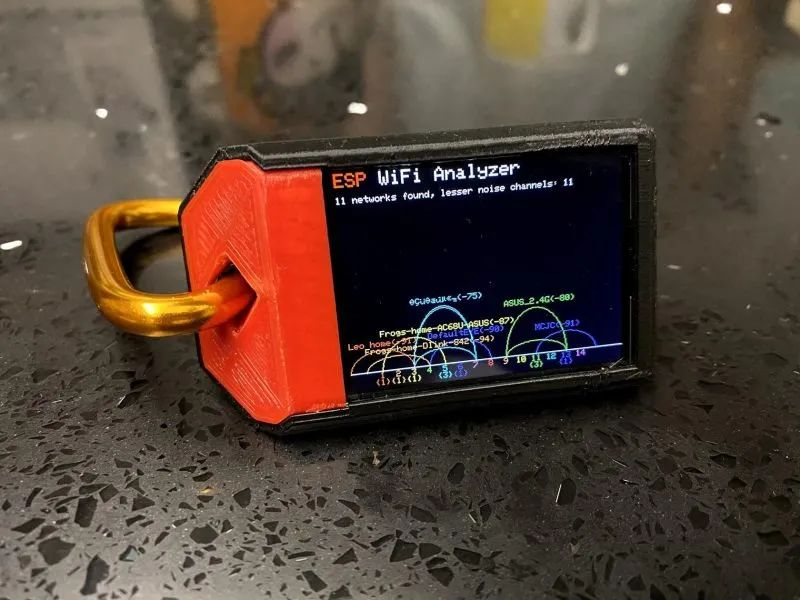
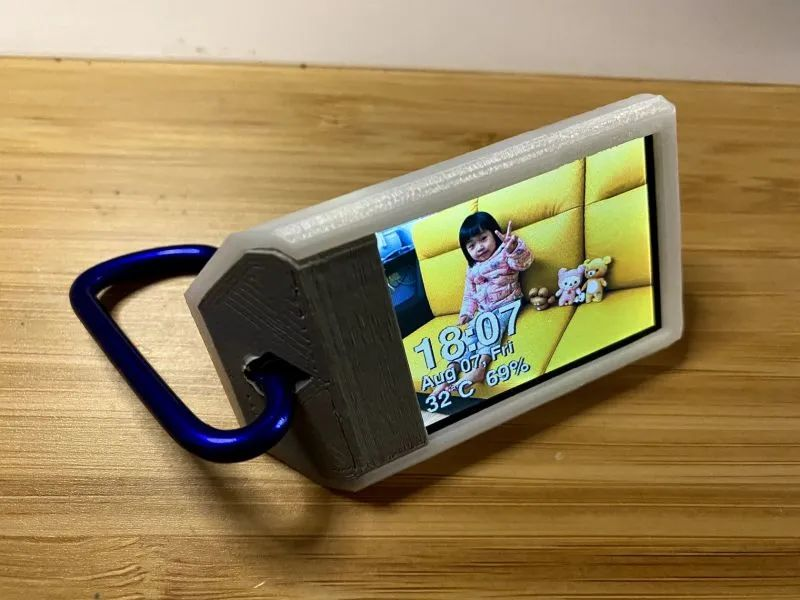
This is a portable IoT display project that can be developed into various practical tools using the Arduino_GFX library, such as WiFi signal analysis and electronic photo albums. With a well-designed 3D printed case, it can be easily attached to a keychain or backpack for portability.
Materials List
- TTGO T7 V1.0 (ESP32 WiFi Module) × 1
- 2-inch IPS LCD × 1
- 402035 Lipo Lithium Battery × 1
- D-shaped Carabiner Clip × 1
3D Printed Case
You can download it directly from Thingiverse:<span><span>https://www.thingiverse.com/thing:4564272</span></span>
Soldering the Circuit
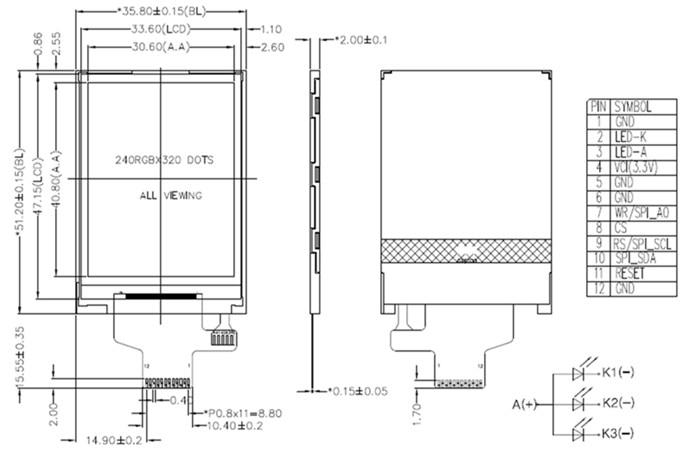
Refer to the LCD’s datasheet for pin connections. Be sure to read the datasheet thoroughly before connecting, especially if the LCD model you ordered differs from the one mentioned here.

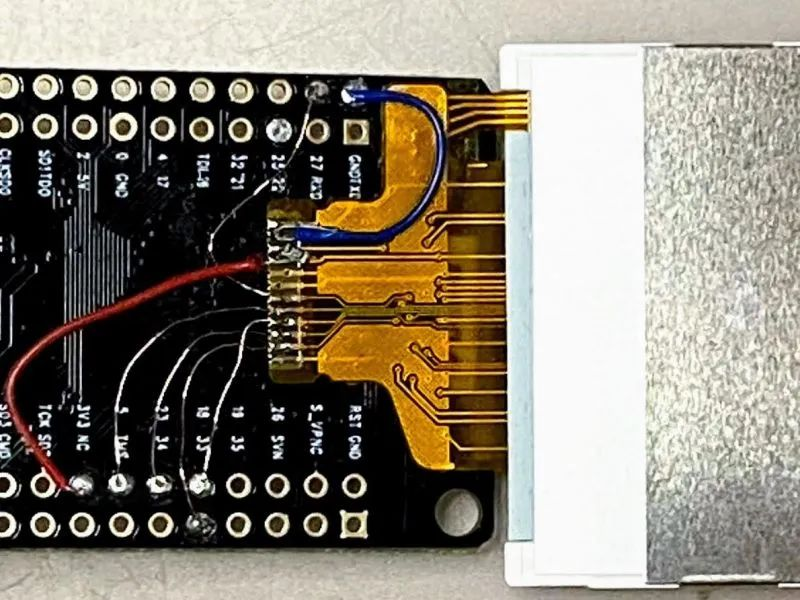
ESP32   -> LCD
GND     -> Pin  1 GND
        -> Pin  2 LED K
3v3.    -> Pin  4 Vcc -> 20 Ohm -> Pin 3 LEDA
GPIO 27 -> Pin  7 D/C
GPIO  5 -> Pin  8 CS
GPIO 18 -> Pin  9 SCK
GPIO 23 -> Pin 10 MOSI
GPIO 33 -> Pin 11 RST
Assembly
Seal the soldered areas and exposed pins with tape.
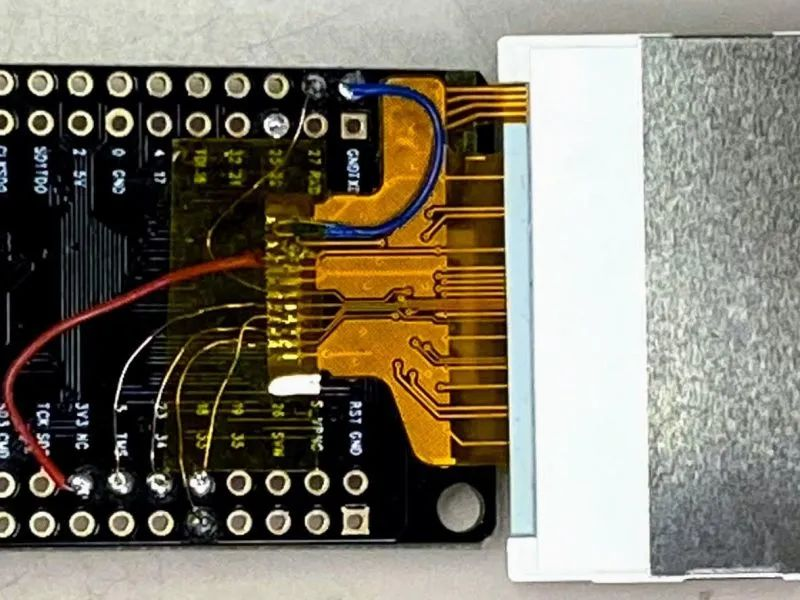
Assemble the module and case by referring to the video below.
Programming
Arduino IDE
If you have not installed the Arduino IDE, you need to download and install it:<span><span>https://www.arduino.cc/en/main/software</span></span>
ESP32 Support
Follow the instructions in the link below to install ESP32 support:<span><span>https://github.com/espressif/arduino-esp32</span></span>
Arduino_GFX Library
Download the latest version of the Arduino_GFX library: (“Clone or Download” -> “Download ZIP”)<span><span>https://github.com/moononournation/Arduino_GFX</span></span>
Import this library in the Arduino IDE. (Arduino IDE “Sketch” Menu -> “Include Library” -> “Add .ZIP Library” -> select the downloaded ZIP file)
Compile and Upload
-
Connect to your computer using a USB cable and open the Arduino IDE.
-
Open the ESPWiFiAnalyzer example code (“File” -> “Example” -> “Arduino_GFX” -> “ESPWiFiAnalyzer”)
-
Click the “Upload” button in the Arduino IDE.
-
The ESPWiFiAnalyzer.ino code file is also provided for download at the end.
Completion
This 2-inch IoT display can not only be used for WiFi signal detection analysis, but the ESP32 also has many more possibilities. It’s time to unleash your imagination to make it more fun!
Original link: https://www.instructables.com/Portable-IoT-Display/Original author: Chen LiangTranslation first published on: Qu WujinPlease indicate the source and original author information when forwarding