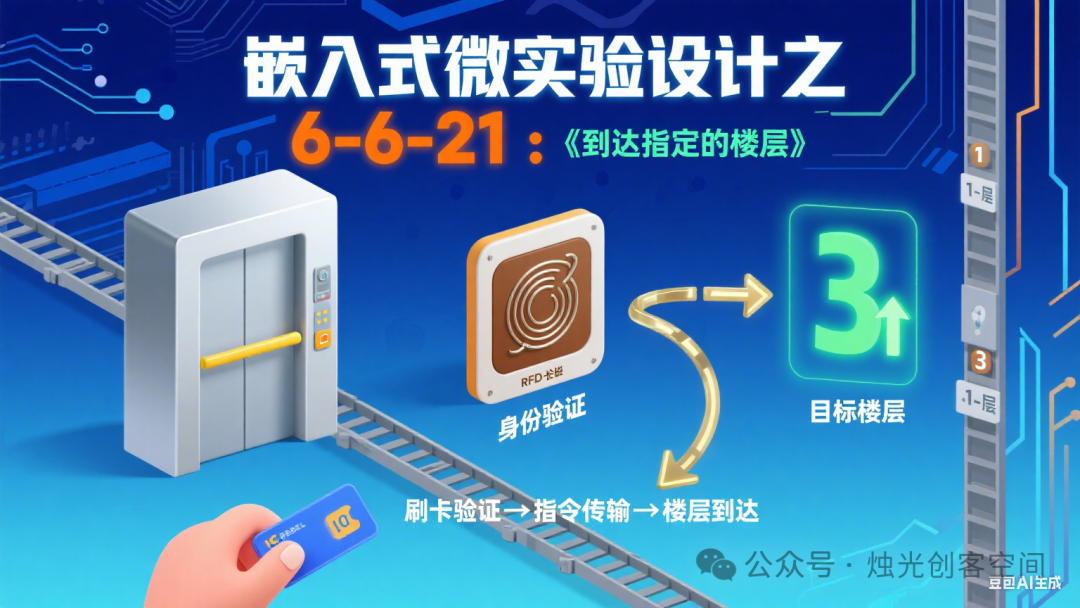
 Grade 6 Unit 6: Introduction to Process and Control Framework for Large Unit Teaching Design1. Unit ThemeLogic and Application of Elevator Control Systems (This lesson is connected to Lessons 20-23, focusing on the “subsystem decomposition of complex elevator systems, control logic of each subsystem (AND/OR/NOT operations), and the application of logical operations in practical control”. The core is to understand the decomposition method of complex control systems, master the rules of logical operations, and cultivate the ability to analyze practical problems using system thinking and computational thinking.)2. Context Creation“Elevator Safety Operation Optimizer” Project The scenario revolves around “acting as the community elevator safety operation optimizer, analyzing the subsystems and logic of the existing elevator control system, and solving practical problems during operation (such as reaching floors, door control, overload protection)”: from decomposing the elevator’s subsystems, to analyzing the logical operations of each subsystem (AND/OR/NOT), and then optimizing the control logic to enhance safety, ultimately forming a complete capability chain of “decomposing systems—analyzing logic—optimizing design”.Lesson 21: Reaching the Designated Floor Embedded Micro-Experiment Design1. Micro-Experiment Design (1) Clarifying Experiment Objectives Based on the core content of Grade 6 Unit 6 Lesson 21 “Elevator Reaching Designated Floor”, utilizing the ZW Digital Innovation Education Platform’s “Card Swipe Elevator” virtual simulation scenario, the experiment objectives are set as follows:1. Understand the working logic of the card swipe elevator system: the elevator can only operate to the designated floor if both conditions “card swipe successful” and “floor button pressed” are met, understanding the rules of “AND operation” (both conditions must be true for the result to be true).2. Through virtual operation, record the elevator status corresponding to different input combinations (card swipe success/failure, button pressed/not pressed), fill in the truth table, and reinforce the representation method of switch quantities (1 represents “yes”, 0 represents “no”).3. Draw the algorithm flowchart for elevator operation, describing the process of “input judgment output”, and experience the application of modular thinking in control systems. (2) Designing Experiment Tasks Focusing on the logic of “virtual operation → logical perception → process sorting”, combined with the interactive characteristics of RFID card swiping and floor buttons in the platform’s “Card Swipe Elevator” scenario, design two progressive tasks:1. Basic Task: Simulate different operation combinations (e.g., “card swipe successful + press 3rd floor button”, “card swipe failed + press 2nd floor button”, etc.) in the virtual scenario, observe whether the elevator operates, and record the correspondence between “input conditions” and “elevator status”.2. Advanced Task: Based on the experimental records, summarize the necessary conditions for “elevator operation” (both inputs must be met), fill in the truth table for AND operation, and draw an algorithm flowchart that includes “card swipe verification”, “floor judgment”, and “elevator operation” steps. (3) Preparing Experiment Resources Software: ZW Digital Innovation Education Platform (Login URL: https://xxkj.i3done.com/login).
 Hardware: Student computers (must meet the platform’s minimum configuration: Intel i3 3225 CPU, 2GB RAM, Windows 10, recommended browsers Chrome 120+ or Edge 120+). Materials: Experiment operation guide diagram (indicating the positions of “run simulation”, “RFID card swipe”, “floor button”), elevator status record table, AND operation rules diagram, blank algorithm flowchart template. (4) Experiment Implementation (20 minutes)1. Basic Task: Virtual Operation and Status Observation (10 minutes) Step 1: Scene Loading and Operation Learning① Students log into the ZW platform, enter “Unit 6 Elevator Operation Control → Lesson 21 → Card Swipe Elevator” scenario, read the experiment instructions, and clarify the operation process: click “Run Simulation” → swipe with RFID card → press floor number button → observe the elevator’s response.
 ② Familiarize with interface elements: identify the “RFID card swipe area”, “floor buttons (1/2/3 floors)”, and “prompt box (displays ‘card read correctly’ or ‘card error’)” in the scene.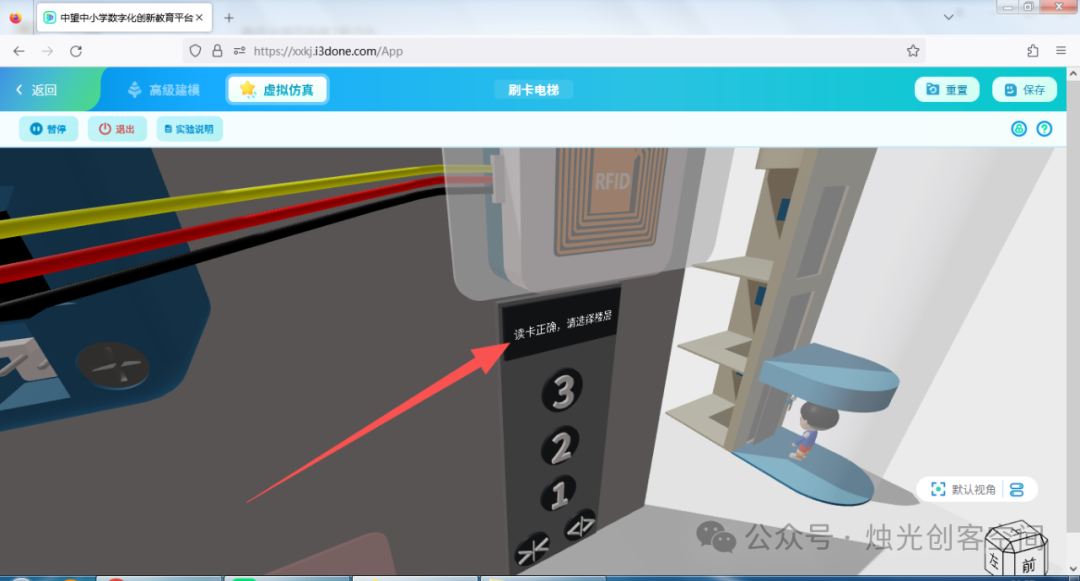
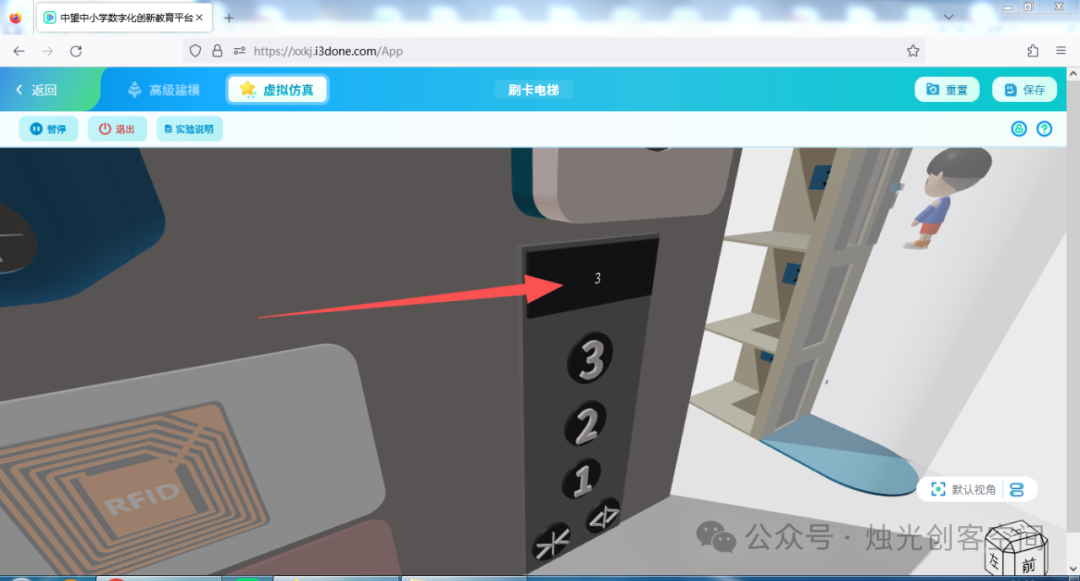
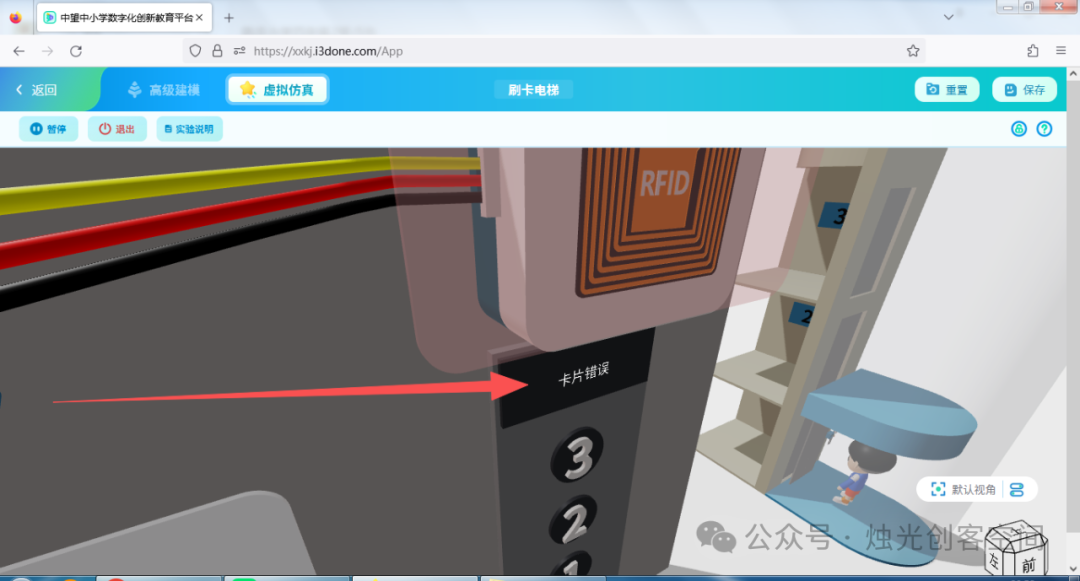 Step 2: Multi-Combination Operation Testing Students operate in the following 4 combinations sequentially, recording the elevator status (whether it operates to the designated floor):① Combination 1: Card swipe successful (using a valid card) + press 3rd floor button;② Combination 2: Card swipe successful + floor button not pressed;③ Combination 3: Card swipe failed (using an invalid card) + press 2nd floor button;④ Combination 4: Card swipe failed + floor button not pressed. Step 3: Immediate Discussion: “Which combination allows the elevator to operate?” Guide students to initially perceive that “both conditions must be met”.2. Advanced Task: Logical Summary and Flowchart Drawing (10 minutes) Step 1: Fill in the truth table Using “1 represents condition met/elevator operates, 0 represents condition not met/elevator does not operate”, fill in the experimental results in the table:
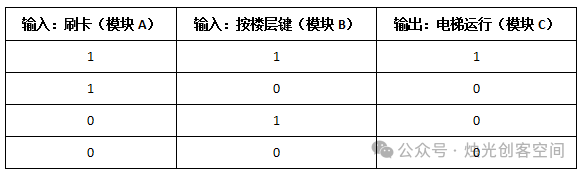 Step 2: Summary and Operation Rules Group discussion: “Which row in the table meets the result of ‘elevator operation’?” Conclude: Only when A=1 and B=1, C=1, that is, the “AND operation” rule—both conditions must be true for the result to be true. Step 3: Draw the algorithm flowchart Based on the scene operation process, draw a flowchart that includes the following steps:① Start → Card swipe verification (check if successful);② If card swipe is successful, check if the floor button is pressed;③ If both conditions are met, the elevator operates to the designated floor; otherwise, the elevator does not operate → End. (5) Result Recording and Analysis Students fill in the “Card Swipe Elevator Experiment Record Table”, integrating operation data and logical analysis:
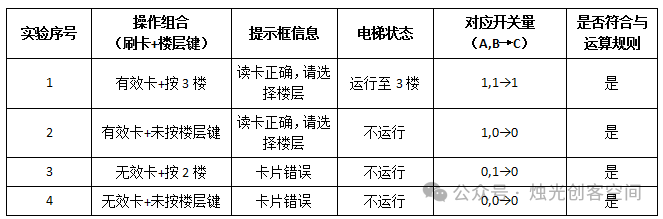 Class sharing: Select typical record tables for display, teachers emphasize: the card swipe elevator system achieves safety control through “AND operation”, only when both conditions are met can it trigger operation, similar to the dual verification logic of “access control + password” in real life. (6) Summary and Extension Teachers guide the summary: The operation of the card swipe elevator relies on the AND operation of the two input conditions “card swipe successful” and “floor button pressed”, reflecting the logic of “multi-condition judgment” in control systems; using flowcharts and truth tables can clearly describe this logical relationship, which is a specific application of modular thinking. Extension Tasks:1. Consider “if the elevator adds an ‘overload detection’ function (the elevator will not operate even if the card is swiped + floor button pressed when overloaded)”, what conditions need to be met for it to operate? (Hint: AND operation of three conditions).2. Try “multiple card swipes + pressing different floor buttons” in the platform, observe whether the elevator prioritizes the last button pressed, and analyze the necessity of its logical optimization.2. Micro-Experiment Activity Design Sheet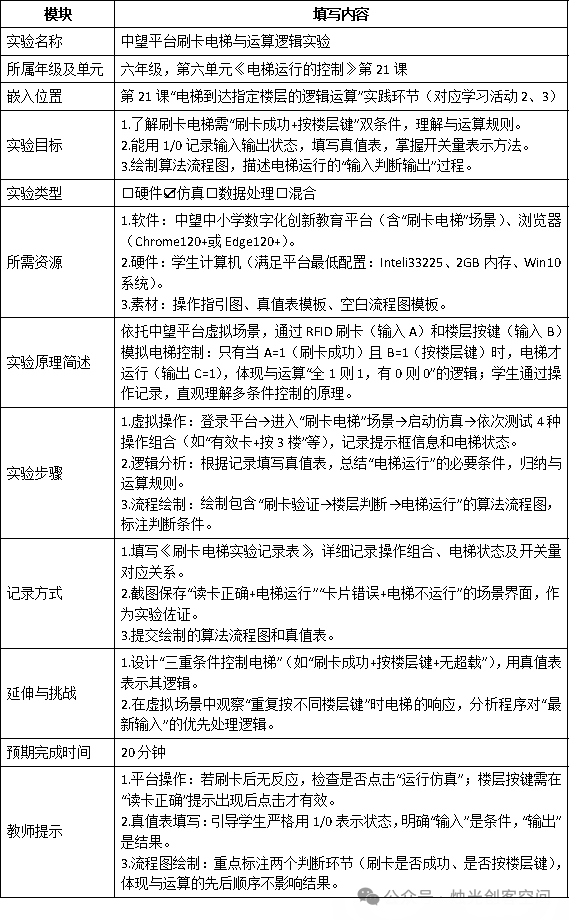
Previous Exciting Articles:
[AI Empowering Teaching] 24: Instant Dream Video Generation 3.0 Smart Multi-Frame, Making Teaching Videos Seamless
[AI Empowering Teaching] 23: Doubao Super Creative 2.0, Stunning Your Batch Generation
[AI Empowering Teaching] 22: AI Unlocking Math Magic for Kids: A Research Learning Journey from 4×4 Grids to Cognitive Leap
[AI Empowering Teaching] 21: Taking a Different Approach, Generating Audio for Three People Teaching the Same Lesson
[AI Empowering Teaching] 20: AI Podcast Teaching Guide: A Versatile Assistant from Lesson Preparation to Home-School Communication
[AI Empowering Teaching] 19: AI Creating Subject-Specific Rewards, Making Kids Love Your Class
[AI Empowering Teaching] 18: AI Prompt List, Helping Improve the Quality and Efficiency of Party Building Materials
[AI Empowering Teaching] 17: When AI Meets Andersen: Unlocking the Magic of Fully Automatic Bilingual Picture Books
[AI Empowering Teaching] 16: AI Generating Historical Figures Biography Videos, Making Students Love Middle School History[AI Empowering Teaching] 15: AI Assisting in College and Major Selection for Volunteer Applications[AI Empowering Teaching] 13: Nezha’s Transformation from “Demon Child” to “Good Student” AI Guide![AI Empowering Teaching] 11: AI Assisting in English Memory, Easily Mastering a Whole Book of Words in 30 Days[AI Empowering Teaching] 10: AI Empowering Traditional Cultural Education: From Generating Tools Practice to New Paths of Cultural Dissemination[AI Empowering Teaching] 6: AI Assisting in Writing Classroom Analysis Reports[AI Empowering Teaching] 5: AI Assisting in Primary Science and Junior High Information Technology Experiment Teaching[AI Empowering Teaching] 3: AI Assisting in Assigning and Grading Layered Math Homework in Primary School[AI Empowering Teaching] 2: DeepSeek Assisting in Designing Activities to Tell Chinese Stories in English[AI Empowering Teaching] 1: DeepSeek Combined with Traditional Art Activities in Rural Primary Schools [Candlelight Maker Space]