 Click on the above↑ ‘Technical Training’ Follow the leading online education platform for China’s manufacturing industry with over 100,000 industrial control professionals: Technical sharing, Learning exchange, Industrial control videos
Here, I will explain how to create a project file in Weicon Touch Screen Software Easy Builder Pro and the process of downloading the project. This is a very important step when using the touch screen to edit the screen program, so let’s learn how to operate it.
The basic steps to create a project file are as follows: 1. Create a new project file; 2. Save/compile the project file; 3. Execute online simulation/offline simulation; 4. Download the project file to HMI. Below, I will detail the operation methods for each step.
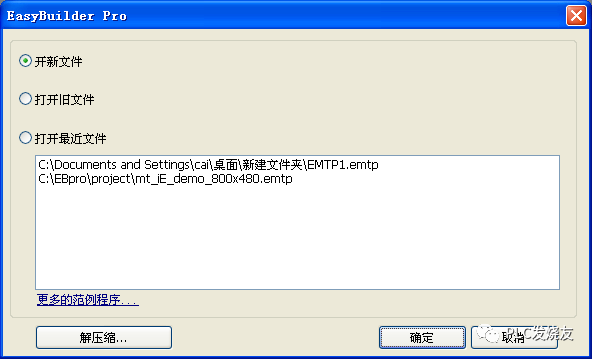
First, create a new project file.
1. Enter Easy Builder Pro and click to create a new file, which will create a new project.
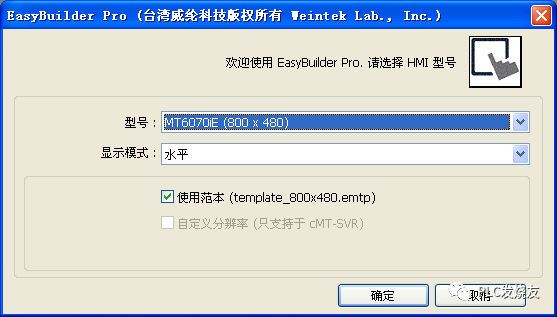
2. Select the model and display mode, check to use the template.
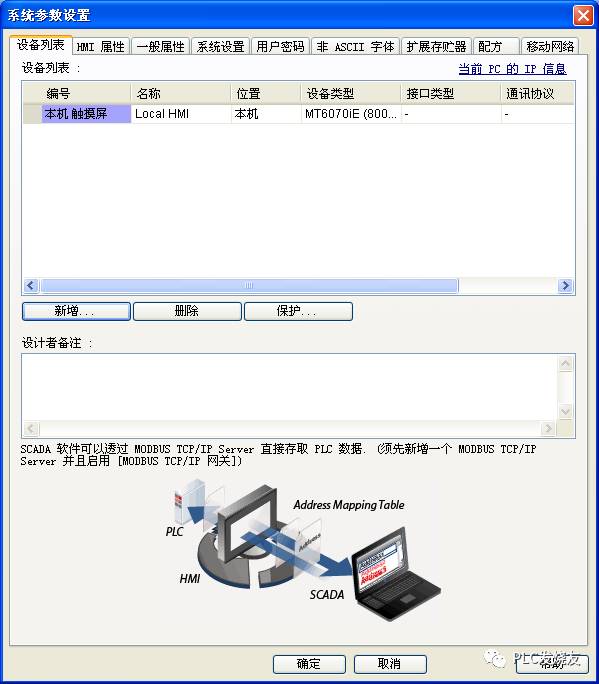
3. In the dialog box that appears, click to add.
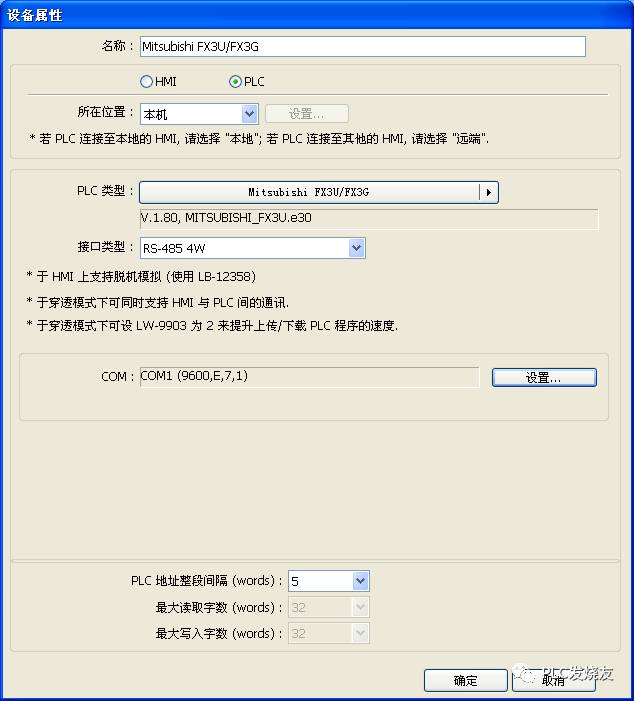
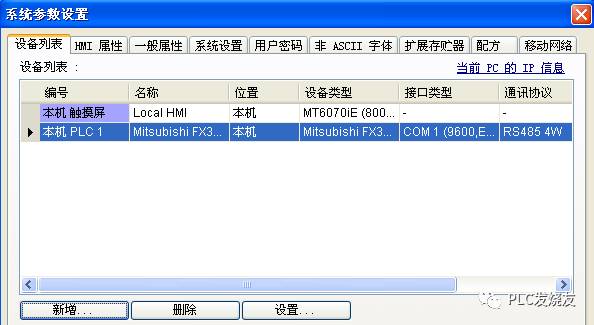
4. Select the PLC type to connect, set the interface type, and configure the correct communication parameters.
5. After setting up, a new device will be added to the device list; here, the FX3U PLC has been added.
6. At this point, create a new component; for example, using a bit status toggle switch component, set the PLC name, address, switch type, and other settings.
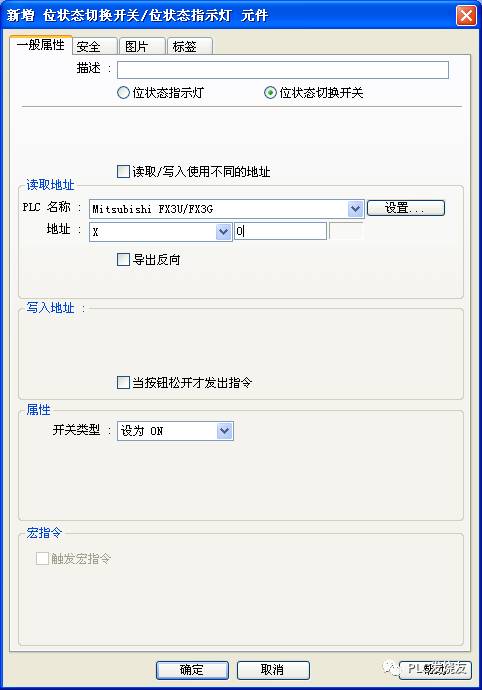
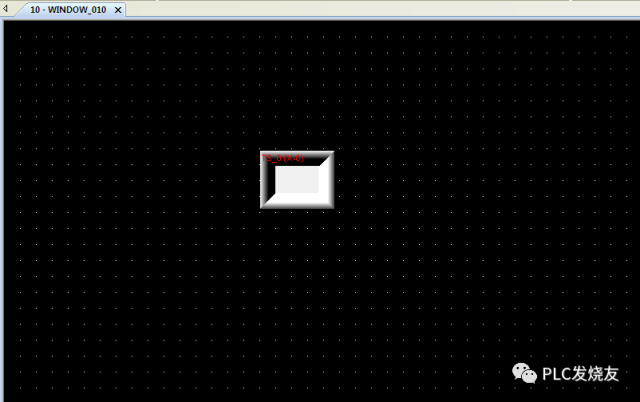
7. After setting up, click OK, and place the component in the editing window, thus completing a simple project file.
Next, save and compile the project file.
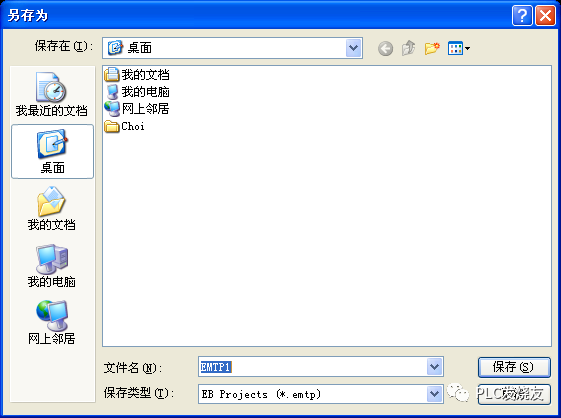
1. In Easy Builder Pro’s menu, click File – Save File, and save it as an .emtp format file.
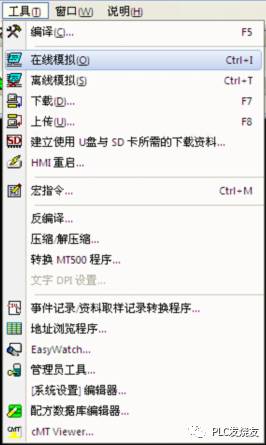
2. Click Tools – Compile to compile the file into an .exob file, and then download this file to the HMI.

Then, you can perform offline simulation and online simulation.
1. Click Tools – Offline Simulation or the corresponding shortcut icon to perform offline mode operations.
Offline simulation: Simulate the operation of the project file on the PC without needing to connect to any devices.
2. Click Tools – Online Simulation or the corresponding shortcut icon to perform online mode operations.
Online simulation: Simulate the operation of the project file on the PC without needing to download the program to the HMI, while the PLC is directly connected to the PC, requiring correct parameter settings.
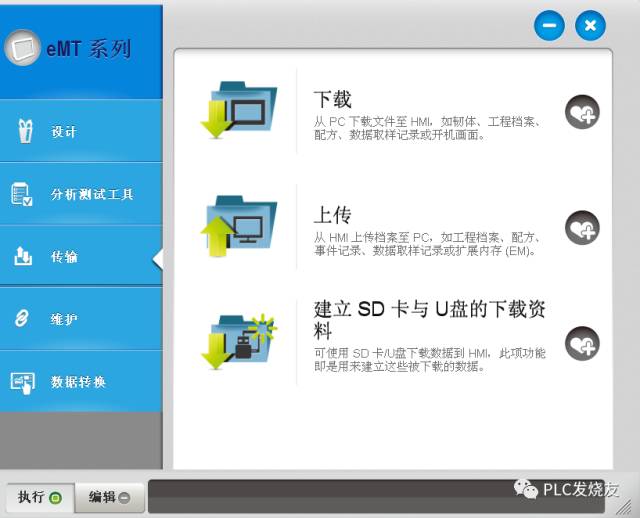
Finally, download the project file to the HMI.
Below are four methods to download the project file to the HMI.
First method: Download using a USB cable
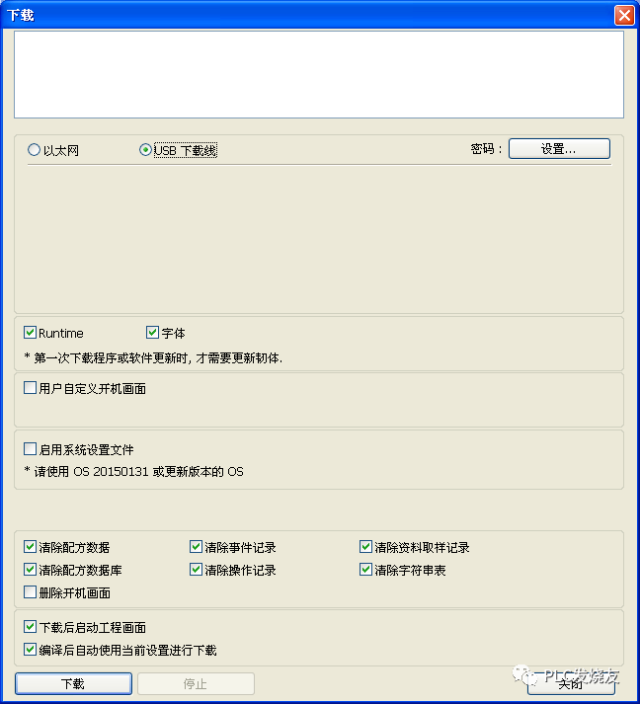
Select the USB cable to download the program. Before using the USB cable to transfer the program, confirm that the USB driver is installed by going to My Computer – Device Manager. If not installed, please complete the installation manually first. Then, in Easy Builder Pro’s tool menu, click Tools – Download, and select USB cable.

Second method: Download using Ethernet
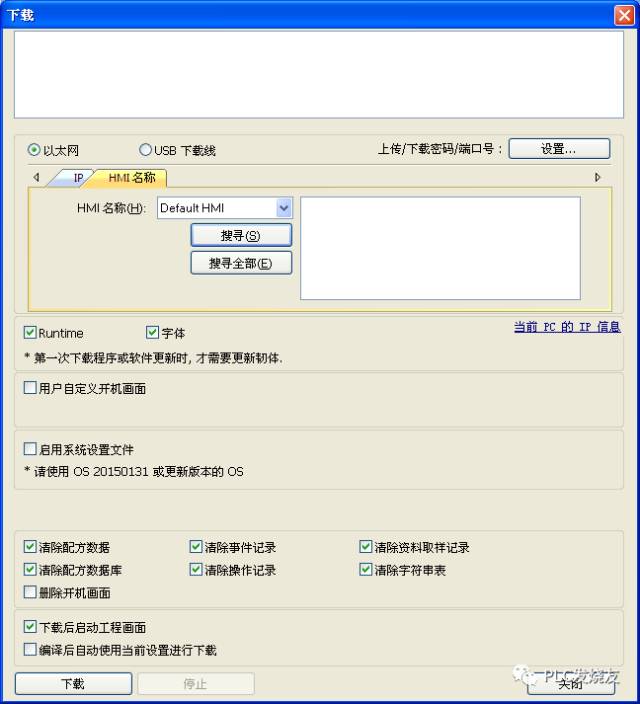
In Easy Builder Pro’s tool menu, click Tools – Download, select Ethernet, and specify the HMI’s IP address.

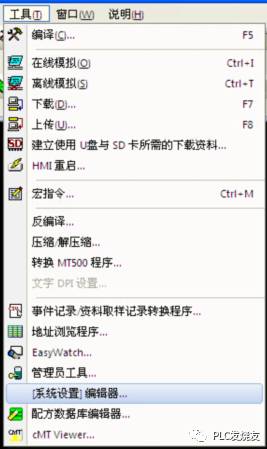
Note: In the dialog box, check the option ‘Automatically use current settings for download after compilation’. If this option is checked, the next time you click Download, Easy Builder Pro will automatically compile the program and download it to the last downloaded target HMI. The operation method is as follows:
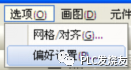
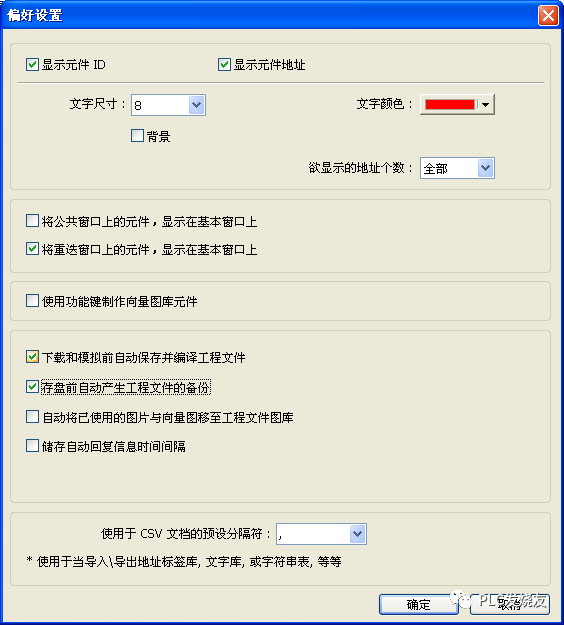
1. In Easy Builder Pro’s tool bar, click Options – Preferences, and in the opened dialog box, check ‘Automatically save and compile project file before download and simulation’.
2. In Easy Builder Pro’s tool menu, click Save Project File, then click Download, and check the option in the dialog box ‘Automatically use current settings for download after compilation’, then click Download.
3. After completing the above settings, next time, just click Download, Easy Builder Pro will automatically compile the program and download it to the last downloaded target HMI.
Third method: Download using HMI name
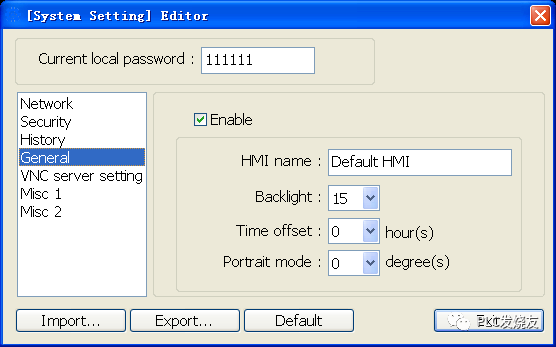
1. In Tools – System Settings, set the HMI name.
2. In Easy Builder Pro, select the previously set HMI name and start downloading. If using Search, enter the specific HMI name in the HMI name field. If using Search All, it will search all HMIs in the same domain.
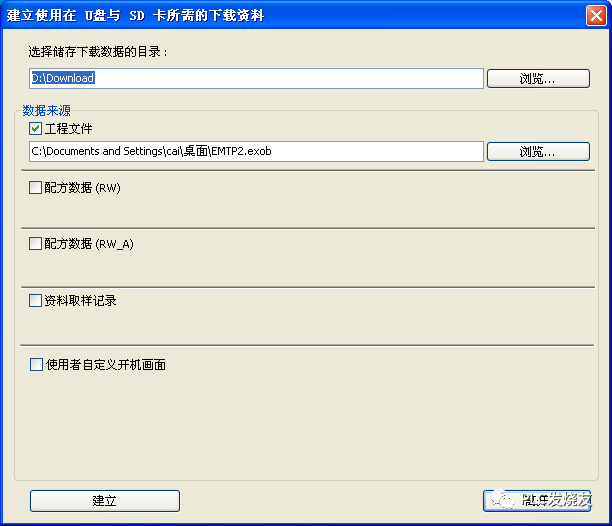
Fourth method: Download using USB drive/SD card.
1. Use the Utility Manager to create the required download data for the USB drive and SD card.
2. Insert external devices such as SD card or USB drive into the HMI.
3. On the HMI, select Download and enter the password.
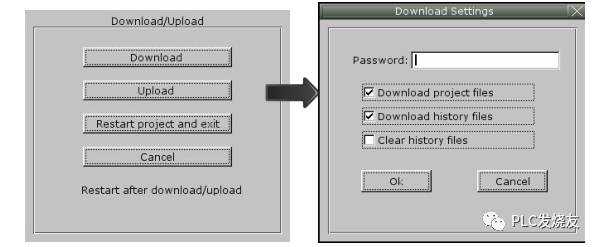
4. After confirming the password, the directory name under the external device will be displayed. (pccard: SD card; usbdisk: USB drive)
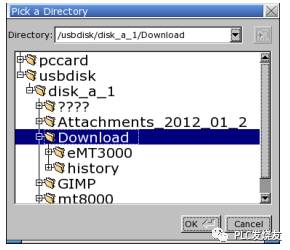
5. Select the project file storage path, press OK to start downloading.
Among the four methods of downloading, the most commonly used are Ethernet download and USB download; it is essential to master these two methods. So, these are the basic steps to create a project file. Have you learned it?
For more PLC knowledge, follow the WeChat account: PLC Enthusiast

So, have you learned the above knowledge?
Click to read the original text, and learn more about electrical engineering, PLC, and CNC robot knowledge for free.
↓↓↓