First, What is Raspberry Pi?
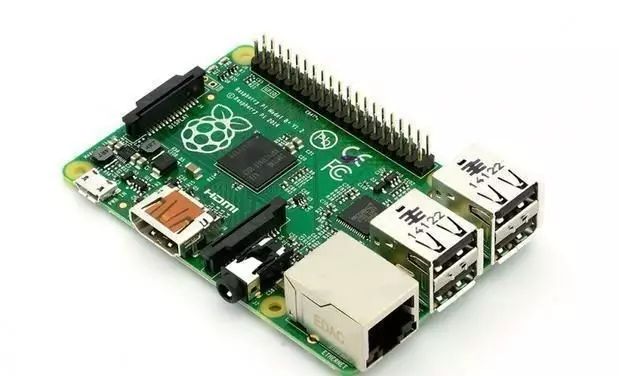
Raspberry Pi is a cheap card-sized Linux computer that has taken the world by storm. It is one of the many inexpensive and mature computers available, costing only 35 dollars, and is very easy to get started with. Raspberry Pi can replace various uses of a daily desktop computer, including word processing, spreadsheets, media center, and even gaming. Moreover, it can play high-definition videos up to 1080p.
There are thousands of ways to use Raspberry Pi, but many people often buy a Raspberry Pi on a whim and then suddenly don’t know what to do with it.

Most things that a computer can do can also be done on Raspberry Pi. Its low power consumption, portability, and GPIO features make it suitable for many tasks that are difficult to perform on a regular computer.
This article introduces how to use OpenCV and Python on Raspberry Pi to complete a face detection project. This project not only describes the specific steps required to recognize faces but also provides a lot of extended knowledge. Additionally, this project does not require readers to understand detailed theoretical knowledge of face recognition, so beginners can easily follow the steps to achieve it.
Required Equipment for the Project
Hardware:
-
Raspberry Pi 3 Model B;
-
Raspberry Pi Camera Module (PiCam).
Languages and Libraries:
-
OpenCV
-
Python 3
Steps
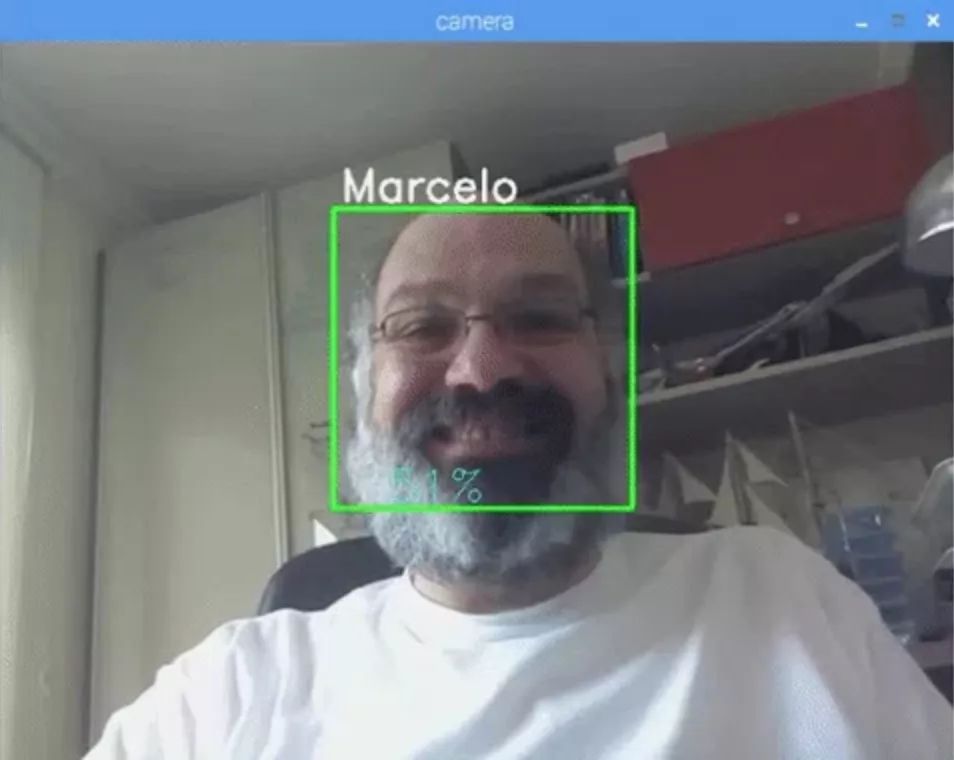
This tutorial mainly discusses how to implement real-time face recognition using PiCam, as shown in the image below:

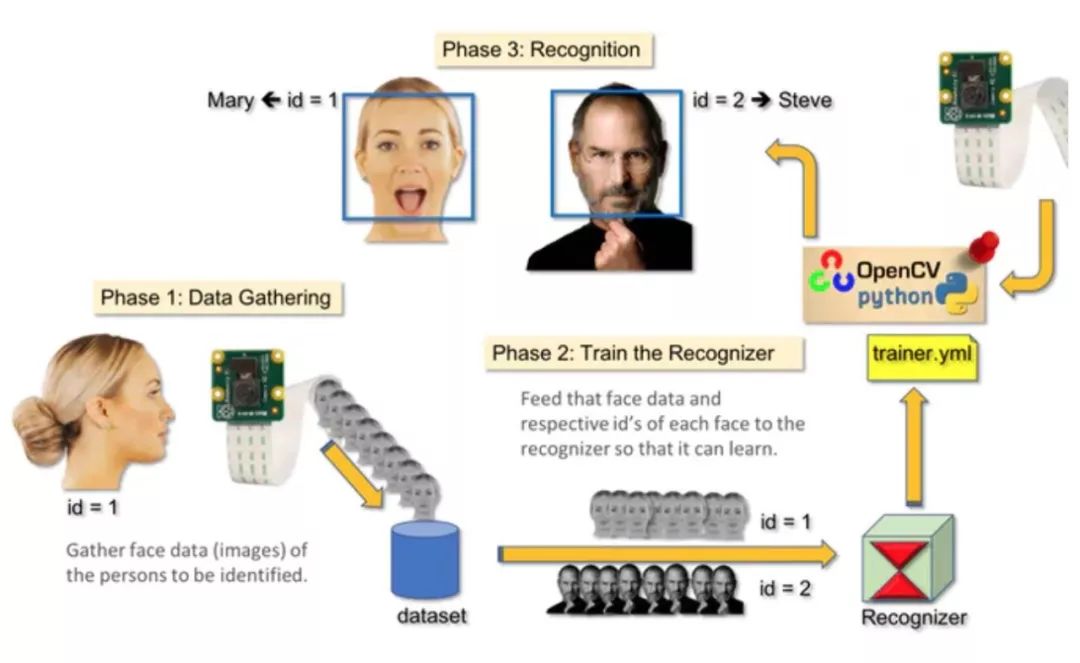
This tutorial uses OpenCV, a magical “open-source computer vision library,” and mainly focuses on Raspberry Pi (hence the operating system is Raspbian) and Python. However, I also tested the code on a Mac, and it ran well. OpenCV has strong computational efficiency and is specifically designed for real-time applications. Therefore, it is very suitable for real-time face recognition using a camera. To create a complete face recognition project, we must complete three stages:
1) Face detection and data collection;
2) Training the recognizer;
3) Face recognition.
As shown in the image below:

Step 1: Material ListMain components:
-
Raspberry Pi V3: 283 RMB (Taobao)
-
5-megapixel 1080p sensor OV5647 mini camera module: 83 RMB (Taobao)
Step 2: Install OpenCV 3 PackageI used the updated version of the Raspberry Pi system (Stretch), so the best way to install OpenCV is to follow the tutorial written by Adrian Rosebrock: “Raspbian Stretch: Install OpenCV 3 + Python on your Raspberry Pi.” After several attempts, I found Adrian’s tutorial to be the best and recommend following it step by step to install.
After completing the above tutorial, you should have the OpenCV virtual environment set up for running this experiment on your Raspberry Pi device.
We enter the virtual environment to ensure that OpenCV 3 is correctly installed.
Adrian recommends running the command “source” every time you open a new terminal to ensure that the system variables are set correctly.
source ~/.profile
Then, we enter the virtual environment:
workon cv
If you see (cv) appear before the prompt, you have entered the cv virtual environment:
(cv) pi@raspberry:~$
Adrian hopes everyone notices that the cv Python virtual environment is completely isolated and separate from the default Python version included in Raspbian Stretch. Therefore, any Python packages in the global site-packages directory are not available to the cv virtual environment. Similarly, any Python packages in the cv site-packages are also not available to the global Python package installation.
Now, enter the Python interpreter:
python
Confirm that you are running version 3.5 (or above). Inside the interpreter (“>>>” will appear), import the OpenCV library:
import cv2
If there are no error messages, OpenCV is correctly installed in your Python virtual environment.
You can also check the installed version of OpenCV:
cv2.__version__
You should see 3.3.0 (or a higher version that may be released in the future).

The terminal screenshot above shows the above steps.
Step 3: Test the Camera After installing OpenCV on Raspberry Pi, we will test it to confirm that the camera is working properly. Assuming you have installed PiCam on the Raspberry Pi.
Enter the following Python code in the IDE:
import numpy as np
import cv2
cap = cv2.VideoCapture(0)
cap.set(3,640) # set Width
cap.set(4,480) # set Height
while(True):
    ret, frame = cap.read()
    frame = cv2.flip(frame, -1) # Flip camera vertically
    gray = cv2.cvtColor(frame, cv2.COLOR_BGR2GRAY)

    cv2.imshow('frame', frame)
    cv2.imshow('gray', gray)

    k = cv2.waitKey(30) & 0xff
    if k == 27: # press 'ESC' to quit
        break
cap.release()
cv2.destroyAllWindows()
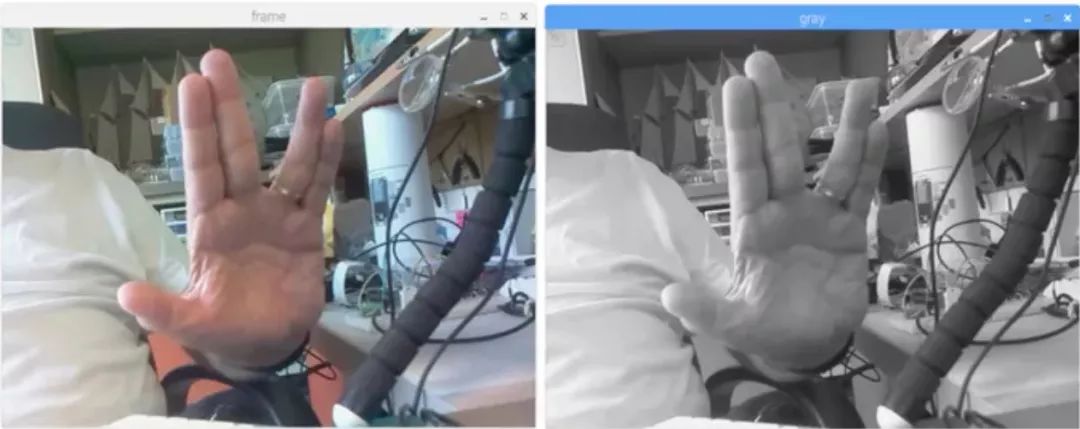
The code above captures the video stream generated by PiCam and displays it in BGR color and grayscale mode.
Note: I rotated the camera vertically according to the assembly method. If your situation is not the same, then comment out or delete the “flip” command line.
You can also download the code from my GitHub: https://github.com/Mjrovai/OpenCV-Object-Face-Tracking/blob/master/simpleCamTest.py
Enter the following command line to start executing:
python simpleCamTest.py
To complete the program, you must press the [ESC] key on the keyboard. Before pressing the [ESC] key, click the video window with the mouse.

The above image shows the result. For more information about OpenCV, please check this tutorial: https://pythonprogramming.net/loading-video-python-opencv-tutorial/
Step 4: Face Detection The most basic task of face recognition is “face detection.” You must first “capture” the face (Stage 1) to recognize it when comparing with newly captured faces (Stage 3).
The most common way to detect faces is by using the “Haar Cascade Classifier.” The object detection using a Haar feature-based cascade classifier is an efficient object detection method proposed by Paul Viola and Michael Jones in their 2001 paper “Rapid Object Detection using a Boosted Cascade of Simple Features.” This machine learning method trains a cascade function based on a large number of positive and negative images and then uses it to detect objects in other images. Here, we will use it for face recognition. Initially, the algorithm requires a large number of positive images (face images) and negative images (images without faces) to train the classifier. Then we need to extract features from them. The good news is that OpenCV provides trainers and detectors. If you want to train your own object classifier, such as cars, airplanes, etc., you can do so using OpenCV.
For more details, see: https://docs.opencv.org/3.3.0/dc/d88/tutorial_traincascade.html.
If you do not want to create your own classifier, OpenCV also includes many pre-trained classifiers for detecting faces, eyes, smiles, etc. The relevant XML files can be downloaded from this directory: https://github.com/Itseez/opencv/tree/master/data/haarcascades.
Now, let’s start creating a face detector using OpenCV!
Download the file faceDetection.py from my GitHub: https://github.com/Mjrovai/OpenCV-Face-Recognition/blob/master/FaceDetection/faceDetection.py.
import numpy as np
import cv2
faceCascade = cv2.CascadeClassifier('Cascades/haarcascade_frontalface_default.xml')
cap = cv2.VideoCapture(0)
cap.set(3,640) # set Width
cap.set(4,480) # set Height
while True:
    ret, img = cap.read()
    img = cv2.flip(img, -1)
    gray = cv2.cvtColor(img, cv2.COLOR_BGR2GRAY)
    faces = faceCascade.detectMultiScale(
        gray,
        scaleFactor=1.2,
        minNeighbors=5,
        minSize=(20, 20)
    )
    for (x,y,w,h) in faces:
        cv2.rectangle(img,(x,y),(x+w,y+h),(255,0,0),2)
        roi_gray = gray[y:y+h, x:x+w]
        roi_color = img[y:y+h, x:x+w]
    cv2.imshow('video',img)
    k = cv2.waitKey(30) & 0xff
    if k == 27: # press 'ESC' to quit
        break
cap.release()
cv2.destroyAllWindows()
Using Python and OpenCV to perform face detection requires only a few lines of code. Pay attention to the following line of code:
faceCascade = cv2.CascadeClassifier('Cascades/haarcascade_frontalface_default.xml')
This line of code loads the