Recently, my supervisor asked me to modify the program for the AT89C52.
The code written by the previous developer is truly unworthy of praise. Have you ever seen a program with over 10,000 lines in a single .c file? This is one of them. It has an extraordinarily large while loop and four layers of nested switches. The variable names are a mix of Pinyin and English commands, and the logical structure is misaligned. After seeing this brilliant code, I will never casually take on the task of modifying someone else’s program again.
Just a small complaint. I hope all programmers will pay attention to coding standards. We are all programmers; why make things difficult for each other?
Speaking of modifying the 89C52 program, I need a debugging tool. The debugging tool that the company originally used was the “Weifoo E6000/S”. Speaking of this debugger, it provides a compilation environment that I also cannot praise. It is very unpleasant to use! Fortunately, I can debug in Keil. The specific method is as follows:
I am using Keil version V8.15, which may be slightly different.
Step 1: Before all settings, you must first install the WAVE6000 debugging software and choose the installation path, as it will be used in the settings below.
Step 2: Set the Weifoo to start after compilation.
Open the project in Keil uVision2 and open the Options for Target ‘XXXX’ dialog.
Open the User tab, and the dialog shown below will appear.
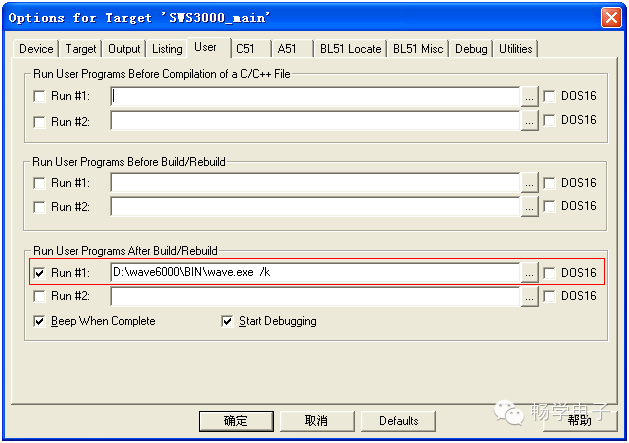
This indicates that after compilation, Keil will start the Wave.exe program to initialize the debugger before debugging.
Step 3: Set the debugging parameters.
In the Options for Target ‘XXXX’ dialog, select the “Debug” tab.
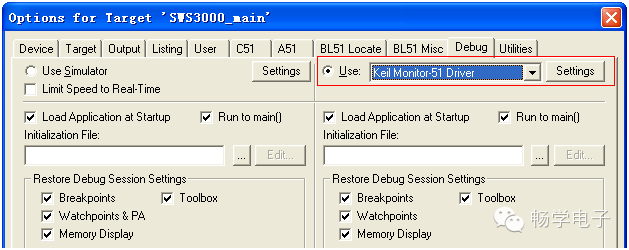
Select the Keil Monitor-51 Driver and choose the Use radio button.
Click the “Settings” button to open the debugging dialog.

As configured above, select COM1 for the port, which must match the COM port used to connect your debugger to the PC.
Select a baud rate of 57600bps; you can also choose 115200bps. Just make sure it matches the configuration of the debugger. (It is recommended to use 57600bps, as issues with data communication failure often occur at 115200bps during debugging.)
Step 4: Complete the configuration and run a small test.
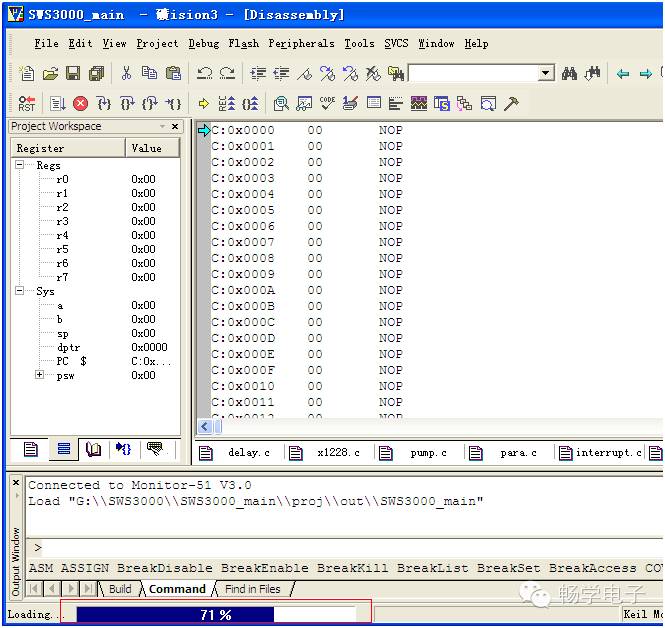
When we recompile the program, the compiler will start the Weifoo debugging software.
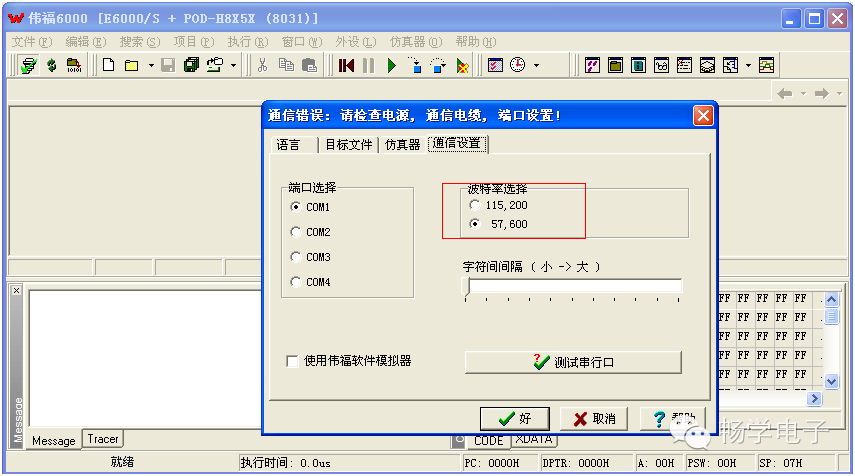
If the displayed baud rate does not match the configuration from the previous step, modify it to be consistent. Once set correctly, click the “OK” button.
Then, the Weifoo debugging program will initialize the emulator. A message box will pop up:
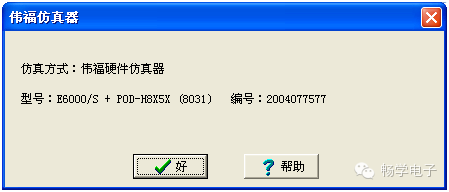
Click “OK”, then close the Weifoo debugging program. Actually, we just need to let it initialize the emulator. Now that the emulator is initialized, it can exit.
Keil is now ready to work.
Seeing this, the simulation debugging function of Keil should be functioning correctly.