Setting breakpoints is a very effective way to debug programs online. Combined with step-by-step debugging, it can quickly locate problems. However, sometimes manually setting breakpoints is not very convenient.
For example, if you want to stop at the Nth iteration of a loop, you would have to keep clicking step run until the loop reaches the Nth iteration.
Another example is when a variable is changed during program execution, and it’s difficult to locate where it was modified; manually setting breakpoints doesn’t help in this case. This is where some advanced breakpoint techniques come in handy.
1. Setting Breakpoint Hit Count
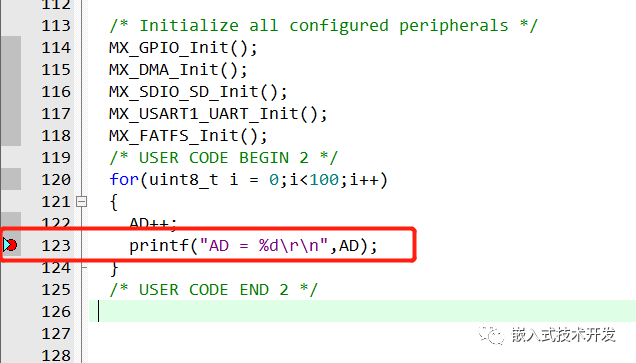
Taking the following program as an example, we will stop the program on the tenth iteration of the loop. First, manually set a breakpoint in the loop:
Click on the Debug menu and select BreakPoints:
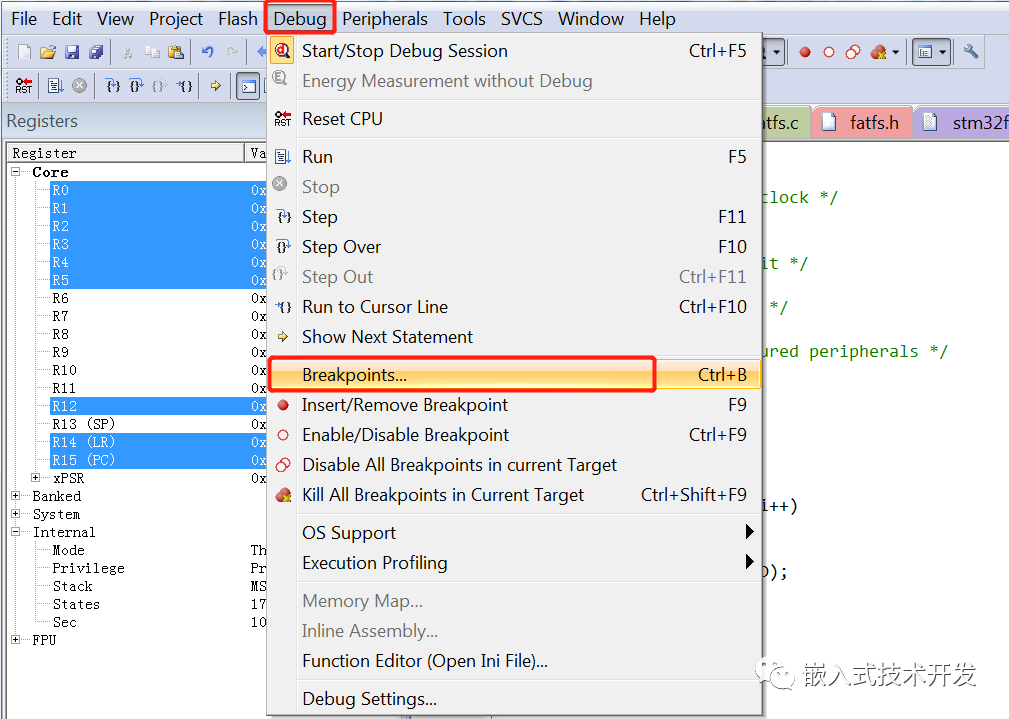
The following menu will pop up:
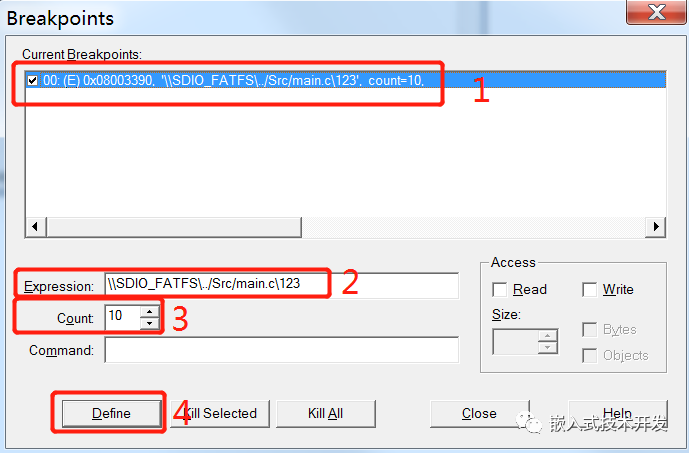
The topmost breakpoint is the one set manually. Double-clicking on that breakpoint will show its information in the Expression field. Change the Count value to 10 and click Define, then close the window. Here is an explanation:
Expression is the condition for the breakpoint. You can see that the manually set breakpoint ends with \123, indicating line 123 in the main.c file. This supports basic operators such as >, <, ==, !=, etc.
Count indicates how many times the program runs before hitting the breakpoint. The manually set breakpoints have a Count of 1.
Command indicates the command to execute when the breakpoint is reached, which is empty by default.
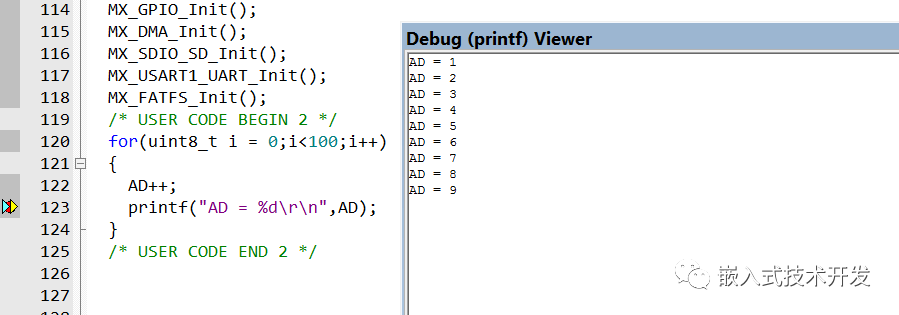
With the above settings, run the program. You will see that the program does not stop immediately at the breakpoint but stops at the 10th time:
2. Variable Matching Breakpoints
Add the variable to the Watch window, right-click and select Set Access BreakPoint at xxx. The same menu will pop up:
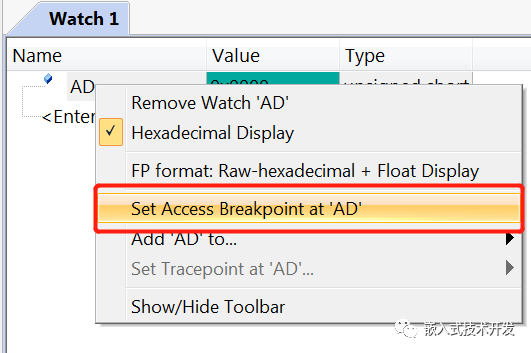
Select the Access method as Read or Write, set the Count value, and click Define. Here, we choose Write, with a Count value of 4, indicating that the program will stop when the variable is written for the fourth time.
3. Conditional Variable Breakpoints
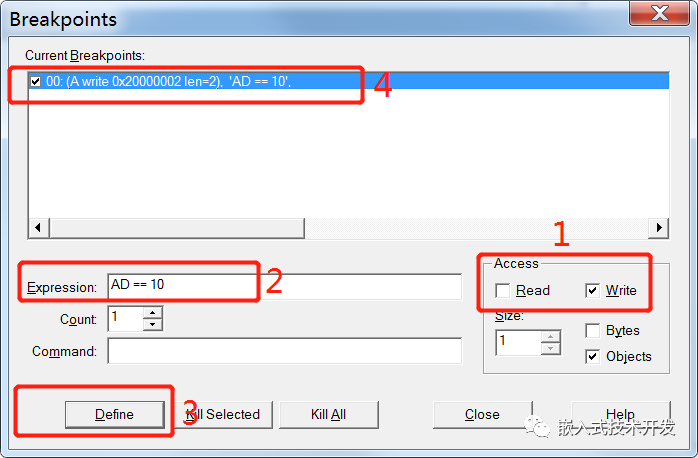
Similar to the previous step, in the Watch window, right-click the variable and select Set Access BreakPoint at xxx. Check the Access method as Read or Write, delete the original content under Expression, and enter the expression “AD== 10”. Click Define. This way, when AD==10, the program will stop.
4. Print Information
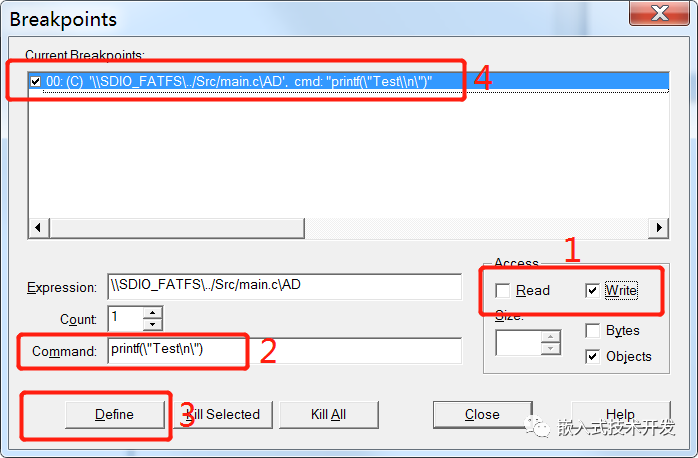
Select a manually set breakpoint, then fill in printf() under Command. When the program reaches the breakpoint, it will not stop but will print the set information in the Command window.

5. Conditional Print Information
You can also combine 3 and 4, as follows:
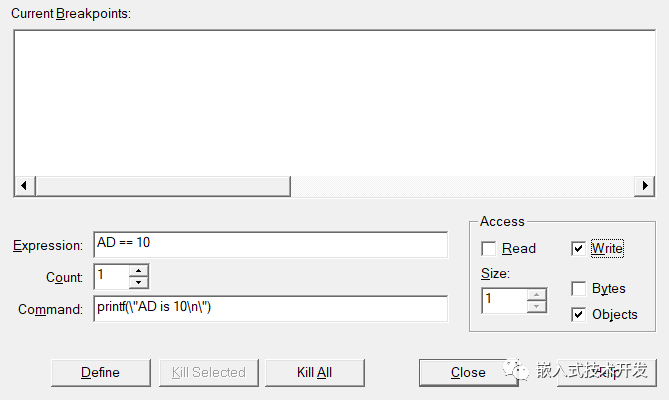
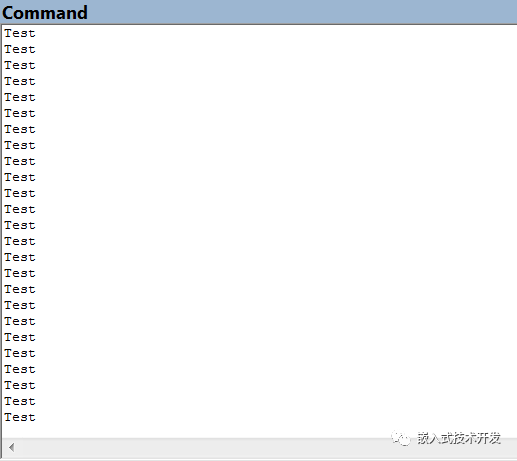
When AD==10, the program does not interrupt and prints information in the Command window.
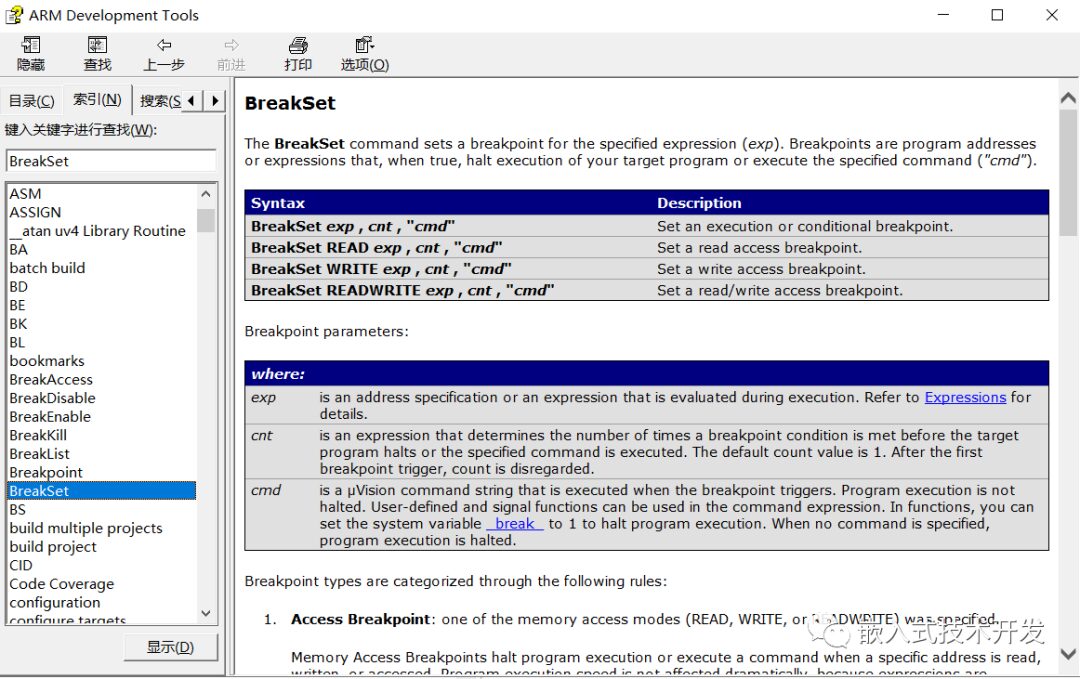
There are many other advanced usages for breakpoints, with different expressions and commands. For specifics, refer to the Keil user help documentation.
Source: Embedded Technology Development
Copyright belongs to the original author. If there is any infringement, please contact for deletion.
I found another open-source serial port tool, it’s amazing!
Graduated with a 450,000 offer, working on chips is really nice!
A skill checklist and upgrade roadmap to become an embedded expert