Currently, there are many USB boot creation tools available on the market, such as the well-known tool “Rufus”. However, these tools often come with some proprietary features. How can we create a pure USB boot tool? Let’s experience how to create a Windows bootable USB drive in a Linux environment.
Preparation for the Experiment
- USB Drive (8GB or larger)
- Windows 11 ISO Image
Preparing the ISO Image
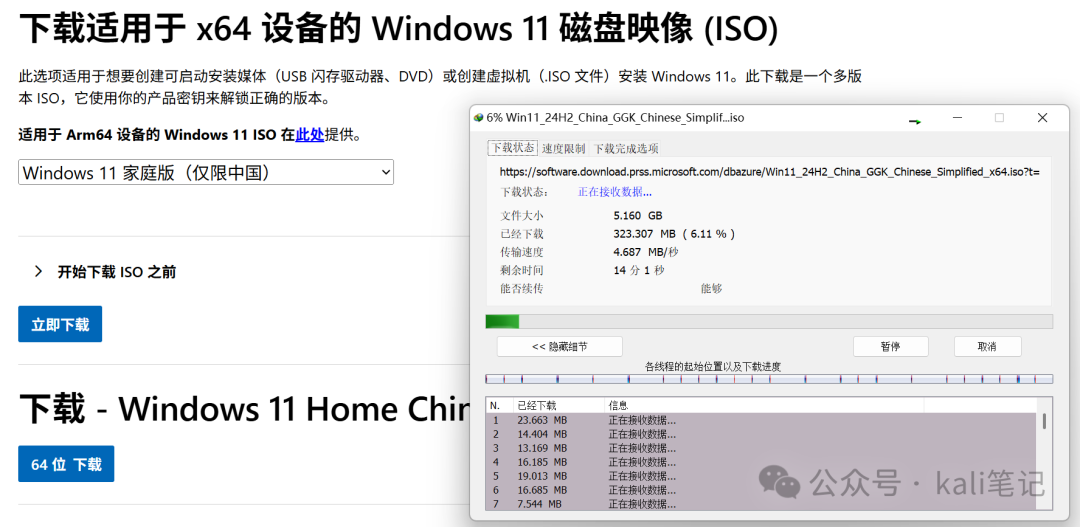
Next, we will download the Windows 11 ISO image from the official Microsoft website. Official address: https://www.microsoft.com/en-us/software-download/windows11
Understanding WoeUSB
<span>WoeUSB</span> is a free and open-source tool for creating Windows USB installation drives from ISO files or DVDs on Linux systems.
Project address: https://github.com/slacka/WoeUSB
Installing WoeUSB
In Linux, we execute the following commands:
git clone https://github.com/slacka/WoeUSB.git
cd WoeUSB
# Generate application version number
./setup-development-environment.bash
# Install dependencies
sudo apt-get install devscripts equivs gdebi-core mk-build-deps
# Package and generate deb file
sudo gdebi woeusb-build-deps__all.deb # Replace with the generated version number.
# Install WoeUSB
dpkg-buildpackage -uc -b
sudo gdebi ../woeusb__.deb  # This file is in the parent folder of WoeUSB
Creating the Bootable Image
It is important to note that the Windows image exceeds 4GB, so we cannot use the FAT32 format; instead, we should use the NTFS format to create the bootable drive. However, the WoeUSB GUI does not support specifying the NTFS format, but we can use the command line.
First, we use the following command to check the current USB drive location.
fdisk -l
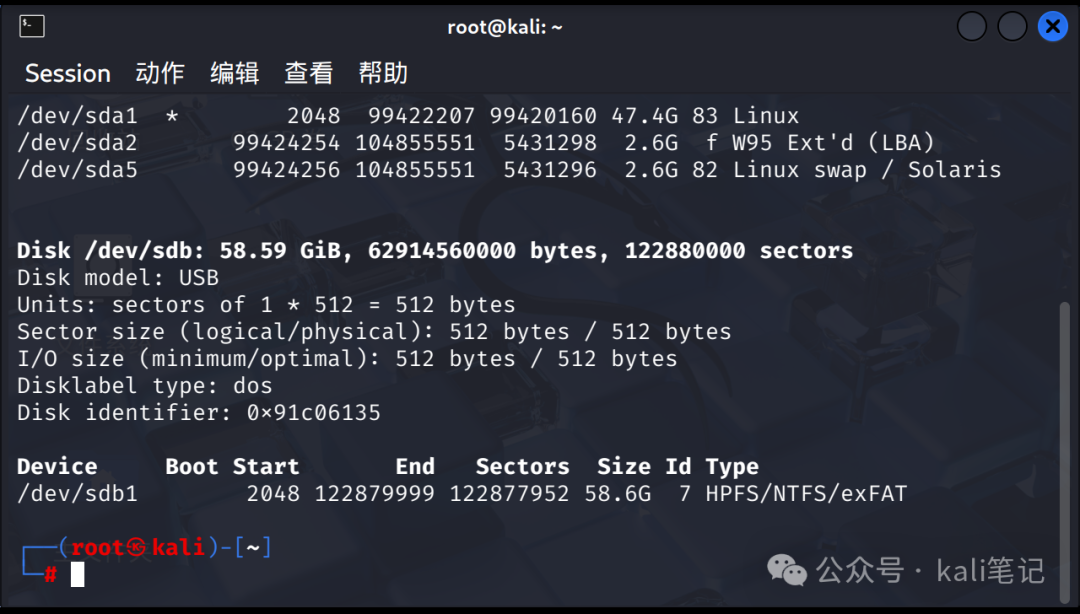
Next, we execute the command:
woeusb --device /root/windows11.iso /dev/sdb --target-filesystem NTFS
At this point, the creation is complete. After rebooting, you can boot from the USB drive and directly enter the Windows installation program.
For more exciting articles, please follow us.