
In many situations, there are a large number of similar devices that need to display and control device parameters through sub-screens in the HMI. If a sub-screen is drawn for each device in the HMI, it will lead to a lot of repetitive work and make the HMI program lengthy.
Therefore, drawing a panel for similar devices in the HMI program and then loading the same panel through a popup screen to display the parameters of different devices will greatly reduce the configuration workload.
This example will introduce how to call the same panel in the popup screen to display the PID adjustment parameters and device start/stop signal parameters for three groups of devices, as well as how to set/reset Bool variables through switch buttons.
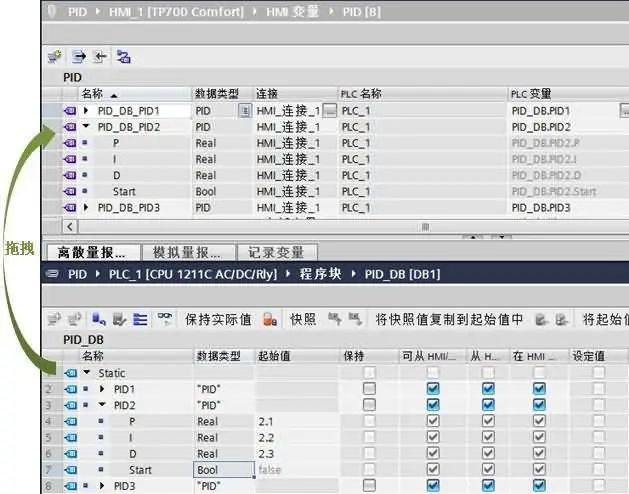
1. Create relevant parameter variables for multiple similar devices in the HMI (PID data type is the UDT PLC data type defined in the PLC program), as shown in Figure 01.
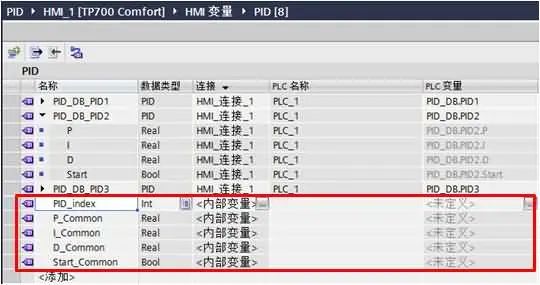
2. Create pointer index variables and pointer variables connected to internal variables in the HMI, as shown in Figure 02.
3. Set index variables for pointer variables, and correspond the index values to the actual variables. As shown in Figure 03.
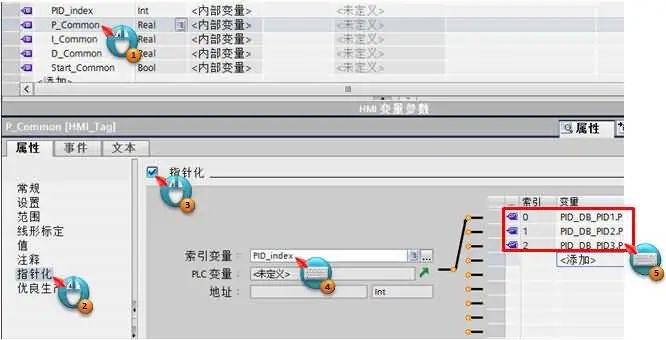
When the index variable PID_index is 0, P_Common is the value of variable PID_DB_PID1.P;
When the index variable PID_index is 1, P_Common is the value of variable PID_DB_PID2.P;
When the index variable PID_index is 2, P_Common is the value of variable PID_DB_PID3.P.
Make the same settings for pointer variables “I_Common”, “D_Common”, and “Start_Common”, and correspond the index values to their respective actual variables.
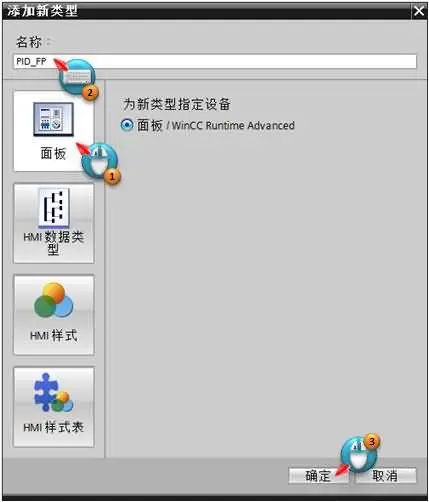
4. Create a panel in the library, as shown in Figure 04.
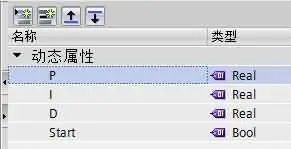
5. Add dynamic properties to the panel, as shown in Figure 05.
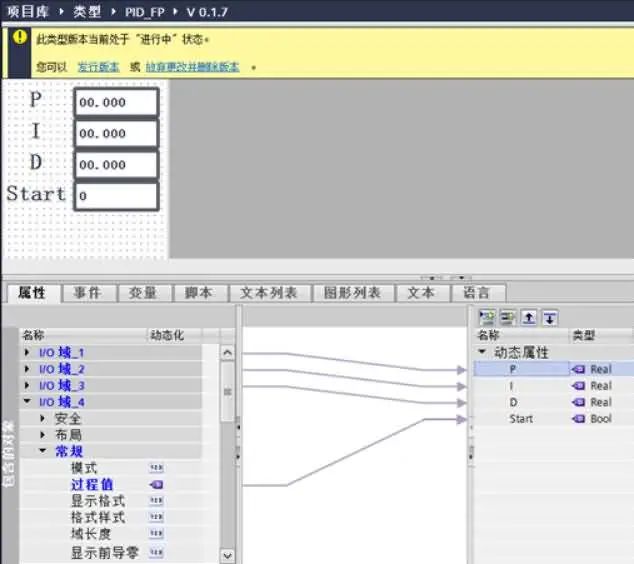
6. Add I/O fields for parameter display and input in the panel, and associate the process values of the I/O fields with the corresponding dynamic properties, as shown in Figure 06.
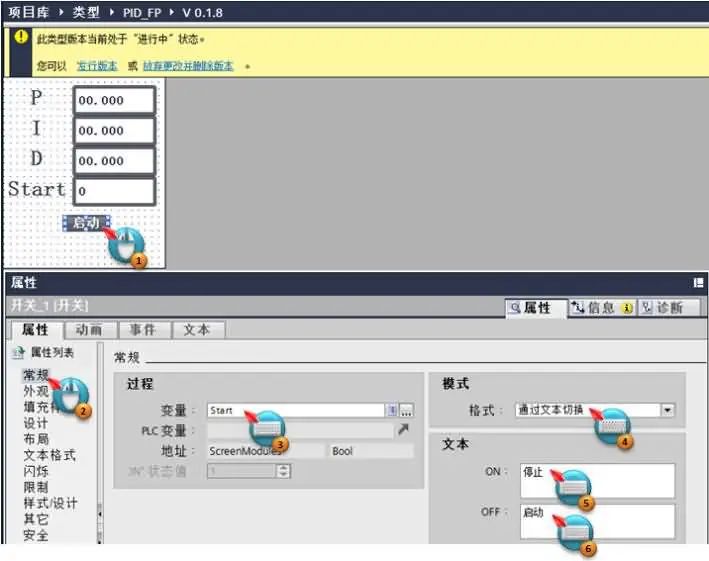
7. Add a “Start/Stop” switch to set/reset Bool type variables to achieve the effect of starting/stopping the device. For pointer-enabled variables, operations using functions on these variables are not supported, such as “set variable,” “set bit,” “invert bit,” etc. Therefore, a switch is required to set and reset Bool type variables. The operation of the switch on Bool type variables is actually an inversion operation, so only one switch is needed to achieve the start/stop operation of the device. However, some customers prefer to use two buttons to distinguish between start and stop operations, so the following will introduce two methods to implement start/stop operations with one button and two buttons. Users can choose one method according to their needs in practical applications.
Add one switch, and associate the variable with the panel type property “Start”, set the mode to “toggle by text”, set the ON text to “Stop”, and set the OFF text to “Start”. As shown in Figure 07.
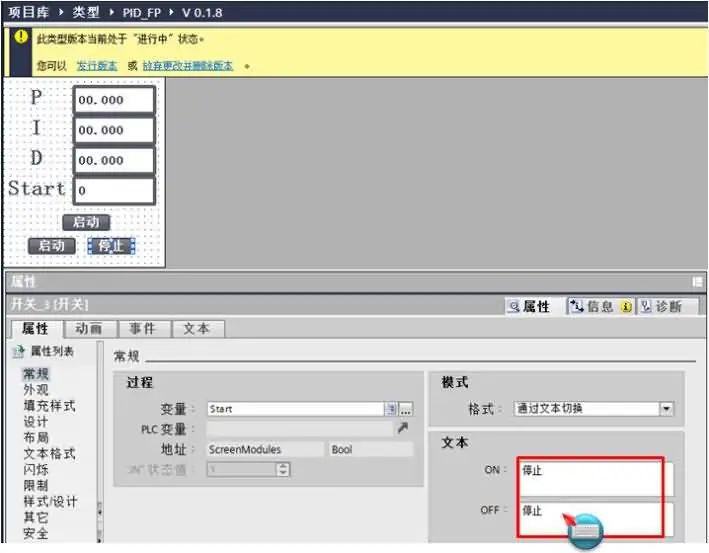
Then add two more switches, performing the same operations as in Figure 07. Only one switch has its ON and OFF texts set to “Start”, while the other switch has its ON and OFF texts set to “Stop”, as shown in Figure 08.
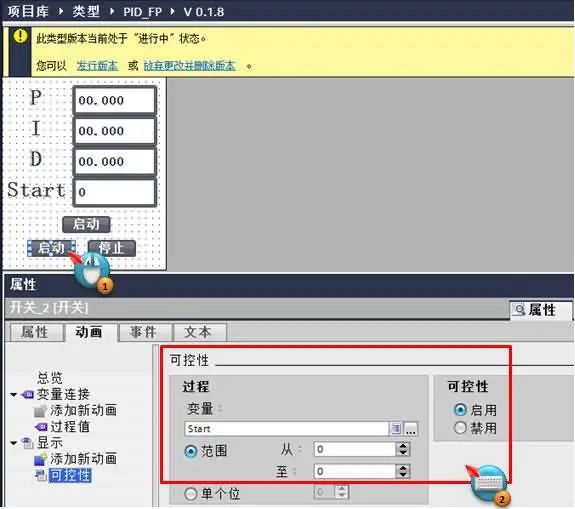
Select “Switch_2”, add animation, choose “controllability”, and set as shown in Figure 09.
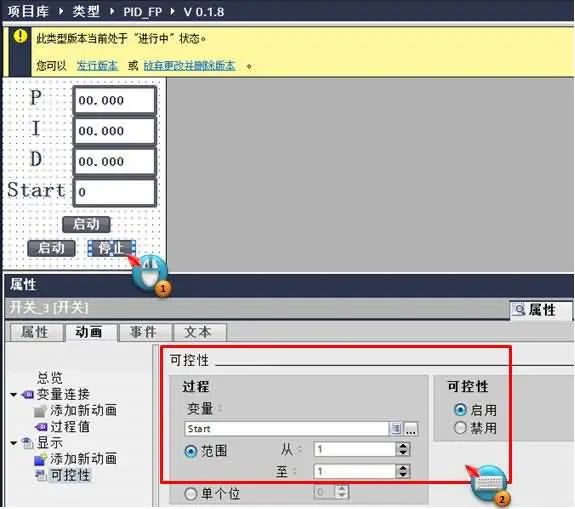
Select “Switch_3”, add animation, choose “controllability”, and set as shown in Figure 10.
After completing the above operations, click “Release Version” in the panel type editor.
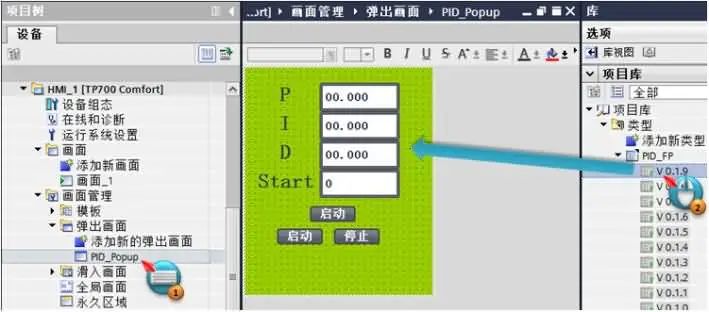
8. In the popup screen under HMI screen management, add a new popup screen named “PID_Popup”, adjust the screen to an appropriate size, and add “PID_FP” from the project library types to this popup screen, as shown in Figure 11.
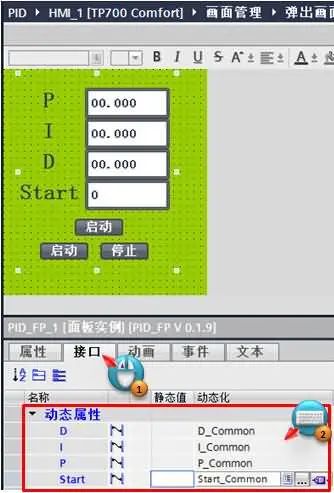
9. In the interface options page of the panel instance, associate dynamic properties with pointer variables, as shown in Figure 12.
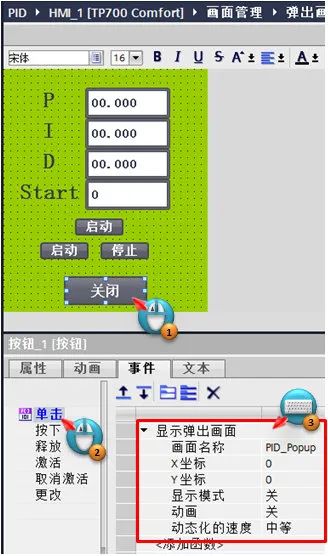
10. Add a “Close” button to the popup screen, and add the “Show Popup Screen” function in the “Click” event, as shown in Figure 13.
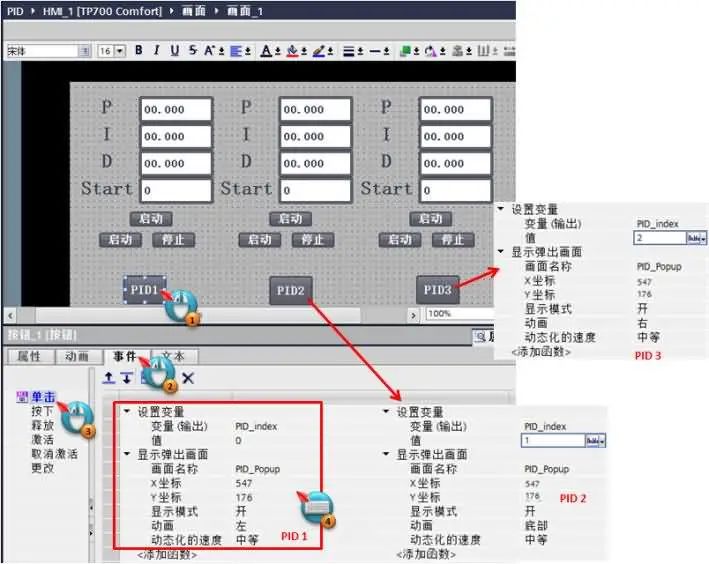
11. Add a button in the main screen to open the popup screen, and add a function in the button’s click event, as shown in Figure 14.
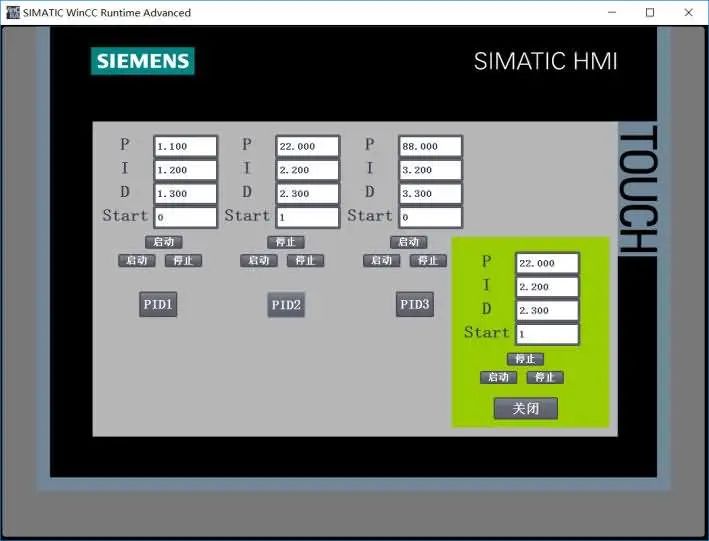
Actual Running Effect
Source: Internet, copyright belongs to the original author. If there are any copyright issues, please contact us in time. Please delete, thank you!
Free Access to Robot Learning Materials ↓
Click “Read Original” to sign up for robot courses