Boost unit testing framework (Boost.Test) is part of the Boost library. It is a fully-featured and extensible framework with various assertion macros, XML output, and more.
Boost.Test itself does not include mocking capabilities but can be used in conjunction with standalone mocking frameworks (like gmock).
If you are not familiar with Boost.Test, here is a description of its main concepts:

For most Boost.Test checkers, you can set the severity level:-
WARN: A warning message is generated if the check fails, but the error counter does not increase, and the test case continues.
-
CHECK: Reports an error and increases the error counter when the check fails, but the test case continues.
-
REQUIRE: Used to report fatal errors when the execution of the test case should be aborted (e.g., checking if an object that will be used later has been successfully created).
👇 Click to receive 👇
👉 C language knowledge materials collection
Thus, Boost checkers are typically macros in the format BOOST_[level]_[checkname] which accept one or more parameters.
The basic macros include BOOST_WARN, BOOST_CHECK, and BOOST_REQUIRE. They accept an expression parameter to check, for example:
BOOST_WARN(sizeof(int) == sizeof(long));
BOOST_CHECK(i == 1);
BOOST_REQUIRE(j > 5);
Several examples of other checkers are as follows:
| Type | Description |
|---|---|
| General Comparison | Macros like BOOST_[level]_EQUAL, BOOST_[level]_NE, BOOST_[level]_GT not only provide a test failure message when they fail but also display the expected and actual values: int i = 2; int j = 1; BOOST_CHECK(i == j); // Only reports the failure fact: “check i == j failed” BOOST_CHECK_EQUAL(i, j); // Reports “check i == j failed [2 != 1]” |
| Floating Point Comparison | BOOST_[level]_CLOSE / BOOST_[level]_CLOSE_FRACTION / BOOST_[level]_SMALL |
| Exception Checking | BOOST_[level]_THROW / BOOST_[level]_NO_THROW / BOOST_[level]_EXCEPTION |
Test Suites
You can organize Boost tests into test suites using the macros BOOST_AUTO_TEST_SUITE(suite_name) and BOOST_AUTO_TEST_SUITE_END(). A simple test suite looks like this:
#define BOOST_TEST_MODULE Suite_example
#include <boost/test/unit_test.hpp>
BOOST_AUTO_TEST_SUITE(TwoTwoFour_suite)
BOOST_AUTO_TEST_CASE(testPlus) { BOOST_CHECK_EQUAL(2 + 2, 4); }
BOOST_AUTO_TEST_CASE(testMult) { BOOST_CHECK_EQUAL(2 * 2, 4); }
BOOST_AUTO_TEST_SUITE_END()
Test Fixtures
To write test fixtures using Boost, you can use the regular BOOST_AUTO_TEST_CASE macro or the special BOOST_FIXTURE_TEST_CASE macro after the fixture class declaration:
struct SampleF {
    SampleF() : i(1) { }
    ~SampleF() { }
    int i;
};
BOOST_FIXTURE_TEST_CASE(SampleF_test, SampleF) {
    // Directly access i in SampleF
    BOOST_CHECK_EQUAL(i, 1);
    BOOST_CHECK_EQUAL(i, 2);
    BOOST_CHECK_EQUAL(i, 3);
}
Adding Boost.Test to Your Project
You can choose from three variants to use the framework: header-only, static library, or shared library. Keep in mind that using header-only Boost.Test may require significant compile time when selecting the most suitable option.
Next, we will focus on the shared library variant.
-
Follow these instructions to install and build the Boost testing framework.
Note that CLion supports Boost.Test version 1.55 and above.
-
Create a folder for Boost tests in the project root directory. For example, we will call it Boost_tests.
-
Create a CMakeLists.txt file in the Boost_tests folder: right-click on it in the project tree and select New | CMakeLists.txt.
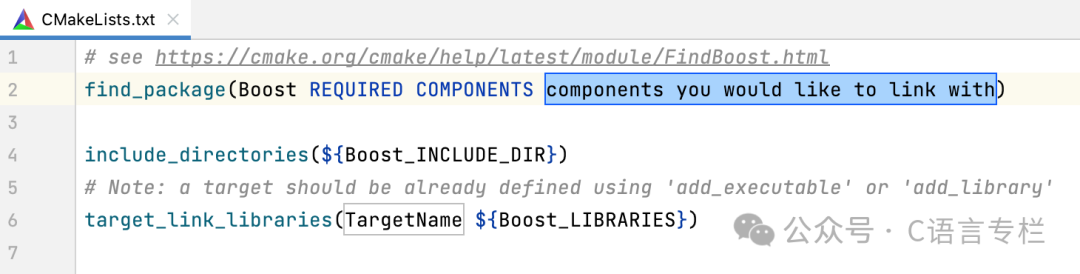
Customize the following lines and add them to your script:
set(Boost_USE_STATIC_LIBS OFF)
find_package(Boost REQUIRED COMPONENTS unit_test_framework)
include_directories(${Boost_INCLUDE_DIRS})
# 'Boost_Tests_run' is the target name
# 'test1.cpp test2.cpp' are the source files containing tests
add_executable(Boost_Tests_run test1.cpp test2.cpp)
target_link_libraries(Boost_Tests_run ${Boost_LIBRARIES})
You can also use the live template for boost_with_libs and then adjust the template code to mimic the code snippet above.
-
Add the command add_subdirectory(Boost_tests) to the end of the root CMakeLists.txt script, and then reload the project.
-
In the source files containing tests, add the following lines:
#define BOOST_TEST_DYN_LINK
#define BOOST_TEST_MAIN  // Only in one cpp file
#include <boost/test/unit_test.hpp>
If you have multiple .cpp files containing tests, #define BOOST_TEST_MAIN should only be placed in one of them.
Live Templates for Boost.Test
There are two predefined live templates that can help you save time editing CMake scripts that include Boost.Test: boost and boost_with_libs.
You can find their descriptions and settings in Settings | Editor | Live Templates | CMake.
To insert a template, press Ctrl + J or call Code | Insert Live Template in CMakeLists.txt. Select from the options list, for example:
Or you can start typing the abbreviation and press Tab to insert the code.
Boost.Test Run/Debug Configuration
While Boost.Test provides a main() entry point for your test program, which you can run as a regular application, we recommend using a dedicated Boost.Test run/debug configuration.
It contains settings related to testing and allows you to benefit from the built-in test runner, which cannot be used if you run the tests as a regular program.
-
To create a Boost.Test configuration, go to Run | Edit Configurations in the main menu, click
 and select Boost.Test from the template list.
 -
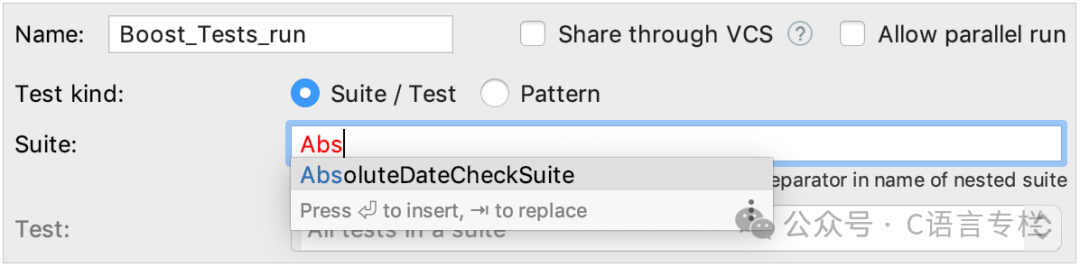
Specify the tests or suites to include in the configuration, or provide a pattern for filtering test names. The autocomplete feature in the fields can help you fill them out quickly:
Set wildcards to specify test patterns, for example:

-
In the other fields of the configuration settings, you can set environment variables and command line arguments.
For Boost.Test version 1.62 or earlier, if you receive the message Test framework quit unexpectedly, set the following string in Program arguments:
--log_format=HRF --log_level=all -
Save the configuration, and it will be ready to run
 or debug
  .
.
You can modify the Boost.Test template itself instead of editing individual configurations. In this case, the settings you specify will be applied as default settings to all new configurations of this type.
Running Tests
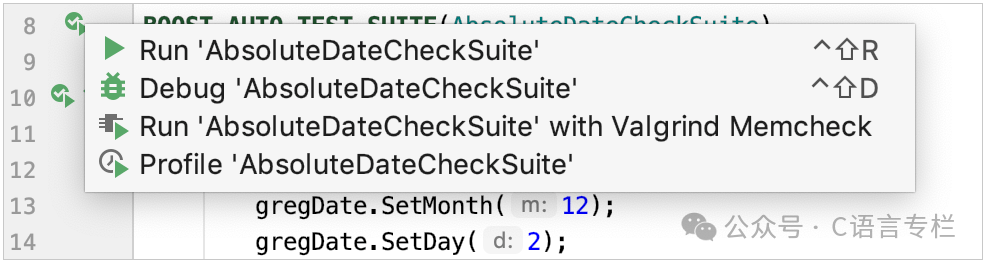
In CLion, there are various ways to start a run/debug session for tests, one of which is using the special rain gutter icon. These icons help to quickly run or debug individual tests or entire suites/fixtures:
The rain gutter icons also show test results (if available): success  or failure
  .
.
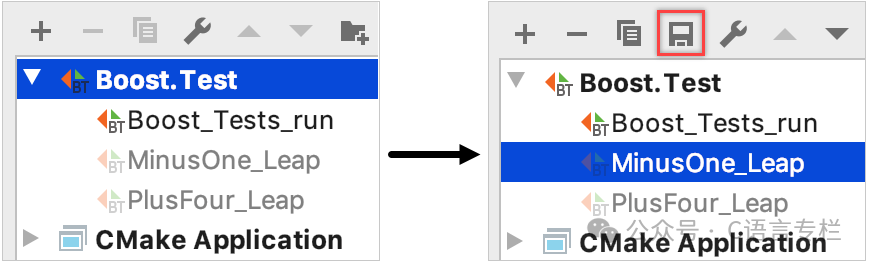
When you run tests/suites/fixtures using the rain gutter icon, CLion creates a temporary Boost.Test configuration, which appears in the configuration list in gray.
To save a temporary configuration, select it in the Edit Configurations dialog and press  :
:
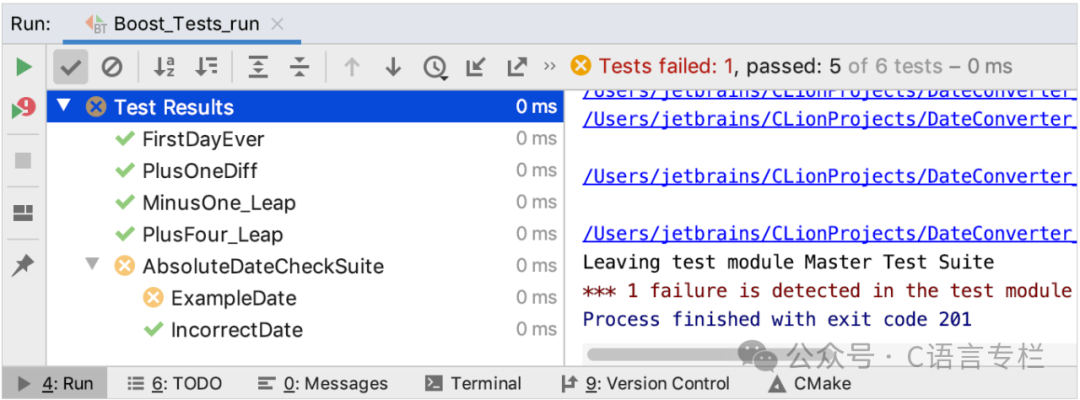
Viewing Results
When you run tests, CLion displays the results and processes in the built-in test runner window. The test tree shows all tests executing one after another. The test runner window includes:
-
A progress bar showing the percentage of tests executed so far,
-
A tree view with the status and duration of all running tests,
-
The output stream of the tests,
-
A toolbar with options to re-run failed
 tests, export
  or open previously auto-saved results
  , sorting tests alphabetically
  for easy finding of specific tests or sorting by duration
  to see which tests take longer than others.
CLion’s test runner also supports Boost.Test decorators like boost::unit_test::disabled()/enabled().
Hot Recommendations
-
Passed the interview, but is there still hope? Netizens: Just raise the bar!
-
Not being human, but promoting the exploitation of employees as a form of glory…
-
What majors do you not recommend younger students to choose? Netizens: Computer science…