Background: Playing with microcontrollers seems too limited nowadays, this article discusses the Raspberry Pi. This article has two goals: 1. Which Raspberry Pi should beginners choose in 2020; 2. Which operating system to install on the Raspberry Pi and how to do it.
Difference Between Raspberry Pi and Microcontrollers
Let’s discuss the differences from the perspective of programming experience, since we are talking about “programming experience,” it is definitely related to the programming language used.
1.
PythonThanks to MicroPython, programming in Python makes it almost indistinguishable between Raspberry Pi and microcontrollers. Sugar once wrote an article titled “How to Make Your STM32 Development Board Support MicroPython” explaining how to turn your STM32 development board into a Pyboard. In fact, it is not just STM32; other platforms like ESP8266, ESP32, K210, etc., also have corresponding methods to support Python.
2.
C/C++The programming experience using
C/C++is quite different between the two. The most obvious difference is that microcontrollers must compile the firmware on a computer and then download it to the microcontroller to run; while the Raspberry Pi itself is equivalent to a computer, it programs and runs on itself.
What Operating System to Use on Raspberry Pi
As mentioned above, the Raspberry Pi itself is equivalent to a computer, so like a computer, it needs to install an operating system to use.
There are many systems available for Raspberry Pi, which can be seen on the official website. Which one should beginners choose? Below, Sugar provides some suggestions to help newcomers avoid pitfalls.
The Raspberry Pi supports many systems, most of which are based on Linux. The official Noobs is a 32-bit Debian, which is the first choice for beginners. The commonly used ROS Melodic is based on Ubuntu 18.04, and the current Raspberry Pi version of Ubuntu Mate is Ubuntu 18.04. This means that if the goal is to play with the ROS system, then the Ubuntu Mate system should be chosen.
| System | Bit |
|---|---|
| Noobs | 32bit |
| Ubuntu Mate | 32bit and 64bit |
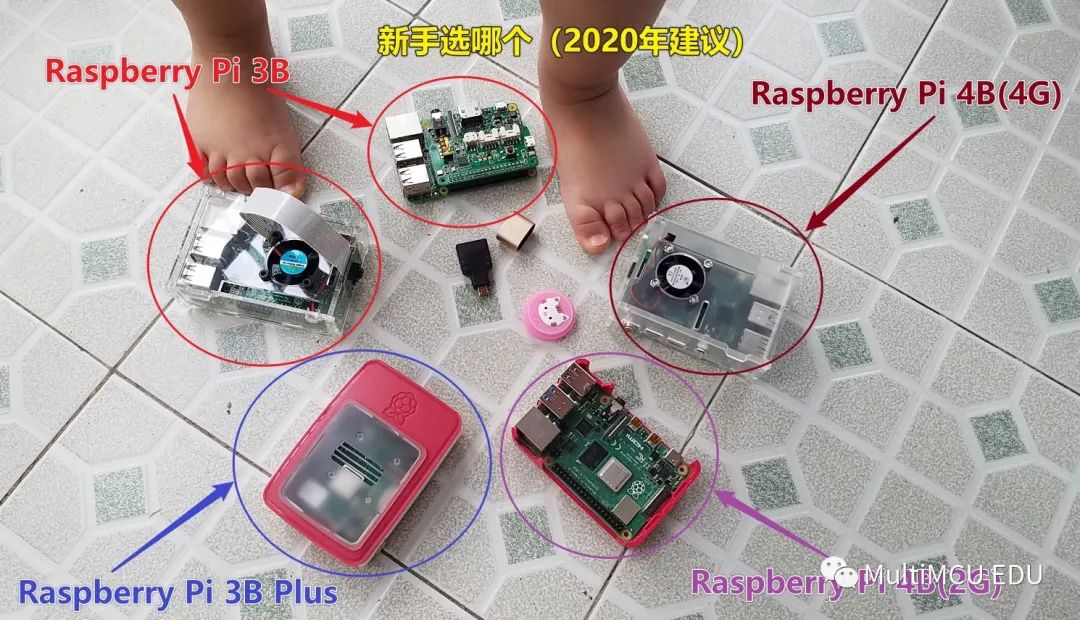
This article mainly discusses the above 3 systems. For today’s beginners, the choice of system is closely related to hardware selection. For Raspberry Pi 3B or 3B+, the normal installation method can complete the installation of the above 3 systems. For Raspberry Pi 4B, currently, only Noobs is a viable option for smooth installation. Although it is possible to install Ubuntu 18.04 on 4B with some tweaking, it is not within the capability of beginners and is not recommended for those who are not experienced.
What Size TF Card is Best for Raspberry Pi
Sugar recommends a 32GB Class 10 card as the most suitable. The Raspberry Pi is a bit more advanced than microcontrollers, but its performance is not very superior, so having too much storage space is not very meaningful. Generally, for learning Linux and ROS, 32GB is sufficient.
Sugar’s habit is to “choose the best within a suitable range,” so 8GB and 16GB are not recommended, but it does not mean that smaller sizes cannot be used.
Noobs Installation Method
1. Format the TF card using
SD Card Formatter on Windows. 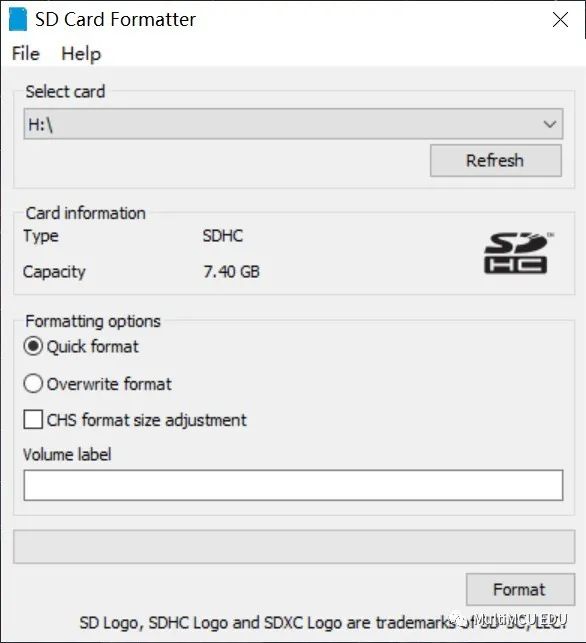 2. Download Noobs from the official website and extract it to the TF card using
WinRAR. 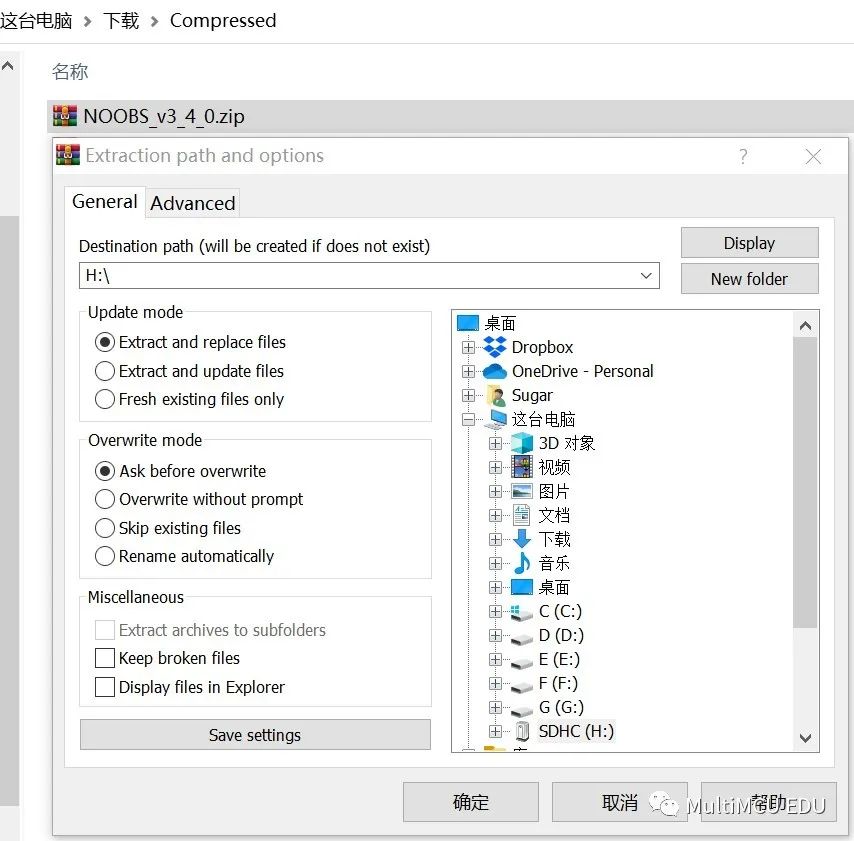 3. After extraction, safely eject the TF card, insert it into the Raspberry Pi, and connect the
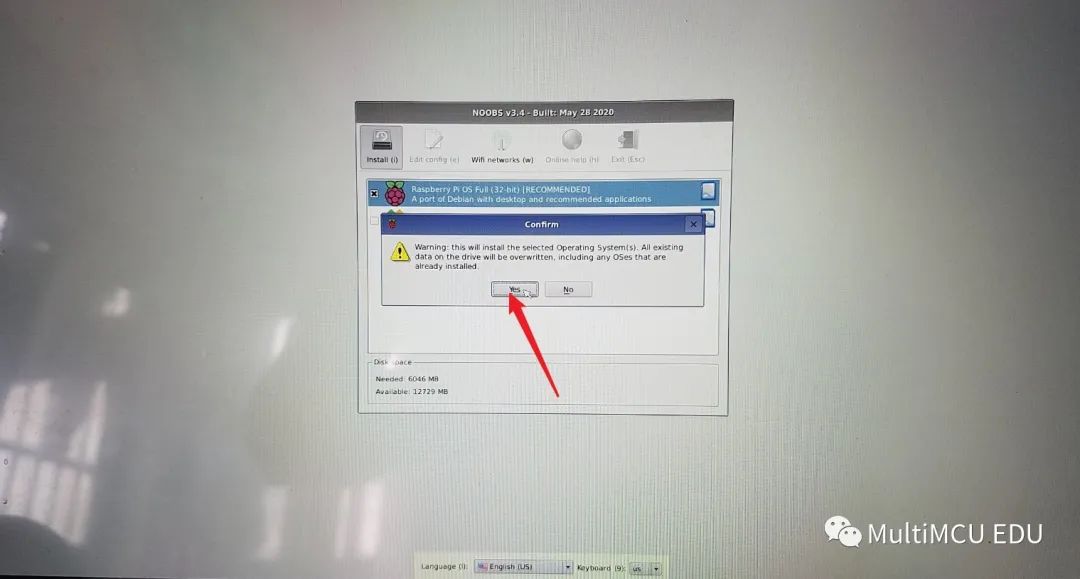
screen, keyboard, and mouse properly.  4. Power on the Raspberry Pi, make a few simple selections, and then the automatic installation process will begin.
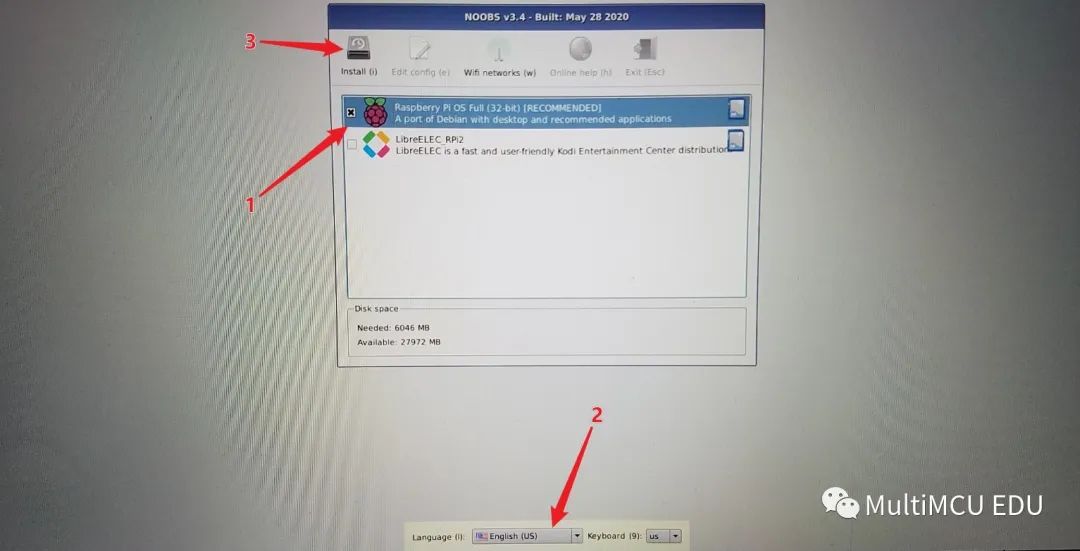
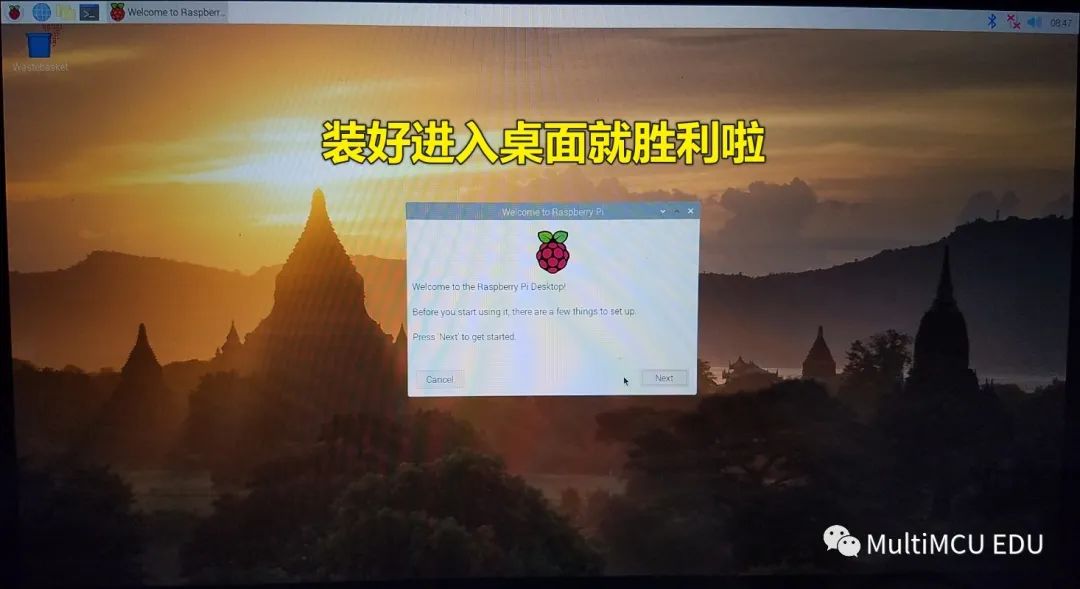
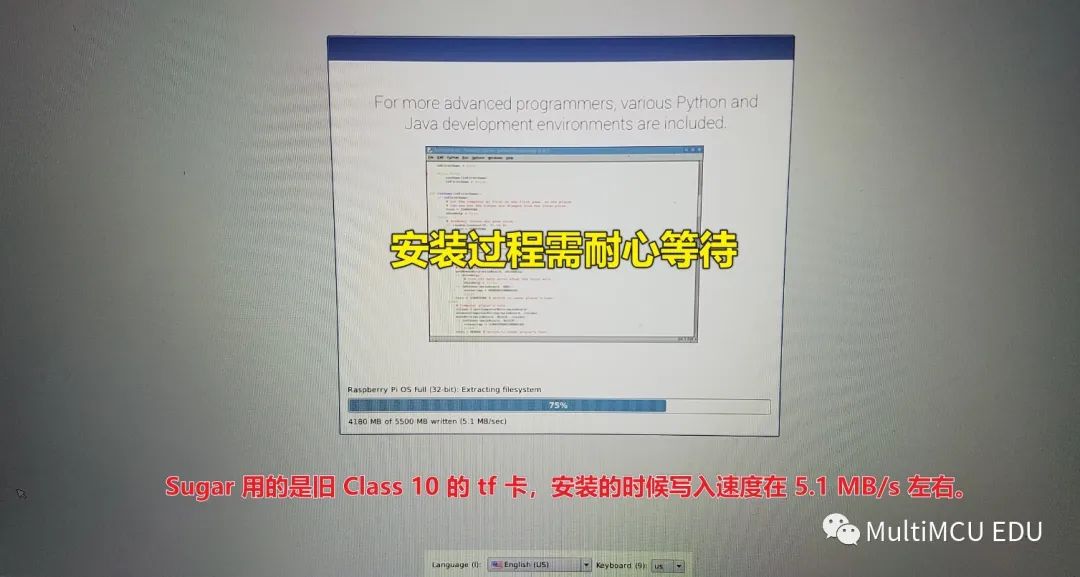 5. After the automatic installation is complete, it will restart, as shown below:
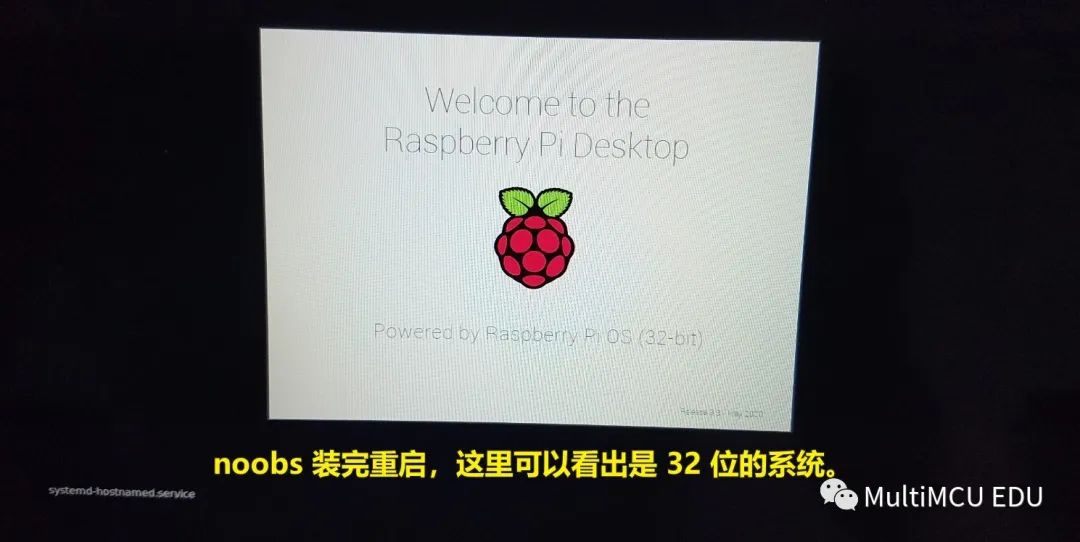
The installation method for Noobs is particularly simple, with no major pitfalls. One point to note is that when relying on Windows for several operations, it is best to use reliable software. Sugar uses
SD Card Formatterto format the SD card and
WinRARfor extraction.
Ubuntu Mate Installation Method
Currently, Ubuntu Mate has official versions of 32bit and 64bit, both are Ubuntu 18.04 LTS, and the installation method is the same.
1. Format the TF card, download the system compressed package from the official website, and use
WinRARto extract the img system image file. 2.
balenaEtcher is an open-source software specifically designed for flashing img images onto Raspberry Pi, and it is very simple to use: select the img and target TF card, then click the button to start flashing. 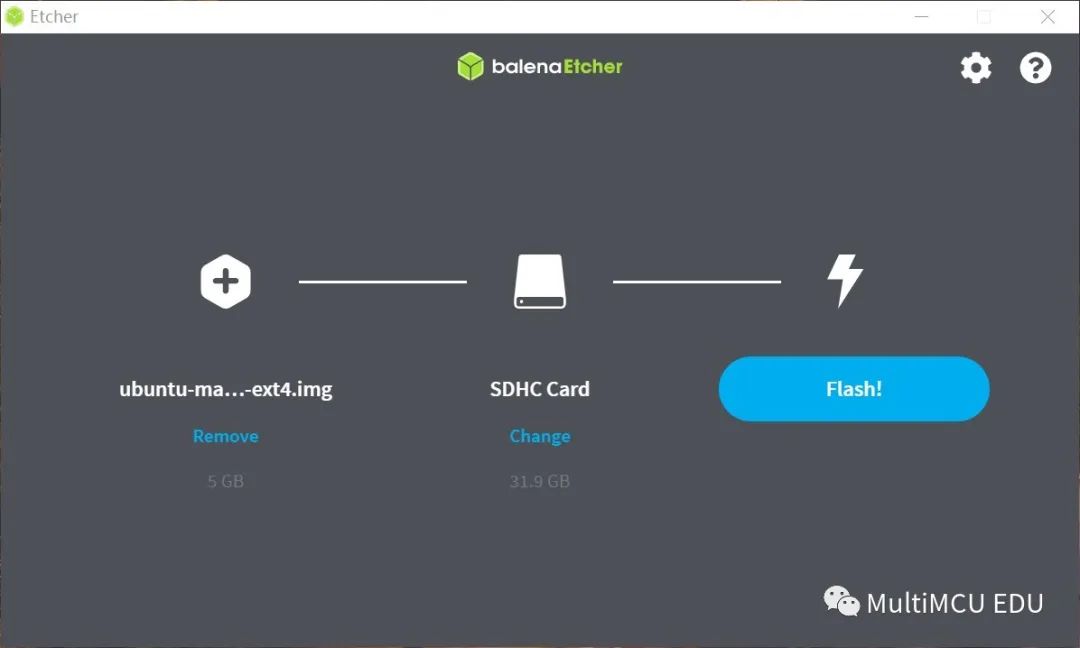 3. The time it takes to flash the system depends on the write speed of the TF card, and it will automatically verify after flashing.
 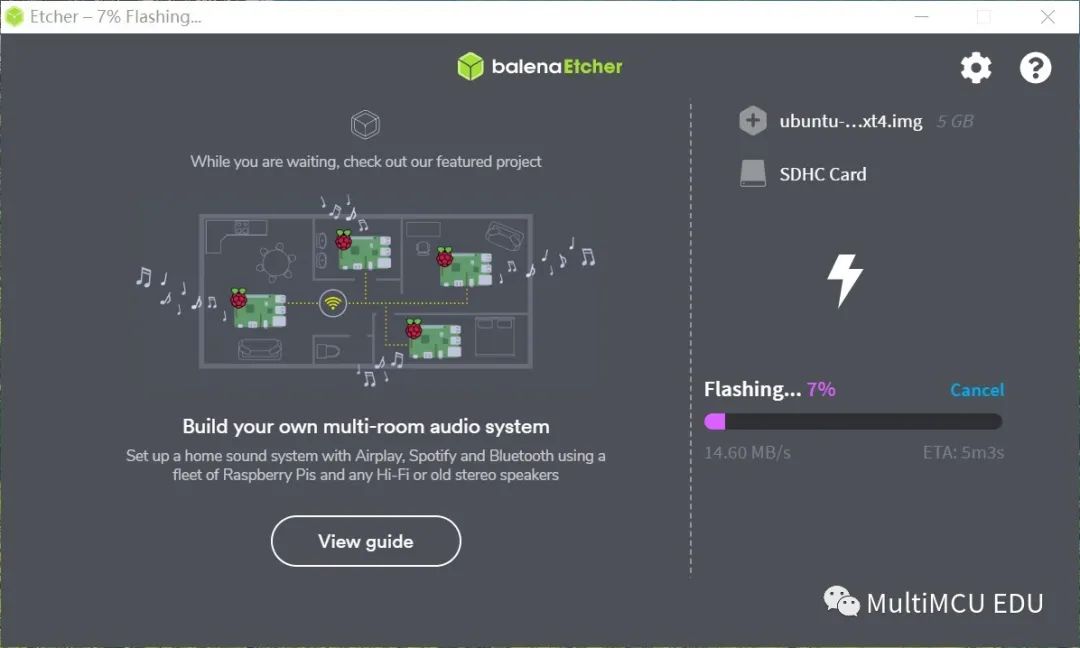 4. After flashing, safely eject the TF card, insert it into the Raspberry Pi, connect the
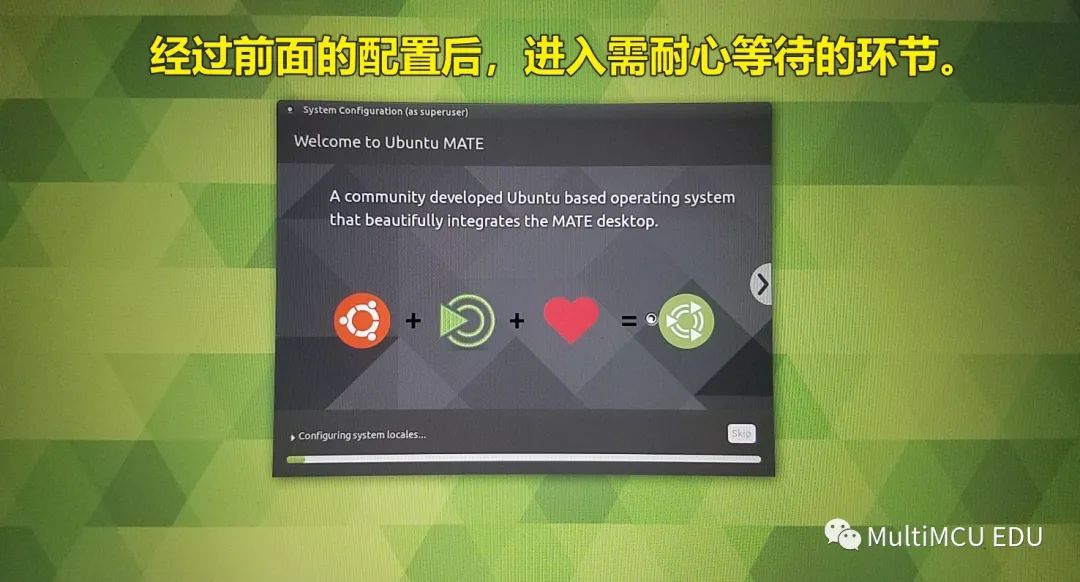
screen, keyboard, and mouse, and then power on. 5. Make some simple configurations and then wait. 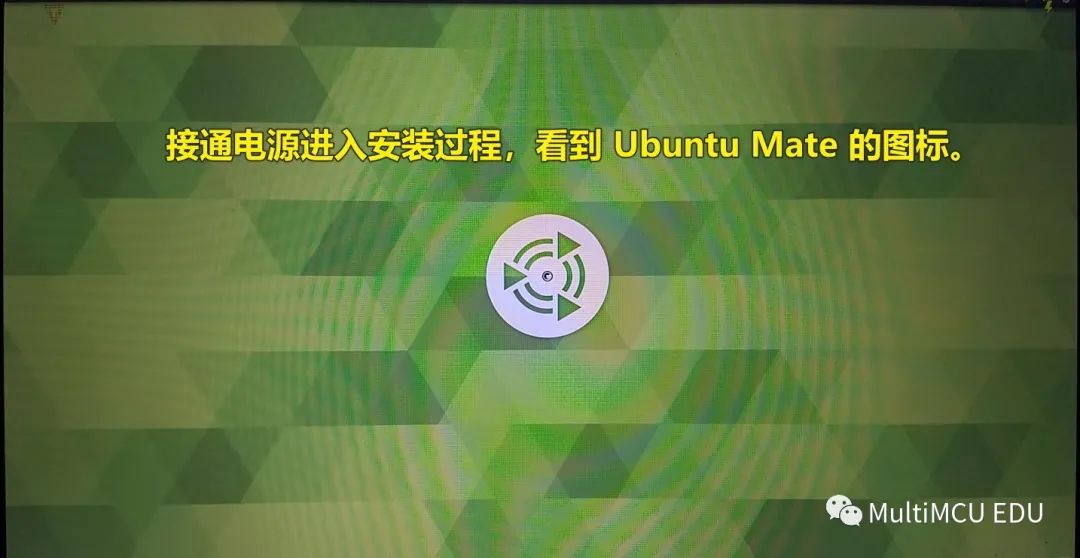

PS
Sugar bought a Raspberry Pi as soon as the 3B+ was released while playing with ROS Kinetic. At that time, Ubuntu 16.04 was used to run ROS, and Ubuntu Mate did not support 3B+, so the installation process involved a lot of hassle. Later, it was found that the performance improvement compared to 3B was not significant, and a lot of time was wasted on system installation unrelated to ROS.
For Raspberry Pi, it is not recommended to chase new hardware trends; Sugar still recommends 3B and 3B+ because for beginners, only Noobs is available for 4B. If you are a high-end player pursuing development performance, Sugar recommends switching directly to the Jetson TX2, as the performance improvement of the latest Raspberry Pi is not as significant as advertised and cannot be compared with TX2.
Follow the Author
Feel free to scan the QR code to follow my WeChat public account
MultiMCU EDU. 
Tip: You can add the author as a WeChat friend on the “About Me” page of the public account.
Tip: You can add the author as a WeChat friend on the “About Me” page of the public account.
If you like this article, please give it a thumbs up; your donations will motivate me even more.
If you like this article, please give it a thumbs up; your donations will motivate me even more.