When starting to learn about embedded systems or microcontroller systems, most people’s learning method is to find video tutorials or books to learn by themselves. Some may spend money to enroll in a training class to learn with a teacher. When you slowly become capable of writing code independently, you might feel like you have already mastered it. Especially after completing some simple projects independently, you may feel ready to go out on your own. Gradually, with various projects, your coding ability will slowly improve. In the end, you will find that many projects are just different combinations of code; once a function is well-written, it can be reused in each project. For example, after writing a serial port function, when a project requires a serial port, you can simply copy the previously written code over, and the development project becomes a process of assembling blocks. At this point, writing code seems to have lost the initial passion for learning, and it becomes a physical task, where you hardly need to think anymore, just copy and paste. It seems that the ability to write code is also difficult to break through, and you feel a bottleneck. It becomes challenging to find videos, books, or teachers to help you break through this bottleneck. So, how can you further improve your coding skills? Below, I will share my experience.
After writing a function, if you want to know how well you’ve done, the best way is to find someone else’s code that accomplishes the same function and compare it. Look at the differences between your code and theirs. When looking for code, you shouldn’t just find anything online, as you don’t know if the code you found was written by a beginner or an expert, which can easily mislead you. You should look for code that is widely recognized and has a good coding style. I generally find code from certain well-known sources. Let’s analyze a simple LED code as an example.
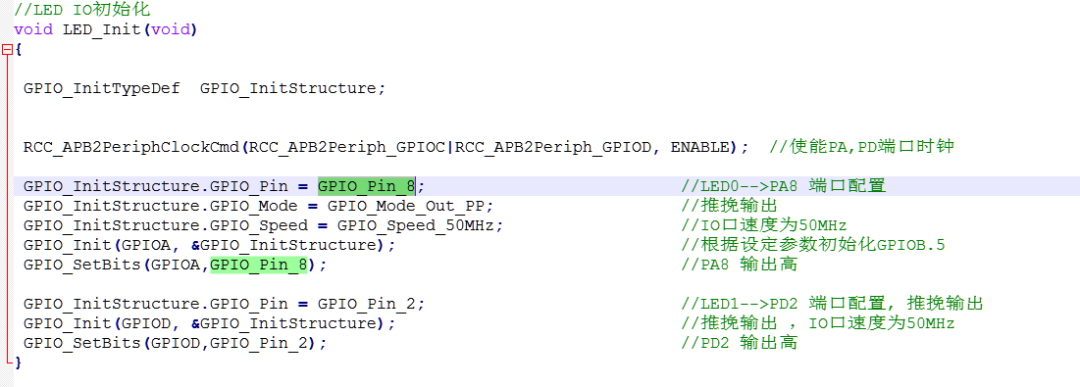
This is the code for led.h

This is the code for led.c
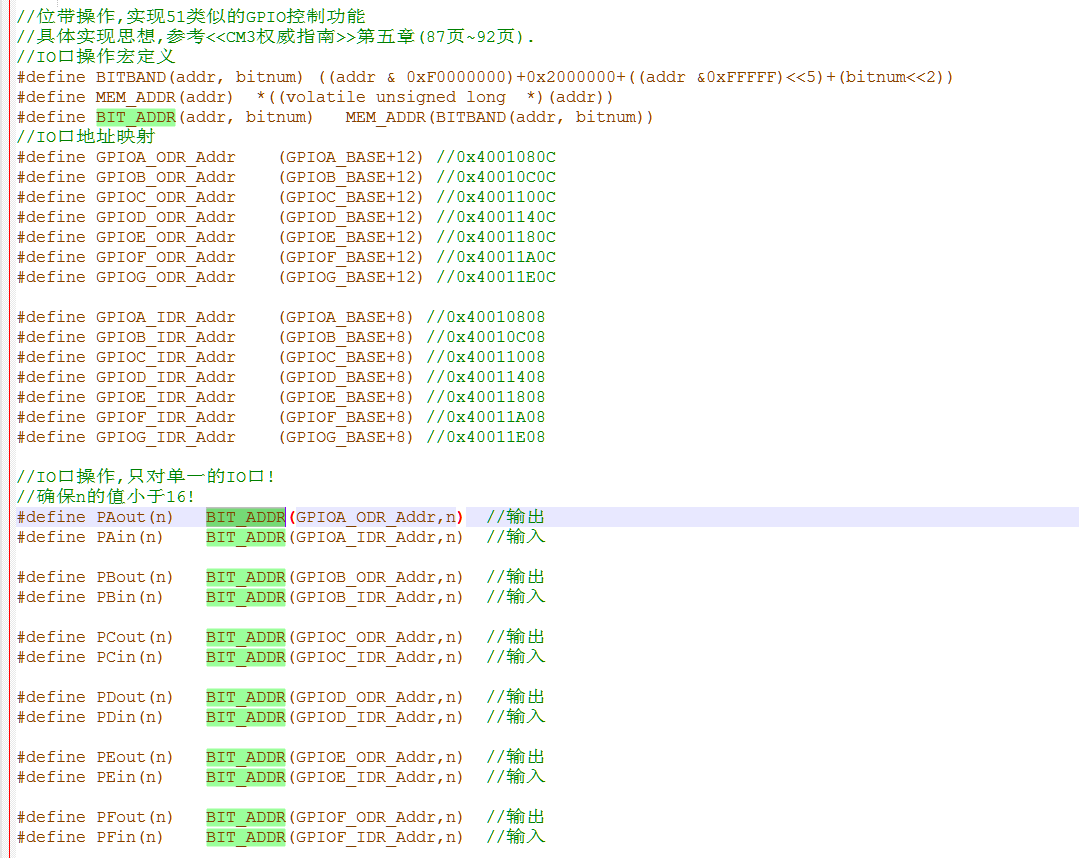
The bit operations used in led.h are defined in the sys.h header file.
This initialization code looks very concise; it first enables the clock for the IO ports used, then initializes the corresponding IO ports. In the initialization function, it is immediately clear that the two LEDs are connected to PA2 and PD8 ports. The code is very easy to understand.
Now let’s look at the code from another source:
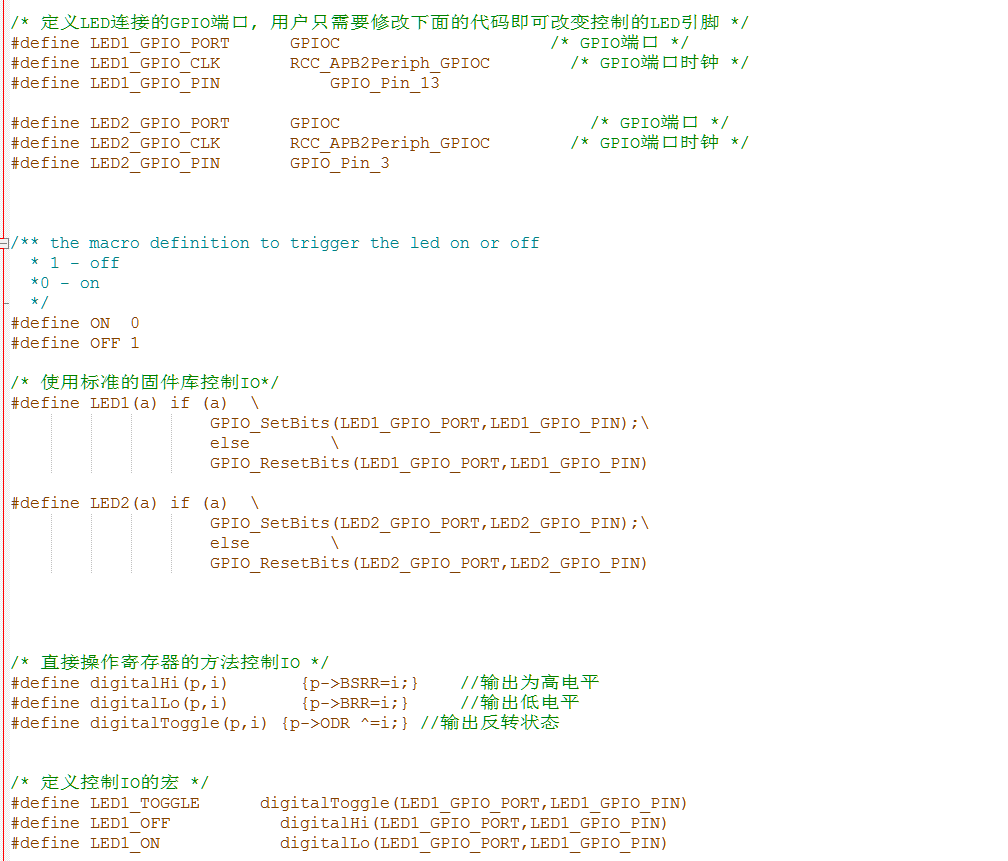
Header file bsp_led.h
 C file bsp_led.c
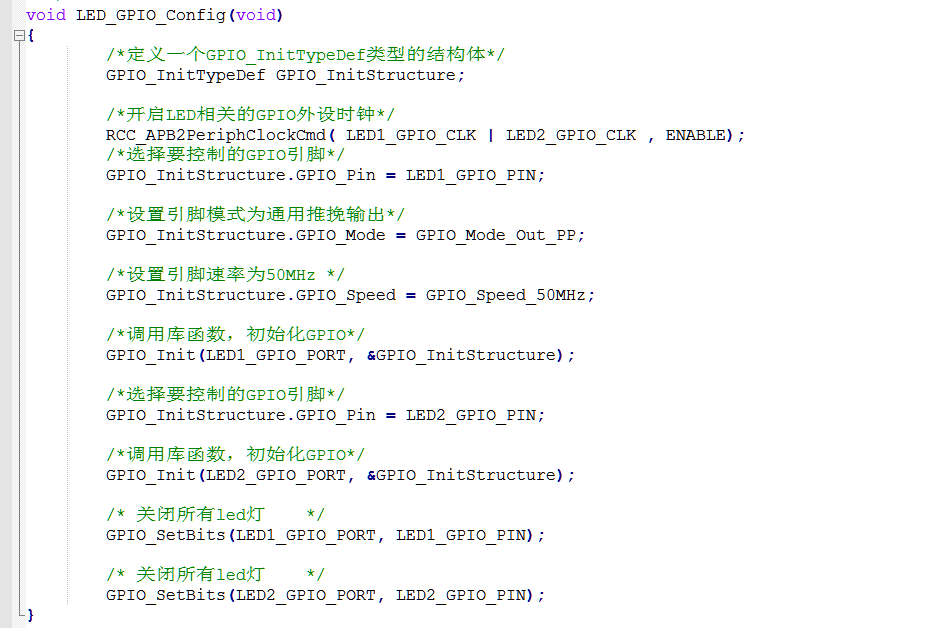 From the filenames, you can see the difference; the first is led.h, and the second is bsp_led.h. The prefix bsp stands for Board Support Package, indicating that this file is related to the current hardware system. Looking at the contents of the header file, you will find that the IO ports used for the LED have been redefined with new names. In the C file, during the initialization of the LED port, new names are used. The initialization process also involves enabling the clock for the IO ports used, and initializing the relevant IO ports. However, from the initialization code, it is difficult to tell which LED port is currently being used. The code appears to be more complicated.
Why is there such a significant difference in style for a simple LED function? Which style does your code resemble more? Personally, I initially preferred the first style, as it is simple and clear, making it easy to write code. However, as I spent more time coding, I gradually started to prefer the second style. My code has also transitioned from the first style to the second. Let’s discuss the differences between these two styles.
When I first started coding, the first style was more suitable; it was simpler to write and easier to understand. When issues arose, it was also more convenient and quicker to troubleshoot. However, as the number of projects increased and the requirements changed, I found that modifying the first style code could be cumbersome. For example, if the LED port changes, both the header file and initialization function need to be modified, requiring changes in multiple places, which can lead to missing some areas and causing various debugging issues. At this point, I wondered if I could just modify one place to update all instances of the LED port. This is where the second coding style becomes useful. In the header file, the ports and clocks used for the LED are abstracted and redefined with new names. During initialization, only the LED ports are initialized, and the specific ports are defined in the header file. This way, the initialization code does not need to be modified.
In simple terms, the first method is straightforward, targeting specific IO ports, but once a project changes, it becomes cumbersome to modify and transfer. The second method is more complex to write but is an abstract approach, where its initialization function is independent of specific IO ports. When project changes or transfers occur, it is more convenient. Both methods have their pros and cons, and you can choose different methods based on your actual situation or combine the two methods. For example, I find the bit-band operations in the first method to be straightforward, as defining all bit operations in one file is convenient. The second method’s bit-band operations are all abstracted in the header file, making it more complex to write. However, the second method does a better job of abstracting the IO ports used for the LED. Therefore, I can use the bit-band operations from the first method along with the port abstraction from the second method in my projects.
By analyzing others’ code and combining it with my own, comparing the advantages and disadvantages of different codes, I can modify my code continuously. By mimicking the excellent aspects of others, my coding skills improve over time. If you feel your skills are good enough, you can look at the source code of library functions or operating systems to see how official source code abstracts different types and models of microcontrollers into unified functions. If one day you can see the advantages and disadvantages of someone else’s code at a glance, it means your skills have significantly improved, and you have broken through your bottleneck.
———————————————— Copyright Notice: This article is an original piece by CSDN blogger “Embedded @hxydj”. Original link: https://blog.csdn.net/qq_20222919/article/details/126748702
Authorized by: Power Node Java Training