Note: This script is currently limited to <span>Rocky Linux 9</span> and has not been tested on other system versions. Future updates will enhance the script’s compatibility, robustness, and options. The installed <span>Docker</span> version defaults to the latest version.
🛠️ Preparation Work
- A minimal installation of the Rocky Linux 9 operating system
- A stable internet connection
- SSH remote login enabled
- Using a root account or an account with sudo privileges (recommended)
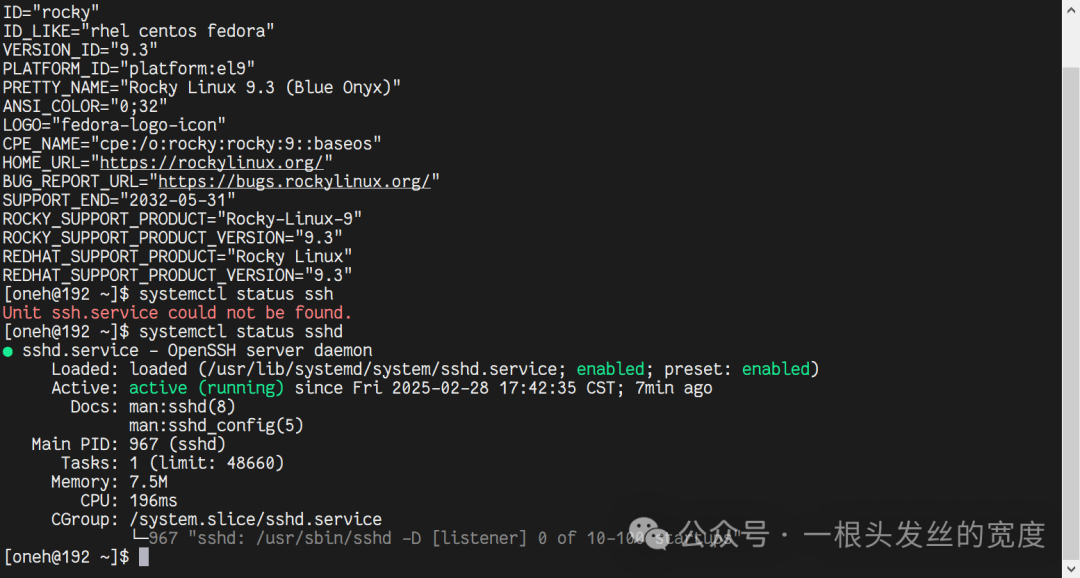
This practical example uses <span>Rocky Linux 9.3</span>, which has SSH installed and enabled by default. See the image below:
1. 📁 File Upload
It is recommended to use any of the following tools to upload the script:
- MobaXterm
- WinSCP
- scp command
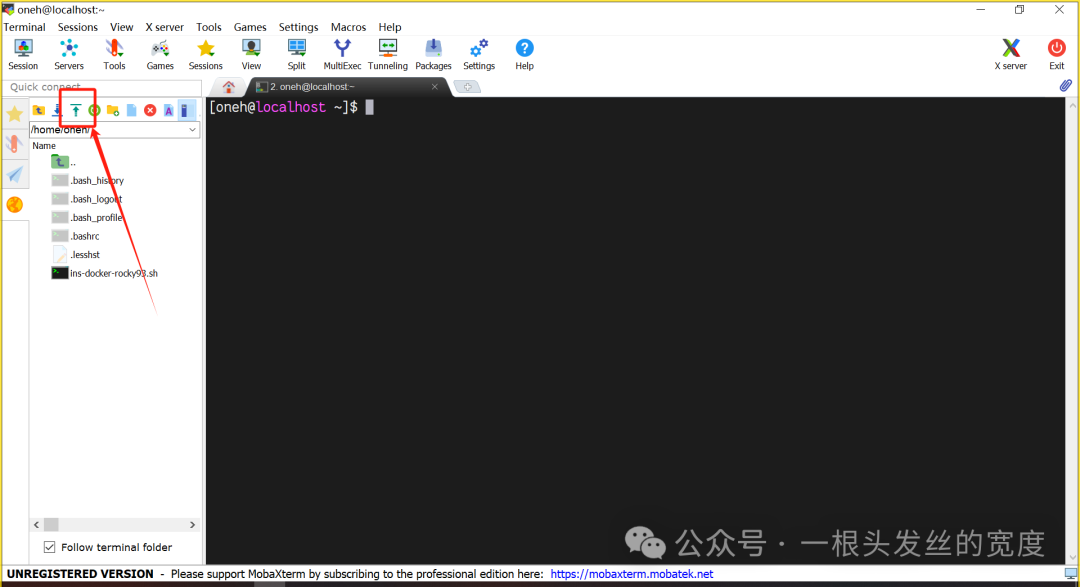
The SSH tool used this time is <span>MobaXterm</span>, upload the script to the server as shown in the image below:
MobaXterm 24.4 download link: <span>https://download.mobatek.net/2442024120112207/MobaXterm_Portable_v24.4.zip</span>
If the download is particularly slow or fails, please visit the Baidu link to download: <span>https://pan.baidu.com/s/1C9Xuc-k9cWYvLiRMylItsA?pwd=hfa7</span> Extract code: <span>hfa7</span>
2. Grant Execution Permission to the Script
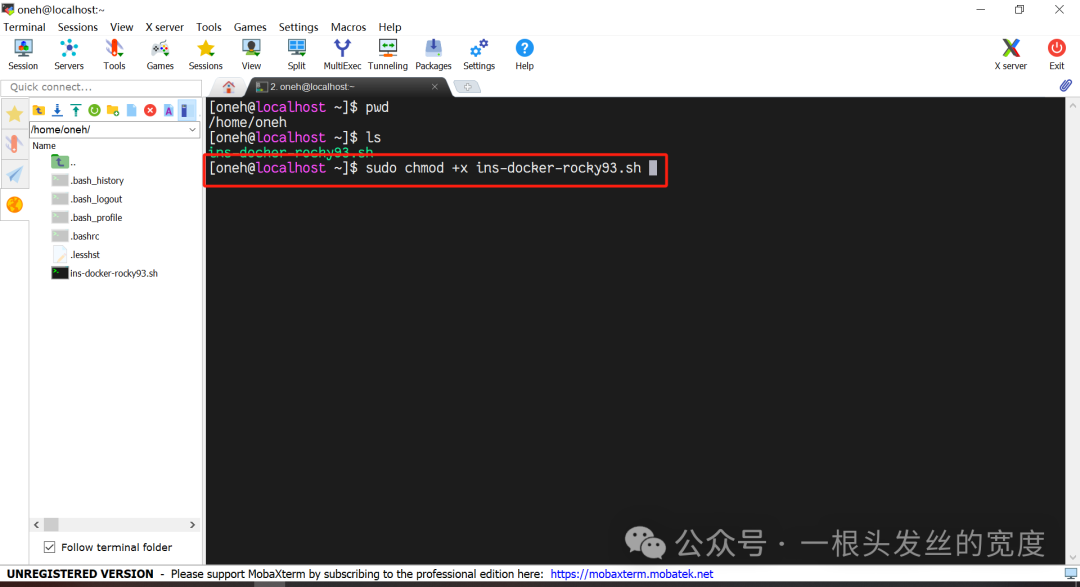
Use the following command to grant execution permission to the script:
sudo chmod +x ins-docker-rocky93.sh # Add execution permission
3. Run the Script
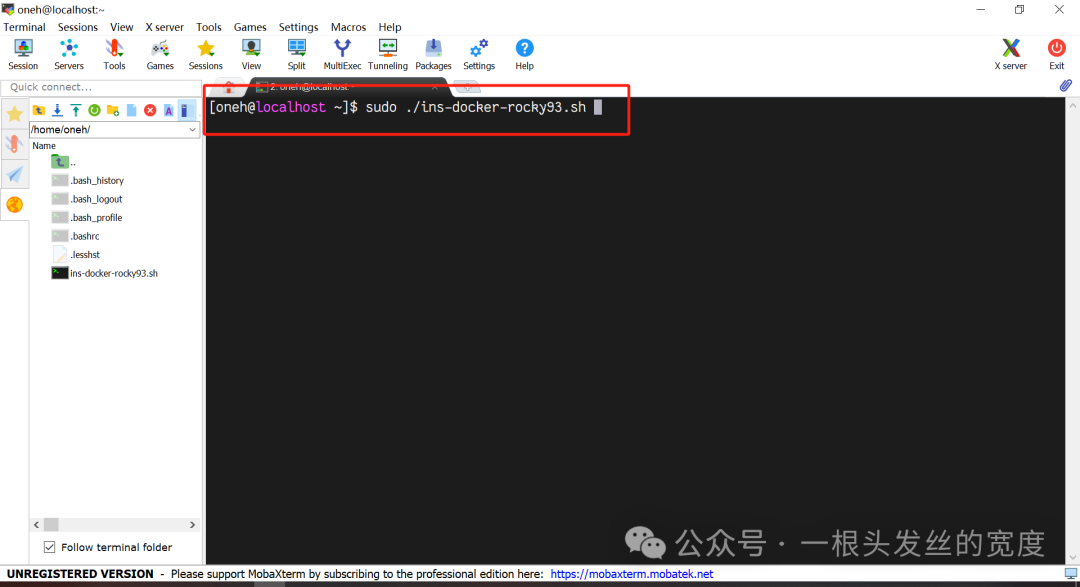
Run the script to install <span>docker</span>. Depending on the device and network environment, it usually completes within fifteen minutes.
sudo ./ins-docker-rocky93.sh # Run the script
4. 🚀 Installation Process
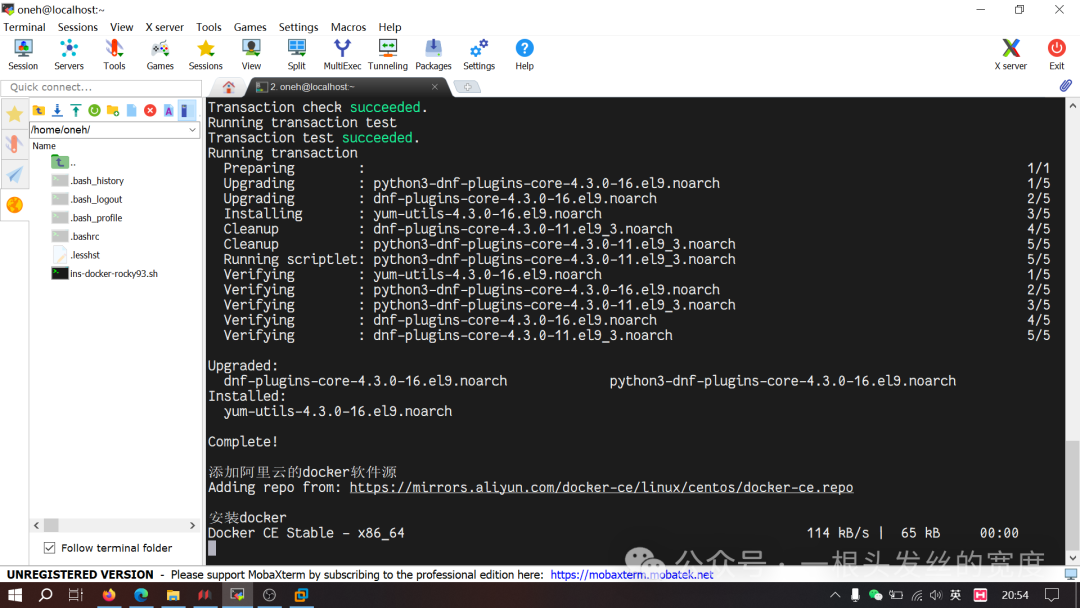
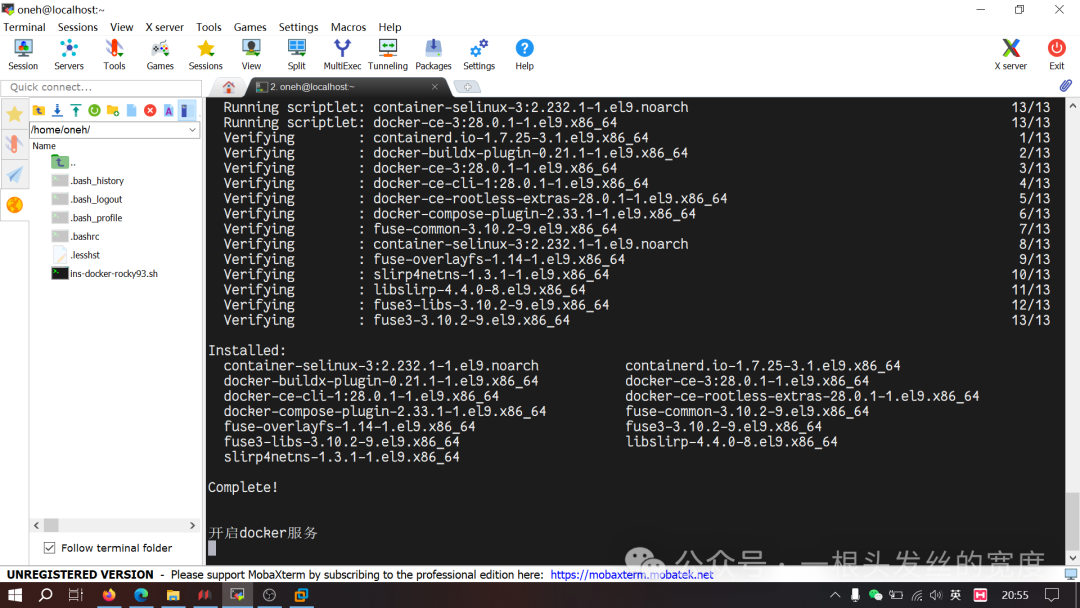
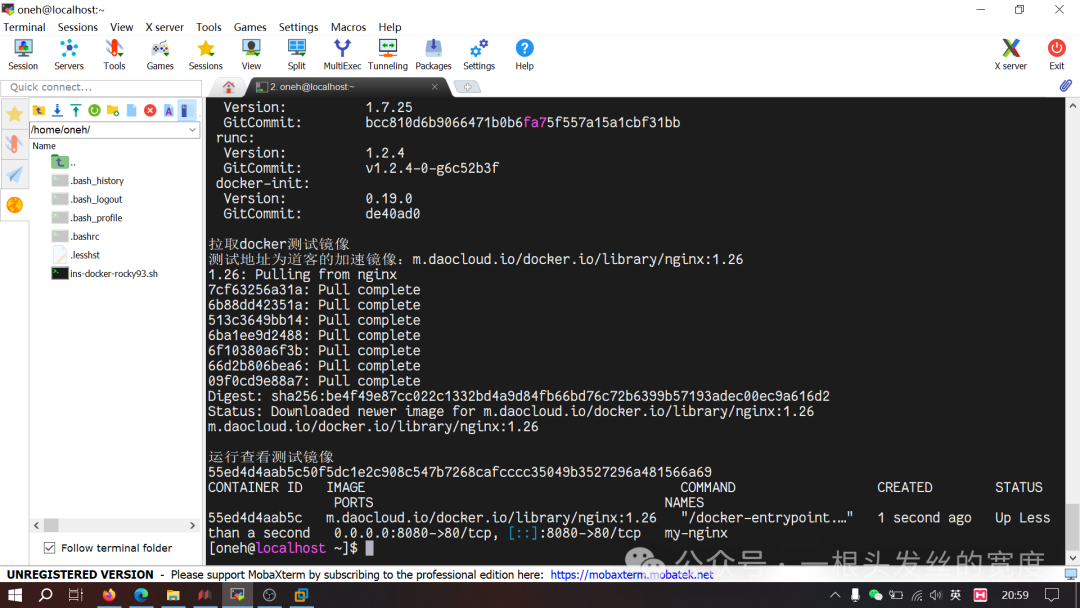
Docker running test:
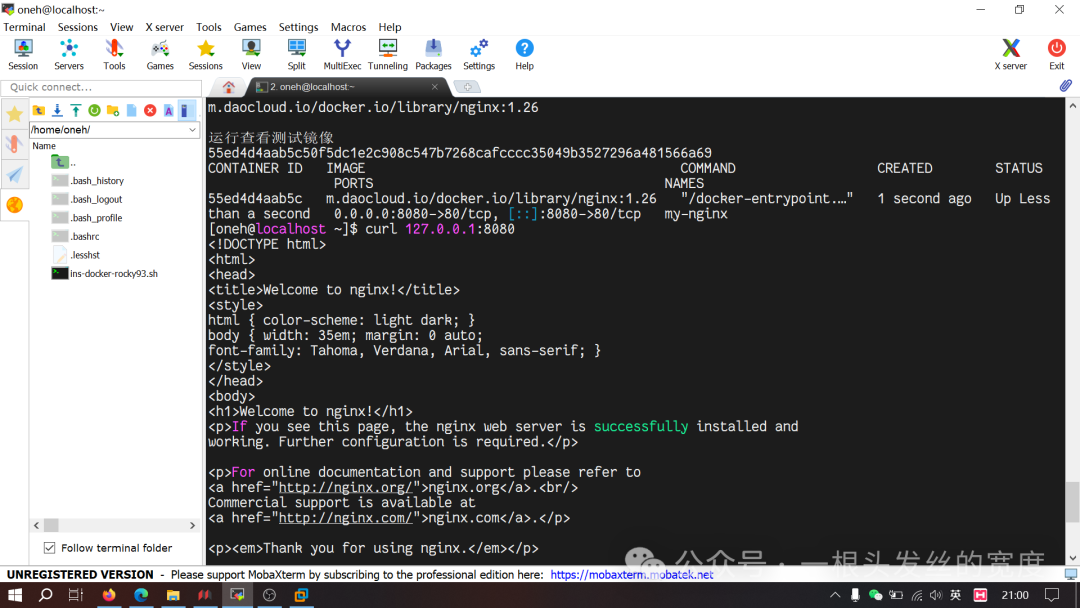
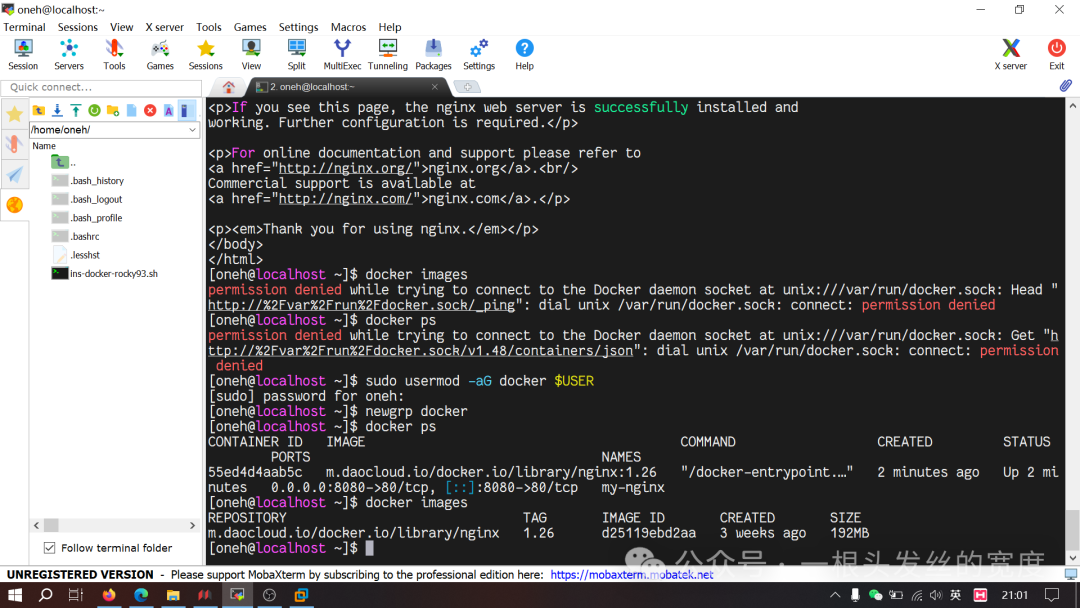
If you encounter a <span>permission denied</span> prompt when executing the Docker command, please execute the following commands:
sudo usermod -aG docker $USER
newgrp docker
5. Installation Video
6. Script Code
The following are the script details for this practice. The code block may be inconvenient to read, please read the script file content directly.
Script file Baidu link:
<span>https://pan.baidu.com/s/1UFctNvPpMyGkpD4t78HwWA?pwd=b938</span> Extract code: <span>b938</span>
[oneh@localhost ~]$ cat ins-docker-rocky93.sh
#!/bin/bash

# Modify the software source to improve download speed, here changed to Alibaba Cloud
# It can be modified to others as per your preference
echo "Modifying software source (Alibaba Cloud)"
sed -e 's|^mirrorlist=|#mirrorlist=|g' \
    -e 's|^#baseurl=http://dl.rockylinux.org/$contentdir|baseurl=https://mirrors.aliyun.com/rockylinux|g' \
    -i.bak \
    /etc/yum.repos.d/rocky-*.repo

# Below is the software source of the University of Science and Technology of China
#sudo sed -e 's|^mirrorlist=|#mirrorlist=|g' \
#    -e 's|^#baseurl=http://dl.rockylinux.org/$contentdir|baseurl=https://mirrors.ustc.edu.cn/rocky|g' \
#    -i.bak \
#    /etc/yum.repos.d/rocky-extras.repo \
#    /etc/yum.repos.d/rocky.repo

echo ""
# Update software cache
echo "Updating software cache"
yum makecache

# If Docker or related components were previously installed, delete them first
for pkg in docker docker-client docker-client-latest docker-common \
                  docker-latest docker-latest-logrotate docker-logrotate docker-engine
do
        yum remove $pkg
done

echo ""
# Install Docker
echo "Installing Docker"
echo ""
# Step 1: Install some necessary system tools
echo "Installing some necessary system tools"
yum install -y yum-utils

echo ""
# Step 2: Add software source information
echo "Adding Alibaba Cloud's Docker software source"
yum-config-manager --add-repo https://mirrors.aliyun.com/docker-ce/linux/centos/docker-ce.repo

echo ""
# Step 3: Install Docker
# Default installs the latest version
echo "Installing Docker"
yum -y install docker-ce docker-ce-cli containerd.io docker-buildx-plugin docker-compose-plugin

echo ""
# Step 4: Add user to Docker user group
#usermod -aG docker $USER
#newgrp docker
# This step has a problem, after completion, it will enter the root user

echo ""
# Step 5: Start Docker service and enable it to start on boot
echo "Starting Docker service"
if systemctl start docker && systemctl is-active --quiet docker;then
        echo "Docker service started successfully."
else
        echo "Docker service failed to start."
        exit 1
fi

echo ""
# Wait for 5 seconds for the service to fully start
count=5
while [ $count -gt 0 ]; do
    printf "\r Waiting %2d seconds" "$count" # \r Return to the beginning of the line, %2d aligns the number
    sleep 1
    ((count--))
done

echo ""
# Enable Docker to start on boot
echo "Enabling Docker to start on boot"
systemctl enable docker

# Note:
# The official software source defaults to the latest software. You can obtain various versions of the software package by editing the software source.
# For example, the official source does not enable the software source for test versions by default, you can enable it as follows. Similarly, you can enable various test versions.
# vim /etc/yum.repos.d/docker-ce.repo
#   Change the enabled=0 under [docker-ce-test] to enabled=1
#
# To install a specific version of Docker-CE:
# Step 1: Find Docker-CE versions:
# yum list docker-ce.x86_64 --showduplicates | sort -r
#   Loading mirror speeds from cached hostfile
#   Loaded plugins: branch, fastestmirror, langpacks
#   docker-ce.x86_64            17.03.1.ce-1.el7.centos            docker-ce-stable
#   docker-ce.x86_64            17.03.1.ce-1.el7.centos            @docker-ce-stable
#   docker-ce.x86_64            17.03.0.ce-1.el7.centos            docker-ce-stable
#   Available Packages
# Step 2: Install a specific version of Docker-CE: (VERSION, for example, 17.03.0.ce.1-1.el7.centos)
# sudo yum -y install docker-ce-[VERSION]

echo ""
echo "Display Docker version:"
docker version

echo ""
# Test Docker
# Pull image
echo "Pulling Docker test image"
echo "The test address is DaoCloud's accelerated image: m.daocloud.io/docker.io/library/nginx:1.26"
docker pull m.daocloud.io/docker.io/library/nginx:1.26

echo ""
# Run image
echo "Running and viewing test image"
docker run --name my-nginx -p 8080:80 -d m.daocloud.io/docker.io/library/nginx:1.26
docker ps
Future updates will continue to be learned and updated. If interested, please follow along. I hope my learning record is also helpful to you. Note: If you need to pull and run other image containers, you need to specify the address; the default Docker address cannot be used for pulling.