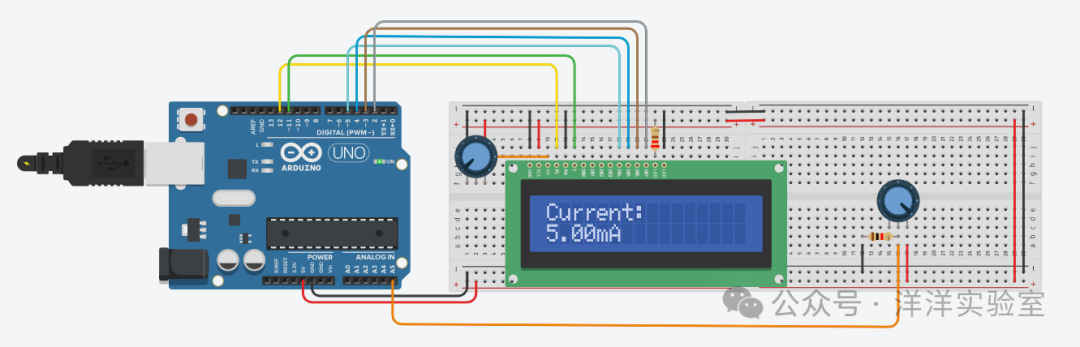
 In Experiment 6, we used Arduino to measure the voltage at port A5. By applying Ohm’s Law I = U / R, we can calculate the current flowing through a known resistor by measuring the voltage across it.In this experiment, we will learn how to use Arduino to create a simple current meter.1. Experiment Materials 1. Arduino development board ×1 2. LCD1602 module ×1
3. 10kΩ potentiometer x2
4. 1kΩ resistor x1
5. Breadboard ×1
6. Dupont wires (male to male) × several
7. USB data cable ×1
2. Experiment Principle2.1 Ohm’s Law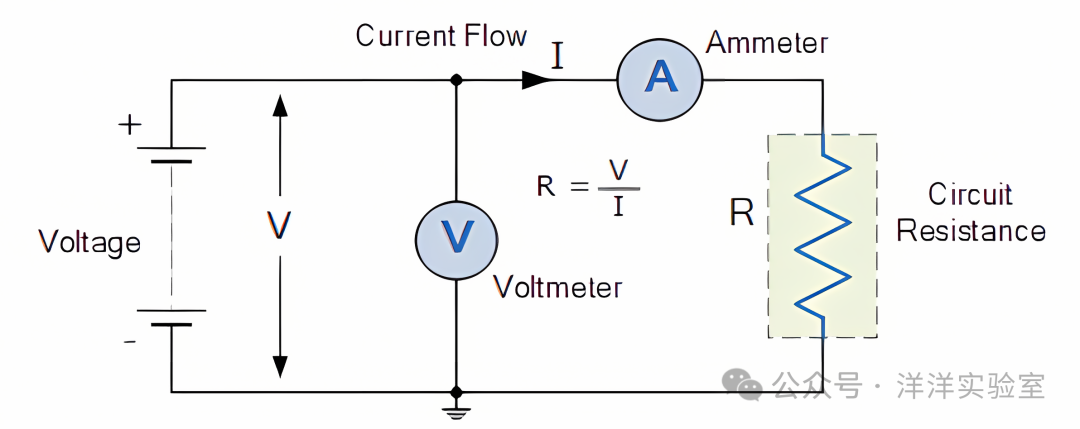
In 1826, German physicist Georg Simon Ohm discovered that at a constant temperature, in a closed circuit, the current (I) flowing through a conductor is directly proportional to the voltage (U) across the conductor and inversely proportional to the resistance (R) of the conductor.
This is expressed by the formula: I = U / R
Where the unit of voltage is volts (V), the unit of current is amperes (A), and the unit of resistance is ohms (Ω).
The above formula is known as Ohm’s Law. Using Ohm’s Law, we can easily calculate the current value. For example, if the voltage across a 1kΩ resistor is 5V, the current flowing through the resistor can be calculated as
5 ÷ (1×10³) = 0.005 A = 5 mA
3. Experiment Content
Based on the “Arduino Basic Experiment 6: Voltage Meter Experiment”, connect a 1kΩ resistor in series between the adjustable terminal of the 10kΩ potentiometer and GND, and connect the adjustable terminal of the potentiometer to the Arduino A5 port using a Dupont wire.
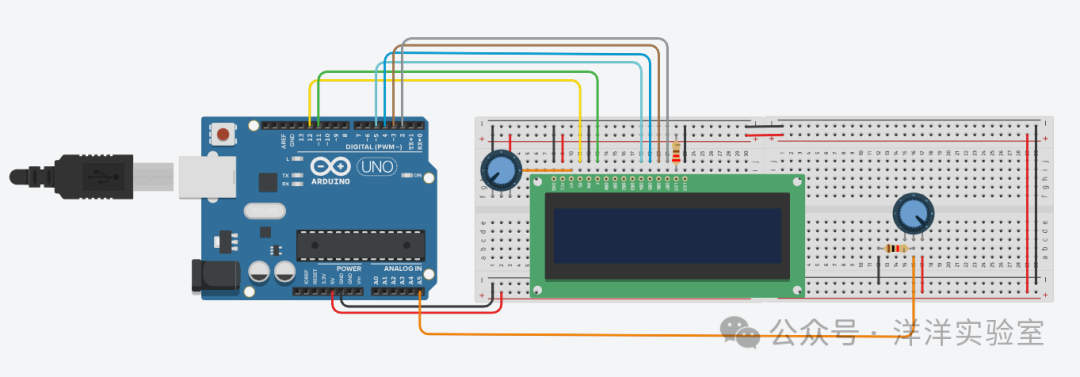 Then upload the Arduino example program, the program code is as follows:
#include <LiquidCrystal.h>
const int rs = 12, en = 11, d4 = 5, d5 = 4, d6 = 3, d7 = 2;
LiquidCrystal lcd(rs, en, d4, d5, d6, d7);
const int voltagePin = A5;
const float VREF = 5.0;
const float R1 = 1.0;
void setup(){  lcd.begin(16, 2);  lcd.setCursor(0, 0);  lcd.print("Current:");}
void loop(){  int adcValue = analogRead(voltagePin);  float voltageOut = (adcValue * VREF) / 1023.0;  // Read voltage value  float currentOut = voltageOut / R1;  // Calculate current value  lcd.setCursor(0, 1);  lcd.print(currentOut);  lcd.print("mA");  delay(500);}
Change the 10kΩ potentiometer resistance and observe the changes in the output value on the LCD screen. When the potentiometer knob is turned to the far left, the current flowing through the 1kΩ resistor is
5 ÷ (1×10³ + 10×10³) = 0.00045 A = 0.45 mA
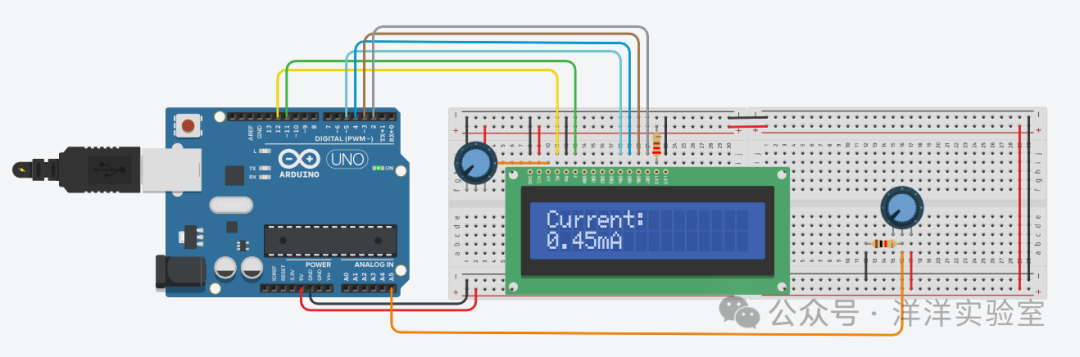
When the potentiometer knob is turned to the far right, the current flowing through the 1kΩ resistor is
5 ÷ (1×10³) = 0.005 A = 5.00 mA